Do you want to forward all incoming phone calls to a different number when you are busy or unavailable? Whether you use an Android or an iPhone, setting up call forwarding is rather simple. We will lead you through the necessary processes.
How to Use Call Forwarding on iOS (iPhone/iPad)
Step 1: Open Settings

Begin by opening the Settings app on your iPhone.
Step 2: Navigate to Phone Settings
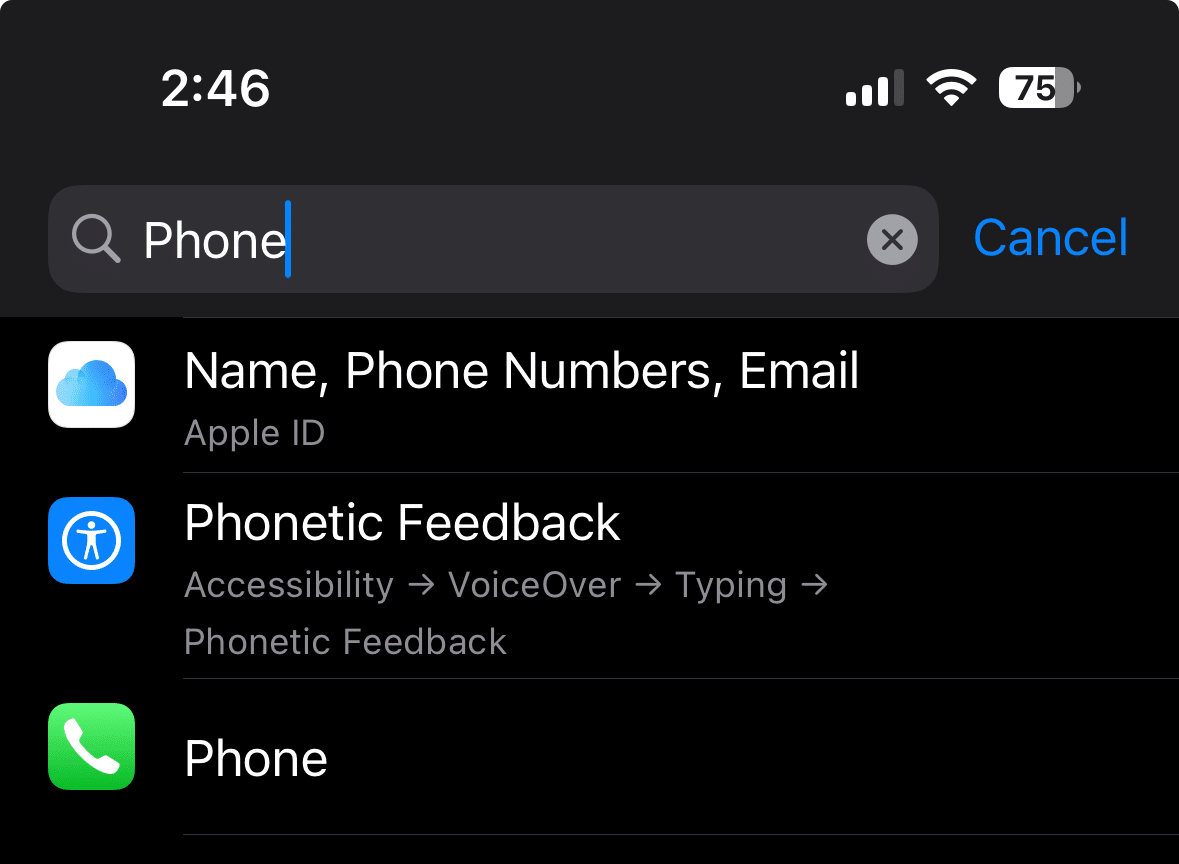
Once you’re in Settings, scroll down until you find the “Phone” option. Tap on it to access various call-related settings.
Step 3: Access Call Forwarding Options
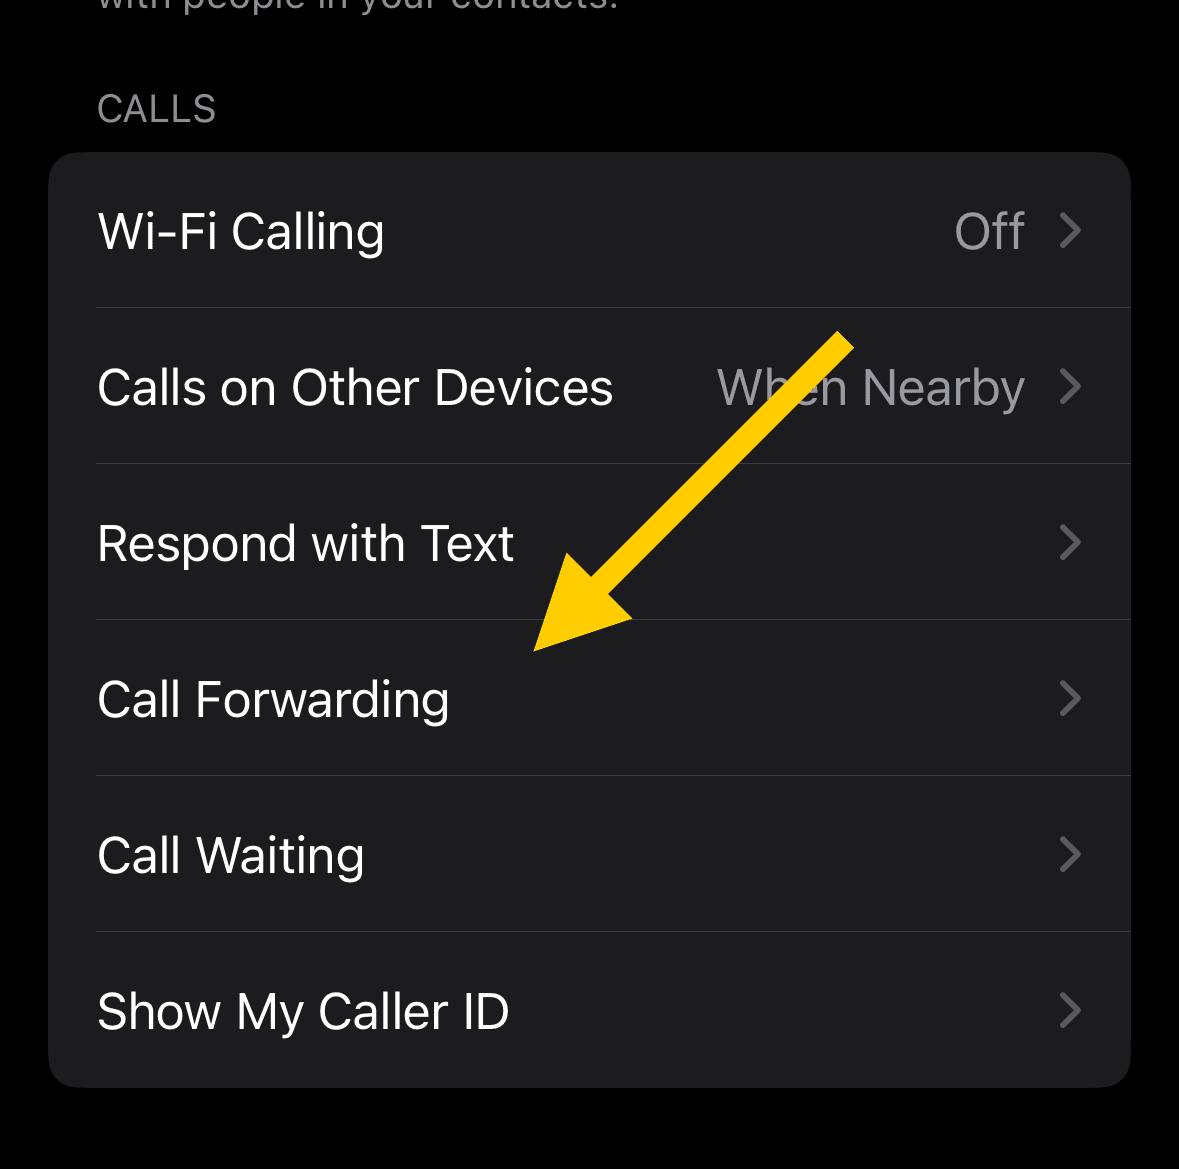
In the Phone settings menu, look for the “Call Forwarding” option under the Calls section. This is where you can manage forwarding incoming calls to another number.
Step 4: Enable Call Forwarding
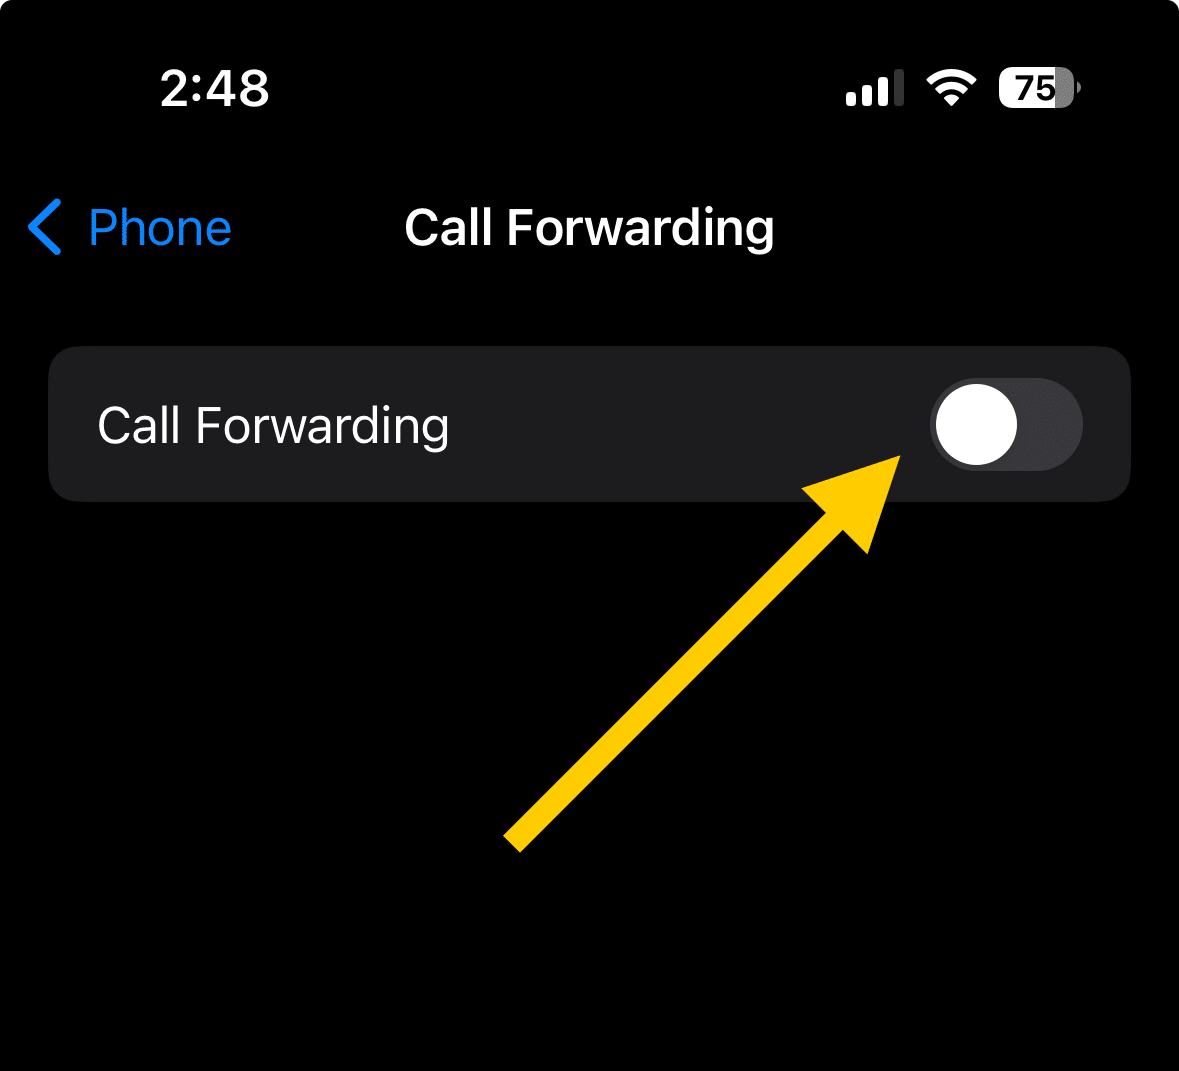
Tap on “Call Forwarding” to enter its settings. You’ll see a toggle at the top of the screen. Switch it to the on position to activate call forwarding on your device.
Step 5: Enter the Forwarding Number
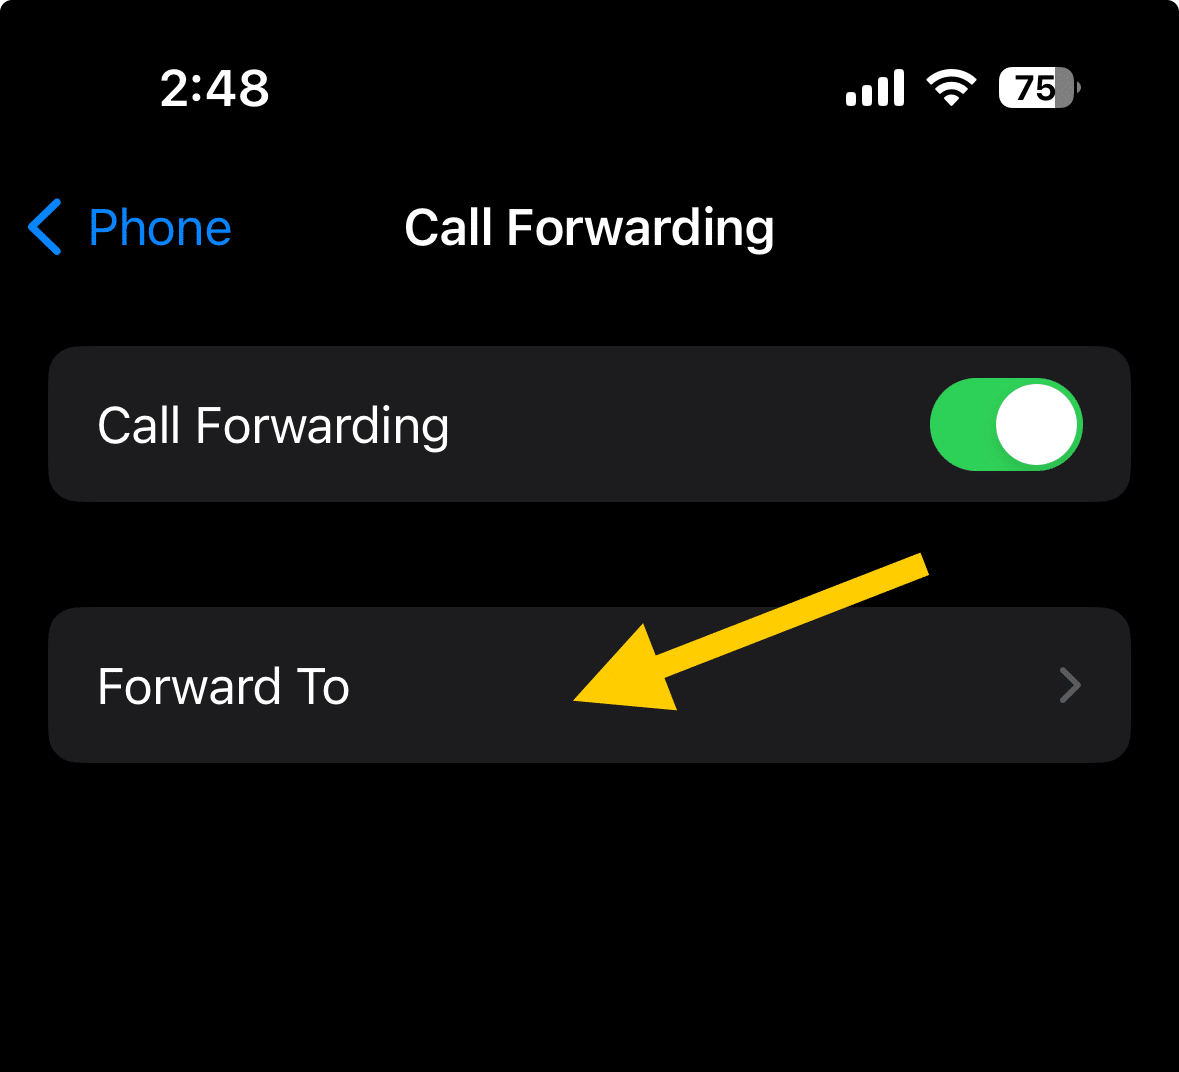
After enabling Call Forwarding, tap on “Forward To.” Here, you can enter the phone number where you want your incoming calls to be redirected.
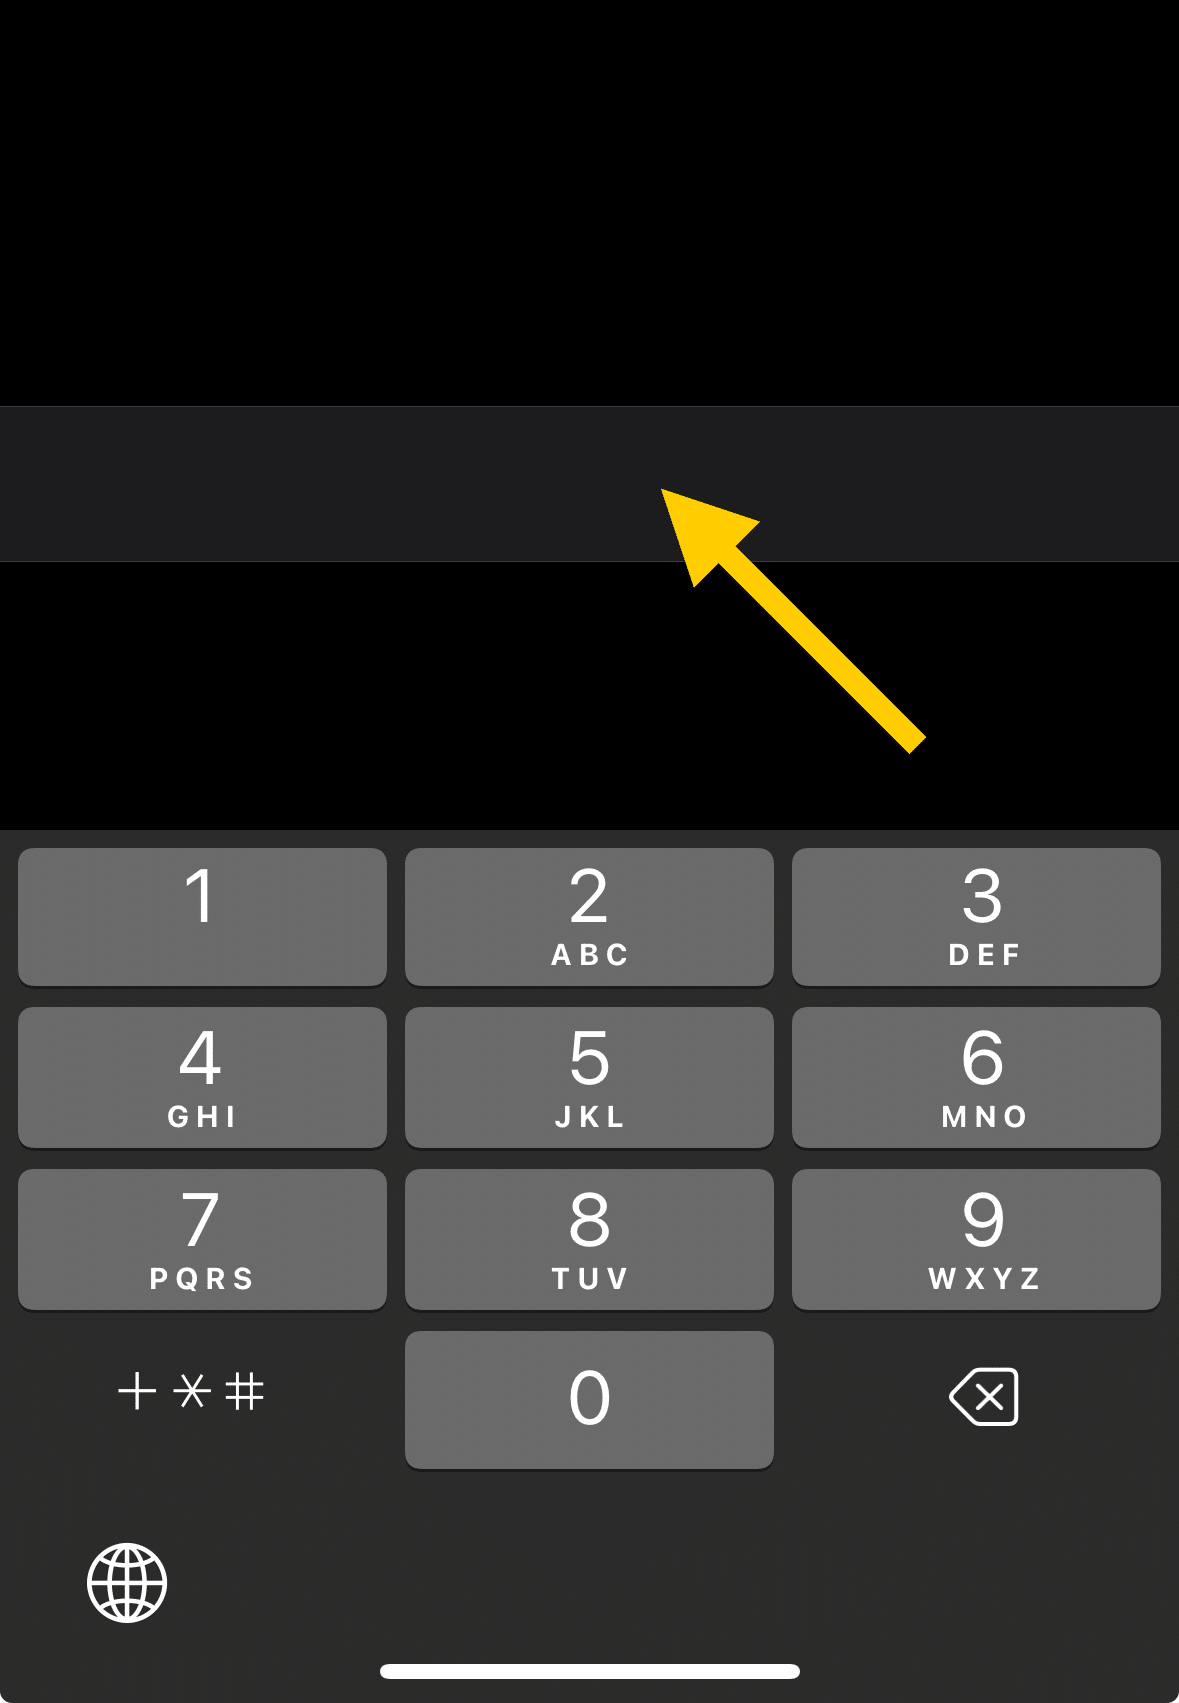
Remember to include the area code if you’re forwarding calls to a landline.
Step 6: Confirm and Test
Once you’ve entered the forwarding number, your iPhone will automatically start forwarding incoming calls to the specified number. Its good time to test if calls forwarded or not. You can also use Verizon call forwarding app if you want.
It will not only send calls to new number, but, in case, if any incoming call interrupted, then it may gets fixed with the help of call forwarding app.
It’s a good idea to test this setup by calling your iPhone from another phone to confirm that calls are indeed being forwarded.
Deactivating Call Forwarding
When you wish to stop forwarding calls, simply repeat the steps above but toggle off Call Forwarding in Step 4. This will deactivate the feature and return your call settings to normal.
More iOS Resources;
- How to Block a Number in 2 Taps (Android and iOS)
- Try These Lesser Known 6 iPhone Live Photos Tricks
- How to make a Photo Collage on iPhone (2 Methods)
- Recover Deleted iPhone Messages – Quick & Easy Guide
- How to Change Location on Facebook Marketplace on iPhone
- How to Make a PDF on iPhone (2 Easy Methods)
- How to Convert Image to PDF on iPhone (5 Easy Methods)
- How to View Clipboard History (Android, iOS, Windows & Mac)
- How to Use Instagram’s Story Camera Widget on iOS
- How to See Reels you watched on Facebook (iOS, Android, PC)
- How to Clear Cache on Instagram on Android and IOS Devices
- 3 Ways To Know Who Unfollows You on Instagram (iOS & Android)
How to Use Call Forwarding on Android
Setting up call forwarding on an Android device can be just as uncomplicated as on an iPhone, allowing users to easily manage their incoming calls. Here’s a step-by-step guide to getting it done.
Step 1: Open the Phone App
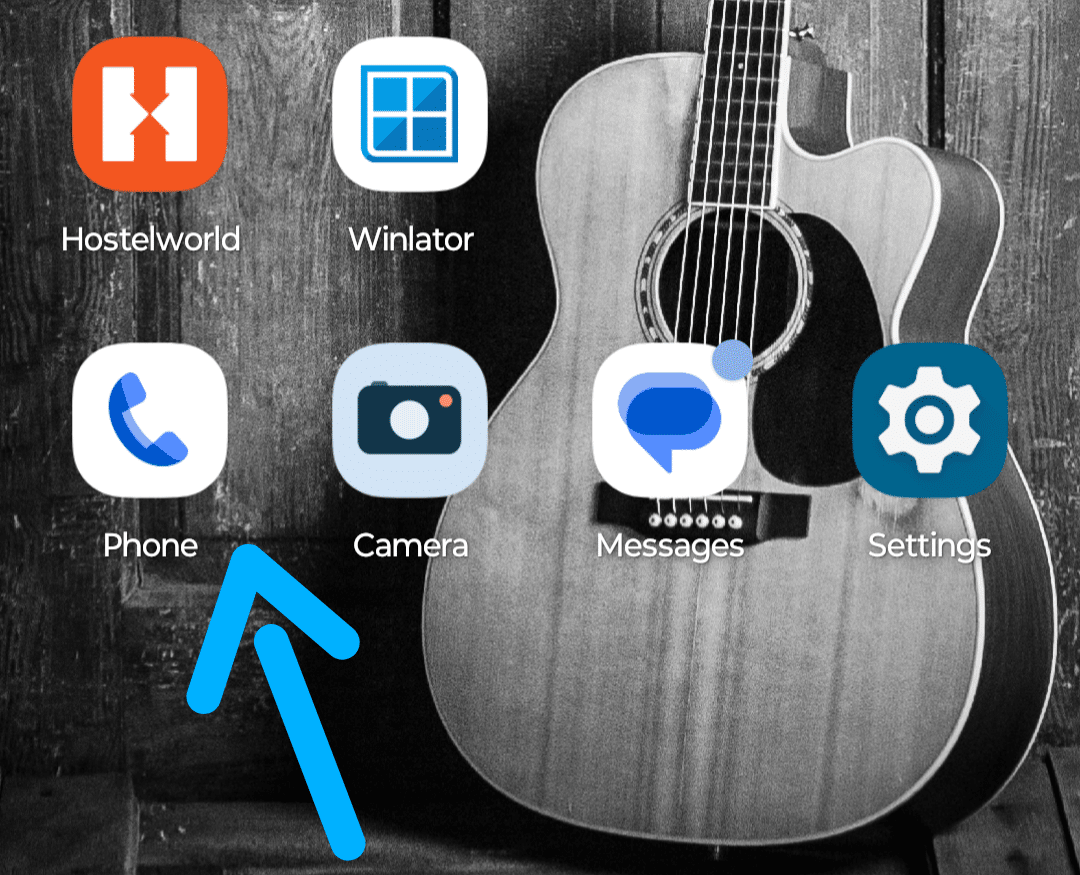
First, unlock your Android phone and open the Phone app. This app is typically found on your home screen or app drawer.
Step 2: Tap the More Options Button
Look for the More options button in the Phone app;
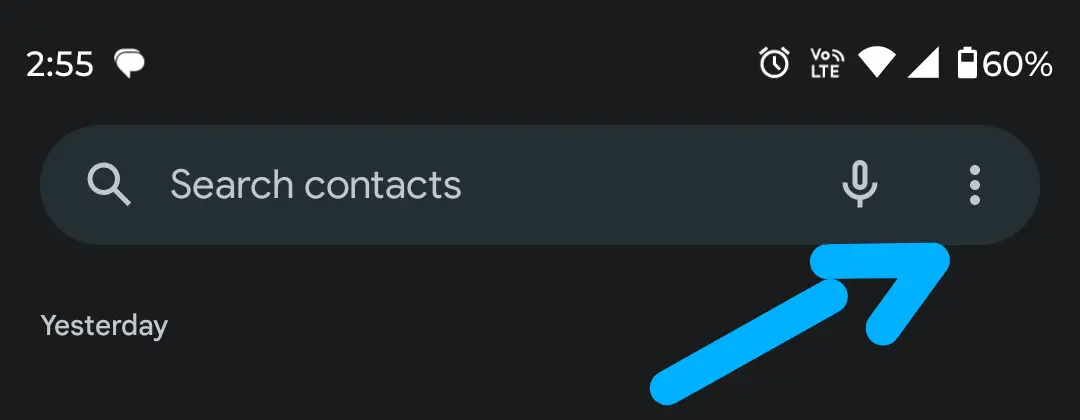
Which usually appears as three vertical dots in the upper right corner of the screen. Tap on this to access additional options.
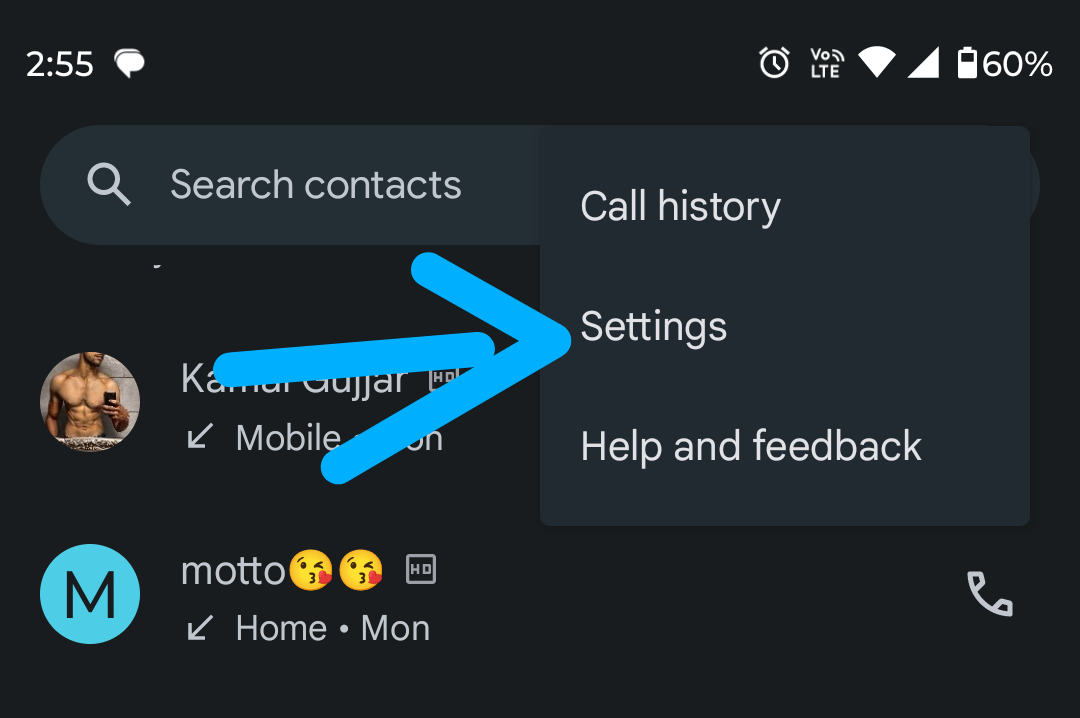
Step 3: Access Settings
After tapping the More options button, select “Settings” from the dropdown menu. This will take you to a menu where you can adjust various call-related settings on your Android phone.
Step 4: Select Call Settings
Depending on your Android phone model, this step can vary. If you’re using a Pixel, look for and select “Calls”. On a Samsung phone, you should find and tap on “Supplementary Services”.
Other brands may have this option listed under a different name, so it’s worth checking any section related to calls or call management.
Step 5: Choose Call Forwarding
Within the call settings menu, find and select the “Call forwarding” option. This might be listed directly, or it might be within another sub-menu related to managing calls or advanced settings.
Step 6: Set Your Call Forwarding Preferences
Android offers flexibility in call forwarding with four options:
Always forward: All incoming calls are forwarded to the chosen number.
When busy: Calls are only forwarded if you are already on a call.
When unanswered: Calls are forwarded when you do not pick up.
When unreachable: Calls are forwarded if your phone is off or out of coverage.
Select the option that best suits your needs.
Step 7: Enter the Forwarding Number
After choosing your preferred forwarding setting, you will be prompted to enter the phone number you wish to forward your calls to. Include the area code.
Step 8: Activate Call Forwarding
Once you’ve entered the desired phone number, tap “Turn on” or “Confirm” to activate call forwarding on your Android device.
You should receive a confirmation message or tone indicating that call forwarding has been successfully set up.
Deactivating Call Forwarding on Android
To deactivate call forwarding, simply go back to the Call forwarding settings by following the steps above. Tap on each option you’ve previously activated (Always forward, When busy, When unanswered, When unreachable) and select “Disable” or “Turn off”. This will stop your calls from being forwarded and return them to your usual number.
Also learn, How to run Windows apps on Android (2 Awesome Tools)
Conclusion
This comprehensive guide has walked you through every step of setting up call forwarding on both iOS and Android mobile phone. Remember, deactivating call forwarding is equally important to resume receiving calls directly on your device, and it can be managed with similar ease through your phone’s settings
With these instructions, forwarding calls, redirecting them to a landline or another cell phone, and setting up conditional call forwarding based on whether you’re busy, unreachable, or simply don’t answer, becomes a straightforward affair.
For those who’ve wondered how to set up call forwarding, divert calls as well as redirect calls when in airplane mode, or how call forwarding works, this guide provides clear, actionable answers.
Test your knowledge
Take a quick 5-question quiz based on this page.

