Home / Blog / Tutorials / PDF Tutorials / How to Convert Image to PDF on iPhone (5 Easy Methods)
How to Convert Image to PDF on iPhone (5 Easy Methods)
Choose Your Language:
In today’s digital age, sharing high-quality images through various platforms has become the norm. However, preserving the quality and accessibility of these images across diverse devices can pose a challenge. Ever considered converting your iPhone snapshots into PDFs?
This not only ensures the quality of your images but also makes sharing and viewing them a breeze, no matter the device or location of your recipient. Learn how to convert an image to a PDF on your iPhone, a straightforward process that opens up new avenues for maintaining the integrity and quality of your images.
You don’t have to be a PDF Expert to perform this task, you can do it easily with the set of methods we have described below.
1 Why Convert Images to PDF on iPhone
There are many reasons to convert images to PDF on your iPhone. For starters, PDF files maintain the original quality of your images even when shared across multiple platforms.
Unlike other formats, PDFs lock in the picture quality and layout, ensuring the recipient sees the image exactly as you intended.
Furthermore, PDFs are universally compatible. Whether the recipient is viewing the file on a different smartphone, a tablet, or a computer, they can easily open and view a PDF file, removing any obstacles to seamless sharing.
Finally, PDFs provide versatility not found in traditional image files. With a PDF, you can combine multiple images into a single file for easy organization and sharing.
Now, it’s time to use one of the methods below or our PDF Tool to convert your images to PDF on any platform or browser.
So, why not convert your images to PDF and make the most of your iPhone snapshots?
2 How to Convert Photos to PDF On Iphone
2.1 Using Print Option
Open the Photos app on your iPhone and select the image you want to convert;
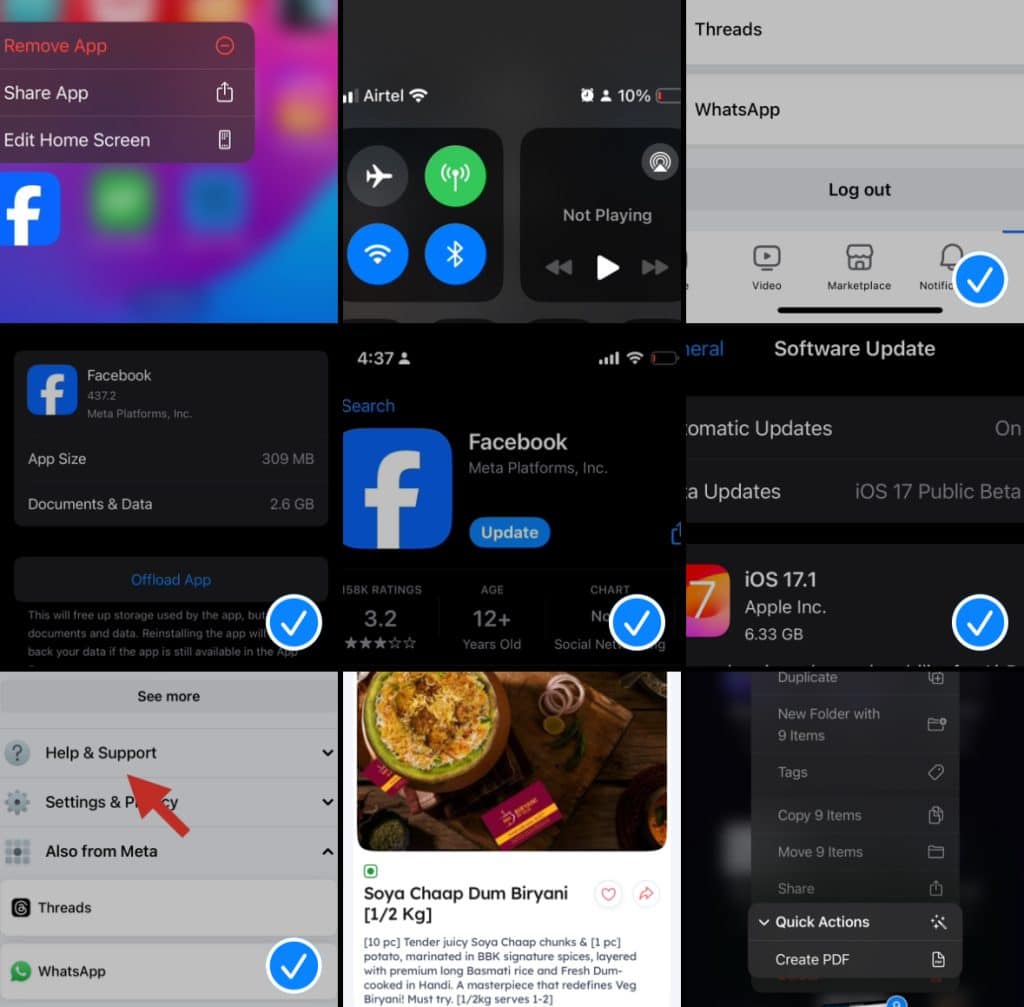
Tap the Share button (it’s the box with an arrow pointing upward);
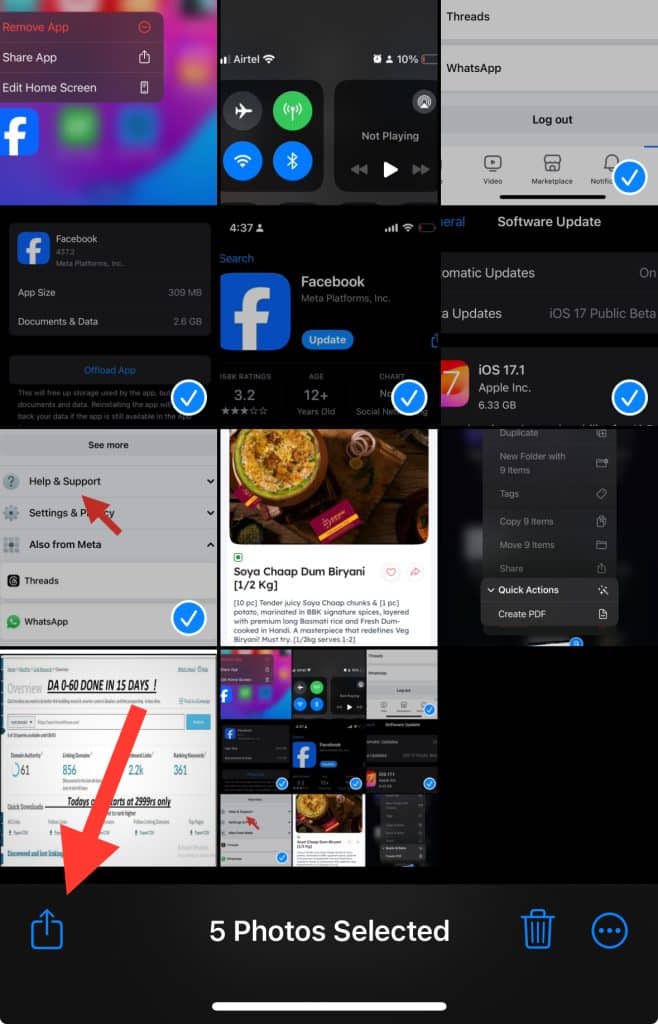
Scroll down and select the Print option;
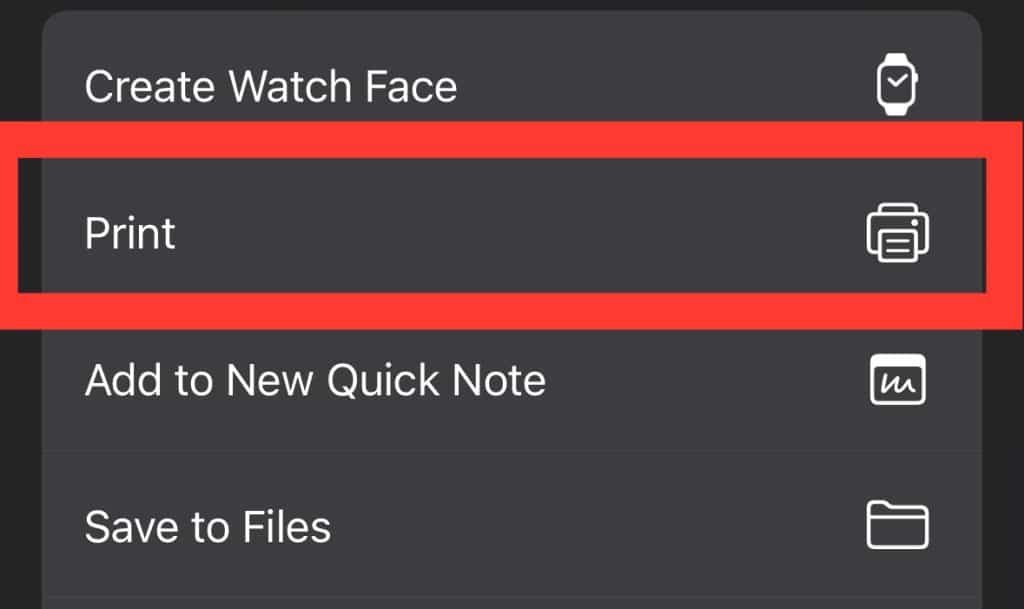
In the Printer Options screen that pops up, tap on share icon again;
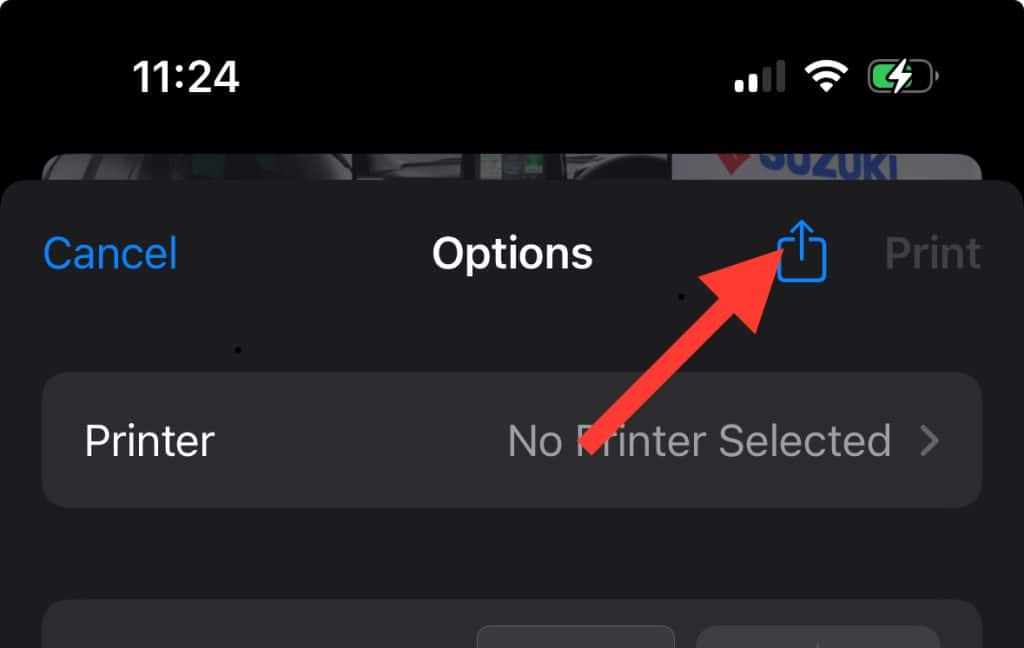
Now, click on “save to files” and choose your desired location;
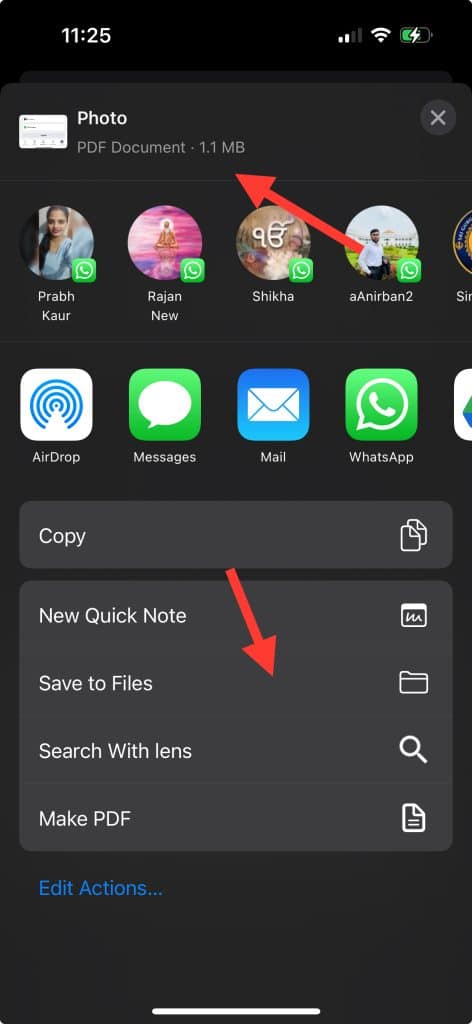
Now, if you see converted file’s info by tap and hold the file and select “get Info” option, you will see all the details.
And there you have it! It’s that simple to convert your photos into a PDF on your iPhone using the Print option and now you can open and edit PDF with any PDF editor out there like Google Doc, or Adobe acrobat reader.
This built-in tool allows you to preserve the quality of your images, ensures compatibility across a variety of platforms, and offers an easy way to compile multiple shots into a single, shareable document. Why not give it a try?
2.2 Using Kwebby’s Image to PDF Converter
Click here to go to the Free PDF Converter tool by Kwebby from your favorite browser.
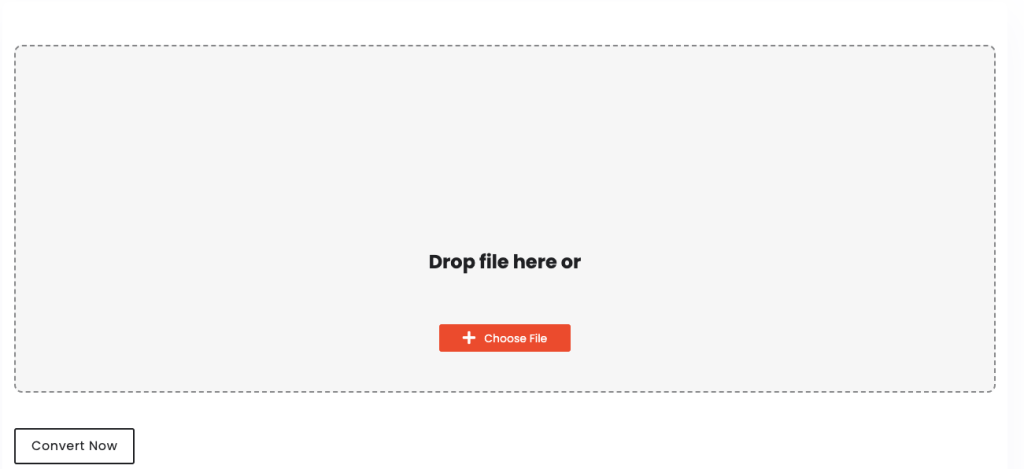
Now Tap on “choose file” button to select your photo;
Now select “convert to” to “PDF Document”;
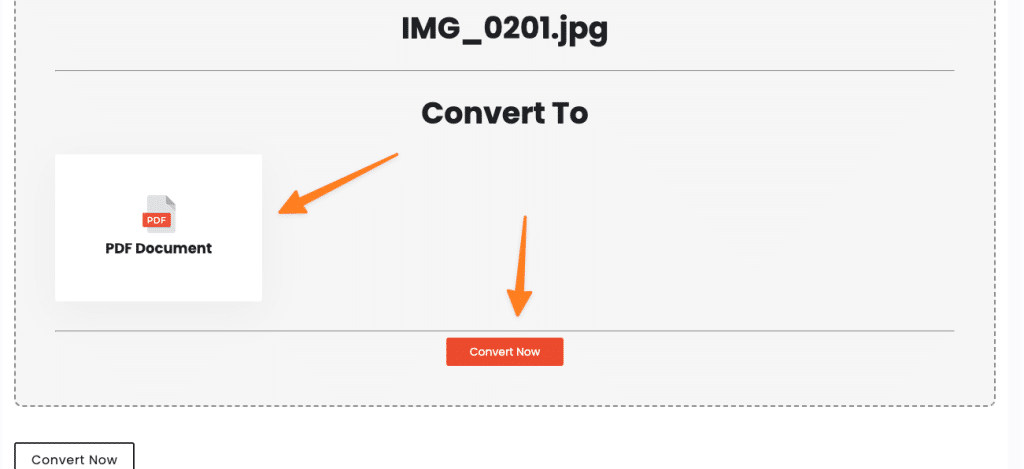
Next, Tap on the “Convert Now” button to convert photos in one Tap.
You can also use the following tools to convert Image specific format to PDF;
The app will then convert the images to a PDF file. You can save this file to your iPhone or share it directly from the app.
With Kwebby’s Image to PDF Converter, converting images to PDF on your iPhone has never been easier. It provides an intuitive interface and a range of options to customize your PDF.
Isn’t it time you gave Kwebby’s Image to PDF Converter a try and made the most out of your iPhone snapshots?
2.3 Using Notes App
Open the Notes app on your iPhone and create a new note;
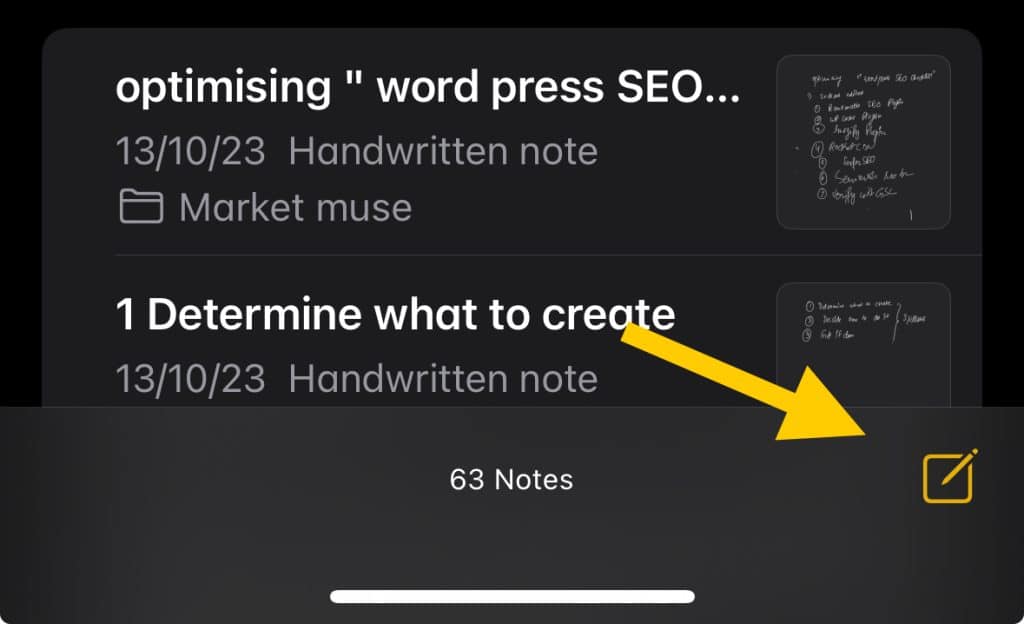
Tap the camera icon at the bottom of the screen and choose ‘Photo Library’;
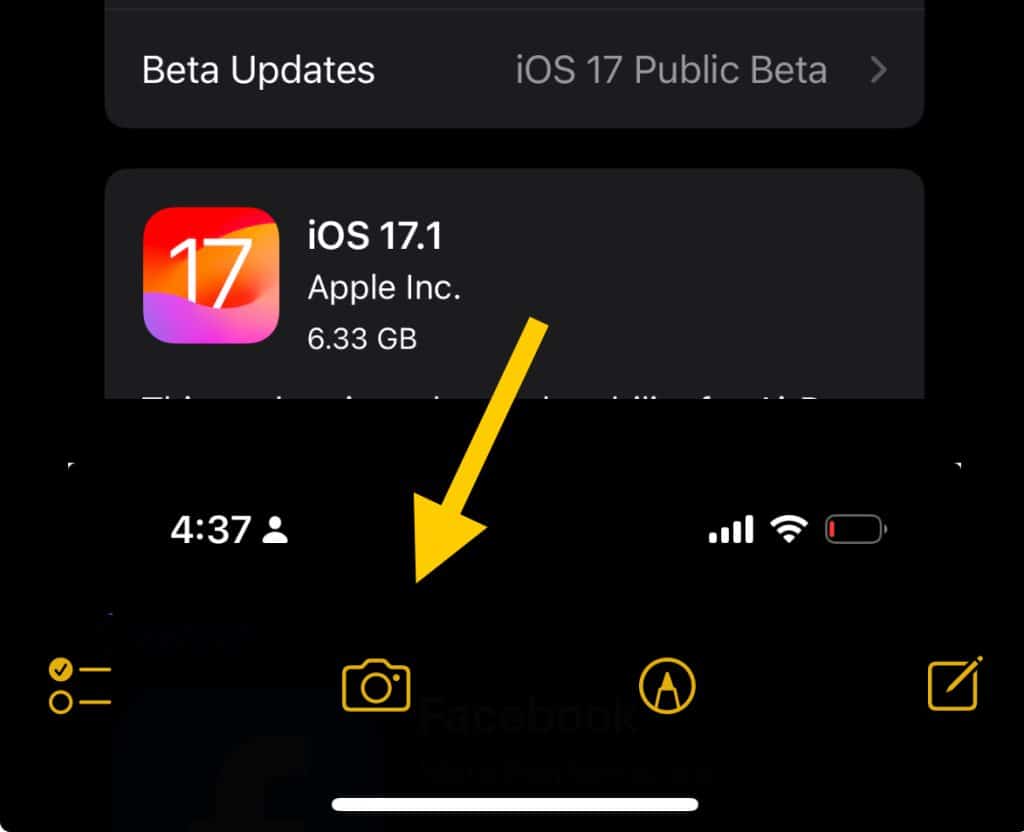
Select the image you want to convert into a PDF.
Once the image is inserted into the note, tap on share icon on the right side of your notes app;
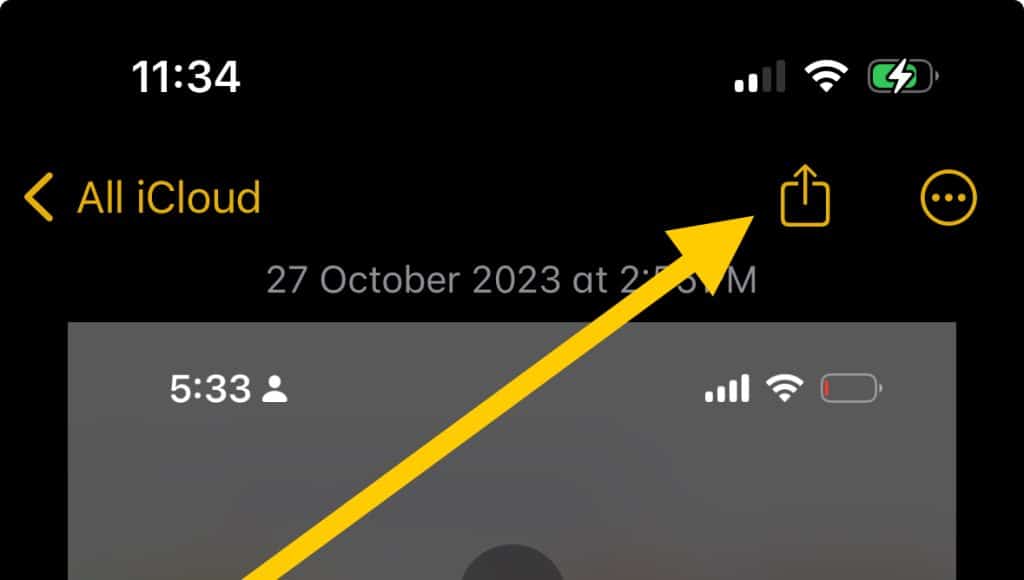
Select “Print” option.
Now, you can follow the same process as we discussed in Method #1 above.
Your image is now converted into a PDF within the note. You can now share this PDF by tapping on the share icon at the top right of the screen.
Converting images to PDF using the Notes app is another simple and effective method, offering flexibility and convenience right at your fingertips. So, are you ready to take full advantage of your iPhone’s capabilities with this easy-to-follow method?
2.4 Using files App
Open the Files app on your iPhone.
Navigate to the location where the image you want to convert is stored; alternatively, you can select your images from the photos app and tap on share icon and select “Save to files.”;
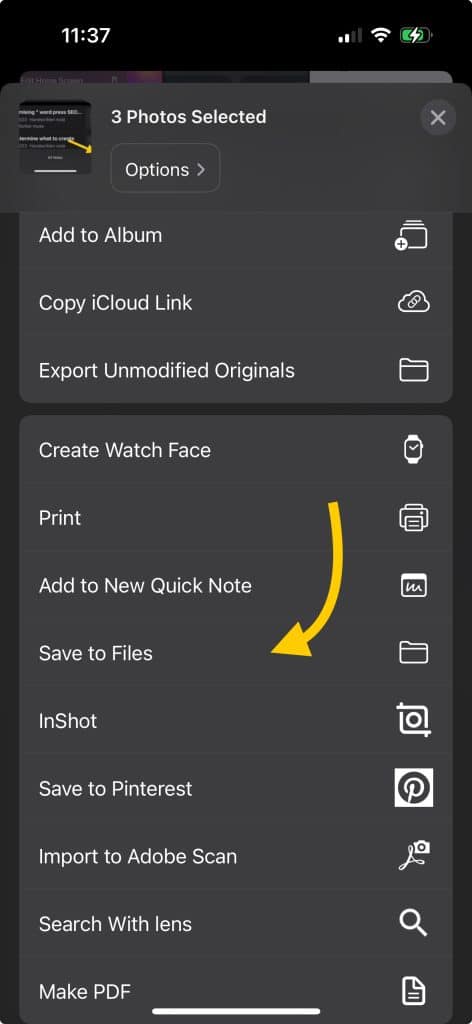
Next, select your desired location in files app or you can create new folder and save images there.
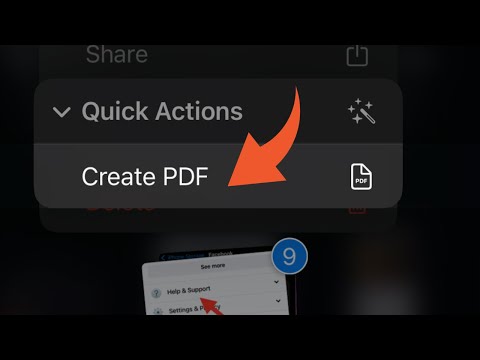
Next, open files app and navigate to the saved images folder, then, Long press the image file(s) until a menu pops up, then select the “Quick Actions” option and select “Create PDF”;
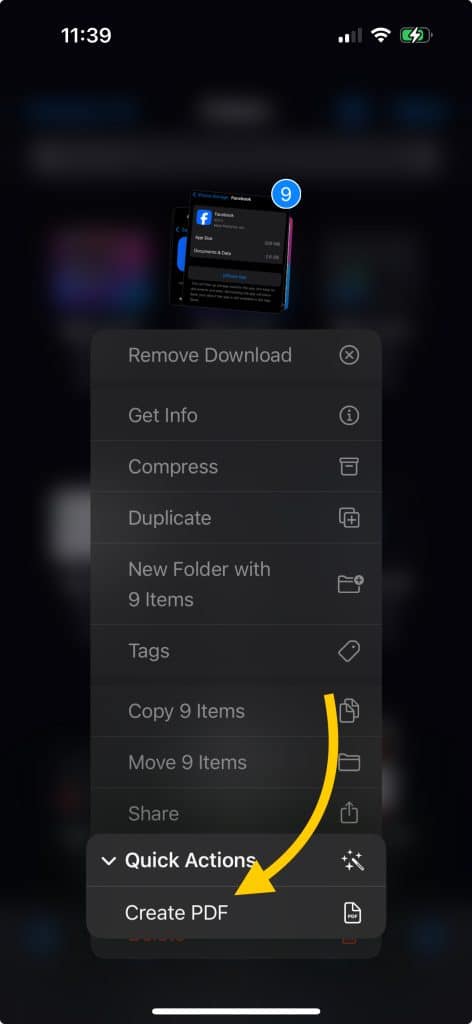
Your image is now successfully converted into a PDF document within the Files app.
To share this PDF, simply tap on the file, and then tap on the share icon in the bottom left corner of the screen.
The Files app on your iPhone is not just a storage space but also a powerful tool that lets you convert images to PDF swiftly and effortlessly. Why not leverage this inbuilt feature and enjoy the convenience and ease it offers?
2.5 Using Shortcuts App
Open the Shortcuts app on your iPhone. If you don’t have it installed, you can download it from the App Store.
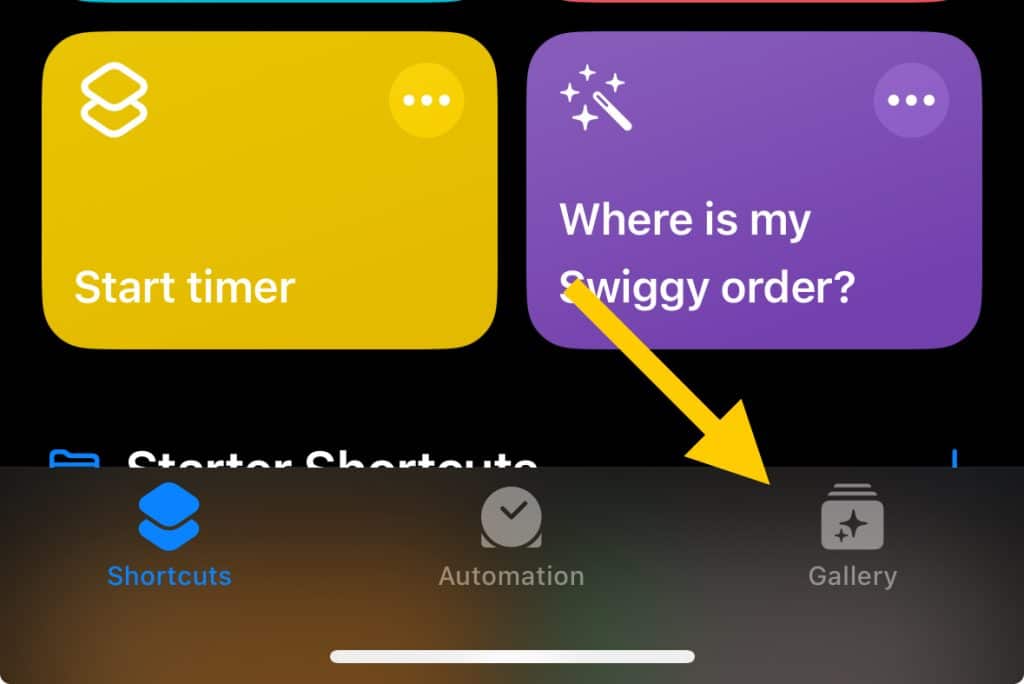
Tap on “Gallery” from the bottom menu;
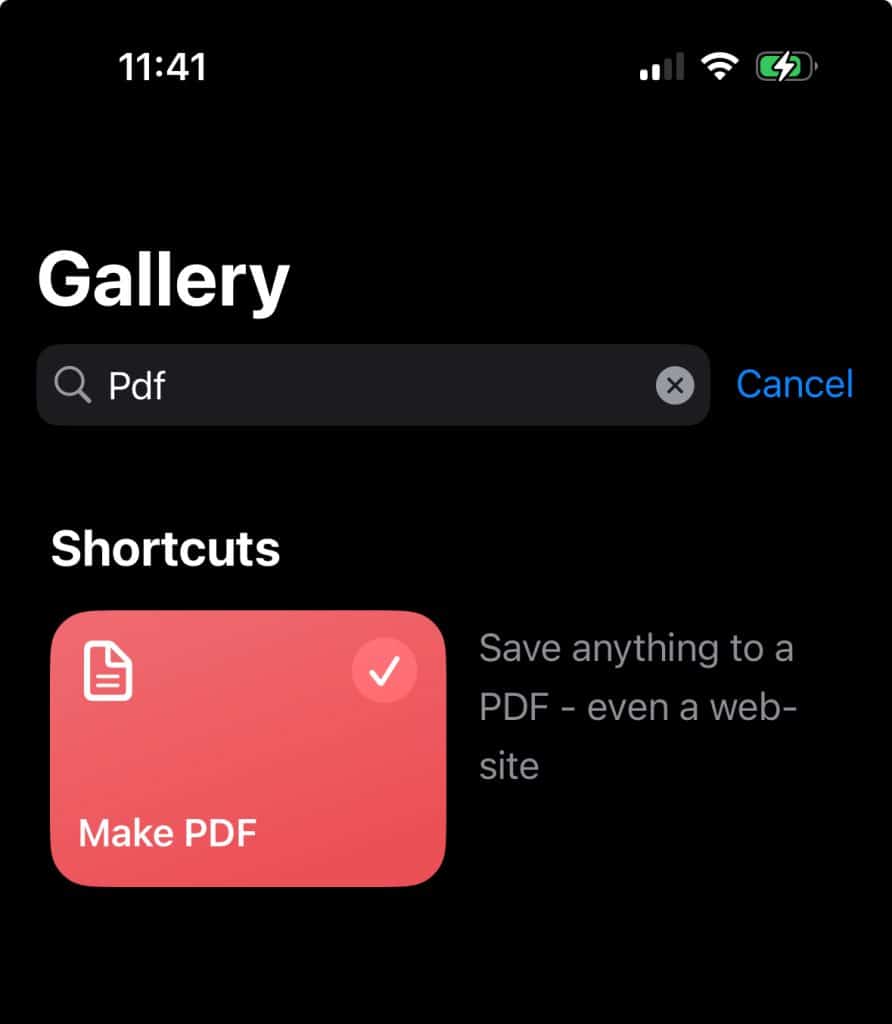
Now, search for “PDF” shortcut and add the first one;
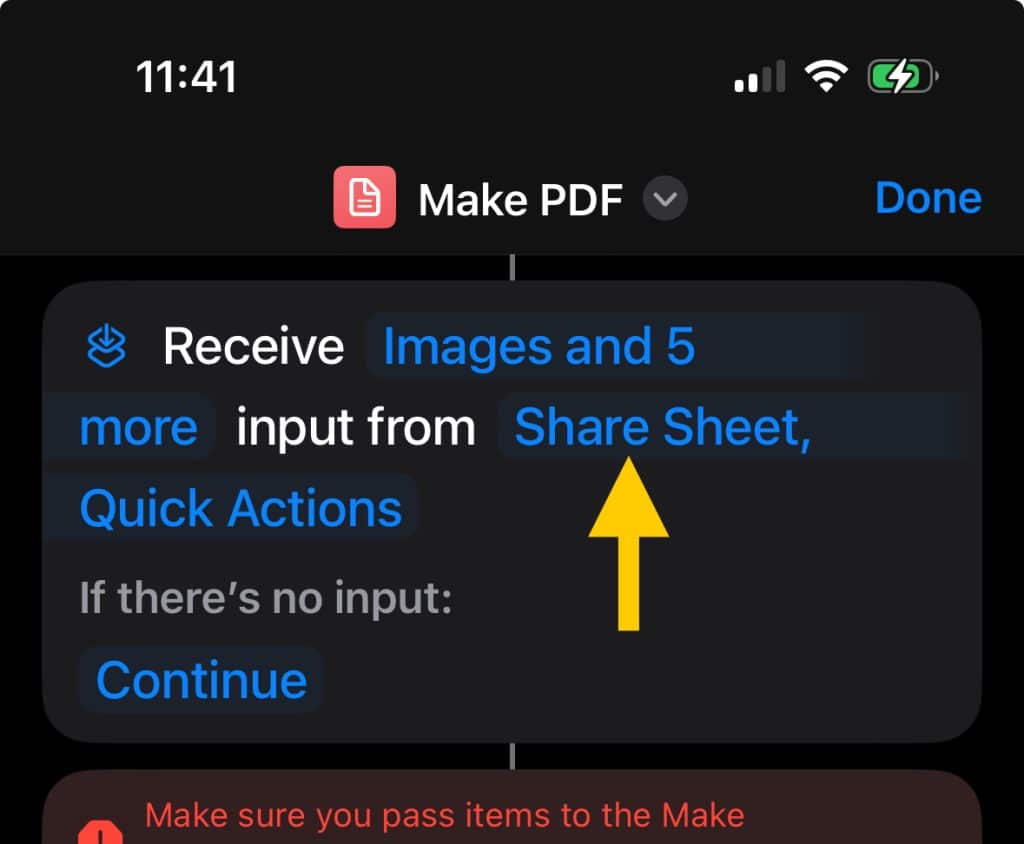
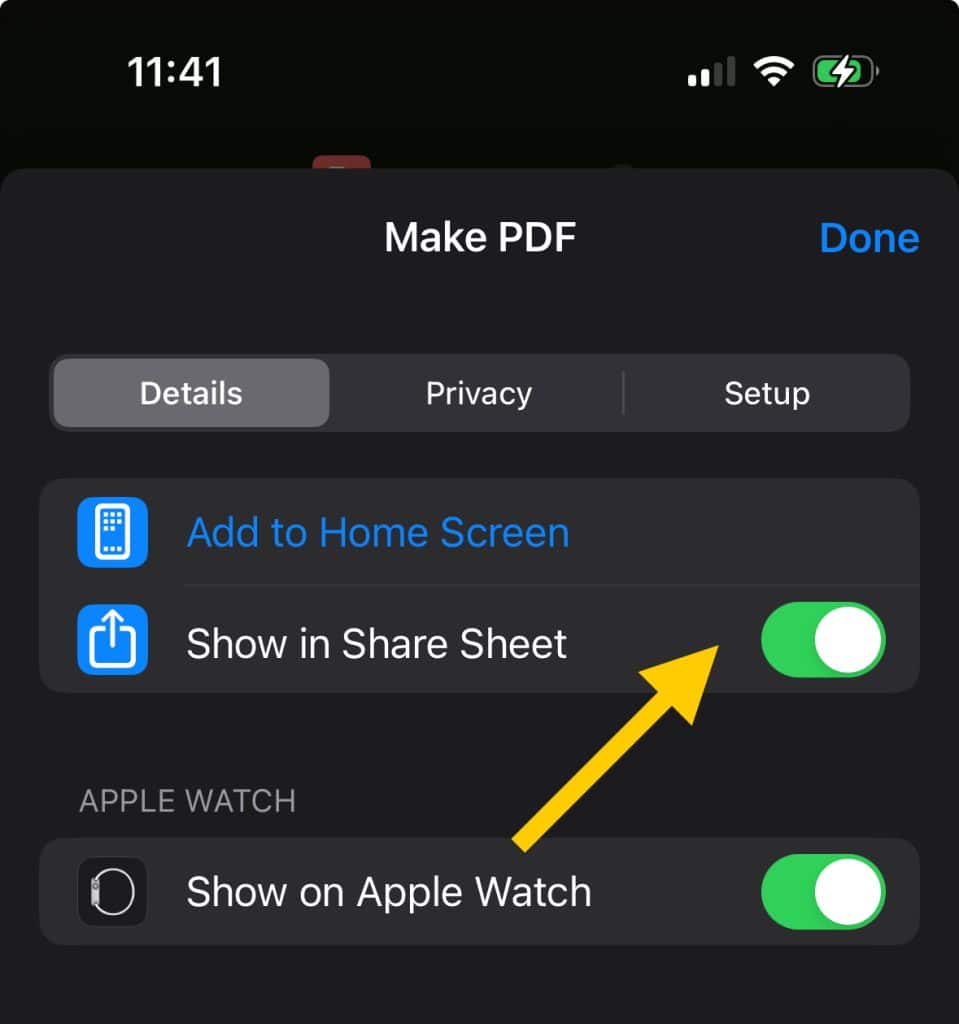
Now you can see shortcut in your home, we need to add this shortcut on our share sheet, to do this, Tap on the shortcut and tap on “Share sheet, quick actions” and make sure its turned on;
Now tap on Done;
Next, go to your photos app, select your photos or multiple photos as you desire and tap on share icon and select “Make PDF” option;
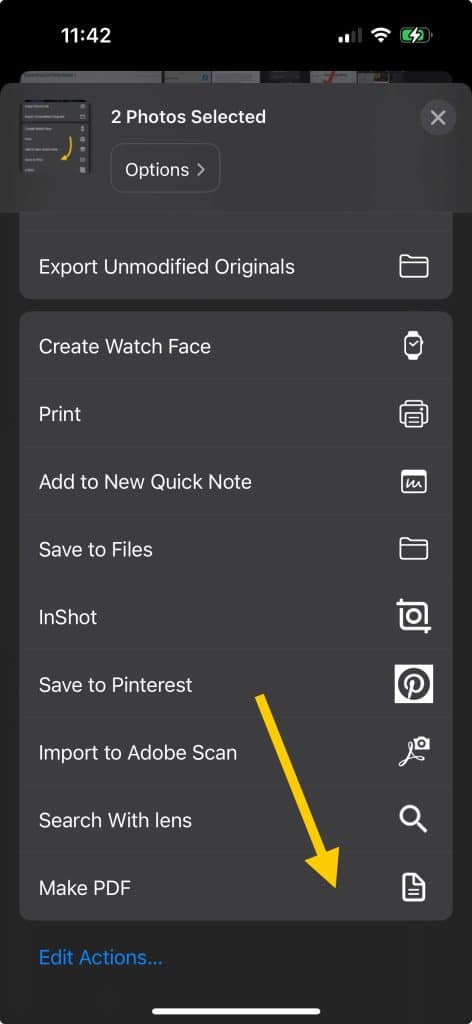
Now your multiple photos will get converted and you will see a preview of your PDF Document.
Now, Tap on the share icon again and save to wherever you want!
The Shortcuts app on your iPhone provides a powerful and highly customizable way to automate converting images to PDF. Why not give it a shot and experience the magic of automation on your iPhone?
More PDF Resources;
How to Redact a PDF? (3 Super Easy Methods)
How to Decrypt a PDF file Online, Mobile and Desktop? (7 Easy Methods)
How to Save Email as PDF? (For all Devices)
How to Draw on a PDF (For all Devices)
3 Conclusion
Converting images to PDF on your iPhone has never been easier, thanks to these simple and effective methods. Whether you want to preserve the image quality, ensure compatibility across platforms, or compile multiple images into a single document, there is an option for you.
You can also use Apple books app to transform your picture and share PDF wherever you want.
So why wait? Start converting your iPhone snapshots into high-quality PDFs today and enjoy seamless sharing with ease! End of Section.
Thank you for reading. If you found this guide helpful, please share it with others who may benefit from it.
4 Can Online Tools be Used to Convert Images to PDF on iPhone?
Absolutely! Online tools can be a convenient alternative for converting images to PDF online on an iPhone. Many online platforms provide this service, and all you need is a stable internet connection.
For instance, tools like Smallpdf, ILovePDF, and Adobe’s online converter offer a straightforward and user-friendly process. Simply upload your image, choose the ‘Convert to PDF’ option, and download the converted file.
These tools often support various image formats and maintain the quality of your image in the PDF. However, while using online tools, be mindful of the privacy and security policies, particularly when handling sensitive images.
So, why not explore the myriad of online tools available for converting images to PDF on your iPhone?
5 What other iPhone photo file types can I convert to PDF format?
There is a wide range of photo file types that you can convert to PDF format on your iPhone. This includes the most common file types such as JPEG and PNG, which are widely used for high-quality images and graphics. Additionally, you can also convert another image format like BMP, GIF, TIFF, and the iPhone-specific HEIC Image format.
You don’t need a separate PDF app or PDF Conversion apps to perform these tasks as your iPhone is capable enough.
Each of these file types has its own advantages in terms of quality, compatibility, and file size. Therefore, no matter what type of photo file you have on your iPhone, rest assured you can easily convert it into a PDF.
Isn’t it fantastic to have such flexibility and convenience right at your fingertips? So, why not start converting your diverse range of iPhone photo file types to PDF today?
6 Can you convert multiple pictures into one PDF file using an iPhone?
Yes, you absolutely can! The iPhone provides several ways to combine multiple images into one PDF document. Whether you want to consolidate images of a project, create a portfolio, or simply put together a memorable collection of photos, this feature can be incredibly handy.
Methods such as using the Notes app, Files app, or the Shortcuts app, as outlined earlier, can be utilized for this purpose.
Many online tools also allow you to upload multiple images at once and convert them into a single PDF file. Isn’t it amazing to have so many options at your disposal? So, why not give it a try and start creating your own PDF documents from multiple images today?
7 How can you adjust the size or orientation of the picture before converting it to a PDF on an iPhone?
Adjusting the size or orientation of an image on your iPhone is a breeze, thanks to the inbuilt editing tools. Simply follow these steps:
- Open the Photos app and select the image you want to adjust.
- Tap on ‘Edit’ in the top right corner of the screen.
- If you wish to change the orientation, tap on the crop icon at the bottom, then rotate the image using the dial on the side. You can also use the ‘Flip’ option under the crop menu to mirror the image.
- To adjust the size of the image, tap on the three-dot icon in the top right corner and select ‘Markup.’ Here you can resize the image by dragging the blue dots at the corners.
- Tap ‘Done’ to save your changes. Your image is now ready to be converted to a PDF.
Remember, fine-tuning your images before converting them to PDF can enhance the final output, ensuring the images are presented exactly as you want them to be. Isn’t it great to have such control over the look and feel of your PDFs? So, why not start perfecting your images before conversion today?
