In today’s digitally-driven world, capturing information from your screen has become more of a necessity than a mere convenience. Whether it’s for saving an entire webpage, gathering data for work, or preserving a lengthy conversation for reference, the need for a comprehensive guide on how to take a scrolling screenshot has never been more evident.
This guide aims to simplify that process, offering step-by-step instructions on utilizing the scrolling screenshot feature available in various operating systems and devices. Whether you’re using an Android device, an iPhone, or seeking solutions through third-party apps, we’ve got you covered.
From capturing extended screenshots on windows to employing built-in screenshot tools on iPhones and android, this guide will walk you through every method to quickly capture, edit, save, and even share full page screenshots.
Stay tuned as we explore efficient ways to get a scrolling screenshot, which allows you to seamlessly capture everything on your screen with just a few taps or clicks, transforming multiple screenshots into a single image for easy viewing and sharing.
How to take a scrolling screenshot on iPhone
It can be easily done using the preview app.
Step 1: Capture the Screen
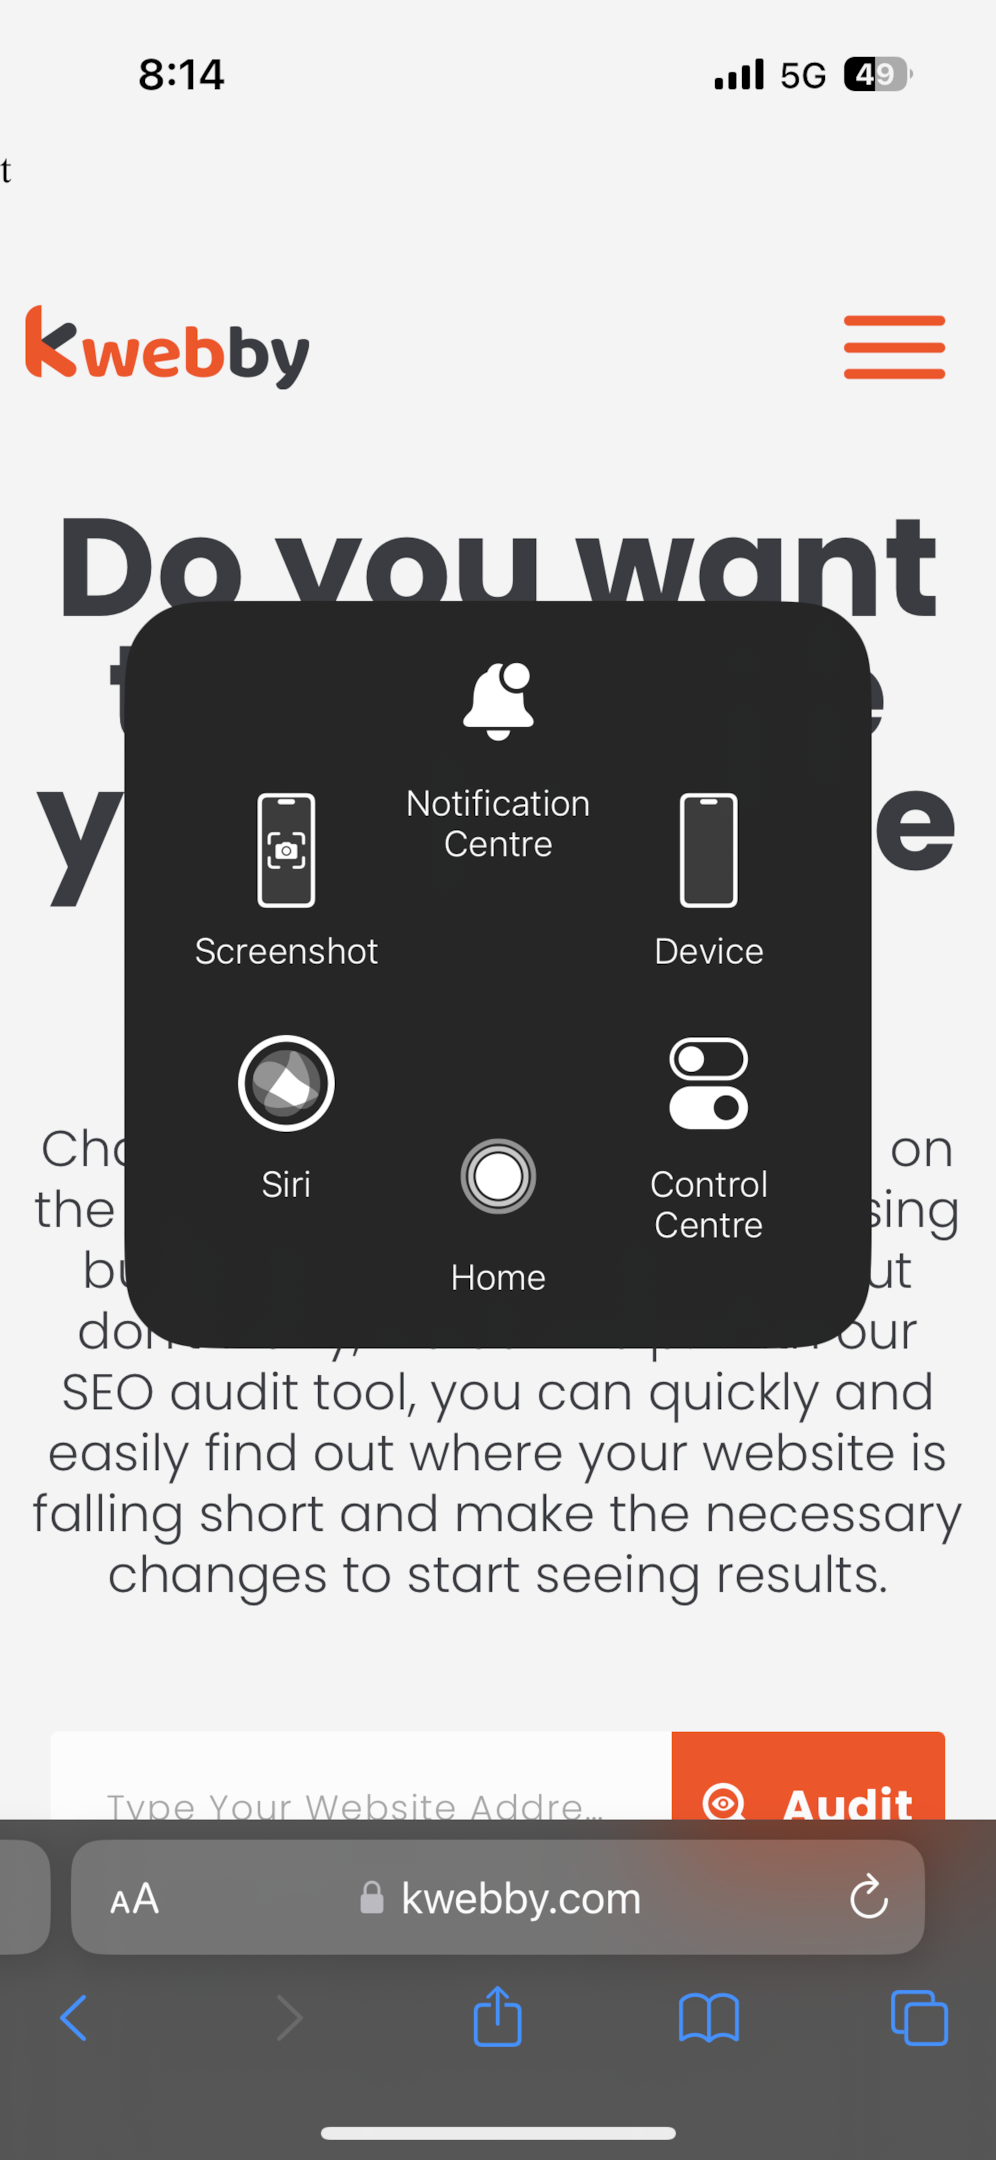
To initiate the scrolling screenshot feature on your iPhone, first take a standard screenshot. This means you should press the side button and the volume up button simultaneously. Ensure you’re on the content you want to capture, be it a document, webpage, note, or email.
Step 2: Access the Preview

Immediately after taking your screenshot, a preview will appear in the bottom left corner of the screen. Tap on this preview before it disappears to access the editing and saving options for your screenshot.
Step 3: Choose the Full Page Option
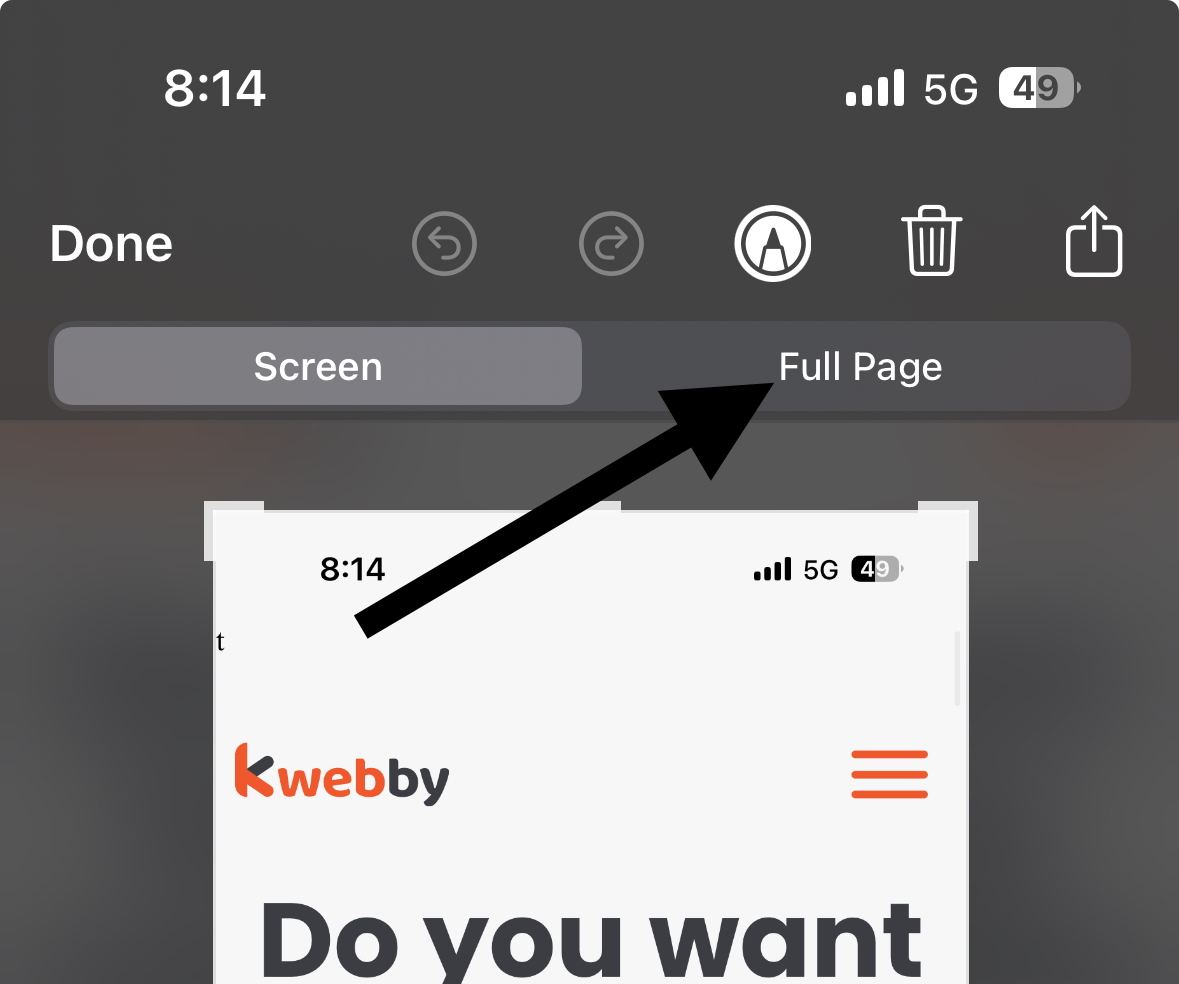
In the preview screen, you’ll notice two tabs at the top – “Screen” and “Full Page”. Tap on “Full Page” to switch to the scrolling screenshot mode. This option allows you to capture the entire page.
Step 4: Edit and Save
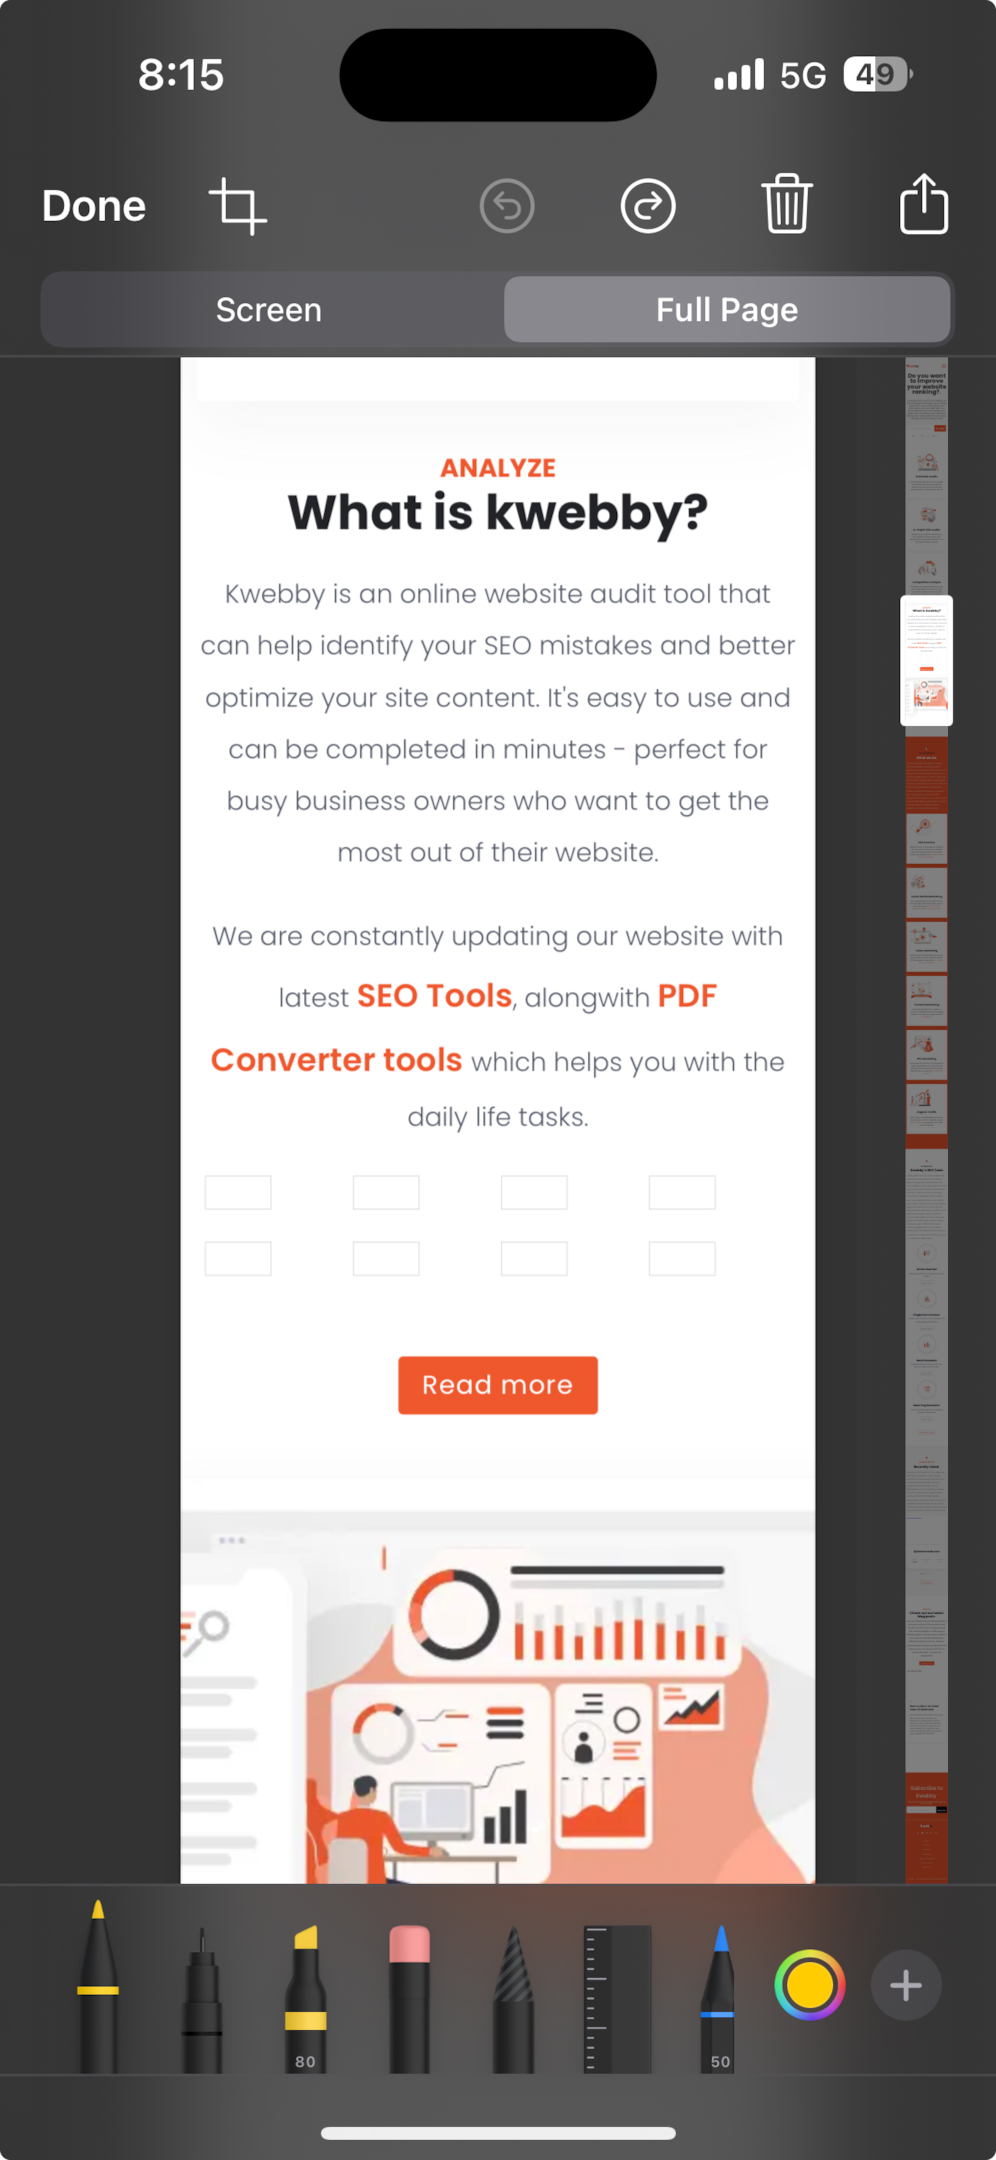
Once in the Full Page mode, you might want to edit what part of the page you’d like to keep. You can do this by tapping the crop icon, which is located next to the “Done” button.
After making your adjustments, you can either tap “Done” to save the screenshot to the Files app or use the share button to send it immediately. Remember, the full page screenshot will be saved as a PDF file.
This native iOS feature for taking a full page or scrolling screenshot simplifies capturing extensive content in Apple’s first-party apps. For occasions where this functionality doesn’t meet your needs, for example, if you’re using a third-party app or require capturing across multiple apps, exploring third-party screenshot tools might be beneficial.
Recover Deleted iPhone Messages – Quick & Easy Guide
How to Change Location on Facebook Marketplace on iPhone
How to Make a PDF on iPhone (2 Easy Methods)
How to Convert Image to PDF on iPhone (5 Easy Methods)
How to take a scrolling screenshot on Android
Step 1: Initiate a Regular Screenshot
To start taking a scrolling screenshot on your Android device, first capture a regular screenshot. You can do this by pressing the Power button and the Volume Down button simultaneously.
For devices with a different setup, such as using gestures or touching a specific part of the screen, follow your device’s standard method for capturing screenshots. Make sure the content you want to capture, such as a long webpage or an extended WhatsApp conversation, is on your screen.
Step 2: Check the Screenshot Preview
Immediately after capturing your screenshot, a small preview will appear at the bottom of your screen. This is your cue that the screenshot was successfully taken.
Step 3: Tap on “Capture More”
Upon seeing the screenshot preview, look for and tap the “Capture More” or similar option. Depending on your Android version or device manufacturer, this button might be labelled slightly differently but is generally found underneath the preview.
Tapping this will transition you to the scrolling screenshot mode.
Step 4: Select the Desired Content
After choosing to capture more, a special interface will pop up, allowing you to select exactly how much more of the content you wish to include in your screenshot.
For finer control, Android provides a magnifier as you adjust the boundaries of your capture area, ensuring you get precisely the content you need without guesswork.
Step 5: Save Your Scrolling Screenshot
Once you’ve selected all the content you wish to include, look for the “Save” button, usually located at the bottom or top of the interface. Tap it to save your scrolling screenshot.
Unlike traditional screenshots, which are saved automatically to your device’s Photos or Gallery app, this comprehensive capture might be saved in a different location, such as the Downloads folder or the Files app, depending on your device and settings.
Capturing scrolling screenshots on Android devices is a powerful way to save and share information contained in long webpages, detailed documents, or extensive conversations without resorting to multiple screenshots.
With the built-in screenshot tool available in Android 12 and later, taking full page or scrolling screenshots has never been easier, allowing users to quickly capture, edit, save, and share content in a seamless manner.
How to See Reels you watched on Facebook (iOS, Android, PC)
How to Clear Cache on Instagram on Android and IOS Devices
How to delete autofill email addresses on Android (3 Easy Methods)
3 Ways To Know Who Unfollows You on Instagram (iOS & Android)
How to take a scrolling screenshot on Windows
The ways of taking a screenshot on windows changes with the browser you are using. In this article we are going to cover how to take a long screen shot on –
Chrome
Mozilla Firefox
Microsoft Edge
Long Screenshot Feature on Google Chrome
Step 1: Get to the Inspect Panel

To start capturing a long screenshot or scrolling screen shot of a web page in Google Chrome, first open Chrome on your PC or Mac. Navigate to the webpage you wish to capture. For Windows users, press `Ctrl + Shift + I` together on your keyboard. If you’re on a Mac, use `Cmd + Opt + I` instead.
This combination opens the Inspect panel, a necessary step to access the tools needed for capturing a full page screenshot.
Step 2: Gain Access to the Command Field
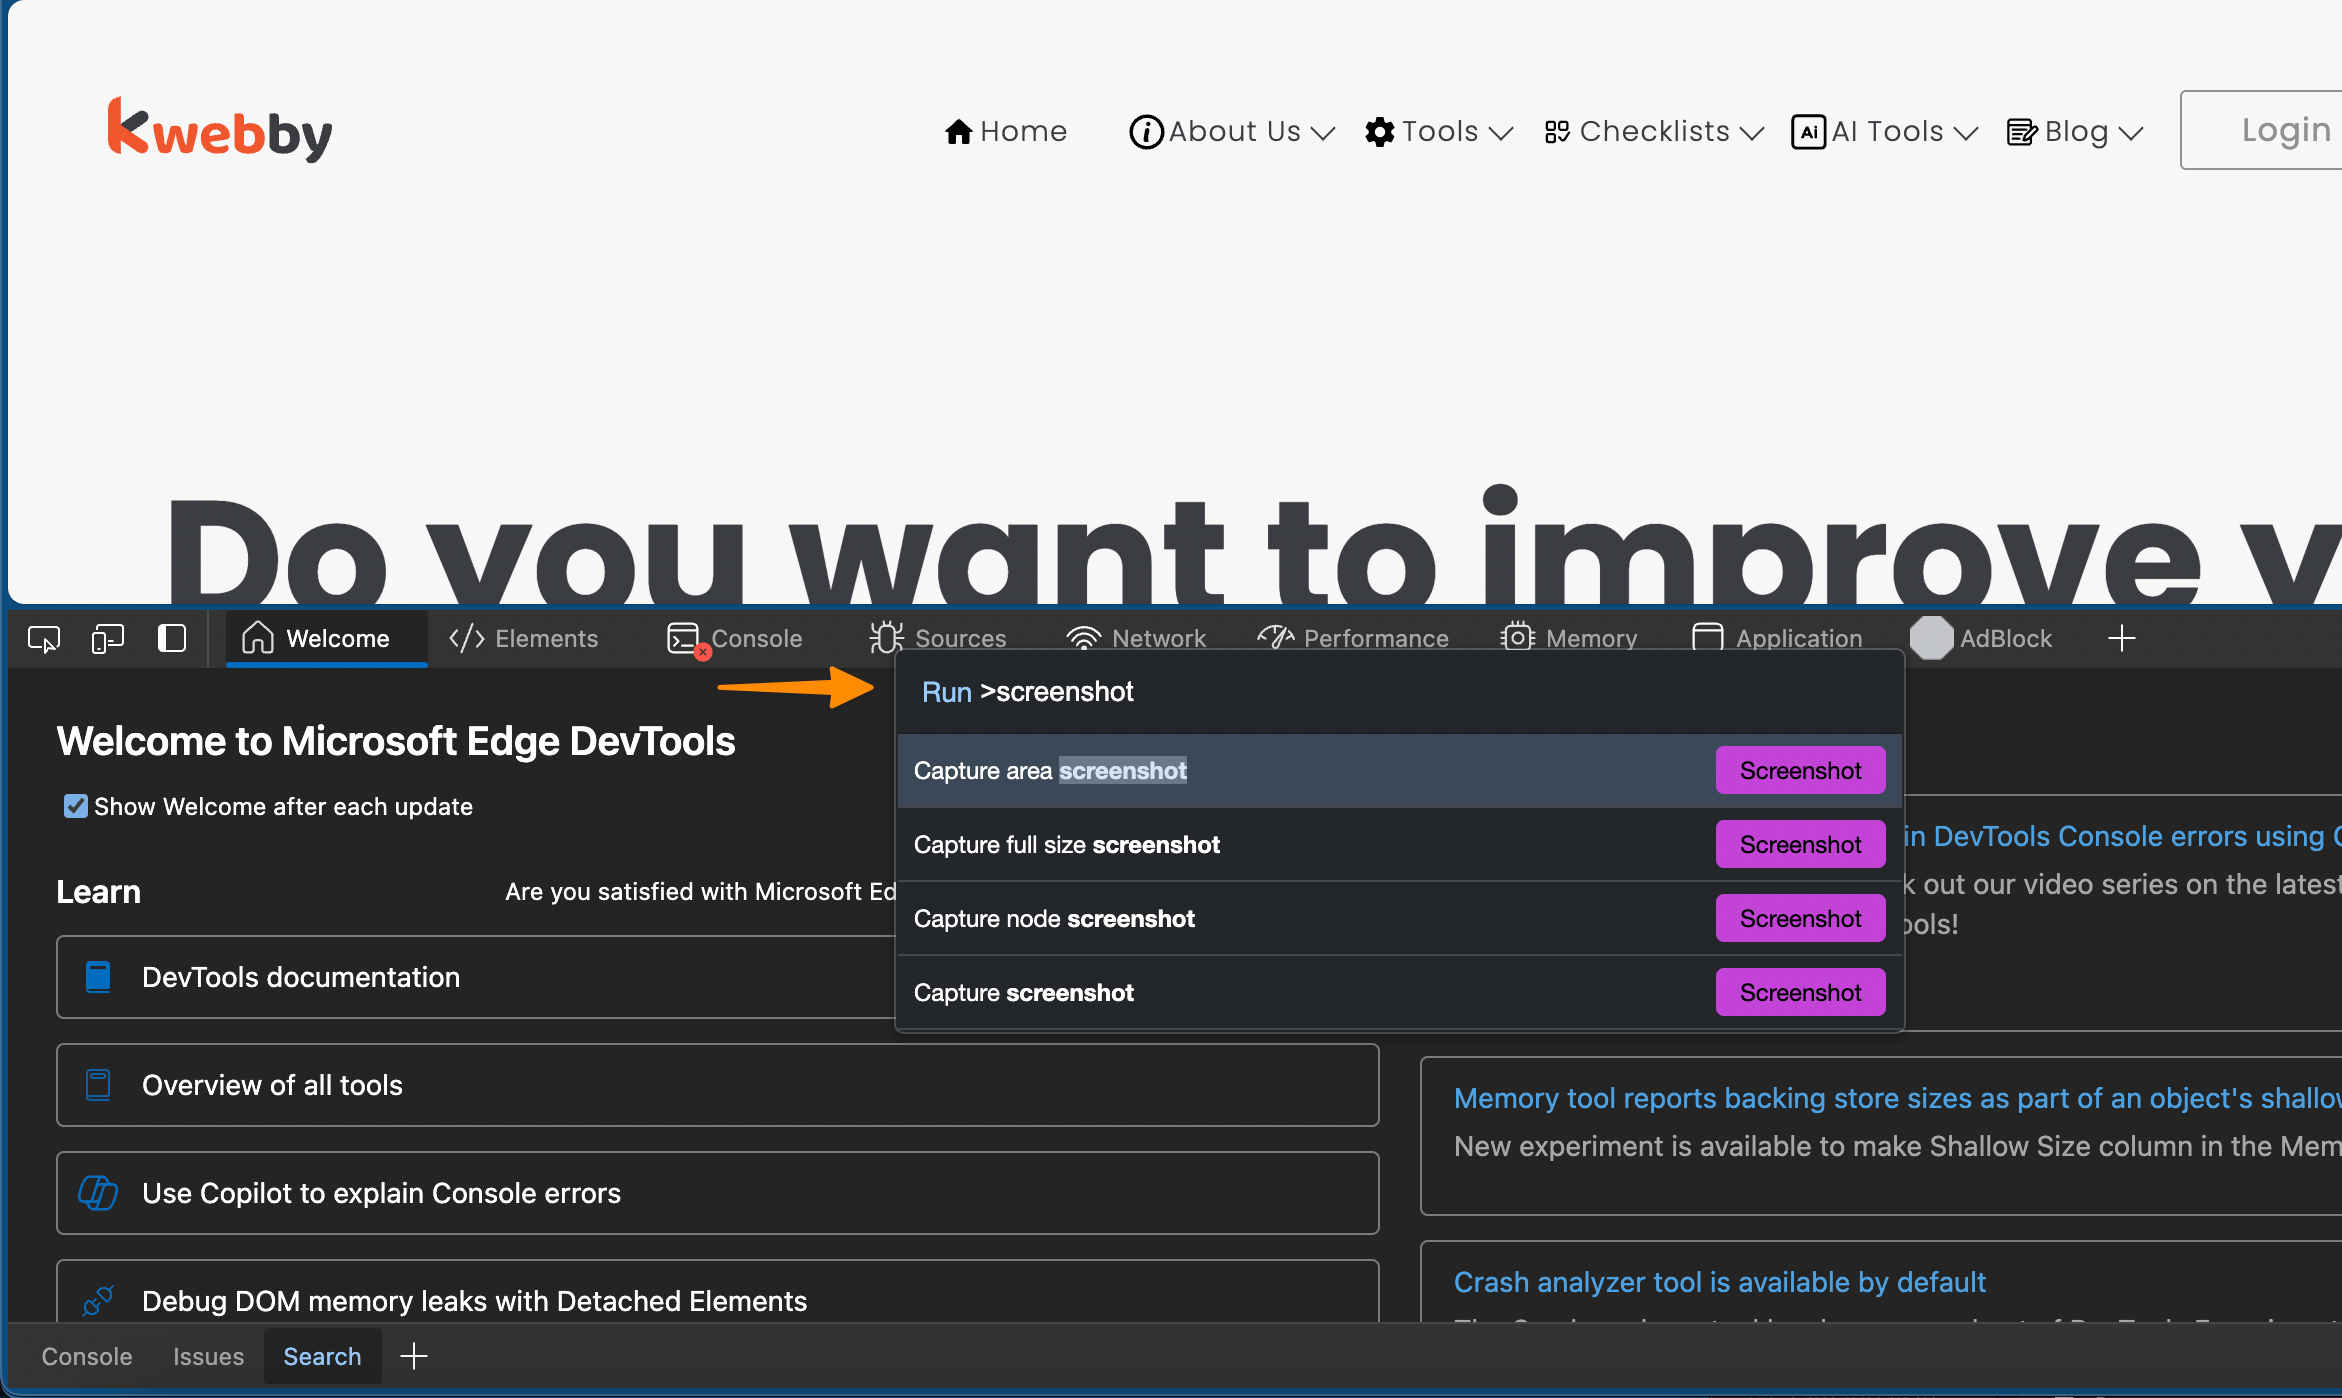
With the Inspect panel open, you’ll need to bring up the Command menu to proceed. Windows users can press `Ctrl + Shift + P`, while Mac users should use `Cmd + Shift + P`.
This action opens a pop-up at the top of the Inspect panel, which is where you can enter commands for various actions in Chrome, including taking a scrolling screenshot.
Step 3: Capture a Long Screenshot
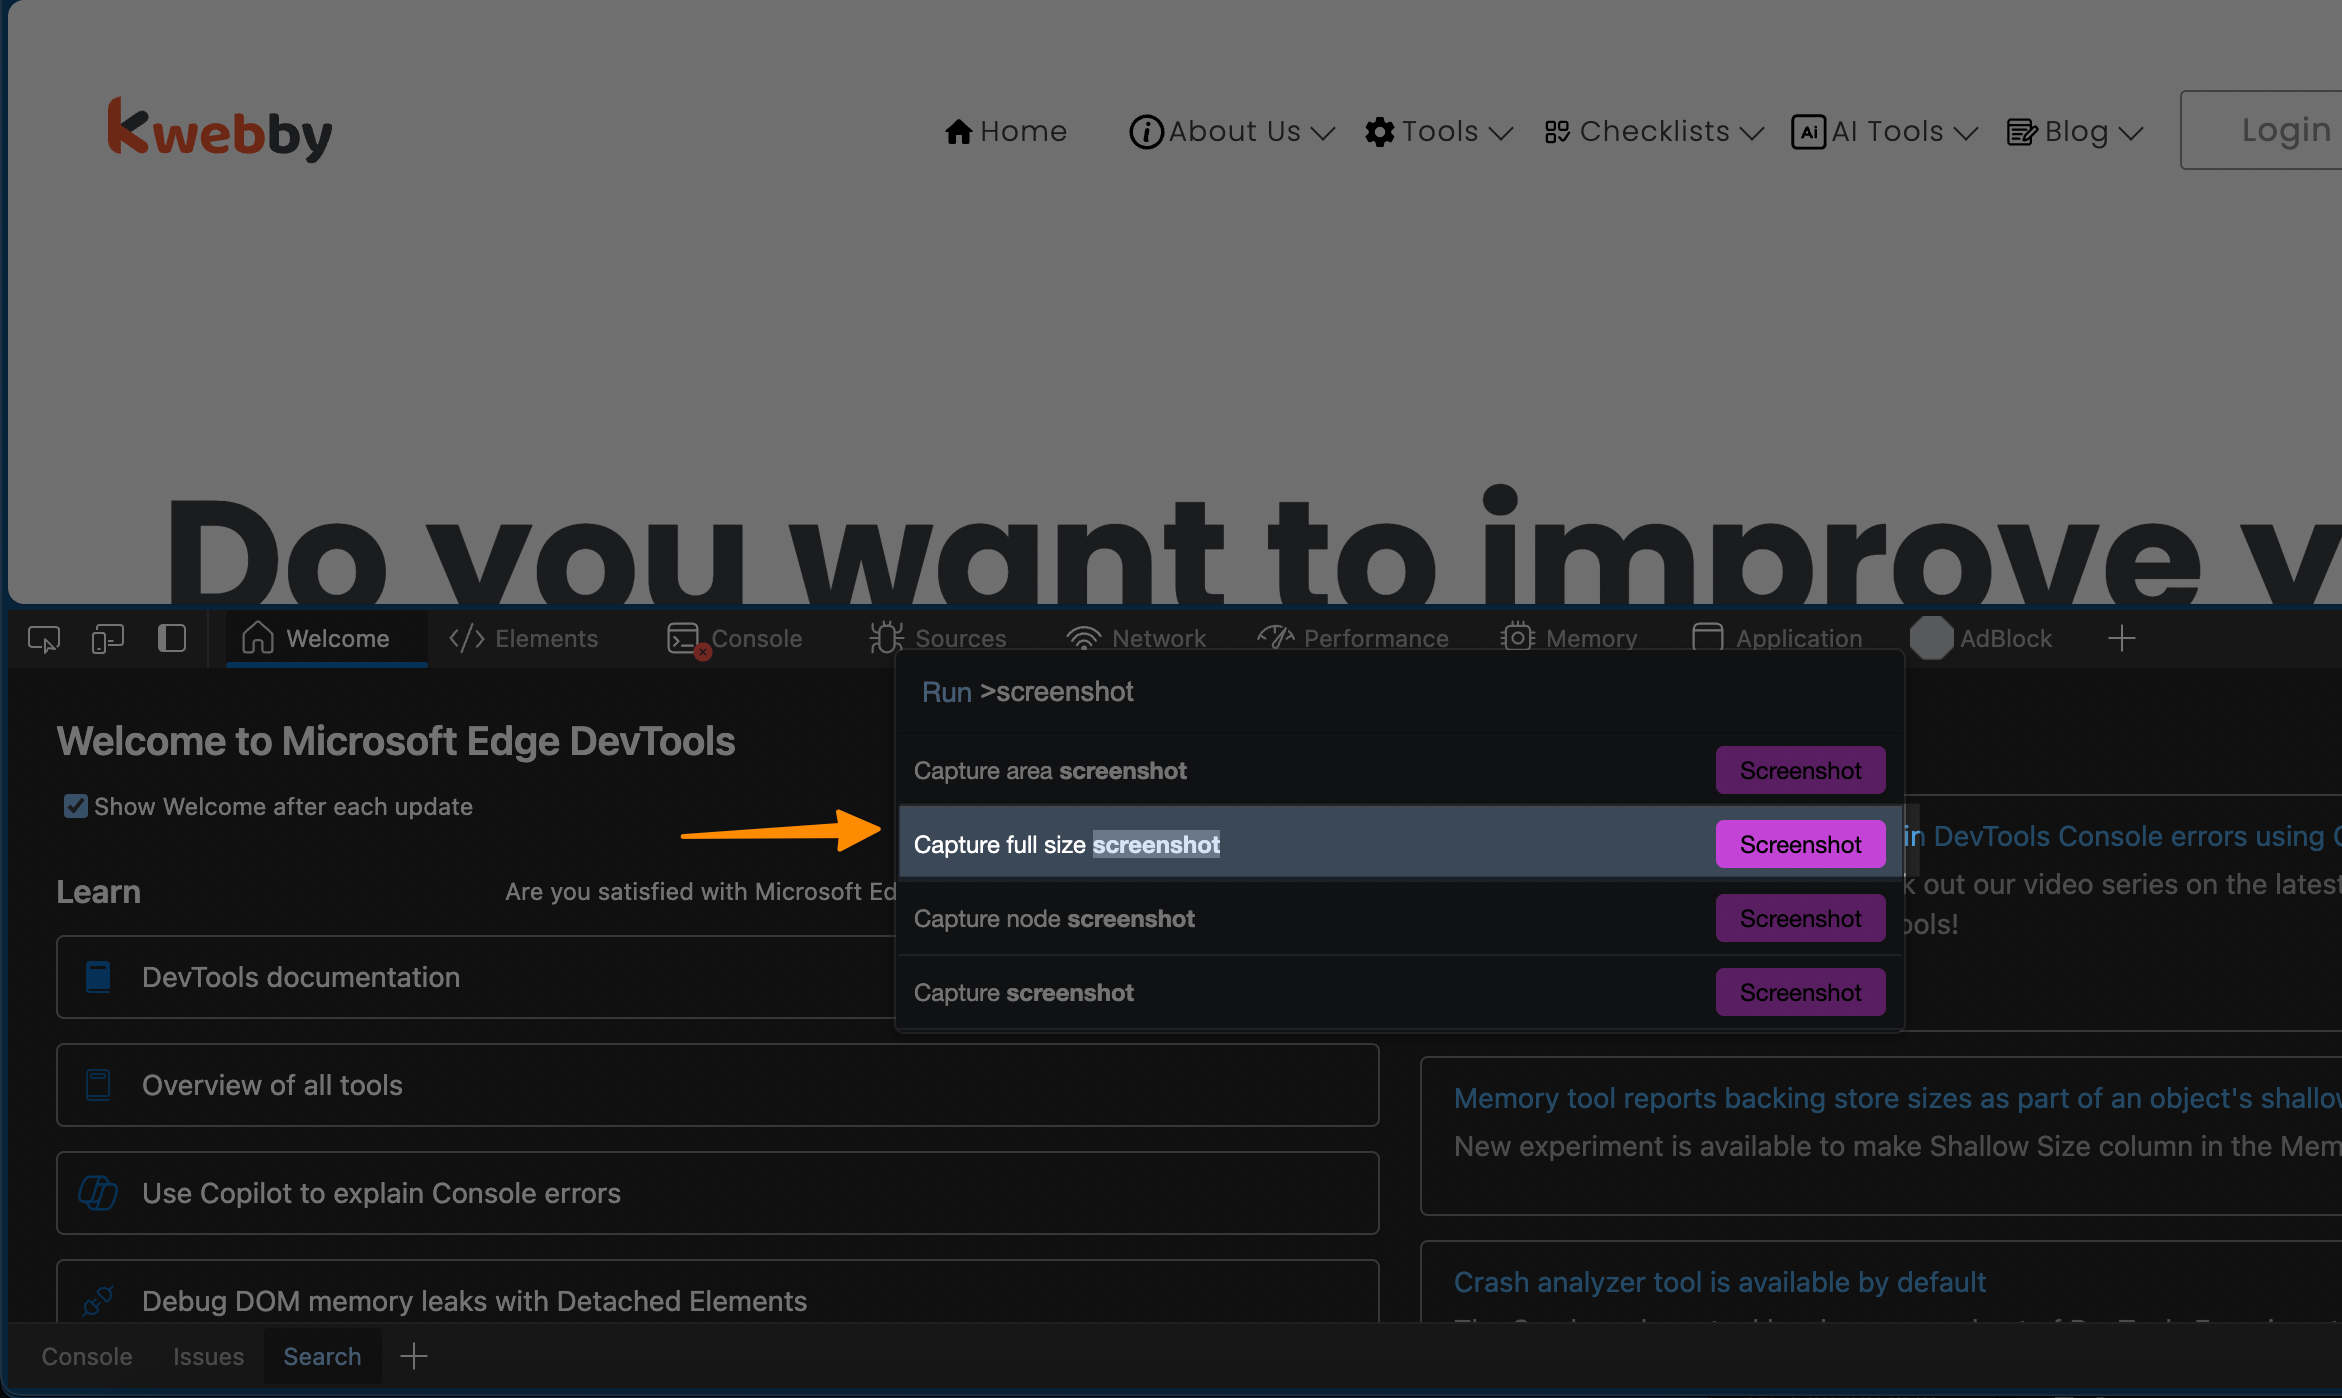
In the Command box that appears, type “Screenshot”. Among the options that show up, click on “Capture full-size Screenshot.” Chrome will then automatically scroll through the entire webpage and capture it in its entirety, saving it as a single, long image.
After the screenshot is taken, a save window will pop up. Here, you can name your screenshot and choose where to save it, like the Downloads folder or the Files app, ensuring you have a comprehensive capture of the webpage content.
By following these steps, you can take a scrolling screenshot or a full page screenshot in Google Chrome. It negates the need for multiple screenshots or manually stitching images together, offering a streamlined approach to save and share extensive information from the web efficiently.
How to find your Saved WiFi password Easy on Windows 11?
Long Screenshot Feature on Mozilla Firefox
Step 1: Get to the Target Page
To commence the process for taking a long screenshot in Mozilla Firefox, open the browser on your Windows PC or Mac. Navigate to the web page you wish to capture fully.
The simplicity of Firefox’s built-in screenshot tool eliminates the need for third-party apps, providing a straightforward approach to capturing an entire webpage.
Step 2: Capture a Long Screenshot
Once you’re positioned on the desired page, press `Ctrl + Shift + S` (on Windows) or `Cmd + Shift + S` (on Mac) to open the Command menu. This is where you can execute the command for a full page screenshot.
Firefox will then automatically scroll through the page, seamlessly capturing every bit of content from top to bottom, thus enabling you to take a scrolling screenshot without the fuss of multiple screenshots.
Step 3. Save the Screenshot
After the capture is complete, a Preview screen will display, showcasing the full page screenshot you’ve just taken. Locate the “Download” button in the top-right area of the screen.
Clicking on this will bring up a dialog box, allowing you to choose where to save your extended screenshot on your PC.
Web Capture Feature on Microsoft Edge
Step 1: Initiate the Web Capture Panel

To begin taking a scrolling screenshot on Microsoft Edge, first launch the browser on your Windows PC. Navigate to the web page that you want to capture in its entirety.
Once there, simply press `Ctrl + Shift + S` on your keyboard. This action will bring up the Web capture panel at the top of your browser, setting the stage for your scrolling capture.
Step 2: Capture a Full Page
With the Web capture panel active, click on “Capture full page.” Edge will then automatically scroll through the entire webpage, taking a full page screenshot.
This feature ensures that you can capture the whole page seamlessly without needing to resort to piecing together multiple screenshots.
Step 3: Save the Screenshot
Once the scrolling capture is complete, you’ll be presented with options in the top-right area. Click on the “Save” icon to save your screenshot.
A dialog box will appear, allowing you to choose the saving destination like the Downloads folder or the Files app. Optionally, you can click on “Open file link” or “Show in folder” icons from the pop-up box to directly access the file from its default save location.
Conclusion
In the digital age where information is consumed rapidly and often in vast quantities, the ability to take a scrolling screenshot is not just convenient but essential.
This article has walked you through the steps to take scrolling screenshots using built-in features in popular browsers like Google Chrome, Mozilla Firefox, and Microsoft Edge, an Android device, and an iPhone.
The ability to quickly capture an entire page, edit the screenshot preview, add text or annotations, and save or share the final image elevates productivity and information management.
In summary, leveraging the full page screenshot capability and understanding how to take a scrolling screenshot can significantly simplify content capture. It encourages a more organized and efficient approach to information storage, especially in scenarios demanding the preservation of extended web content.

