How to save a PowerPoint as a PDF (Easy Way)
In an era where sharing documents seamlessly across various platforms is paramount, knowing how to save a PowerPoint presentation as a PDF becomes an essential skill. This concise guide is poised to demystify the process, enabling users to convert their PowerPoint files into PDF format effortlessly.
Whether you’re looking to share your presentation in a more universally accessible format, maintain the professional appearance of your slides, or avoid compatibility issues across different operating systems, converting your PowerPoint to a PDF file is the solution.
We’ll cover the step-by-step process of converting PowerPoint to PDF on Windows and Mac. Our aim is to make your presentation a lightweight, print-friendly PDF document that is conveniently ready for sharing or distribution, ensuring it retains the desired quality and layout integrity.
Also learn, How to create Harvey balls in PowerPoint in a Few Steps
How to Convert PowerPoint Files as a PDF Online
You can use our Powerpoint to PDF converter to converting powerpoint file in a breeze.
Upload your PowerPoint file and click on “Convert Now”;
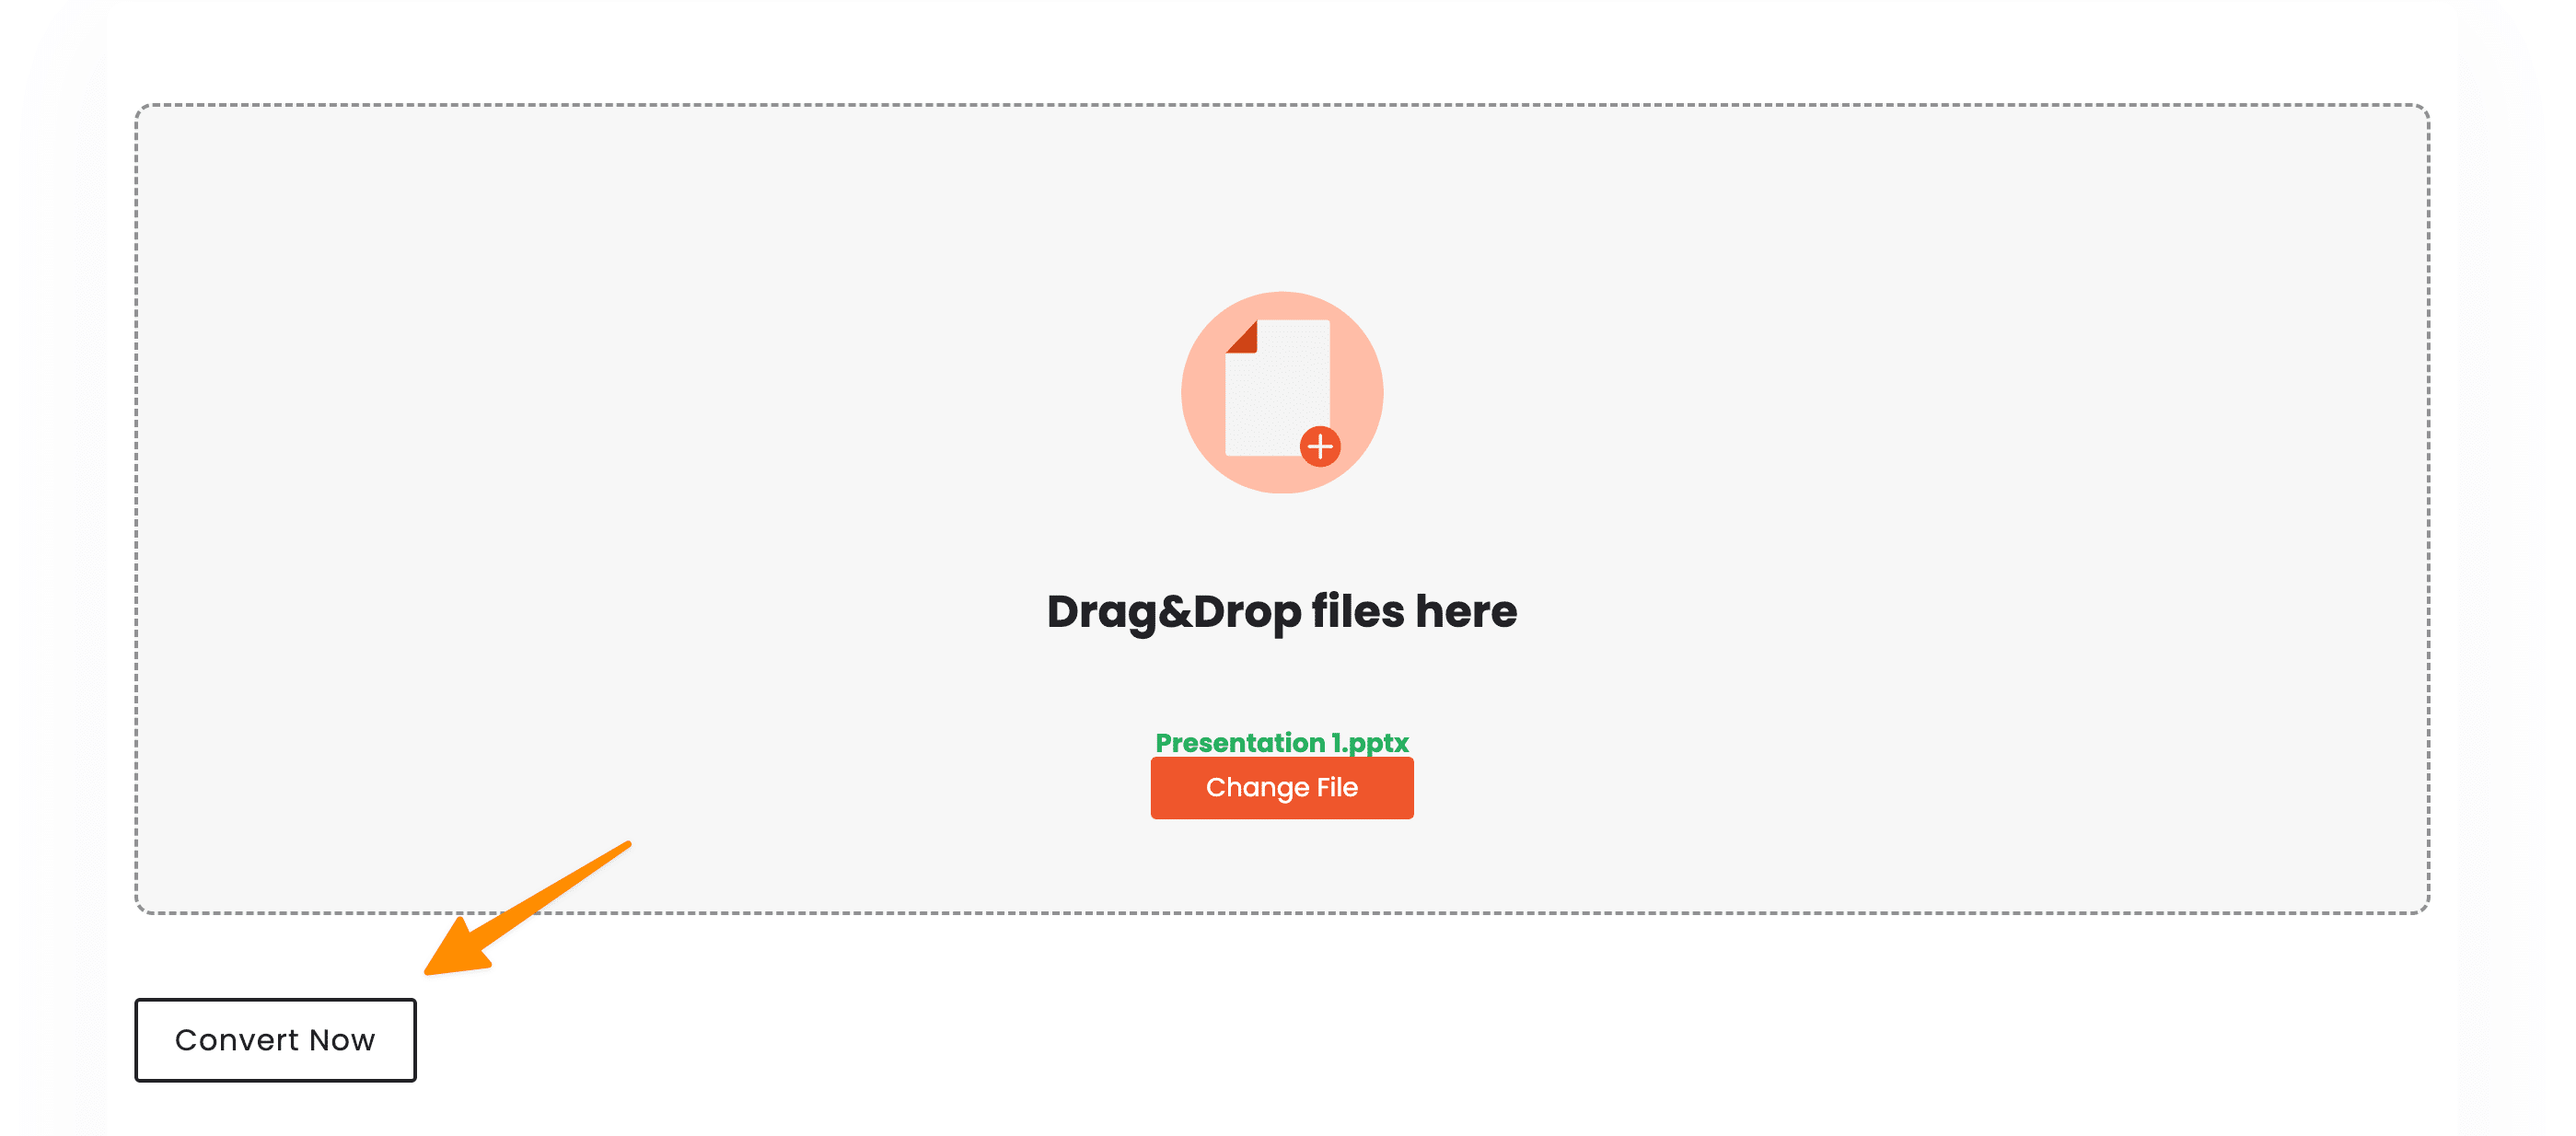
Next, You can download your Powerpoint file as a PDF.
Also learn, How to Insert PDF into PowerPoint (4 Methods)
How to save a PowerPoint as a PDF on Windows
Step 1: Open Your PowerPoint Presentation
Begin by opening the PowerPoint presentation you wish to convert to PDF format. Ensure that all content within your PowerPoint file, including text, images, and any other elements, are finalised and ready for conversion.
Step 2: Navigate to the File Tab
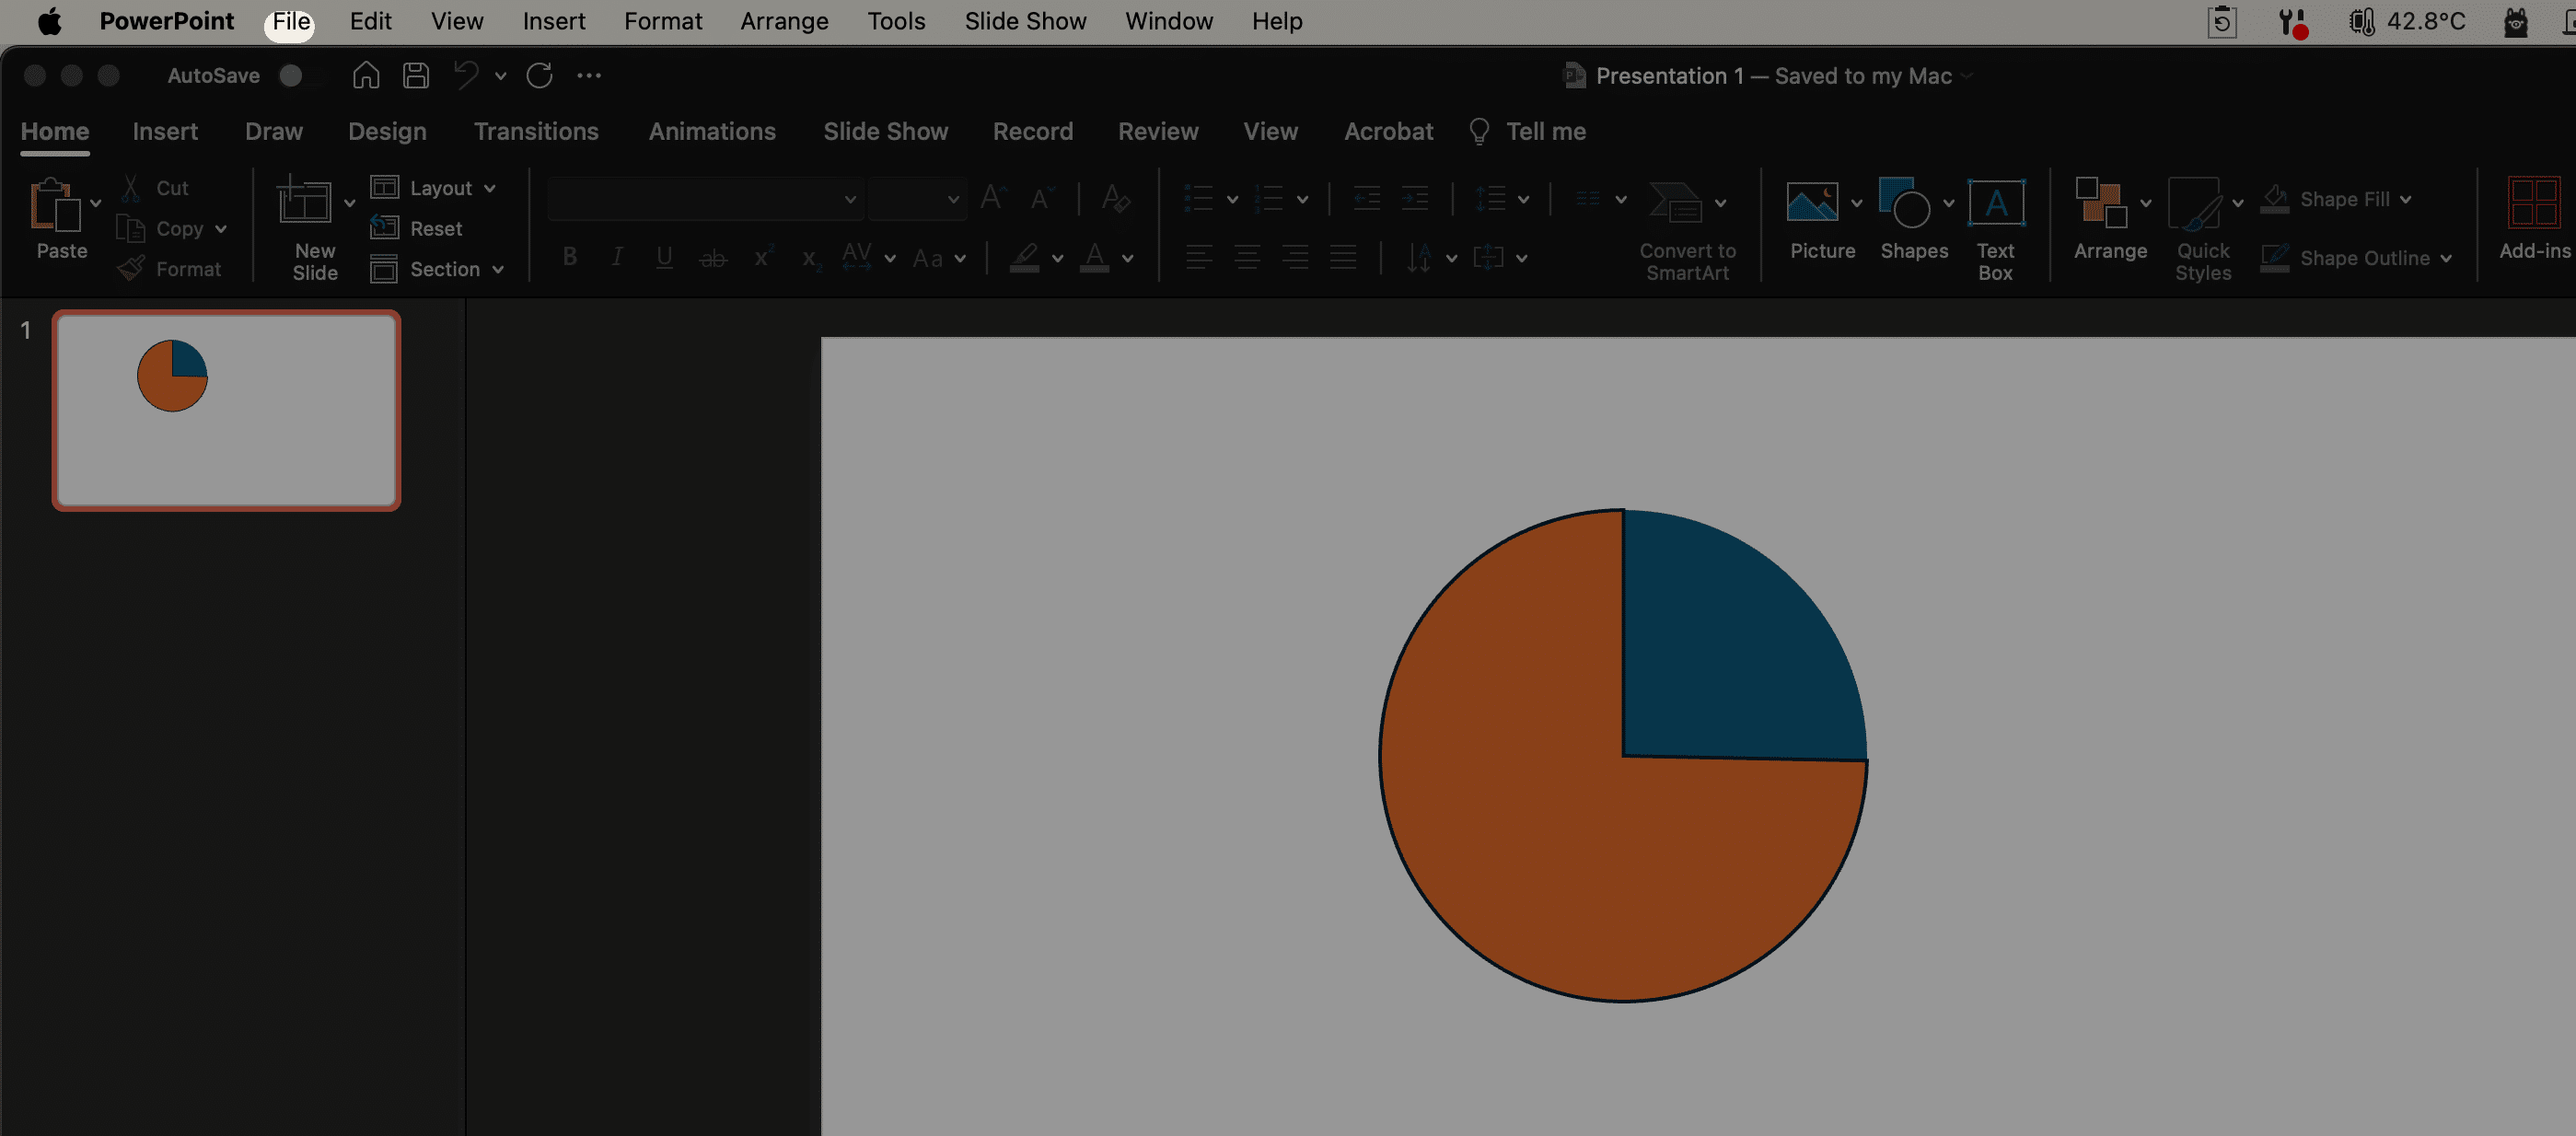
Click on the “File” tab located in the top-left corner of the Microsoft PowerPoint application. This action will reveal a dropdown menu offering various options for managing your PowerPoint file.
Step 3: Select ‘Export’ then ‘Create PDF/XPS Document’
From the dropdown menu, select “Export” to view additional file formats and options. Here, you will find the “Create PDF/XPS Document” option, which is your gateway to converting your PowerPoint to a PDF file. Click on this option, followed by clicking on the “Create PDF/XPS” button to proceed with the conversion process.
Step 4: Choose Location and Name Your PDF File
In the “Publish as PDF or XPS” dialog box that appears, choose a convenient location on your device to save the new PDF file. If you wish to give it a name different from the original PowerPoint presentation, enter your preferred name in the “File name” box.
Step 5: Optimize and Customize Your PDF
Before finalizing the conversion, you have the option to customize how your PDF will appear.
Optimize for Quality or Size: At “Optimize for,” select “Standard” for a higher quality PDF, ideal for printing. Choose “Minimum size” if you prefer a smaller file size for easier email attachments or online sharing.
Select Specific Slides or Content: Utilize the “Range” options to save only the current slide, specific slides, or even only comments, handouts, or the Outline view as a PDF. Simply enter the slide range or select the appropriate option under “Publish what.”
Slides per Page and Orientation: Determine how many slides you want per page and their layout orientation in the PDF by adjusting the “Slides per page” dropdown and selecting either Horizontal or Vertical orientation.
Include Additional Elements: Decide if you want to include frame slides, hidden slides, comments, ink annotations, and non-printing information like document properties or structure tags by checking the respective boxes.
Step 6: Save powerpoint as PDF
After setting all preferences, click “OK” to close the options dialog box, and then click “Publish” to start the conversion process.
Your PowerPoint will be converted to a PDF document, retaining all the chosen settings and adjustments, ensuring your presentation is lightweight, print-friendly, and ready for professional sharing across any platform or operating system.
By following these steps, you can seamlessly convert your PowerPoint presentations into versatile and convenient PDF files, simplifying sharing and distribution while preserving the content’s quality and layout integrity.
Also learn, How to Convert PowerPoint to Video (PPT to Video)
How to save a PowerPoint as a PDF on Mac
To convert your PowerPoint App for macOS presentation to a PDF, there are two methods.
Go to File > Save As to save your presentation as a PDF.
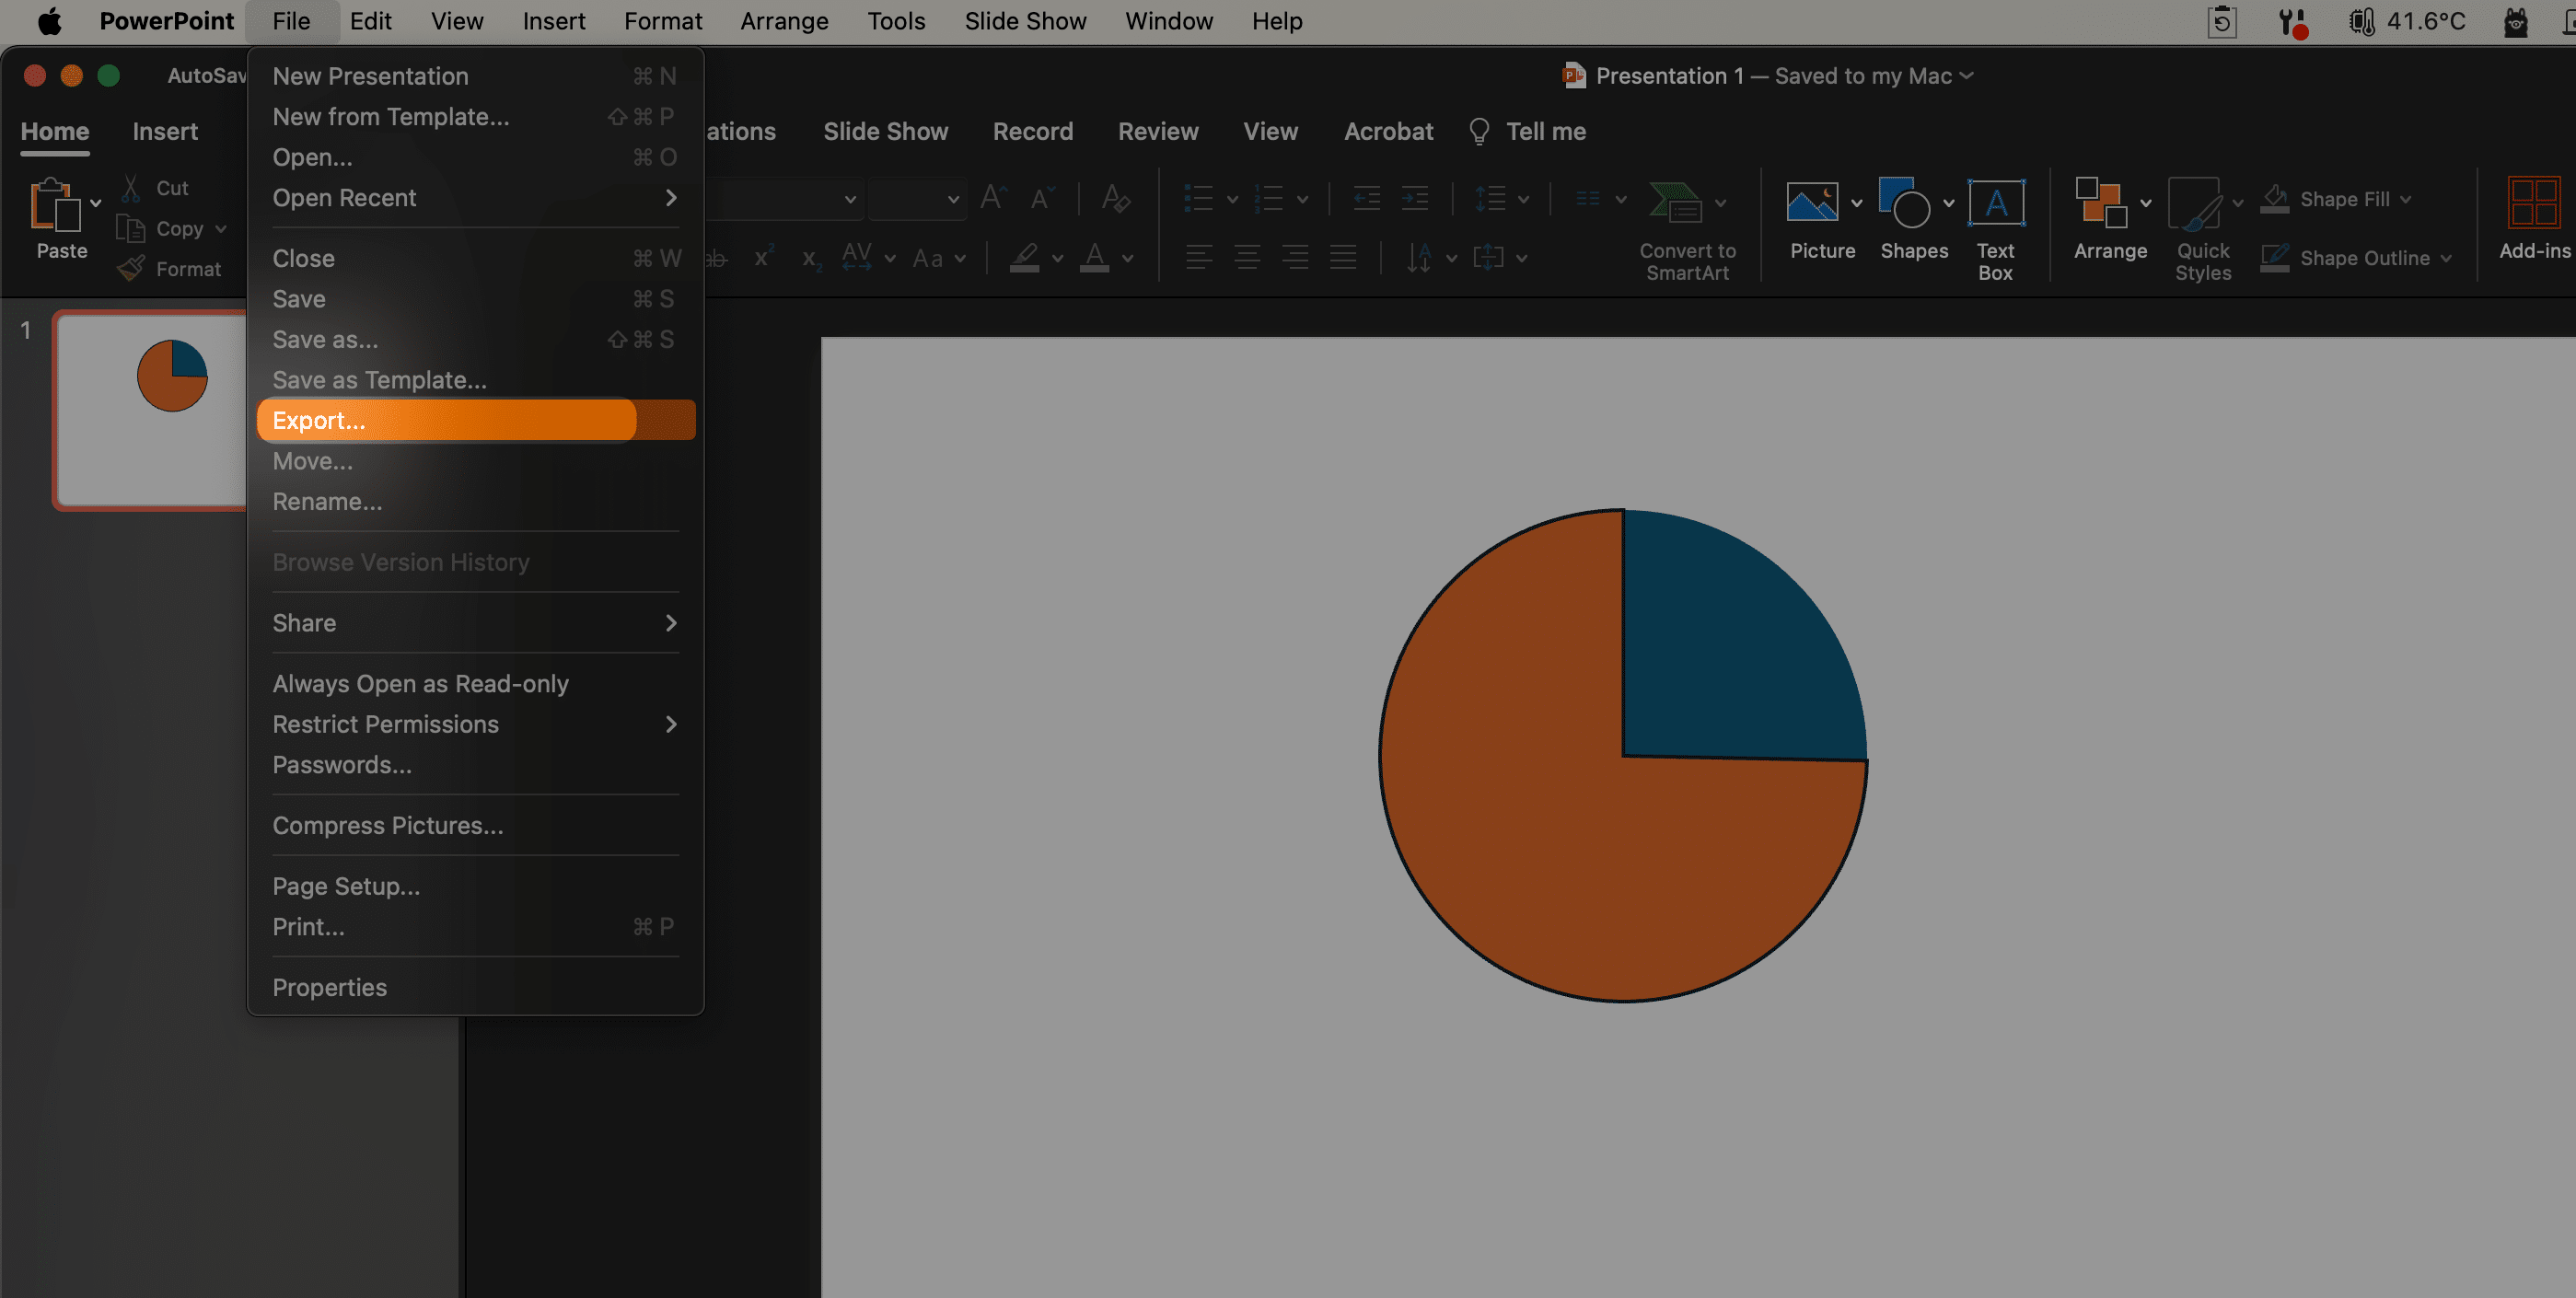
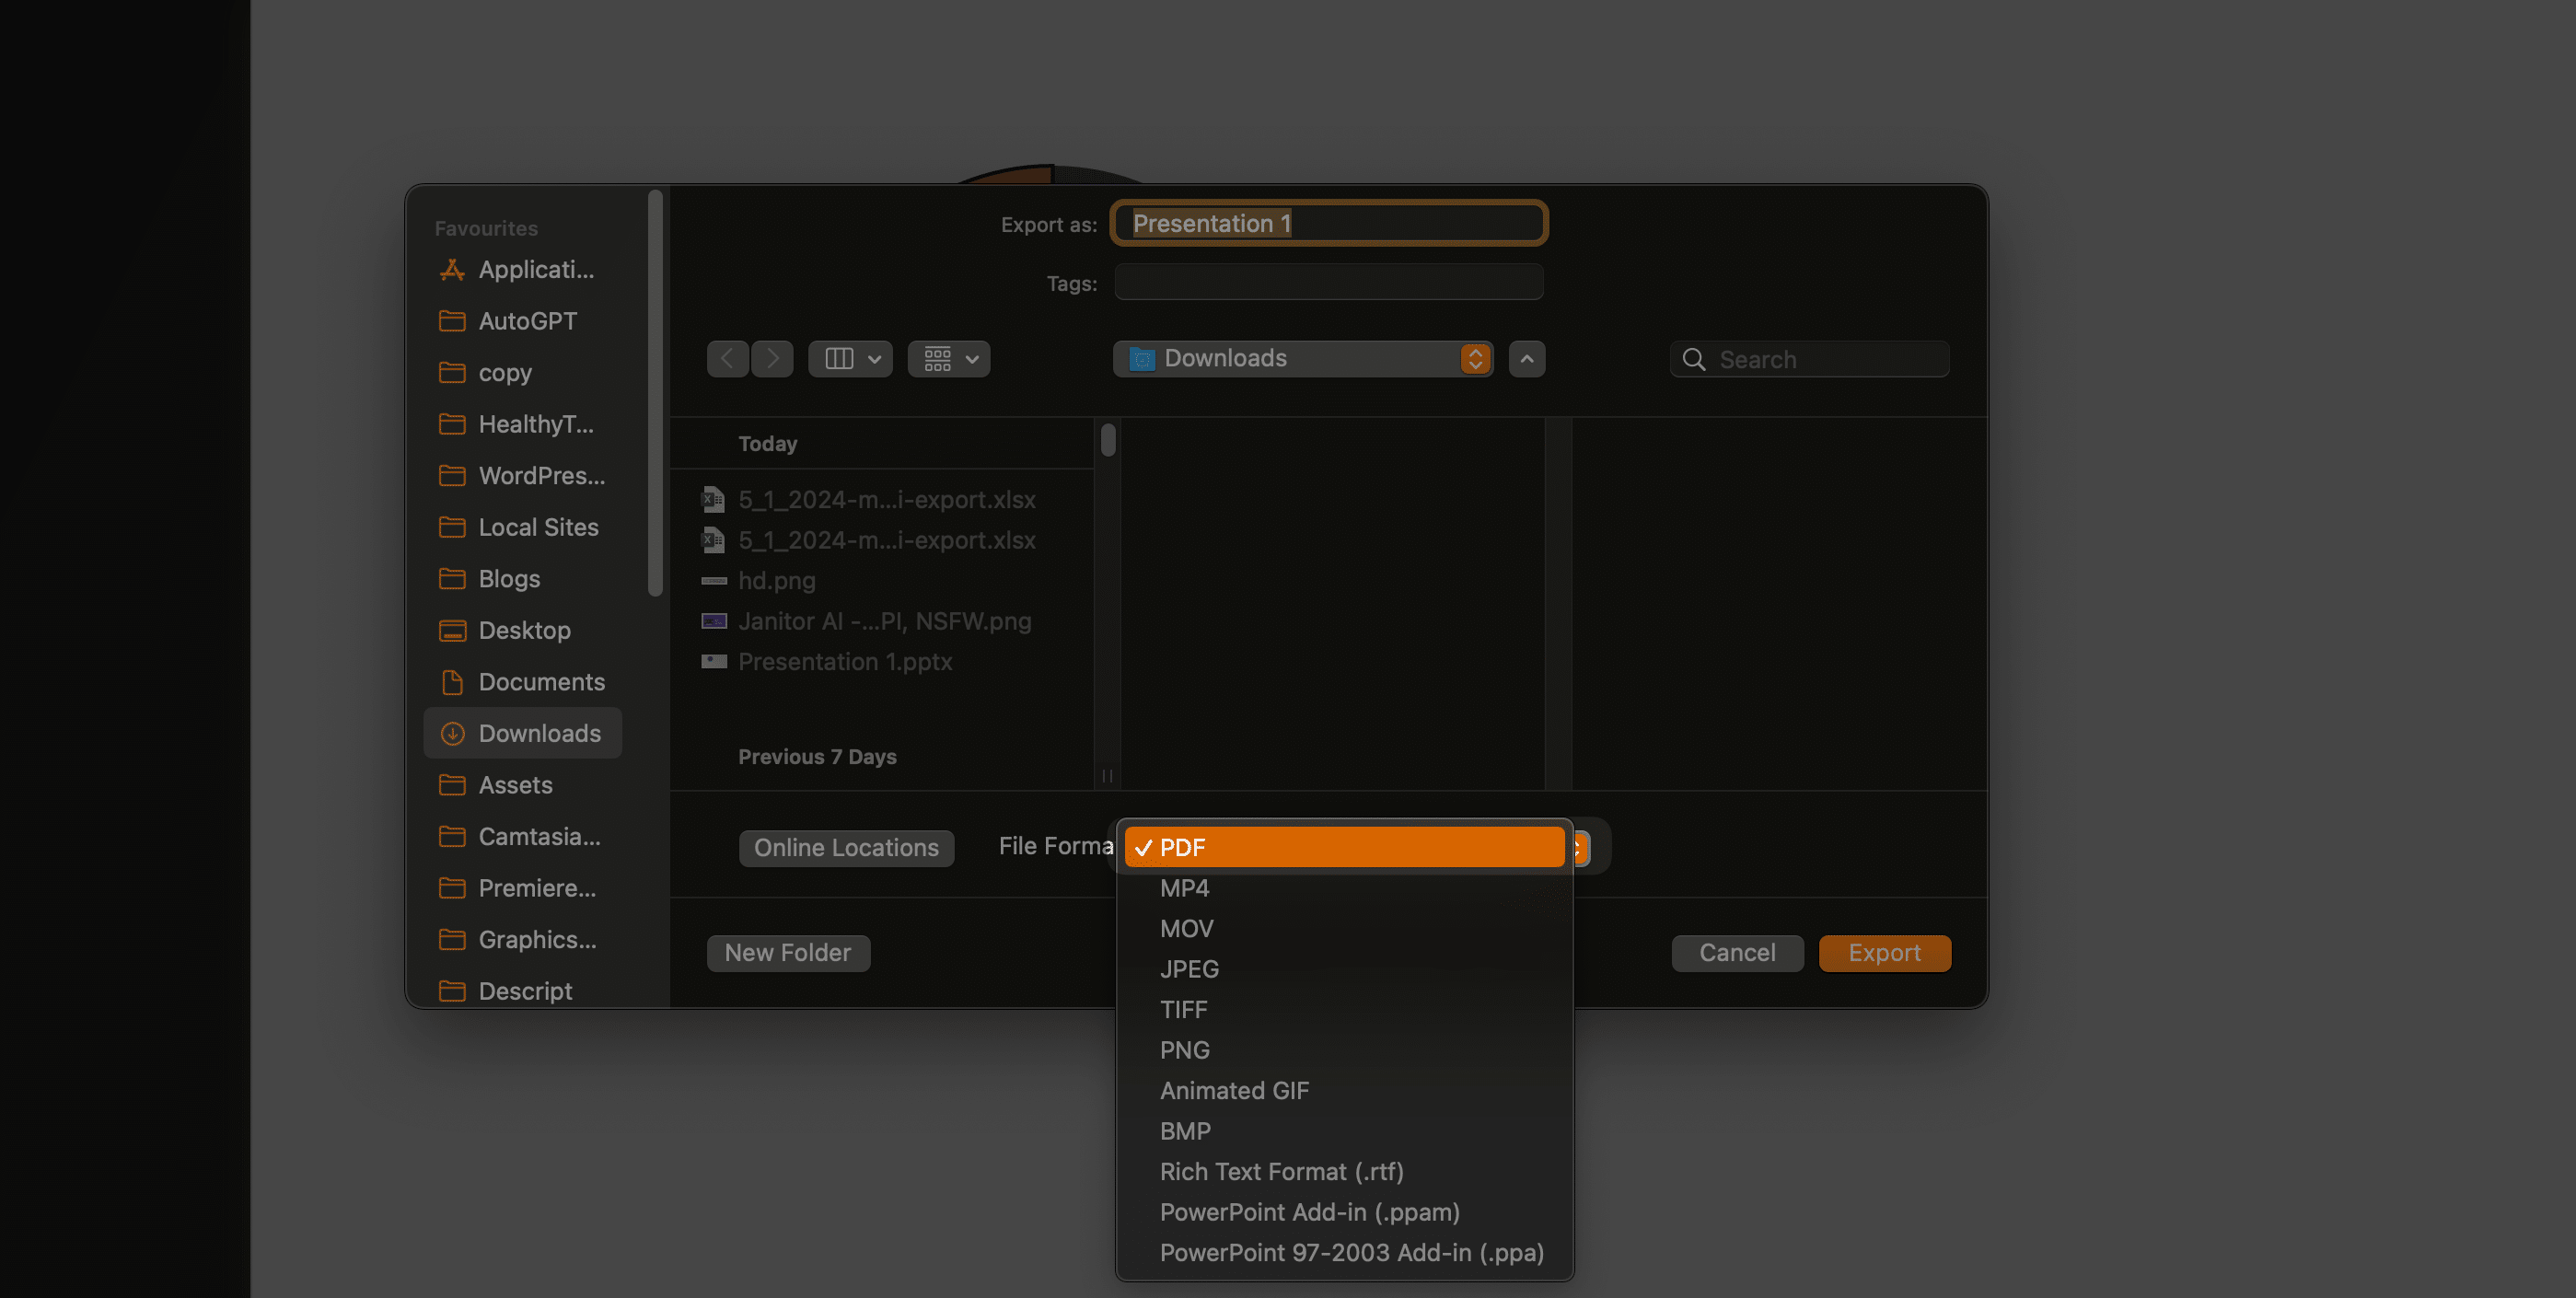
Go to File > Export to export your presentation as a PDF file.
When it comes to creating a PDF version of your presentation, you can select the way that you are most comfortable with, as both accomplish the same goal.
Method 1: Save your presentation as a PDF
Step 1: Navigate to ‘File’ then ‘Save As’
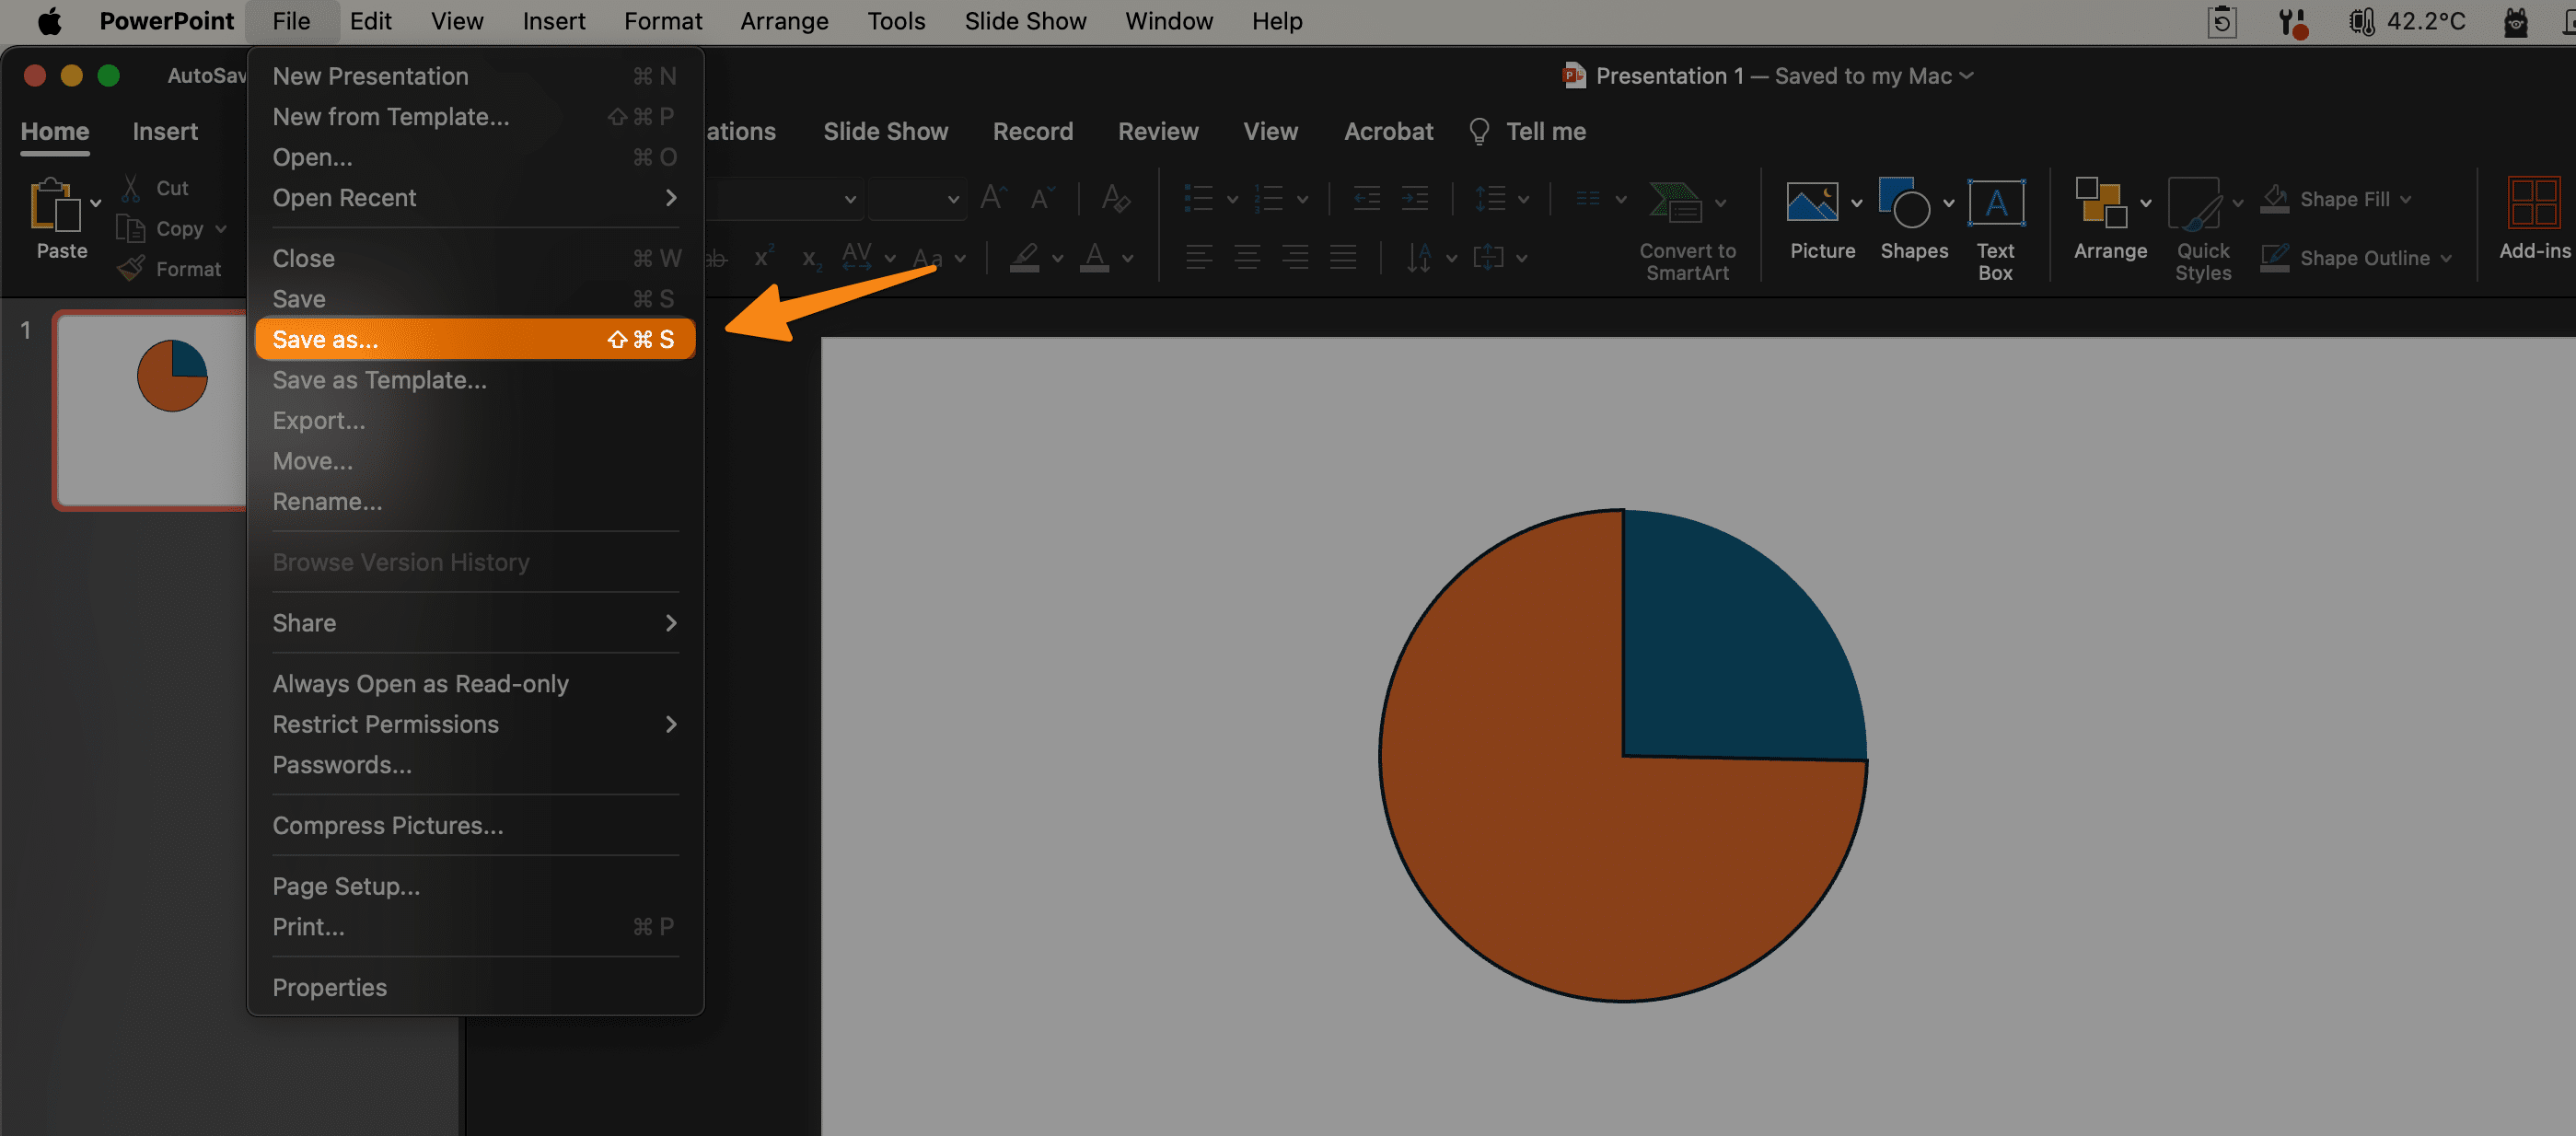
To begin the process of saving your PowerPoint presentation as a PDF on a Mac, first, open the PowerPoint file you wish to convert.
Ensure that your presentation is in its final form, with all content including texts, images, and animations thoroughly checked for accuracy. This ensures that once your presentation is converted into a PDF format, it retains the professional appearance and desired quality.
Next, click on the “File” tab in the menu bar at the top of the screen. This action will display a dropdown menu, where you should select “Save As” to proceed to the next step.
Step 2: Choose Your Save Location and Select PDF as the File Format
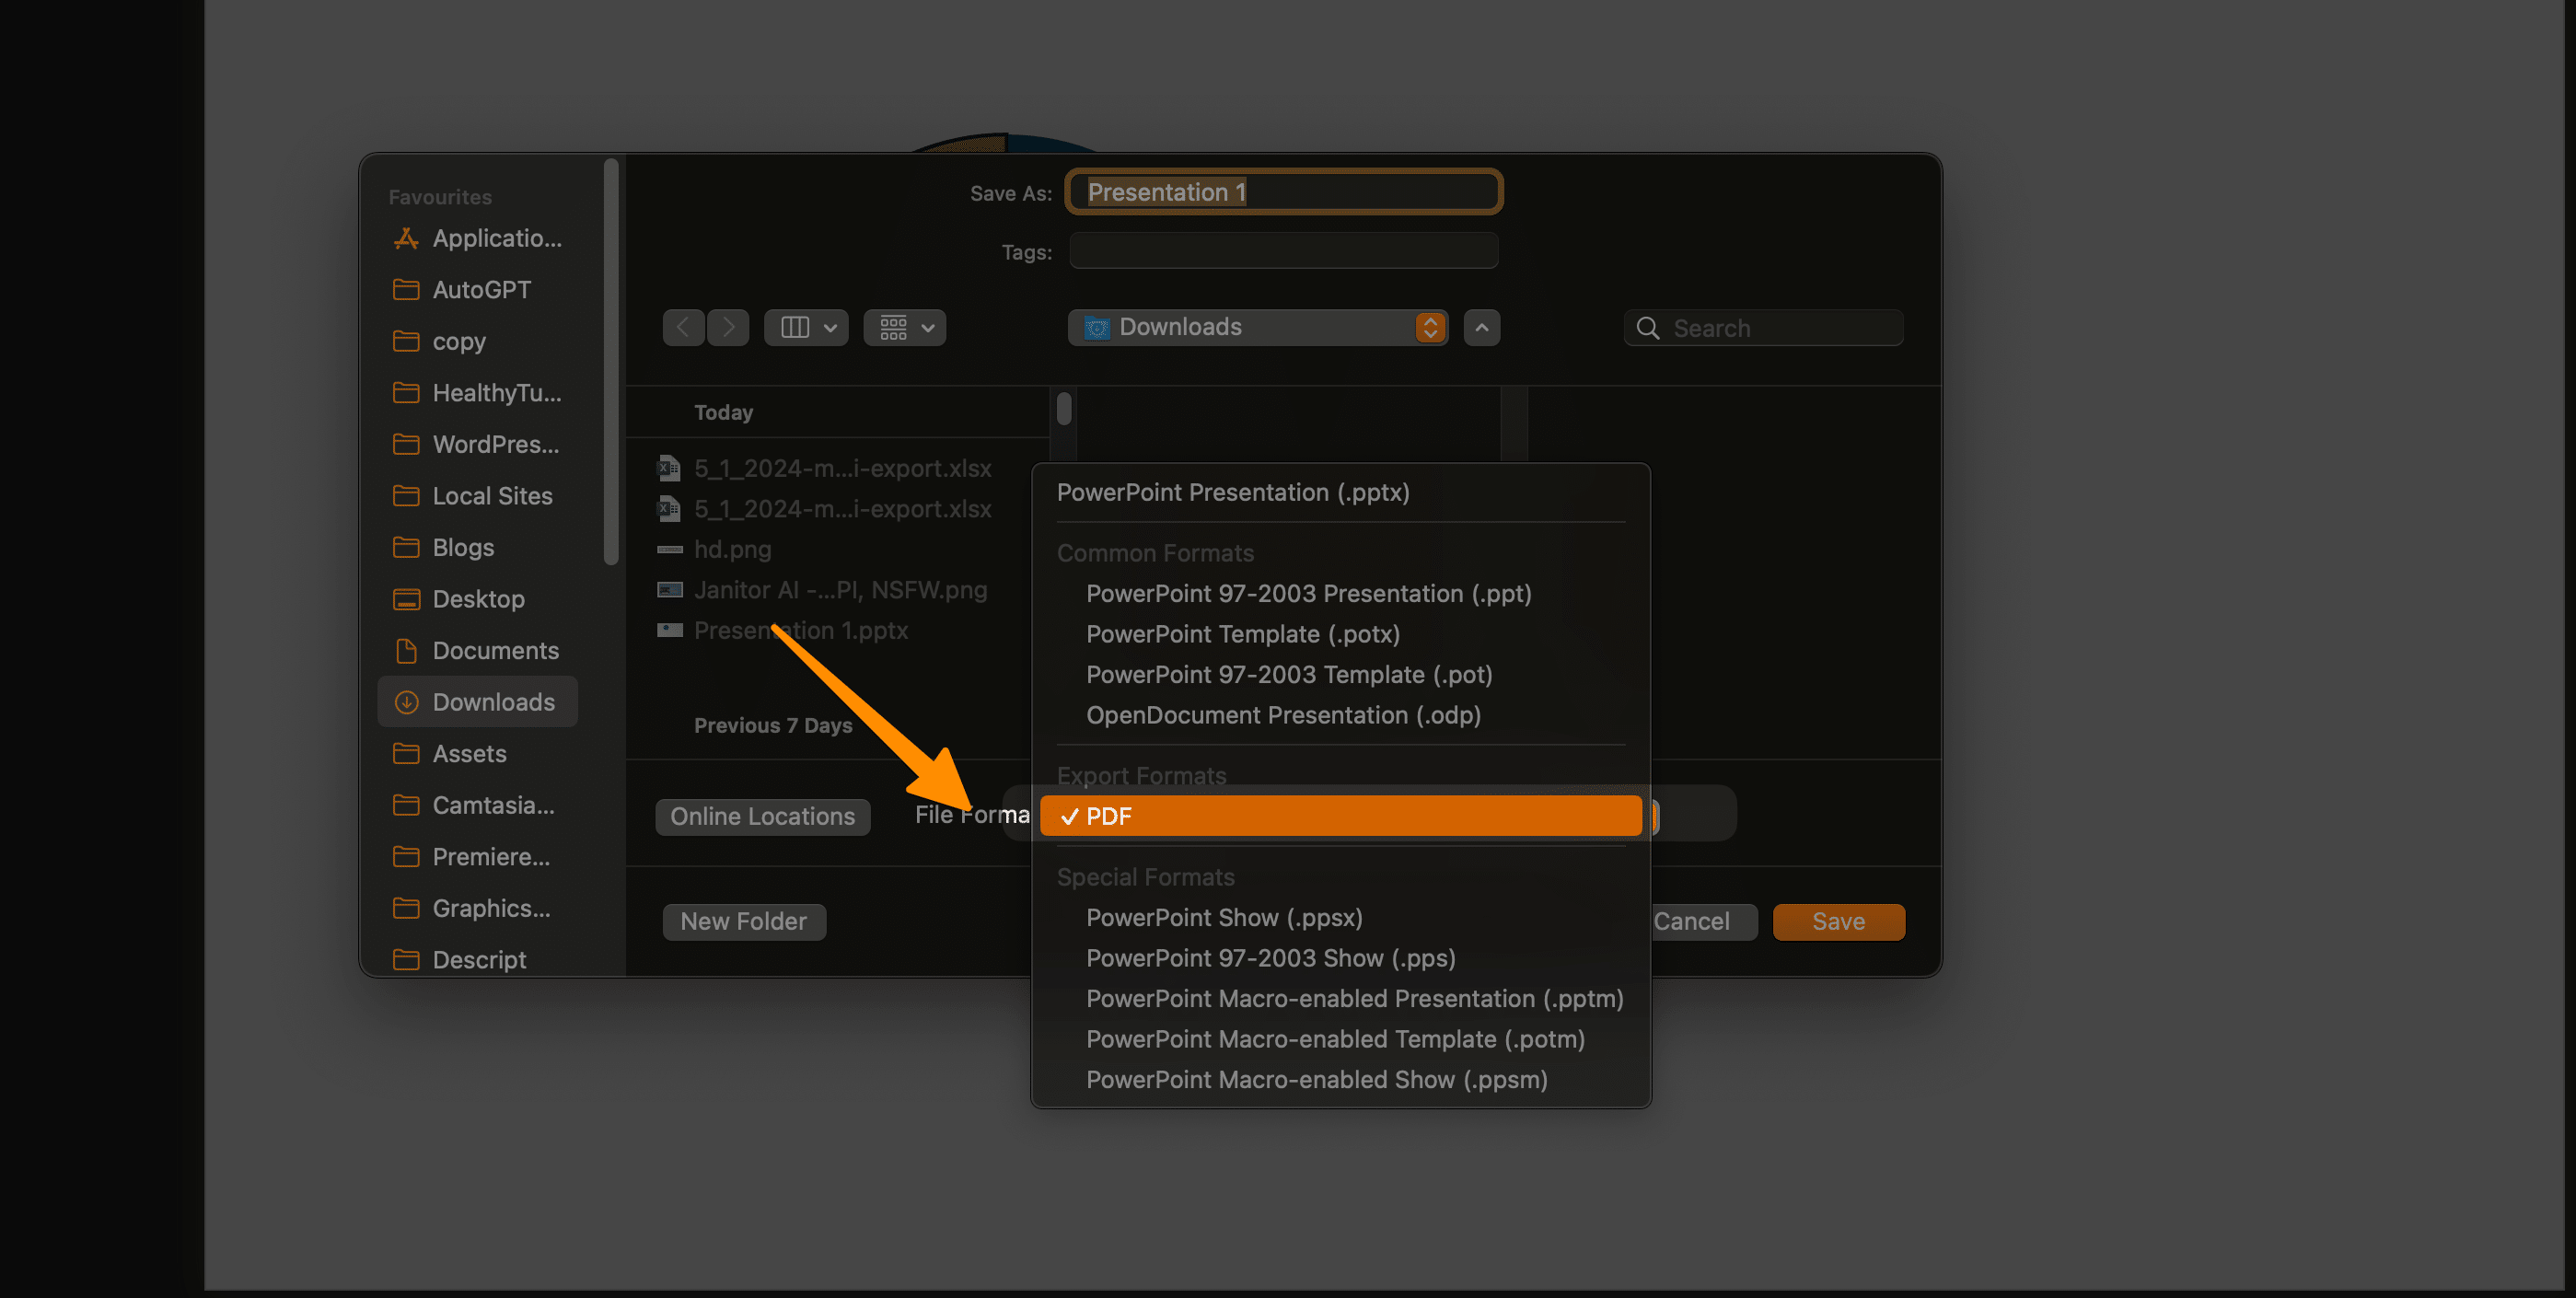
In the dialog box that appears after you’ve selected “Save As,” you will need to choose the destination folder where you want to save the new PDF file. This is a crucial step for easy retrieval and sharing of your PDF document.
Following this, you’ll notice a “File Format” dropdown menu or list. Here, you must select “PDF” from the available file formats.
Step 3: Click Save to Complete the Conversion
After selecting PDF as the desired file format and confirming the save location, the final step is to click “Save” or “Export,” depending on the version of Microsoft PowerPoint you are using. Once you click save, your PowerPoint presentation will start the conversion process to a PDF document.
This seamless conversion process preserves the professional appearance of your slides and ensures that your presentation is lightweight, print-friendly, and ready for professional sharing and distribution across different platforms.
Also Learn, How to download Canva as PowerPoint (PPT) file in 2 Clicks
Method 2: Export your presentation as a PDF
To begin exporting your PowerPoint presentation as a PDF document, ensure all slides and content are finalized, reflecting your desired quality and professional appearance.
Step 1: Navigate to ‘File’ then ‘Export’
Start the process by clicking on the “File” tab at the top of the screen. From the dropdown menu, select “Export,” which allows you to choose from various file formats for saving your presentation.
Step 2: Choose PDF in the File Format Menu
In the “File Format” menu or list that appears, you need to select “PDF” from the available options. Opting for PDF format is key to converting your PowerPoint into a universally shareable and high-quality document.
Step 3: Optimize Your PDF Settings (Optional)
Before finalizing the export, take a moment to customize your PDF settings. This includes selecting the range of slides to include in the PDF, whether to incorporate speaker notes, and deciding on other settings like including hidden slides or comments.
These options provide flexibility and control over how your presentation is converted into a PDF file.
Step 4: Click ‘Export’ or ‘Save’ to Finalize Your PDF
After setting up your preferences, conclude the process by clicking “Export” or “Save.” This action initiates the conversion of your PowerPoint presentation to a PDF document.
By following these steps, you effectively convert your PowerPoint presentations into lightweight, shareable PDF documents. This method offers a convenient way to maintain the quality and integrity of your presentations while ensuring compatibility across various platforms and operating systems.
Whether for academic, business, or personal purposes, converting your PowerPoint files into PDF format simplifies the sharing process, making your presentation accessible to a broader audience.
Also Learn, How to make a fillable PDF form without Acrobat (3 Methods)
How to Convert PowerPoint to PDF on Mac with PDFelement
You can also convert your ppt to PDF to make it easier to share using specific PDF converter and third party tools like PDFelement.
Step 1: Upload PowerPoint Files
Begin your conversion process by launching PDFelement on your Mac. Once the application is open, simply drag and drop your PowerPoint (PPT) file into the program.
Step 2: Create PDF Files
After you’ve uploaded your PowerPoint presentation to PDFelement, the software automatically opens the PPT file. This indicates that your PowerPoint has already been transformed into a PDF document.
At this point, you can directly save the new PDF file on your Mac.
Following the conversion of your PowerPoint presentation to a PDF document, PDFelement for Mac offers several functionalities to augment and refine your PDF document.
More PDF Resources
- How to lock a PDF from editing? (4 Easy Methods)
- How to flatten a PDF in Adobe Acrobat (3 Methods)
- How to Save Screenshot as PDF (For all Devices)
- How to Convert HEIC to PDF? (3 Easy Methods)
- How to write, add text on PDF on a MAC
- 24 Best Websites To Download Free PDF Textbooks
- How to Remove Signature from PDF (5 Methods)
- How to Make a Fillable PDF in Word in Few Steps
- How to Insert PDF into PowerPoint (4 Methods)
Checkout our PDF Tools;
- All-in-One PDF Converter
- Decrypt PDF Tool
- Encrypt PDF Tool
- Rotate PDF Tool
- Split PDF Tool
- Merge PDF Tool
Conclusion
In conclusion, the transition from a PowerPoint presentation to a PDF document represents not just a change in format but a strategic enhancement in the accessibility and professionalism of your content.
By following the outlined steps, whether through the Save As or Export functions in Microsoft PowerPoint, users can effortlessly convert their PowerPoint files into versatile, high-quality PDF documents.
The process ensures that presentations maintain their designed integrity, making them ready for widespread distribution without concerns over compatibility issues or loss of layout. Utilizing tools like Wondershare PDF Element, or even built-in features within PowerPoint itself, the conversion is seamless.
This practice is particularly beneficial in today’s digital landscape, where presentations are a crucial part of communication in educational, professional, and personal settings. Therefore, understanding how to convert PowerPoint presentations into PDF format is an essential skill, ensuring your information is received in the desired quality and form, regardless of the viewer’s operating system or device.


