Creating a booklet might sound like a task reserved for professional designers or someone with advanced knowledge of desktop publishing software. However, Google Docs turns this presumption on its head, making it remarkably simple for anyone to produce professional-looking booklets, whether it’s for a personal project, an educational assignment, or a small-business brochure.
In this guide, we’ll take you through the steps on how to create a booklet in Google Docs, leveraging its user-friendly tools—from selecting the perfect booklet template to adjusting your page setup for booklet printing.
Google Docs, a great tool that supports duplex printing and offers a wide range of formatting options, allows you to easily create, edit, and share your own booklet from a blank document or by using one of the many booklet templates available.
Whether you’re looking to insert images, adjust text boxes, set margins, or manage page numbers, Google Docs provides straightforward solutions that will have your document ready for print or to share as a PDF document in no time. With just a stable internet connection and access to Google Docs, you’re well on your way to creating a booklet that looks as if it came straight from a professional print shop.
How to Create Categories in Google Sheets in Few Steps
Step by step guide to making a booklet in google docs
Google Docs is a great tool for making booklets and other complex documents since it allows for easy customization and collaboration. It also makes it easy to properly format each page, as well as any descriptions and photos.
It is also possible to export the completed document in a variety of formats. To summarize, using Google Docs is an excellent approach to construct a professional-looking dissertation that includes all of the necessary formatting and captions.
Step 1: Sign in to Gmail and Open a Blank Document
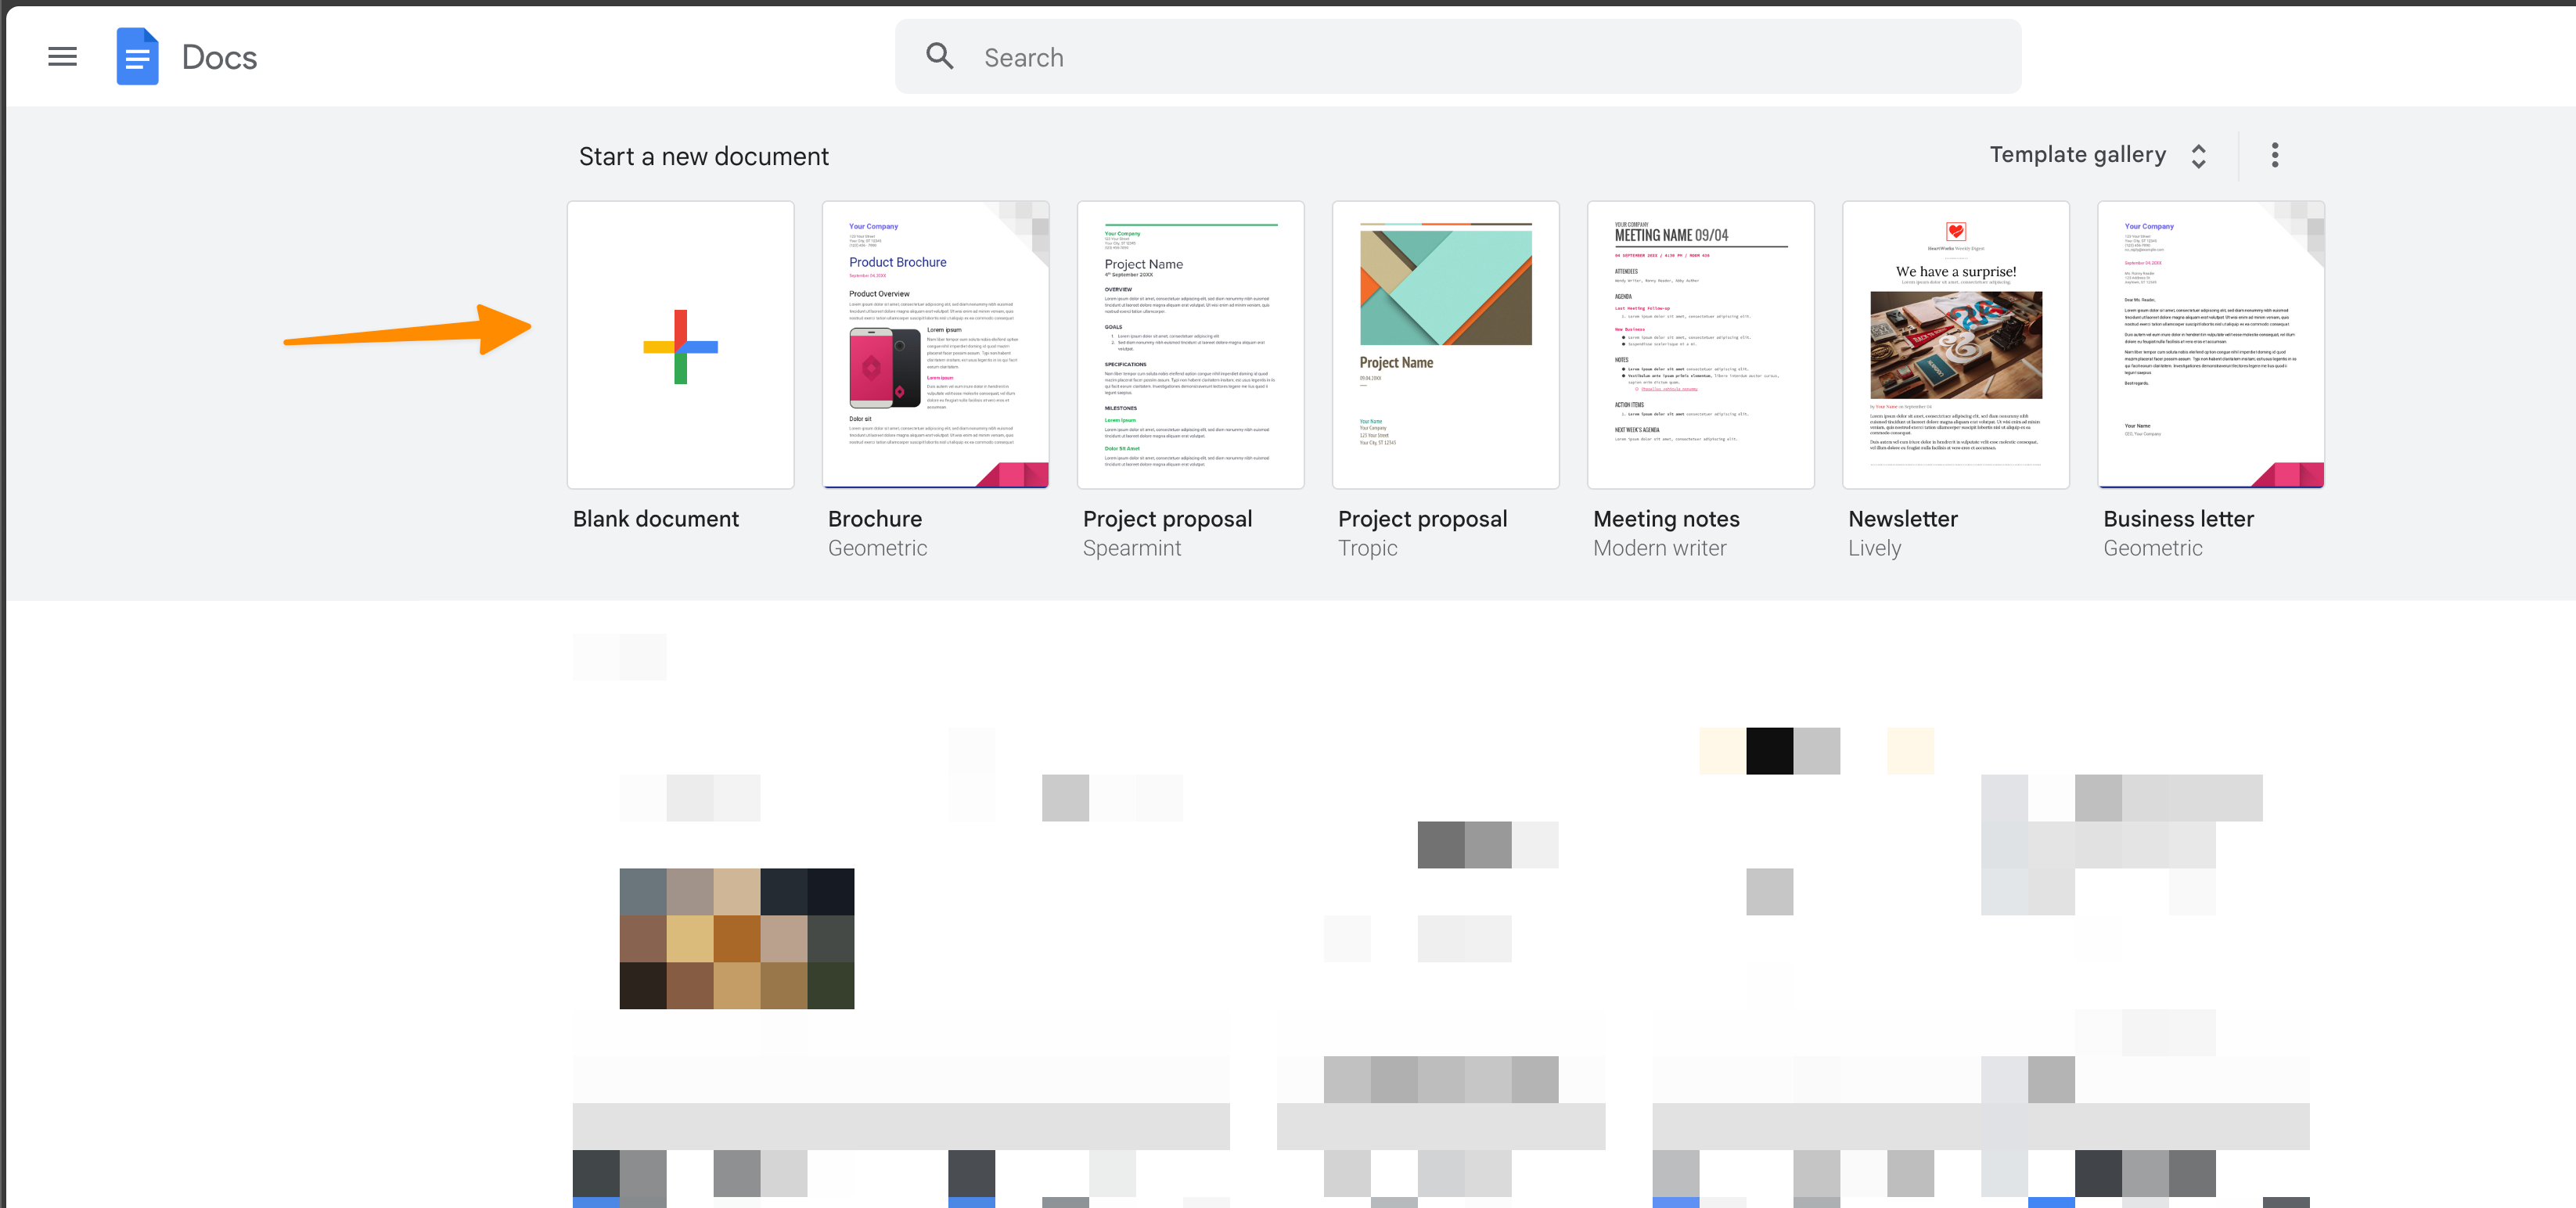
First things first, you’ll need to log into your Gmail account to access Google Docs for creating your own booklet. This step is essential as it ensures you have full access to the suite of tools that Google Docs offers for making professional looking booklets.
If you don’t already have a Gmail account, take a moment to set one up—it’s straightforward and opens the door to a wide array of Google’s productivity tools. Once you’re signed in, head over to “https://docs.google.com/document” to open google docs.
Here, you’ll be greeted with the option to “Start a new document” section; make sure to click on the blank file option. This action will open a blank document, acting as your canvas for creating booklets in Google Docs.
Step 2: Page Setup
Once you’re in your fresh, blank document, the next move is all about laying the groundwork for your booklet – think of it as setting the stage.
From the top left corner of your screen, you’ll head into the “File” section to kick things off. It’s here in the dropdown menu where you’ll find the “Page Setup” shining like a beacon for your booklet creation quest.
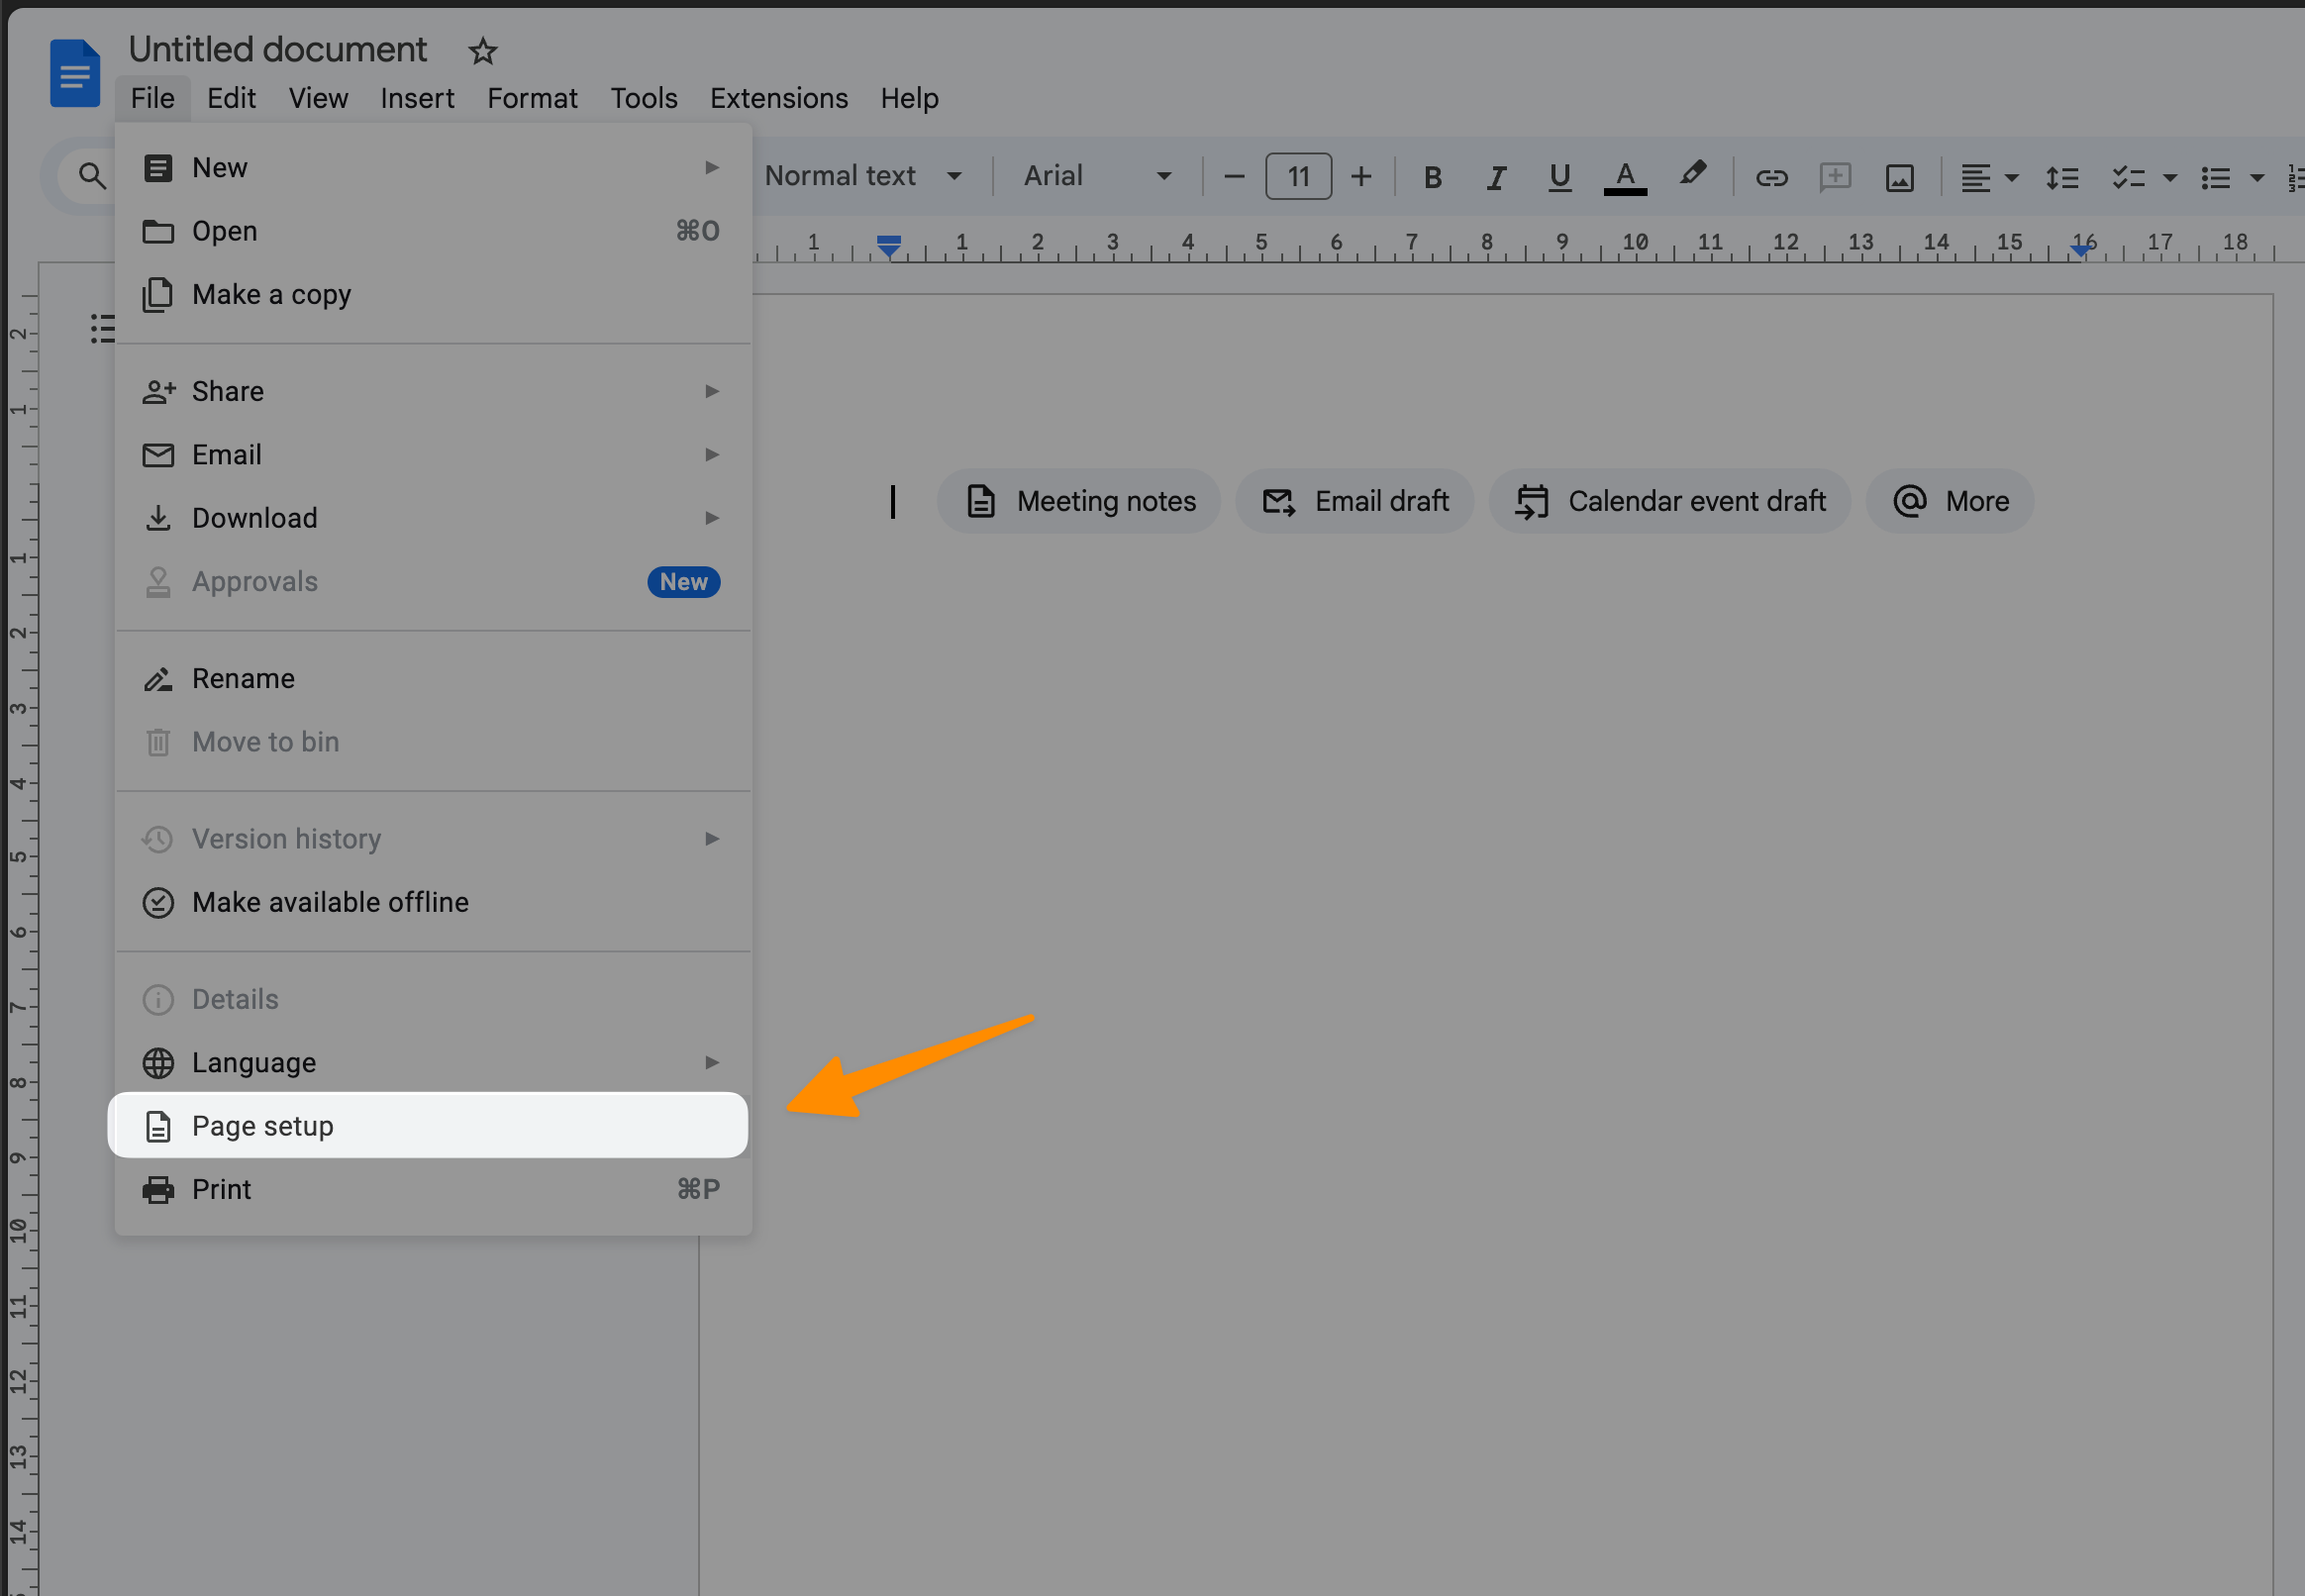
A click on this option summons a dialog box that helps you to tailor your document’s appearance. You can design everyhting from the first page to last page.
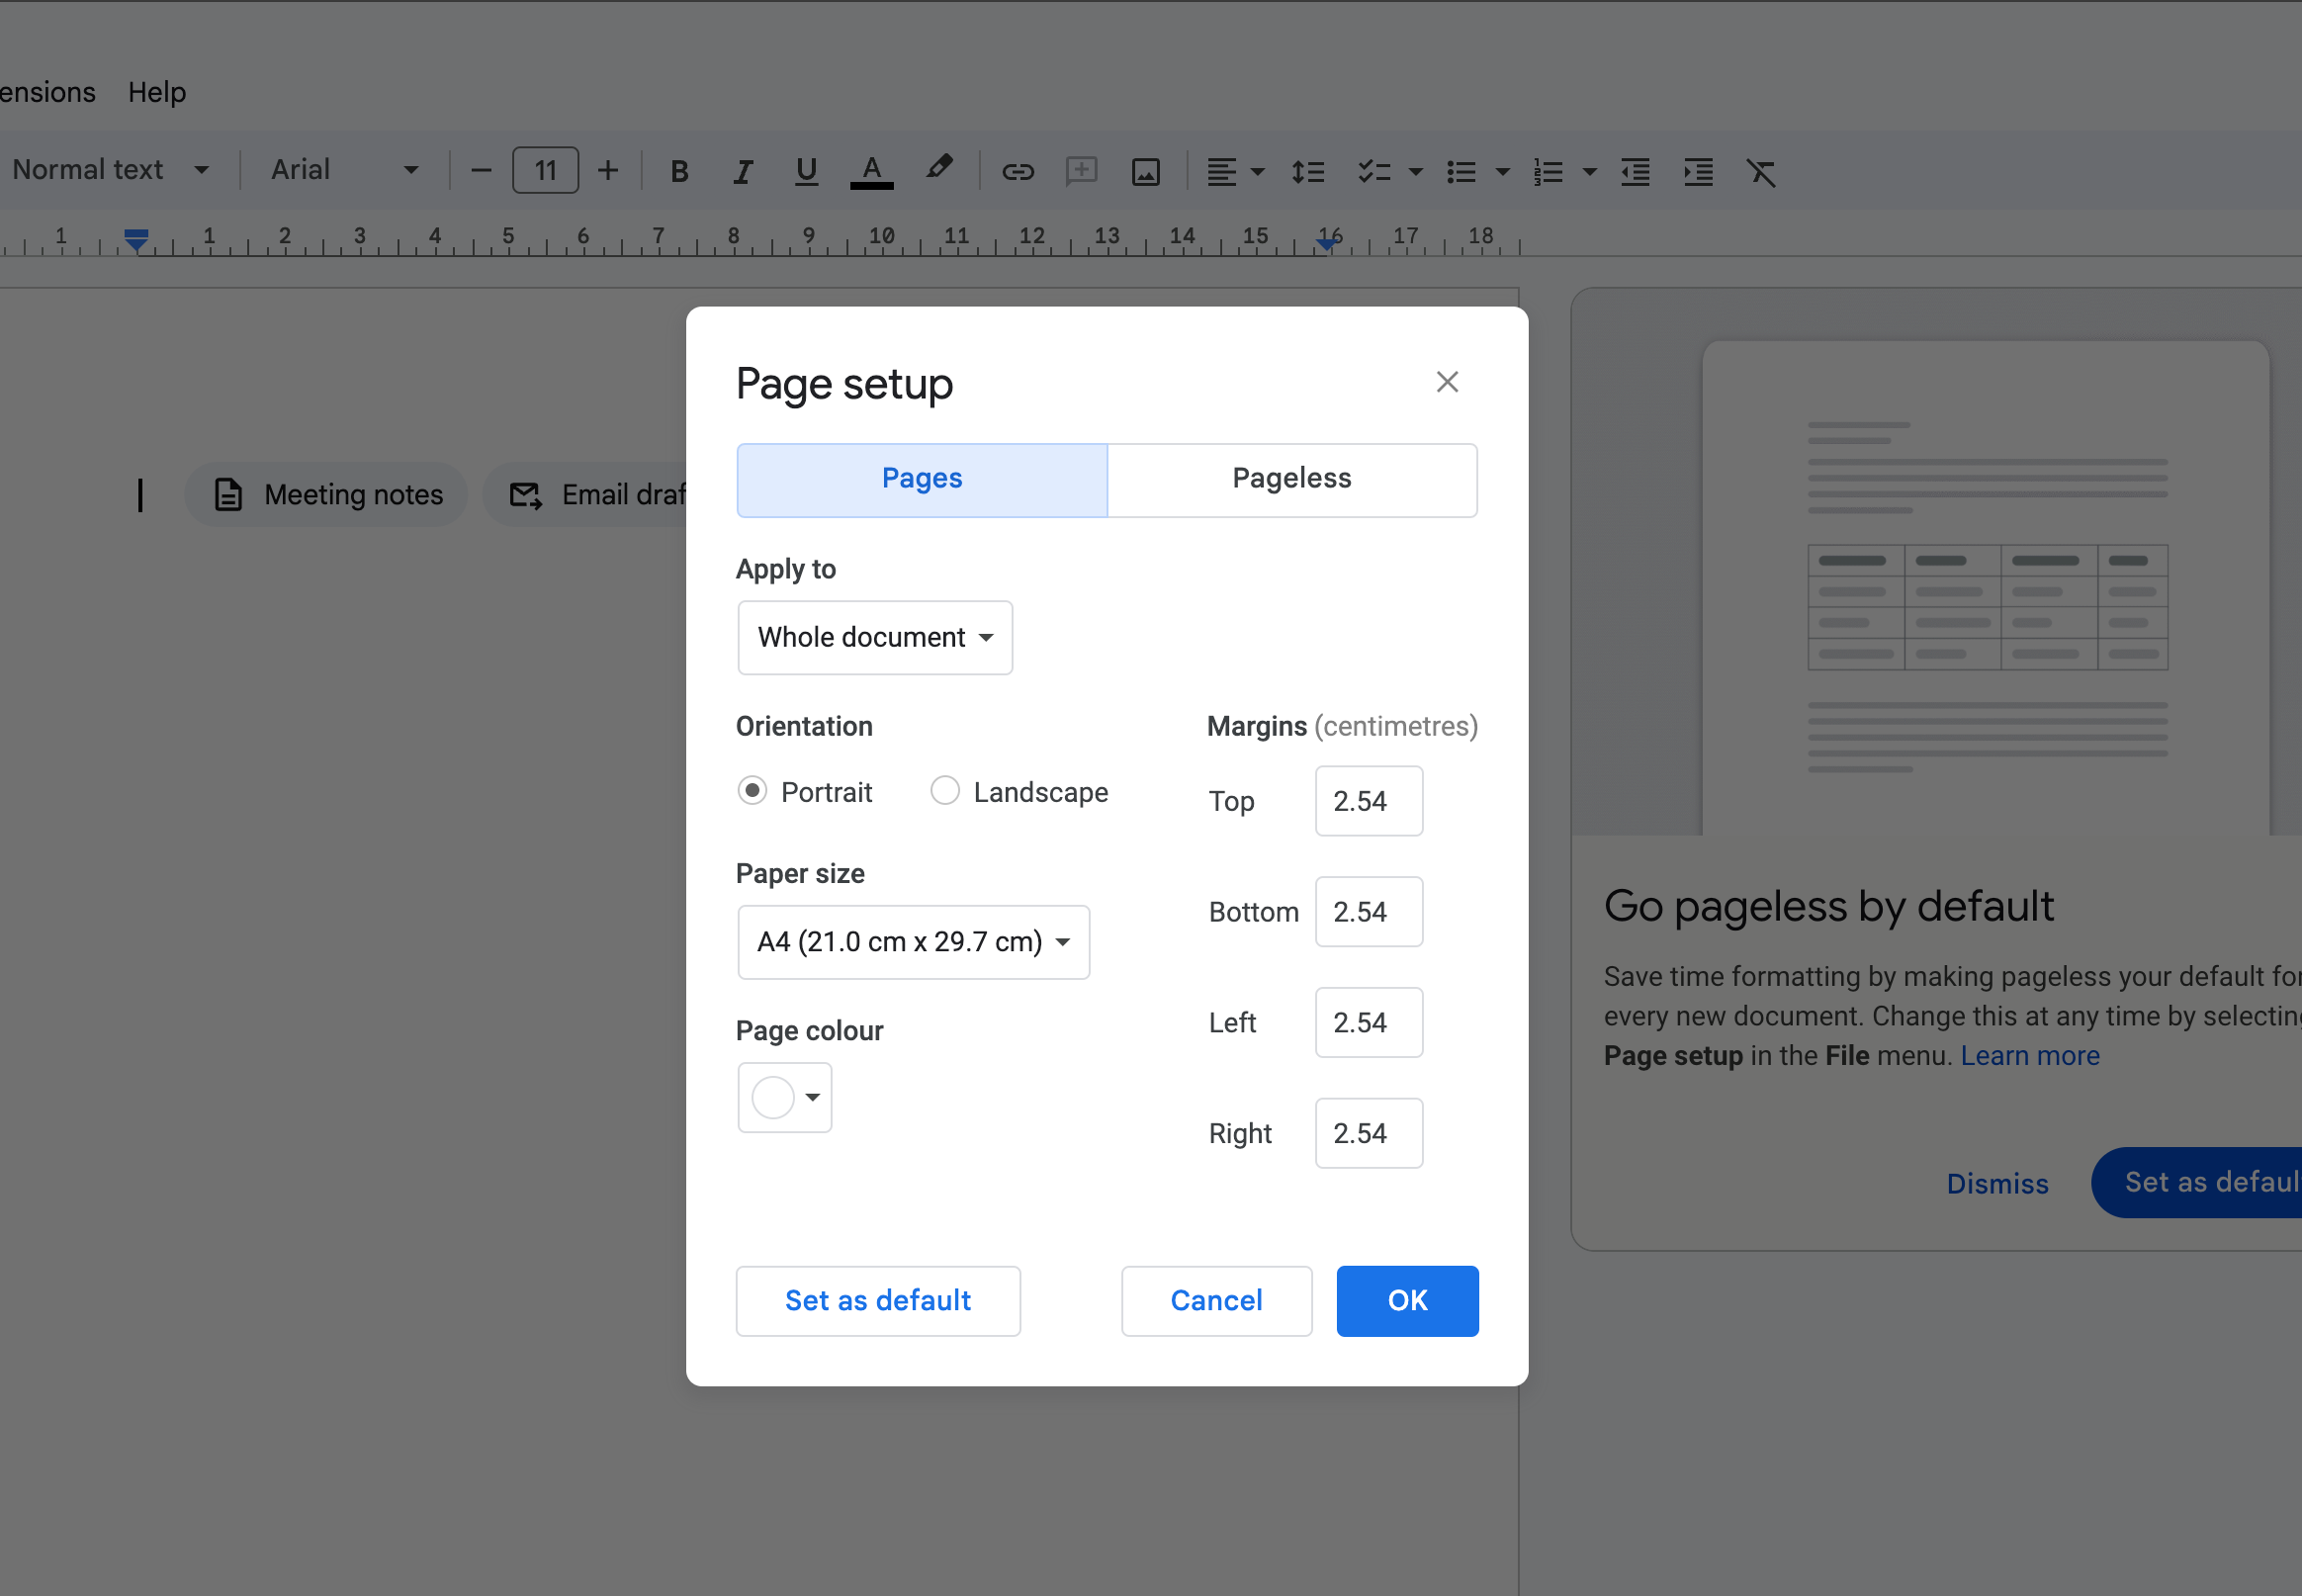
Now, it’s time to give your booklet the personal space it deserves. This means setting up margins and add borders of your booklet’s content.
The dialog box presents you with the margin options on the right side. A standard practice is to opt for a 1-inch margin all around – top, bottom, left, and right.
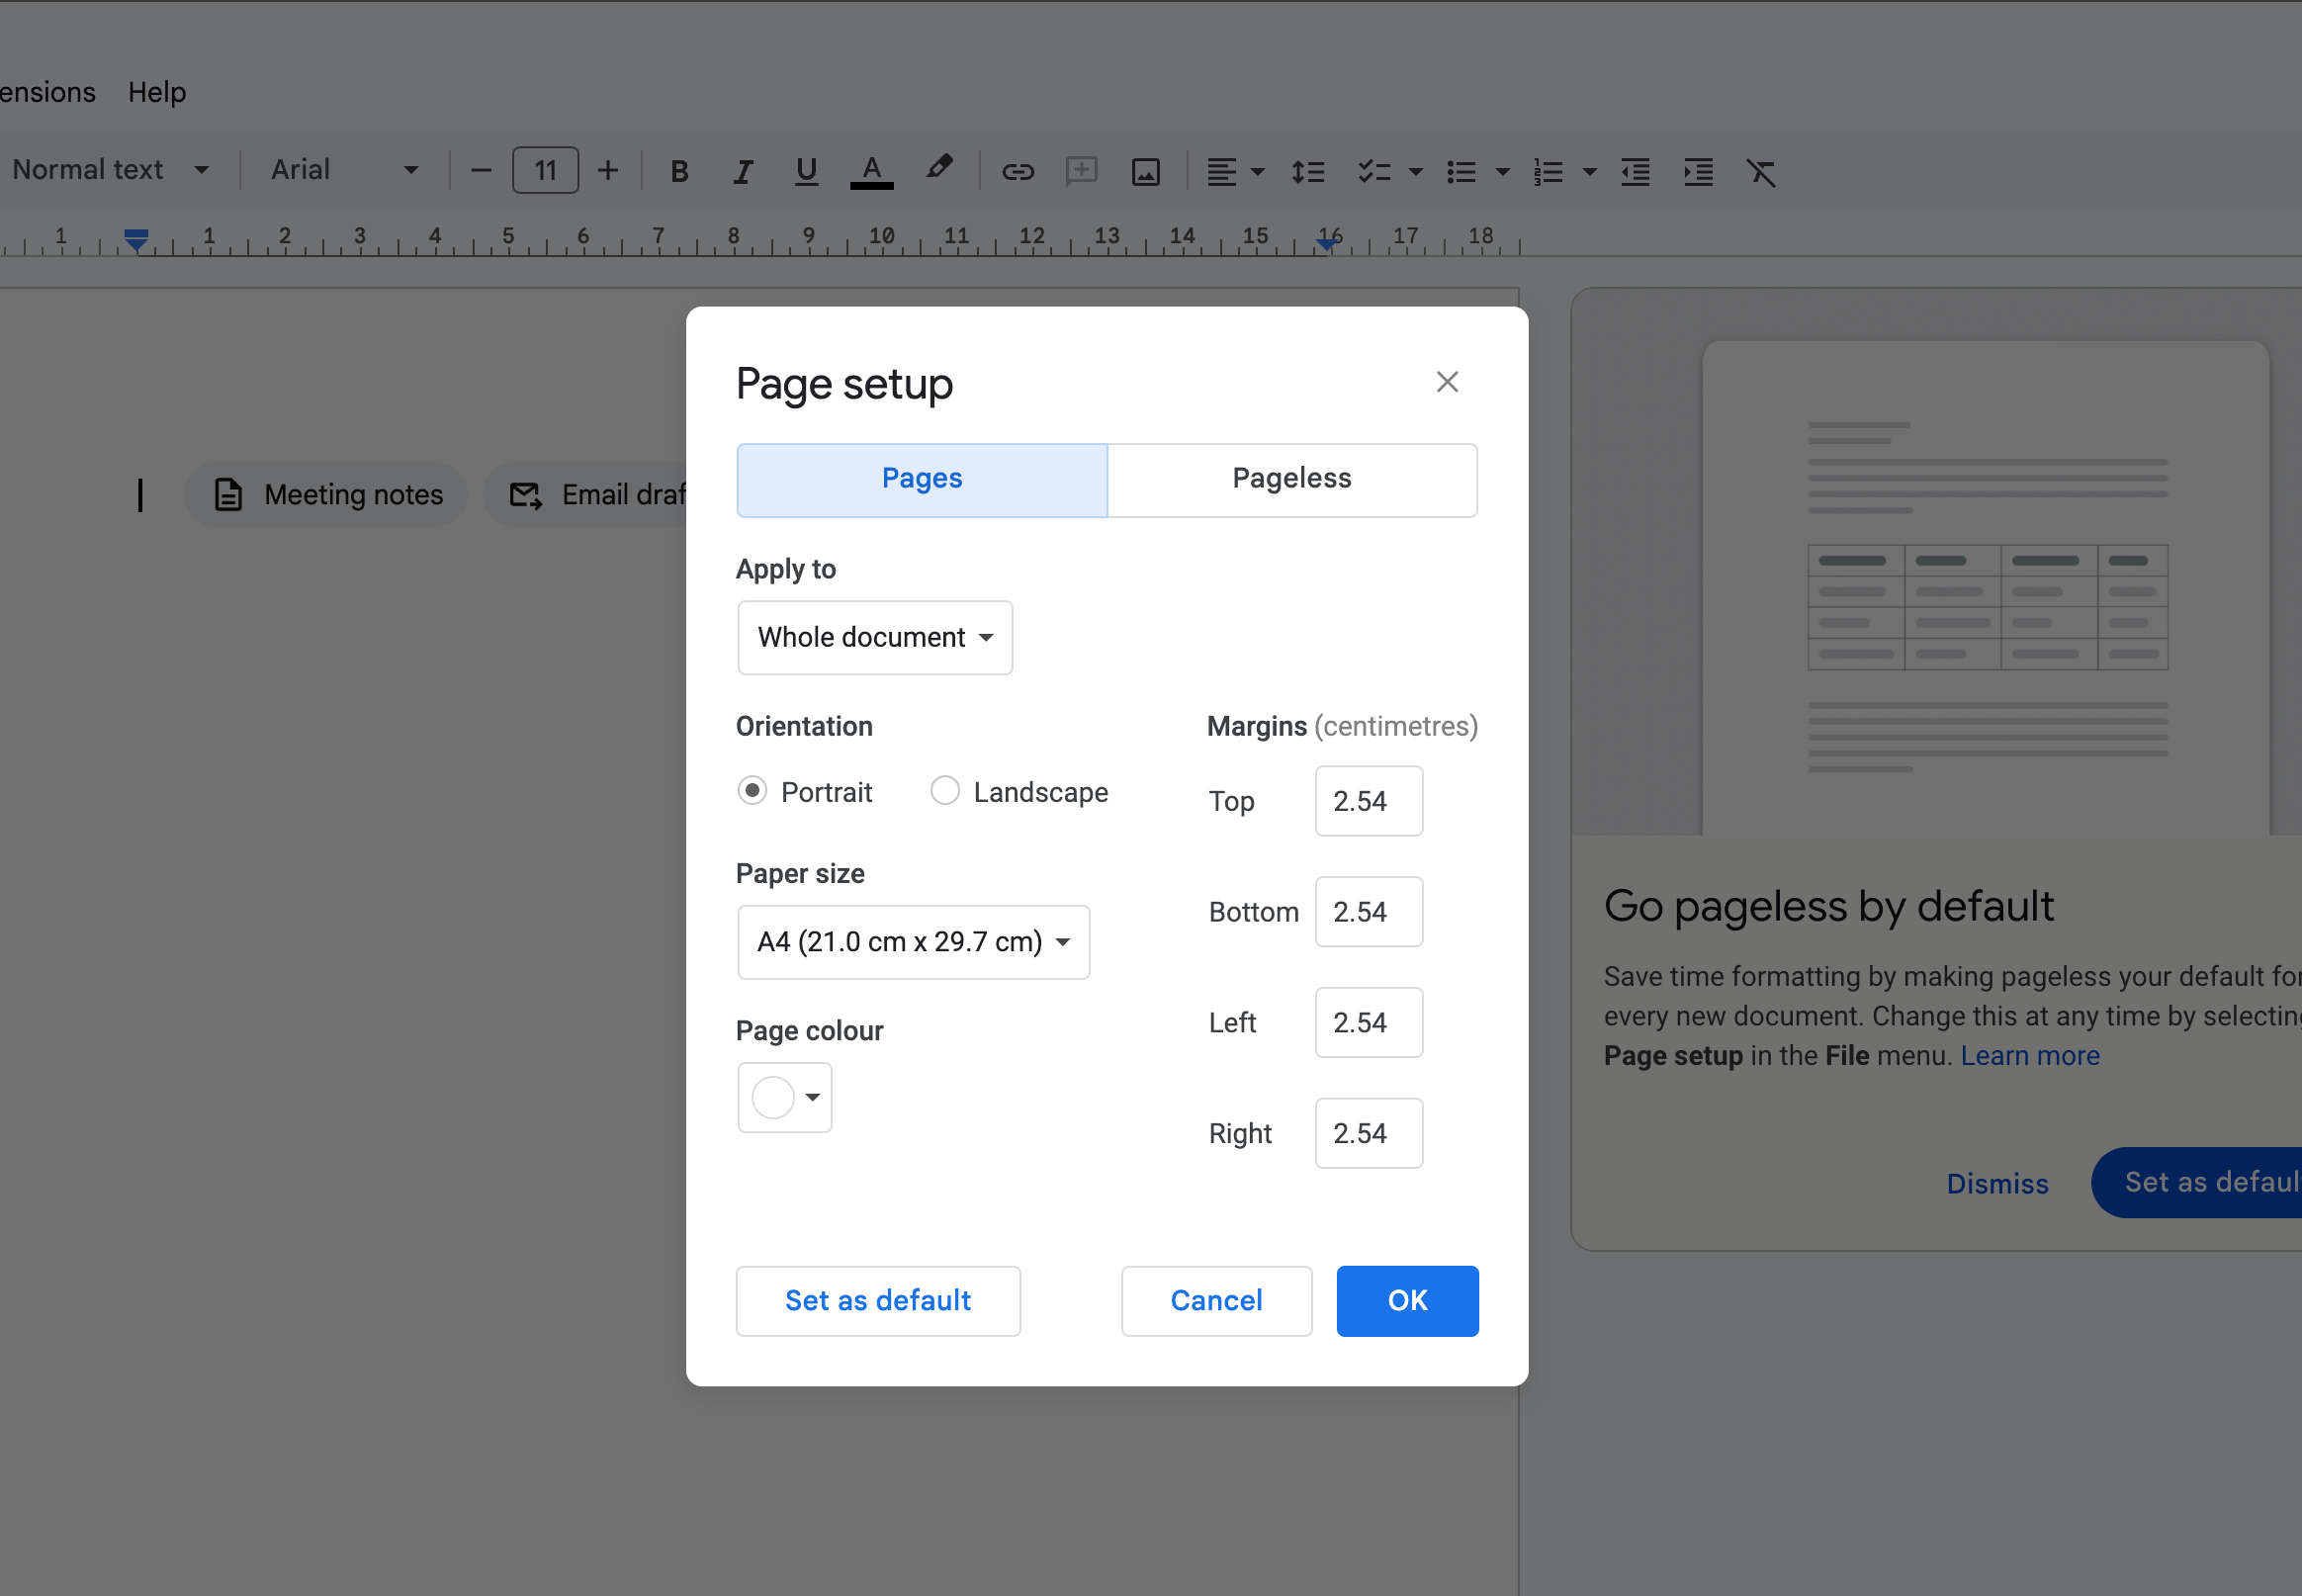
However, Google Docs is all about flexibility, allowing you to adjust these margins according to your specifics as long as they maintain uniformity.
Orientation is up next. On the left side of the dialog box, you’ll be choosing how your booklet stands – Portrait for a more traditional look or Landscape for a wider, more panoramic view of paper size.
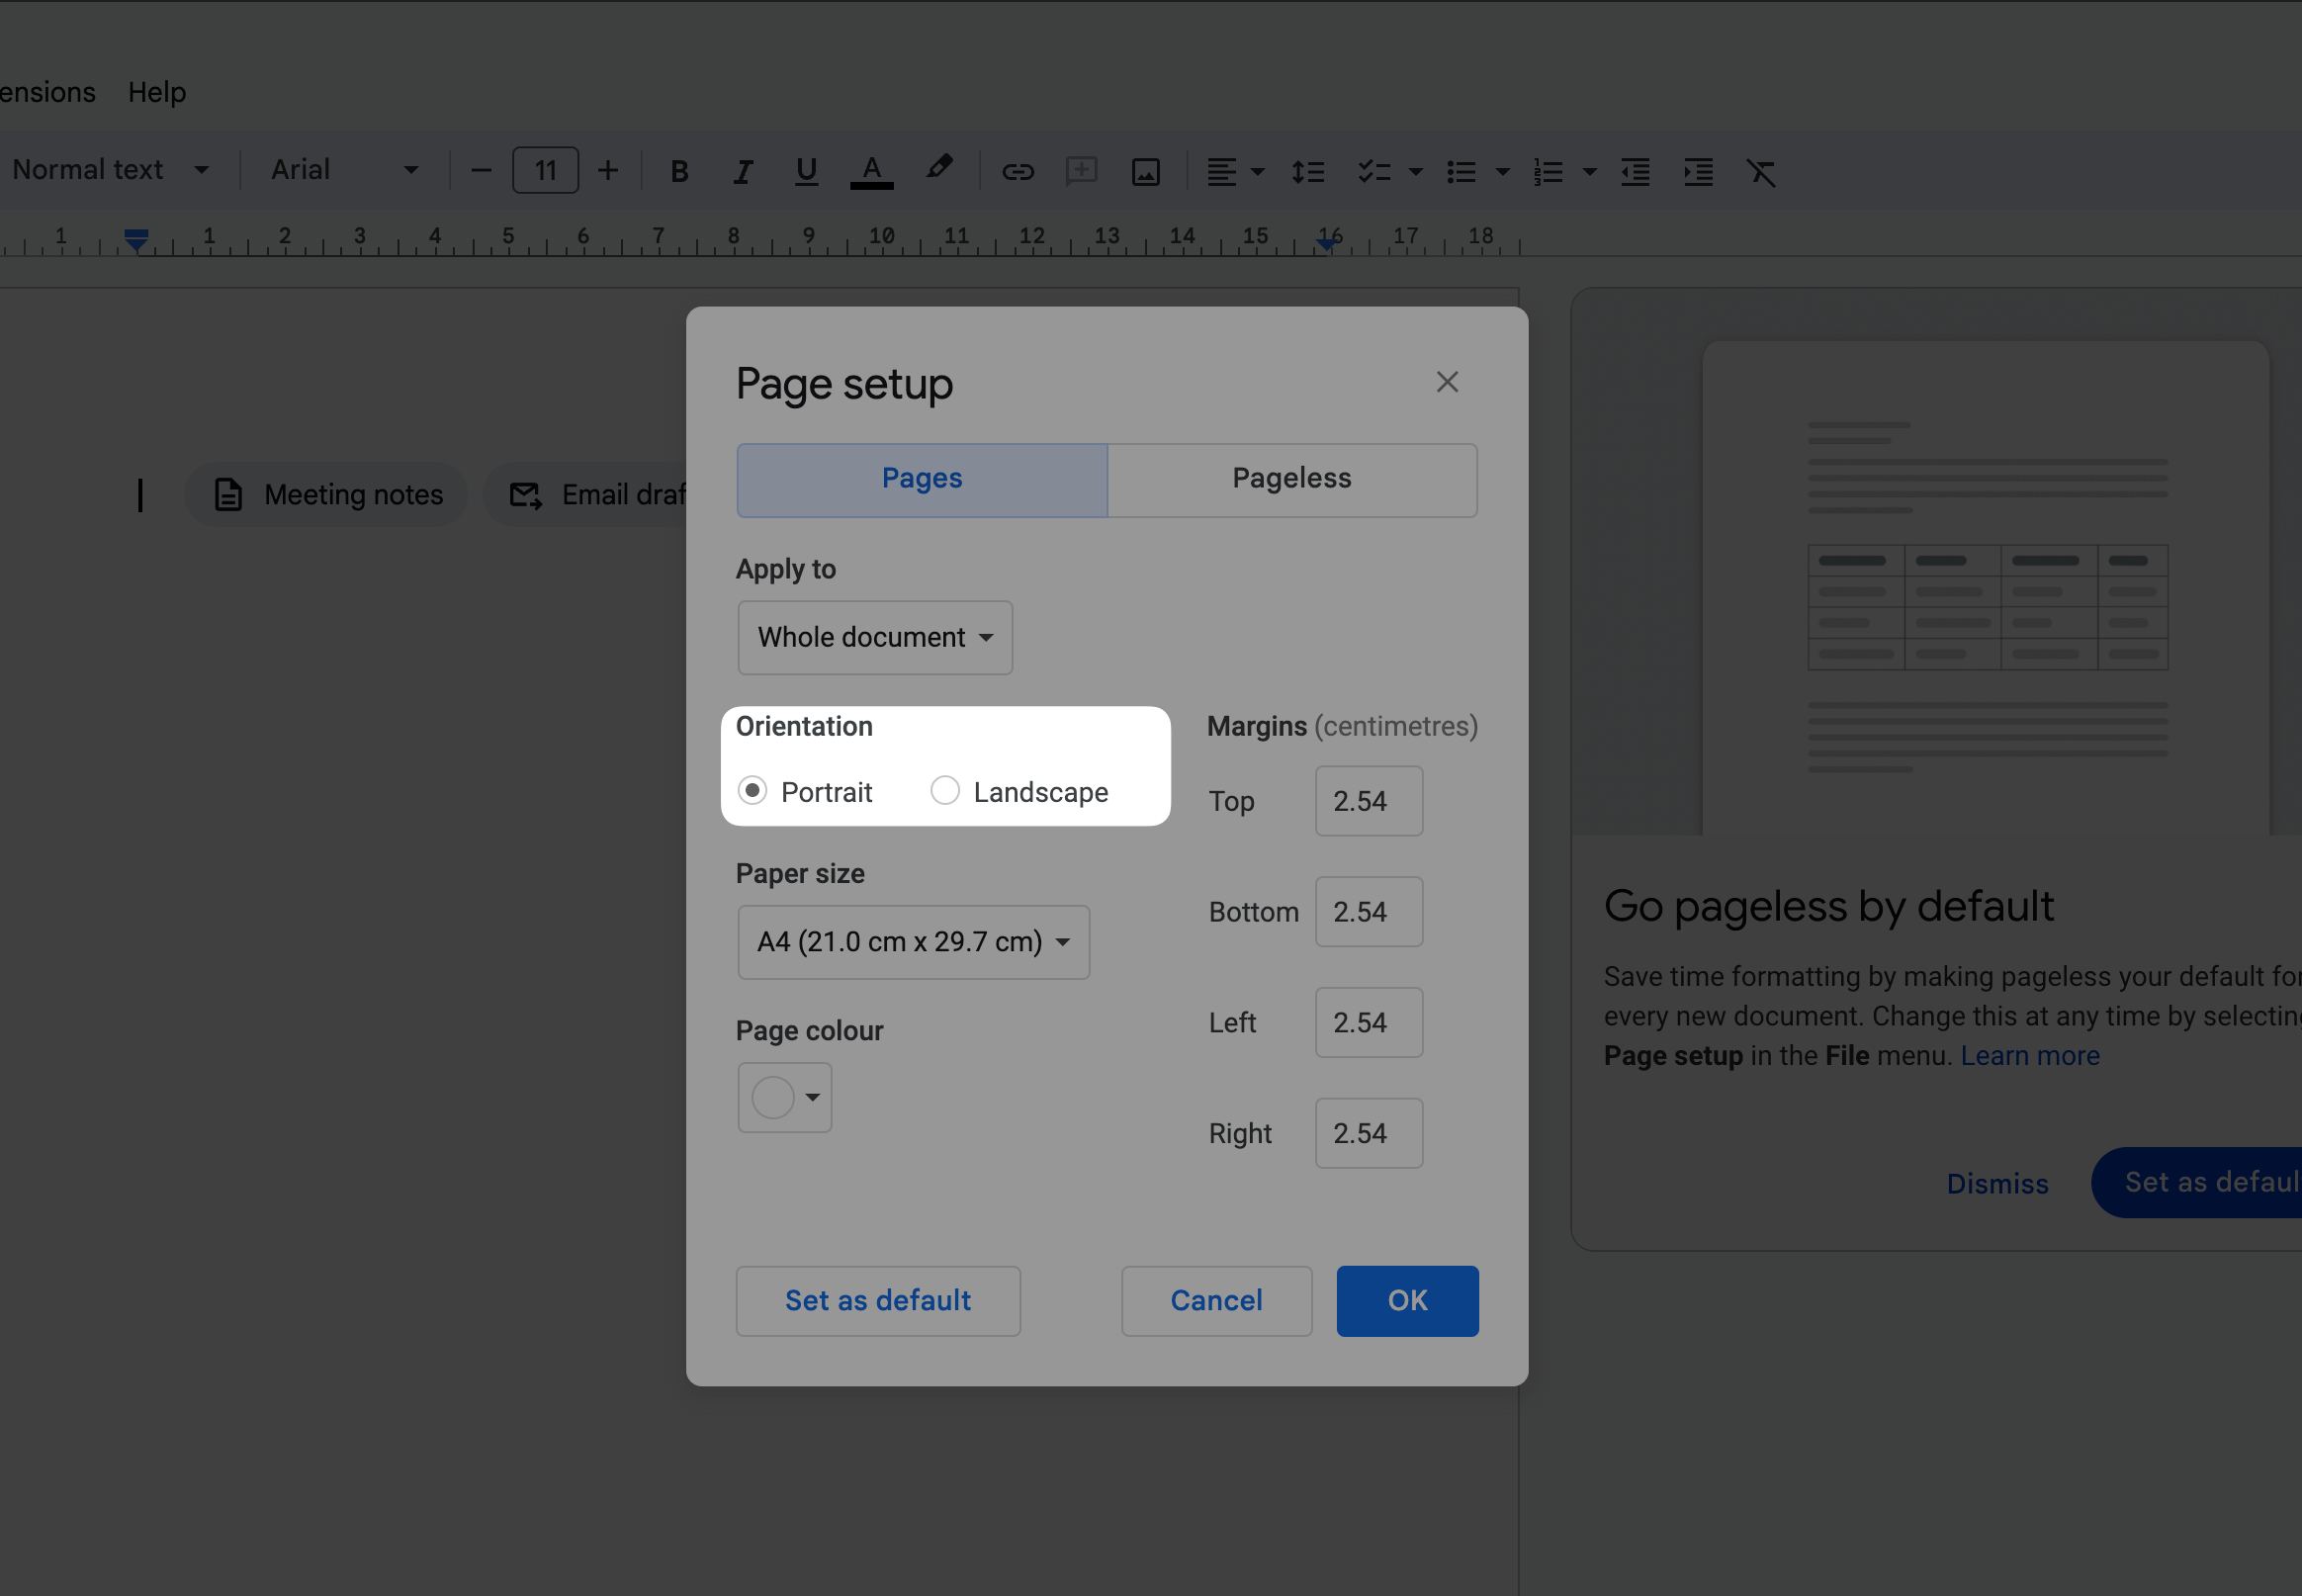
Each option influences the booklet’s layout, so select based on your visual goal.
Lastly, the page colour sets the stage for your booklet’s background tone. Available within the same page setup dialog box, this feature lets you choose a professional colour that complements your booklet’s theme perfectly.
Whether you’re putting together a business proposal or a personal project, selecting the right colour can significantly boost your booklet’s aesthetic appeal.
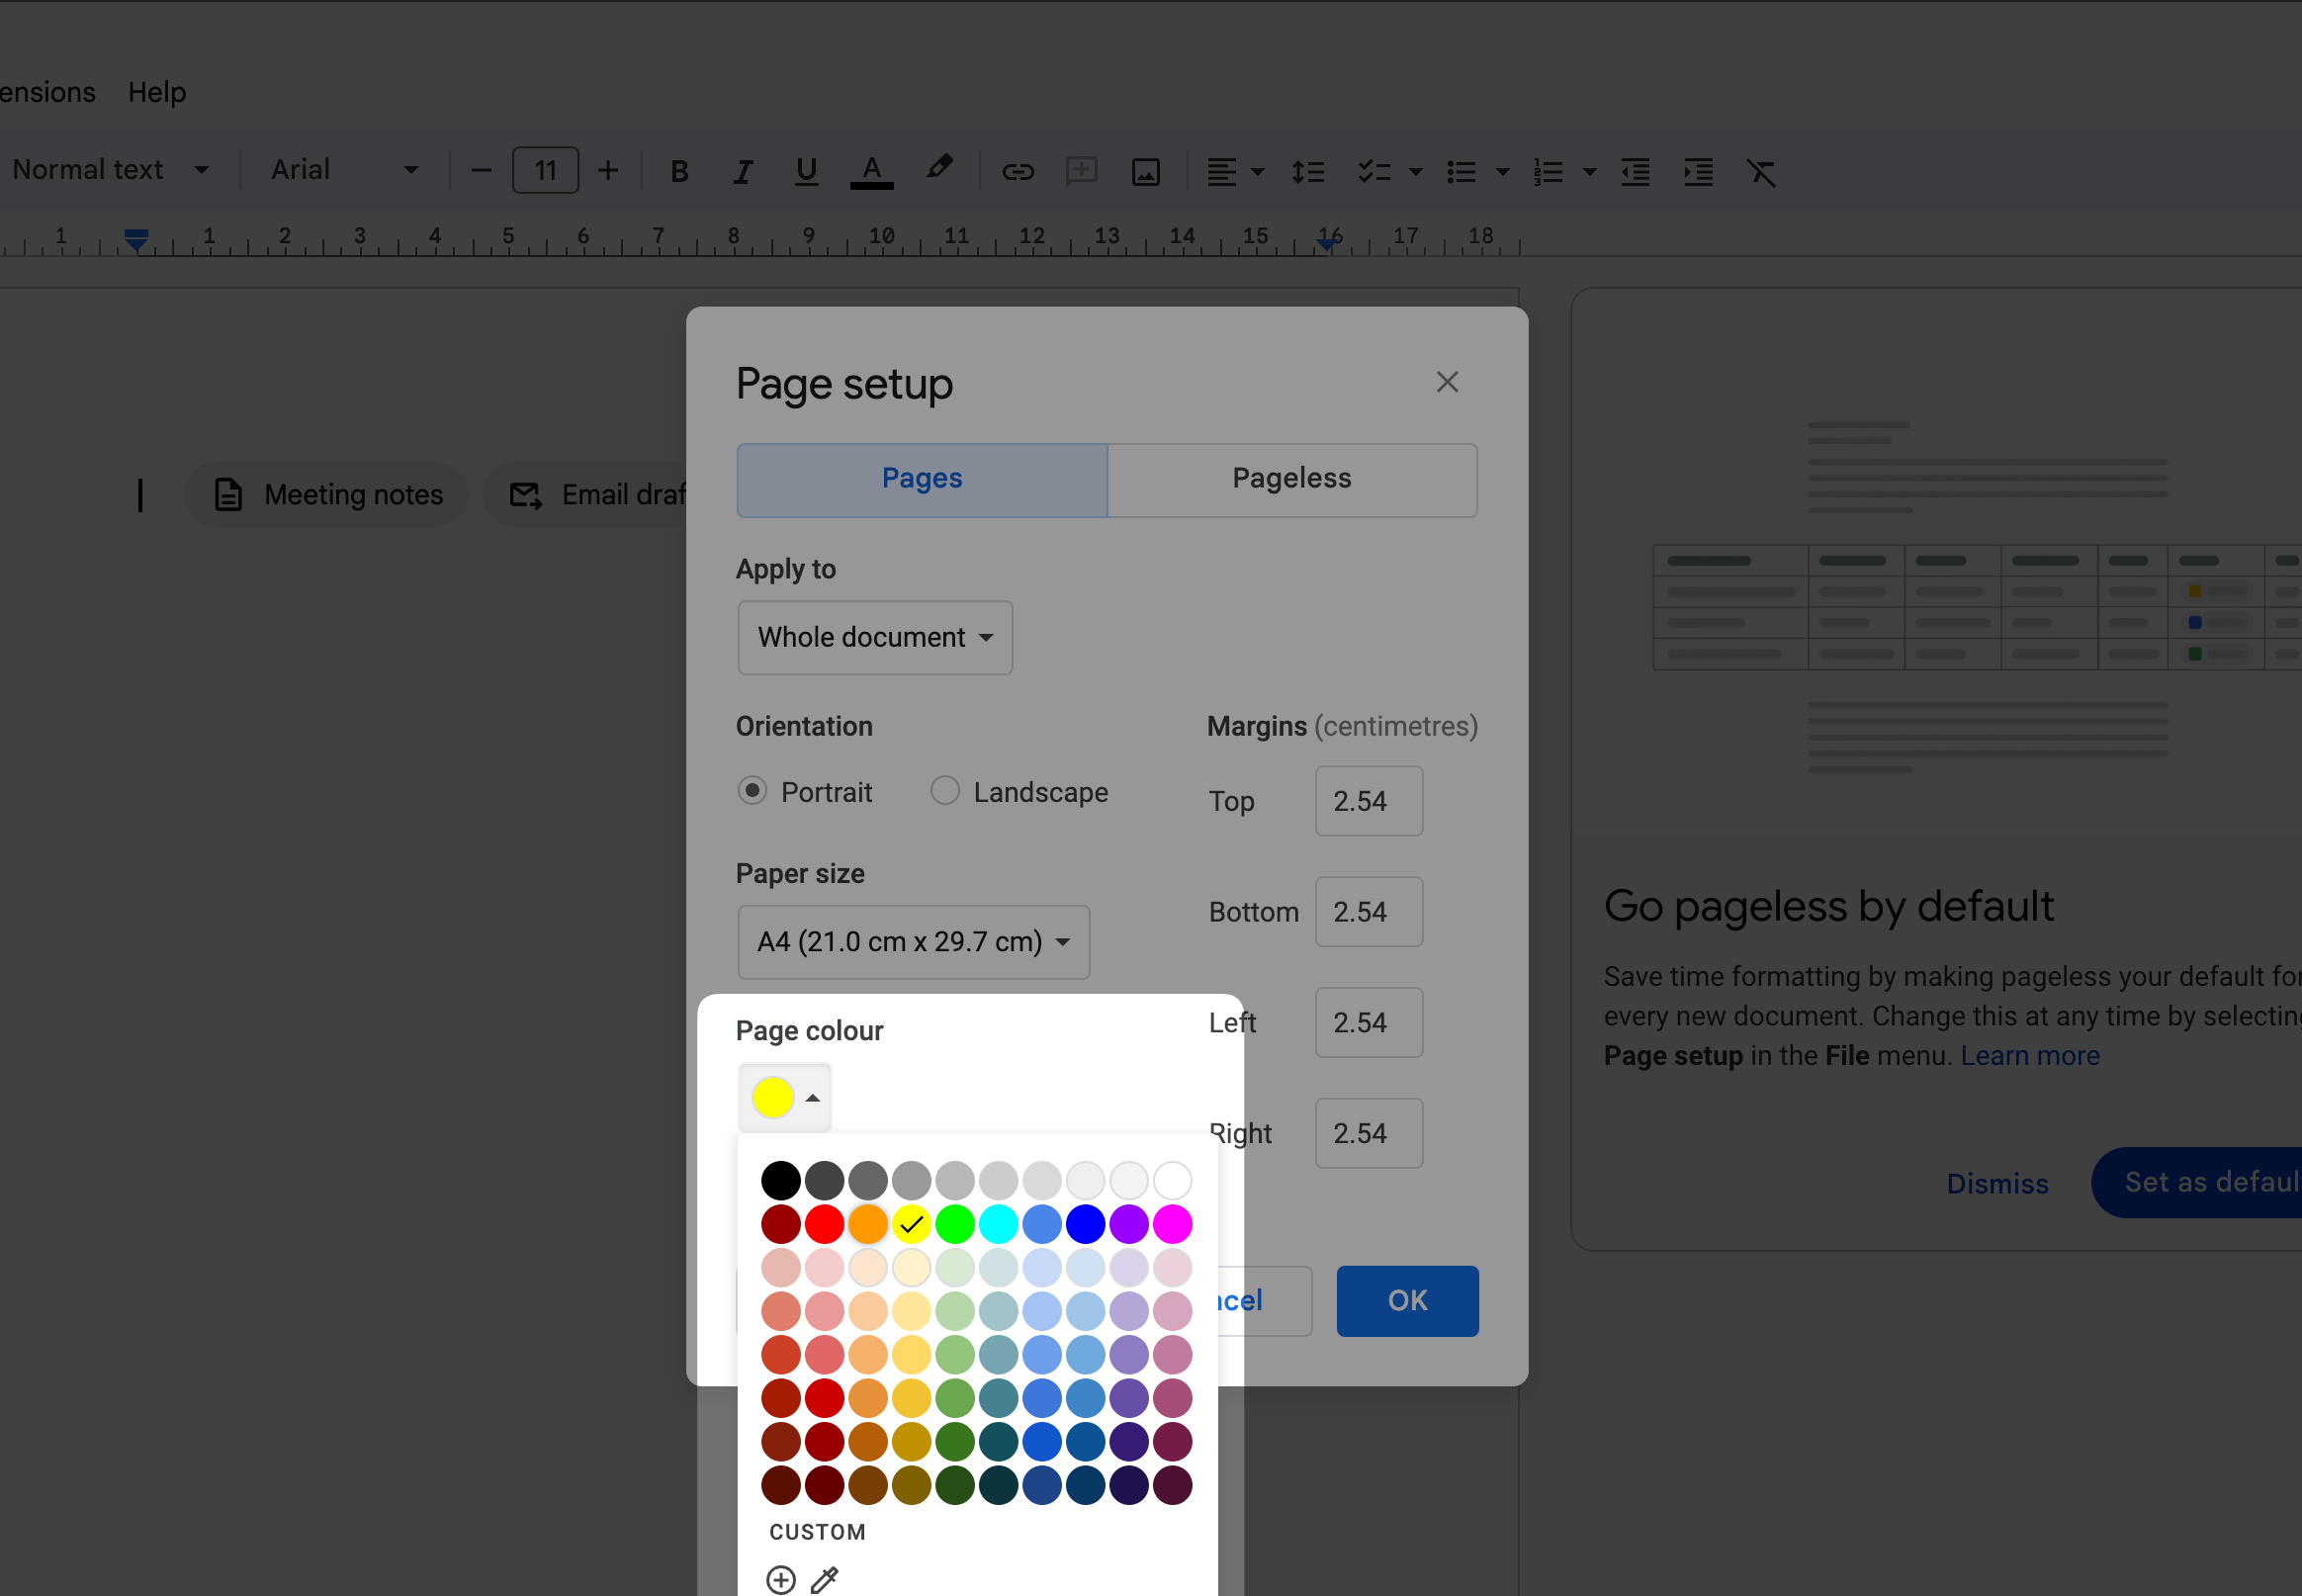
In navigating these steps, you’re leveraging Google Docs’ incredible capacity to make a booklet, tapping into its assortment of formatting options, templates, and print settings.
This process not only empowers you to create professional-looking booklets but also underscores the ease and accessibility of Google Docs as a great tool for your publishing needs.
Step 3: Add Title
Adding the title to your booklet is a pivotal step that sets the tone for what follows. It is the beacon that guides your readers into the world you’re about to unfold.
To initiate this process in Google Docs, direct your attention to the “Insert” button found within the main menu. Your pointer then gracefully dances towards the “Drawing” option, where you’re greeted by a submenu.
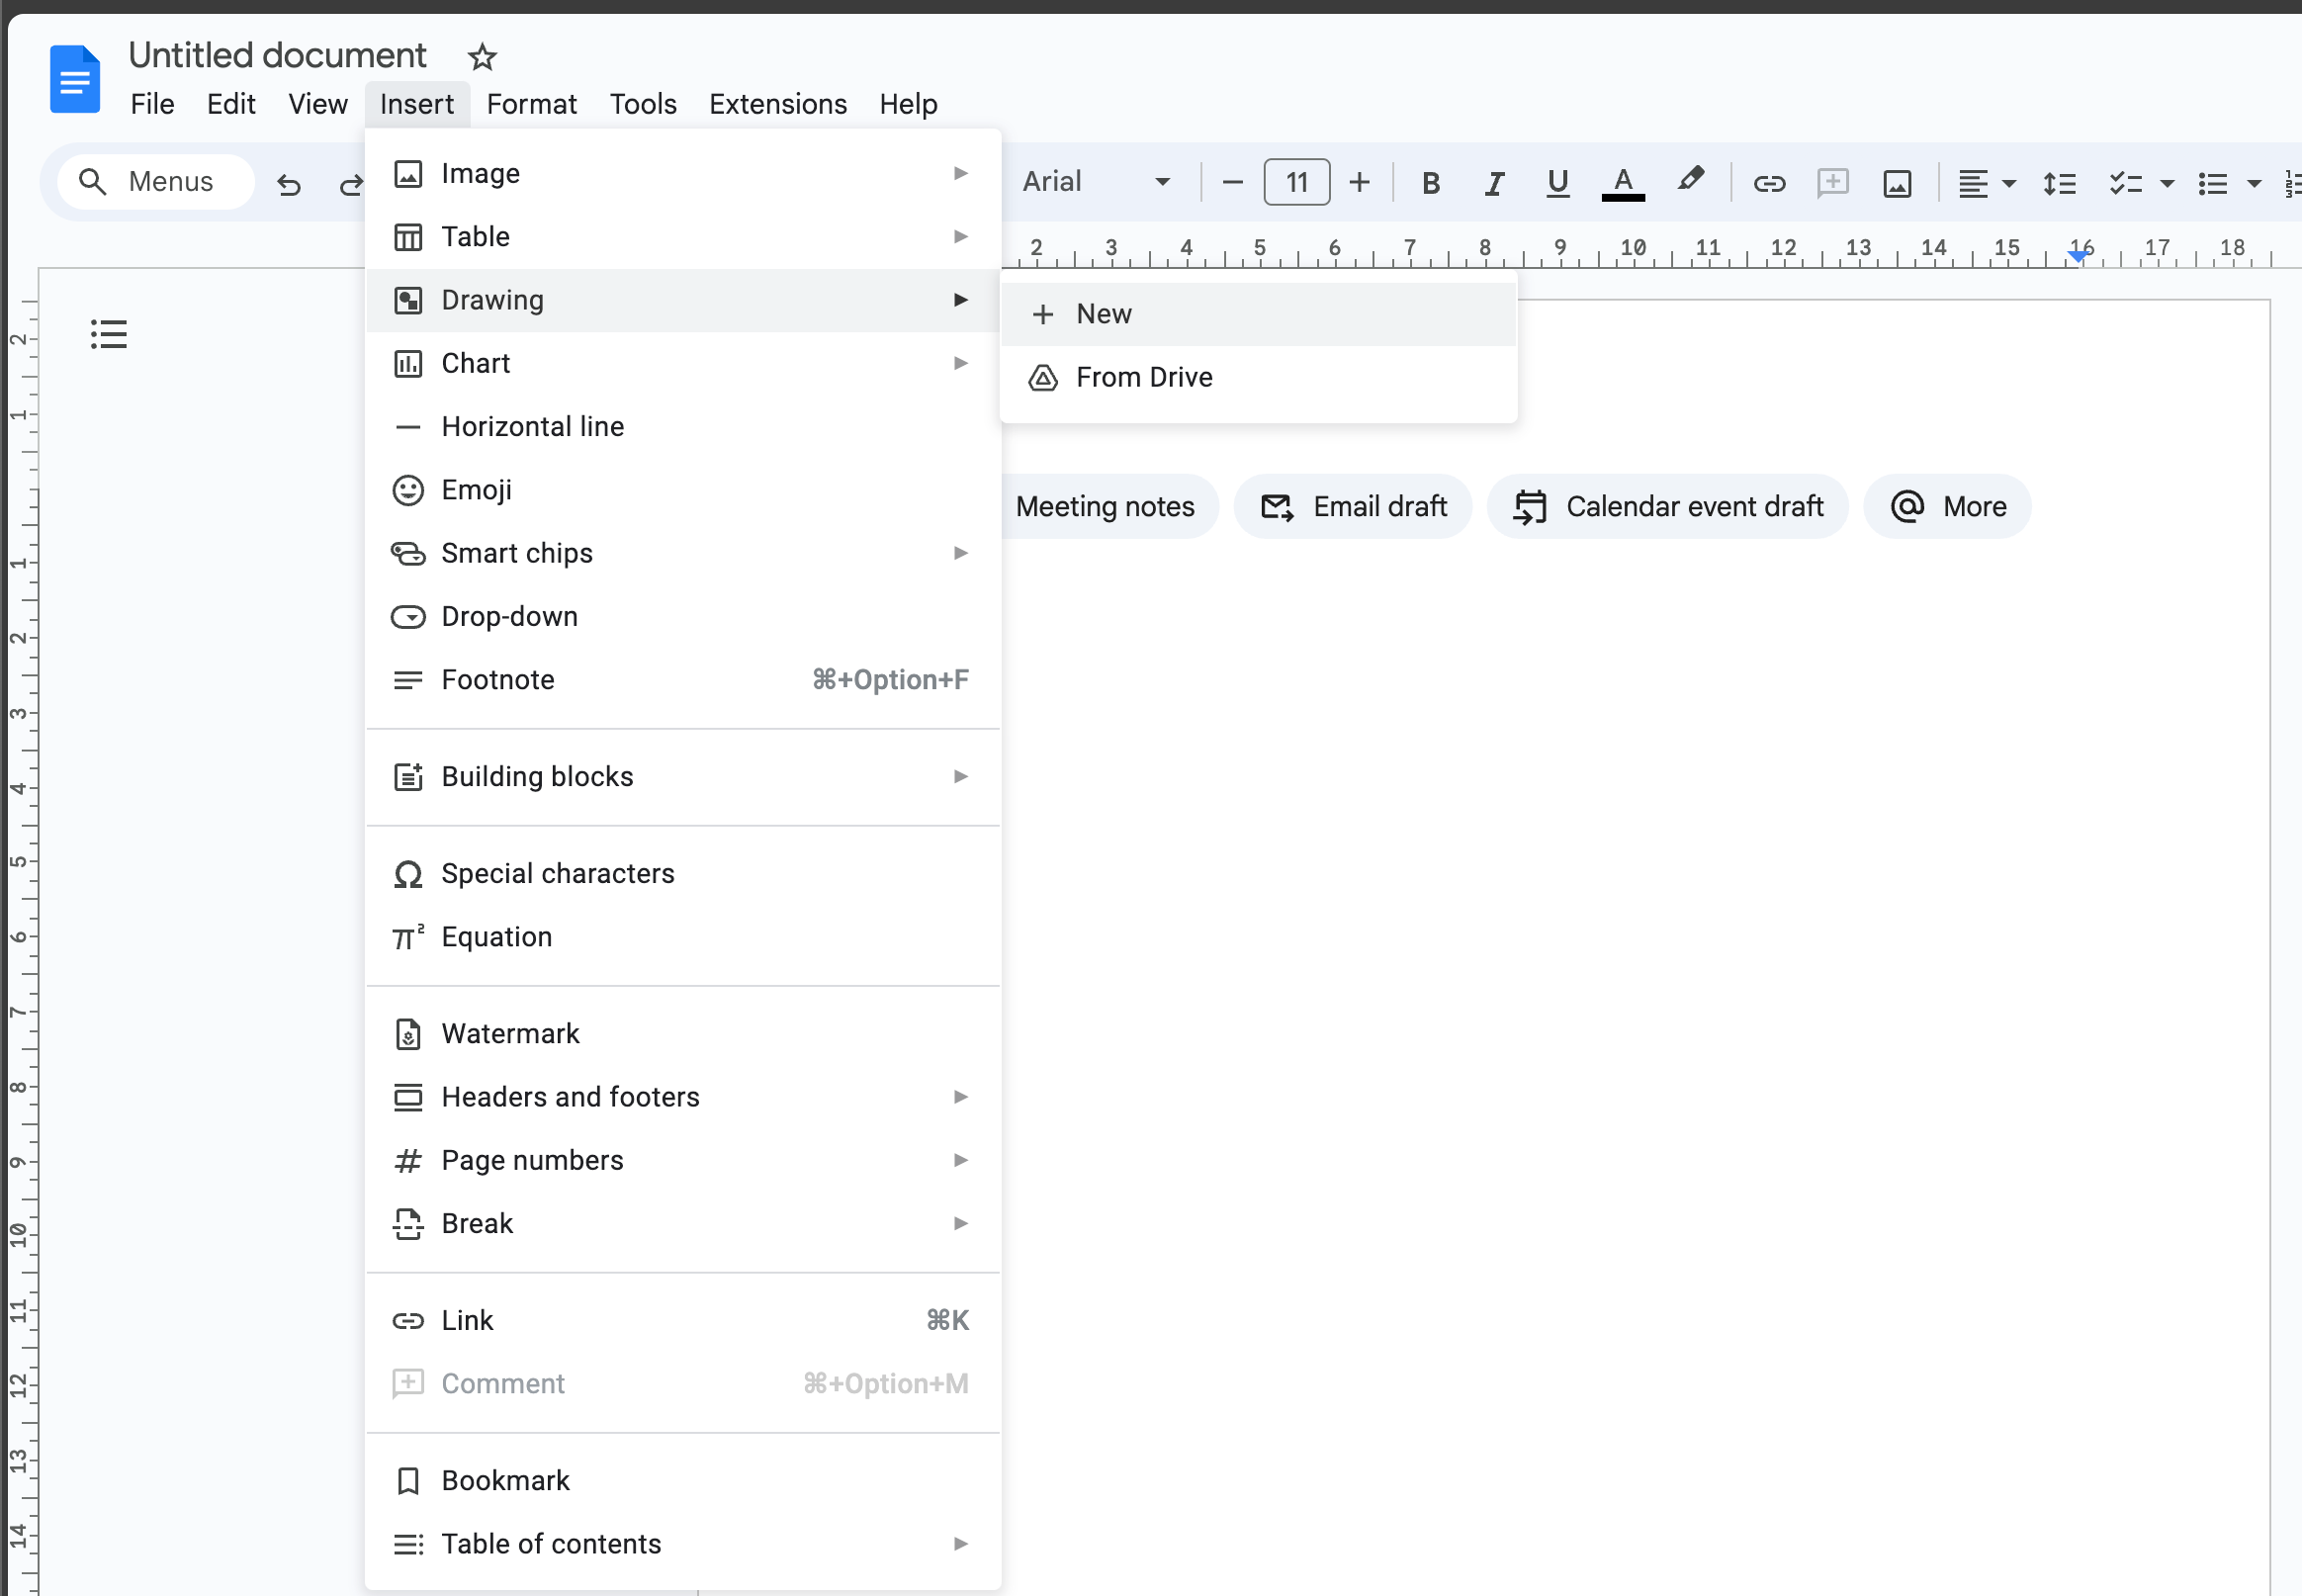
Here, the “New” selection awaits your click, poised on the right side like a gatekeeper to creativity.
Upon engaging with the “New” option, a fresh drawing window springs forth, a blank canvas for your artistic expression. In the upper left corner, the “Action” button hovers, concealing a tool of great importance – “Word Art.”
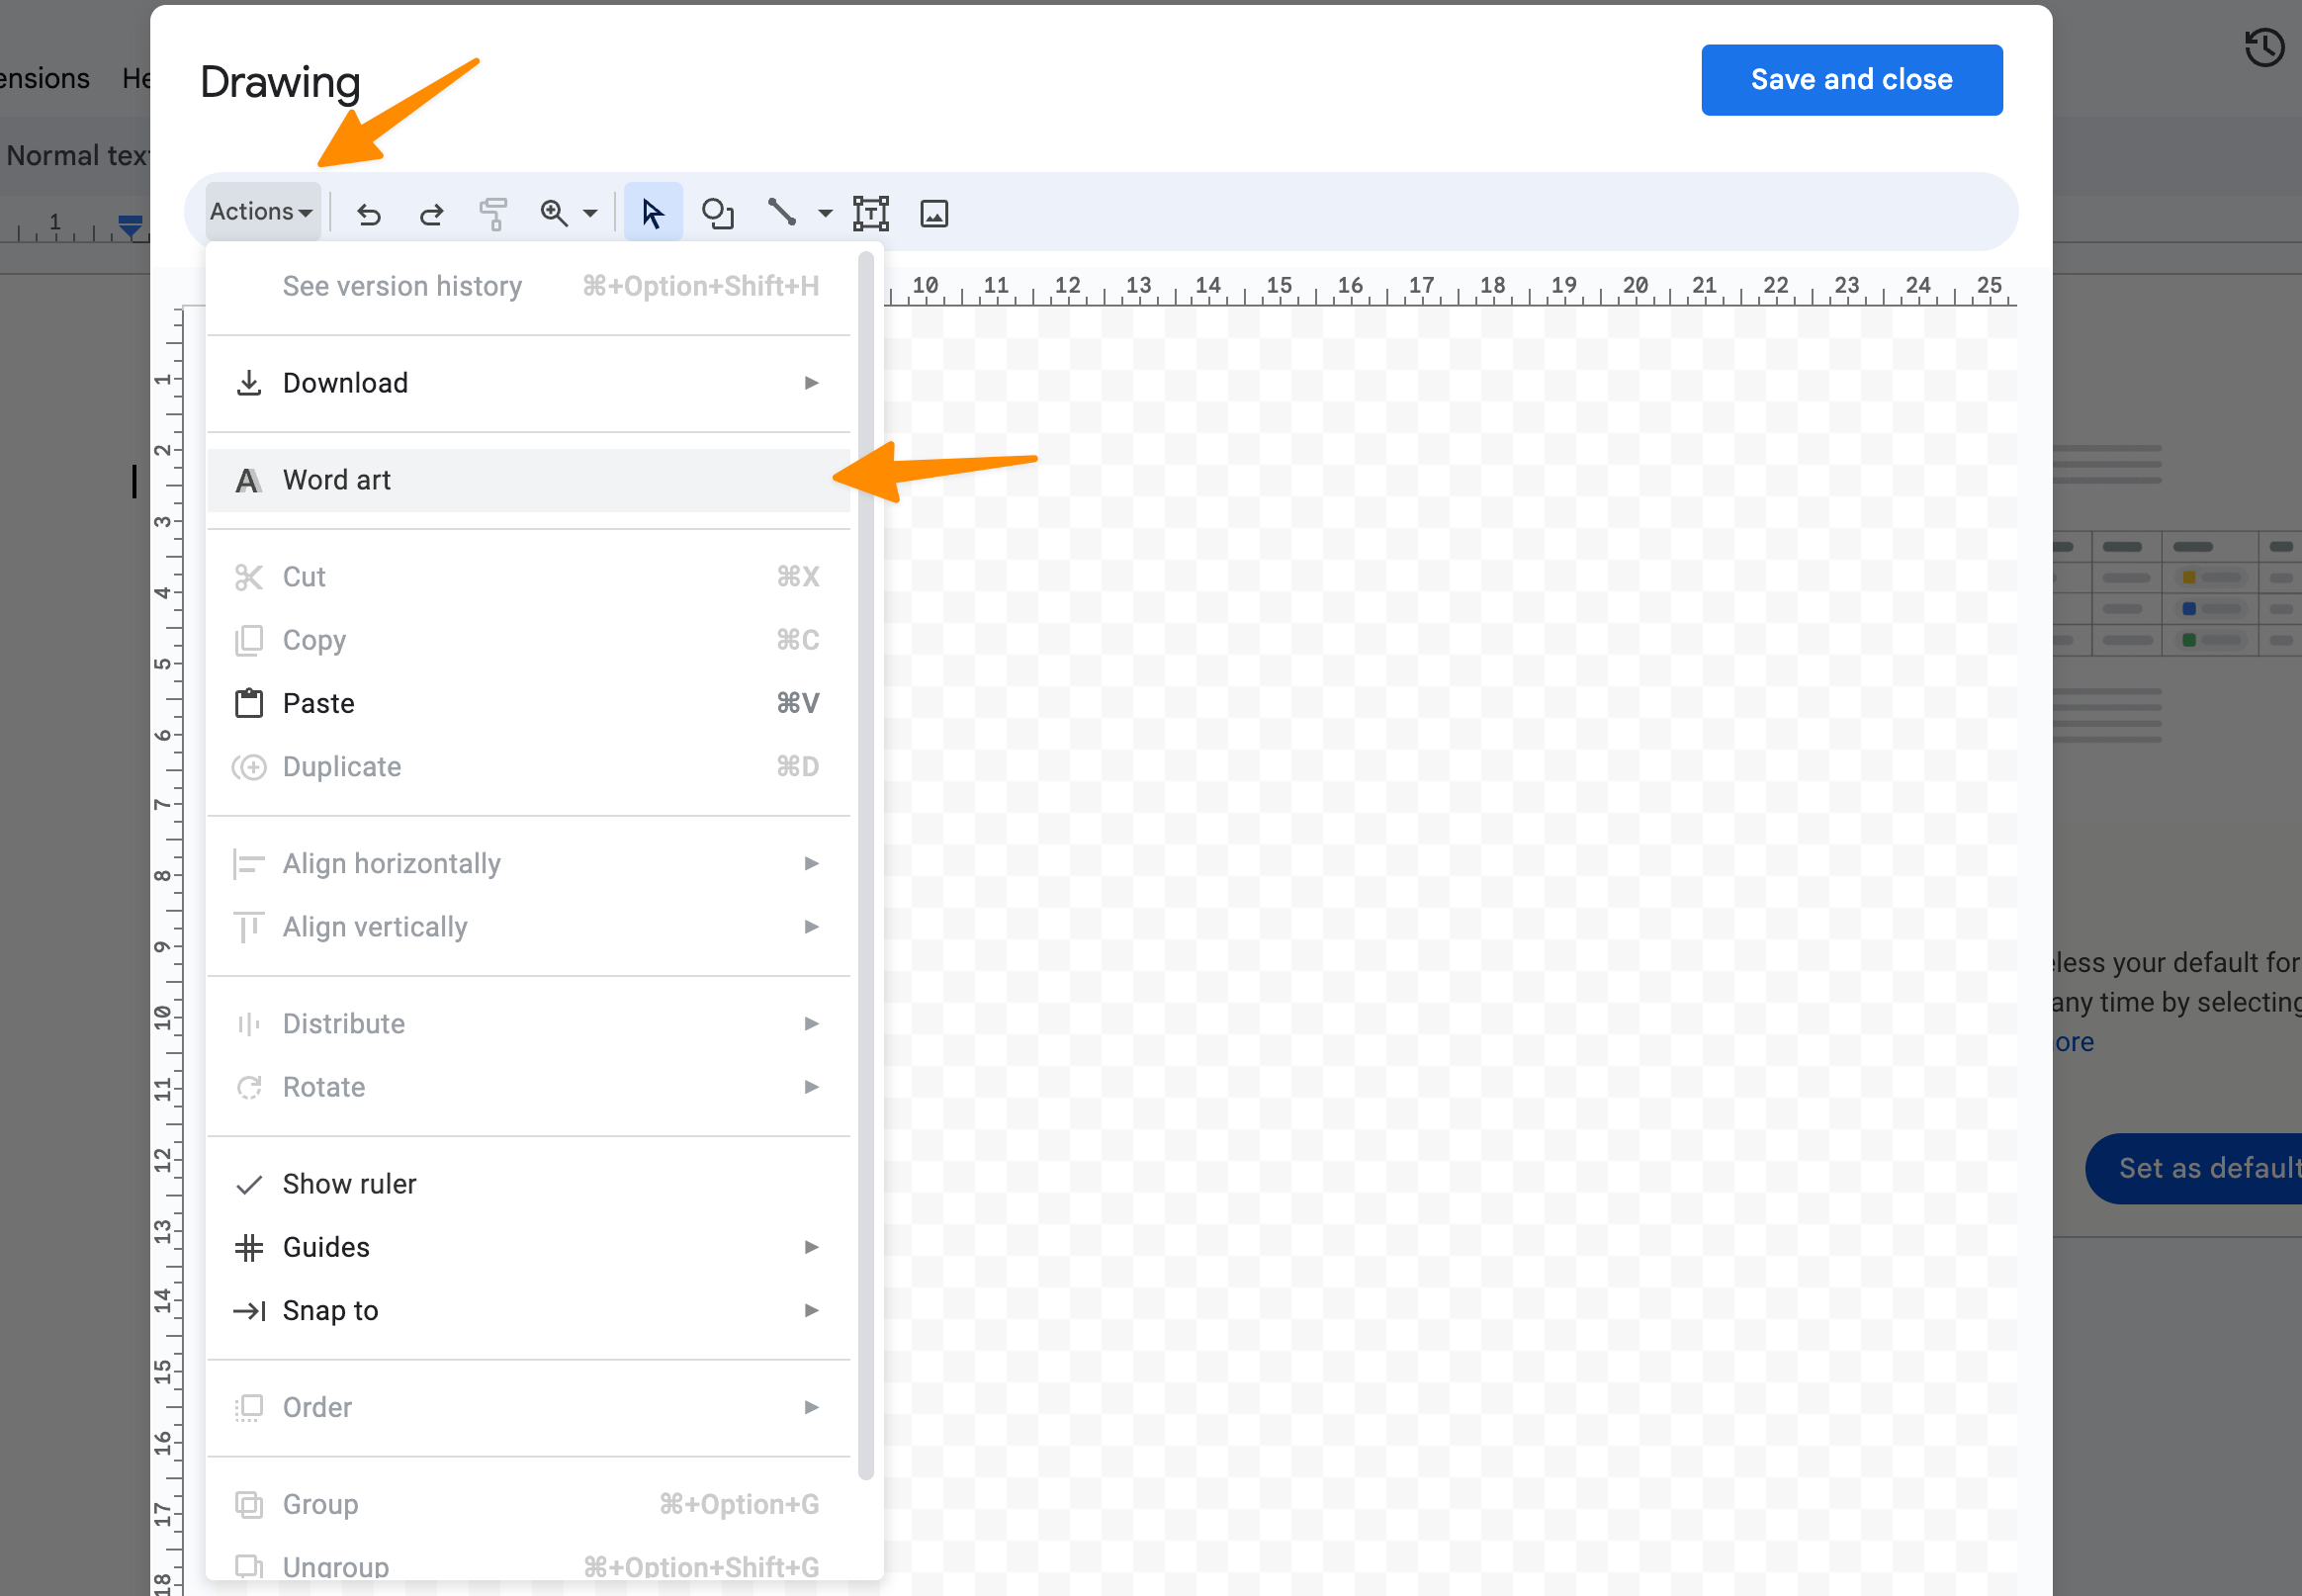
By selecting “Action” followed by “Word Art,” you unlock the capability to inscribe the title of your booklet.
This stage invites you to mould the essence of your title, adjusting its font through the “Impact” tap situated right below the “Save and Close” button – a treasure trove of customization at your disposal.
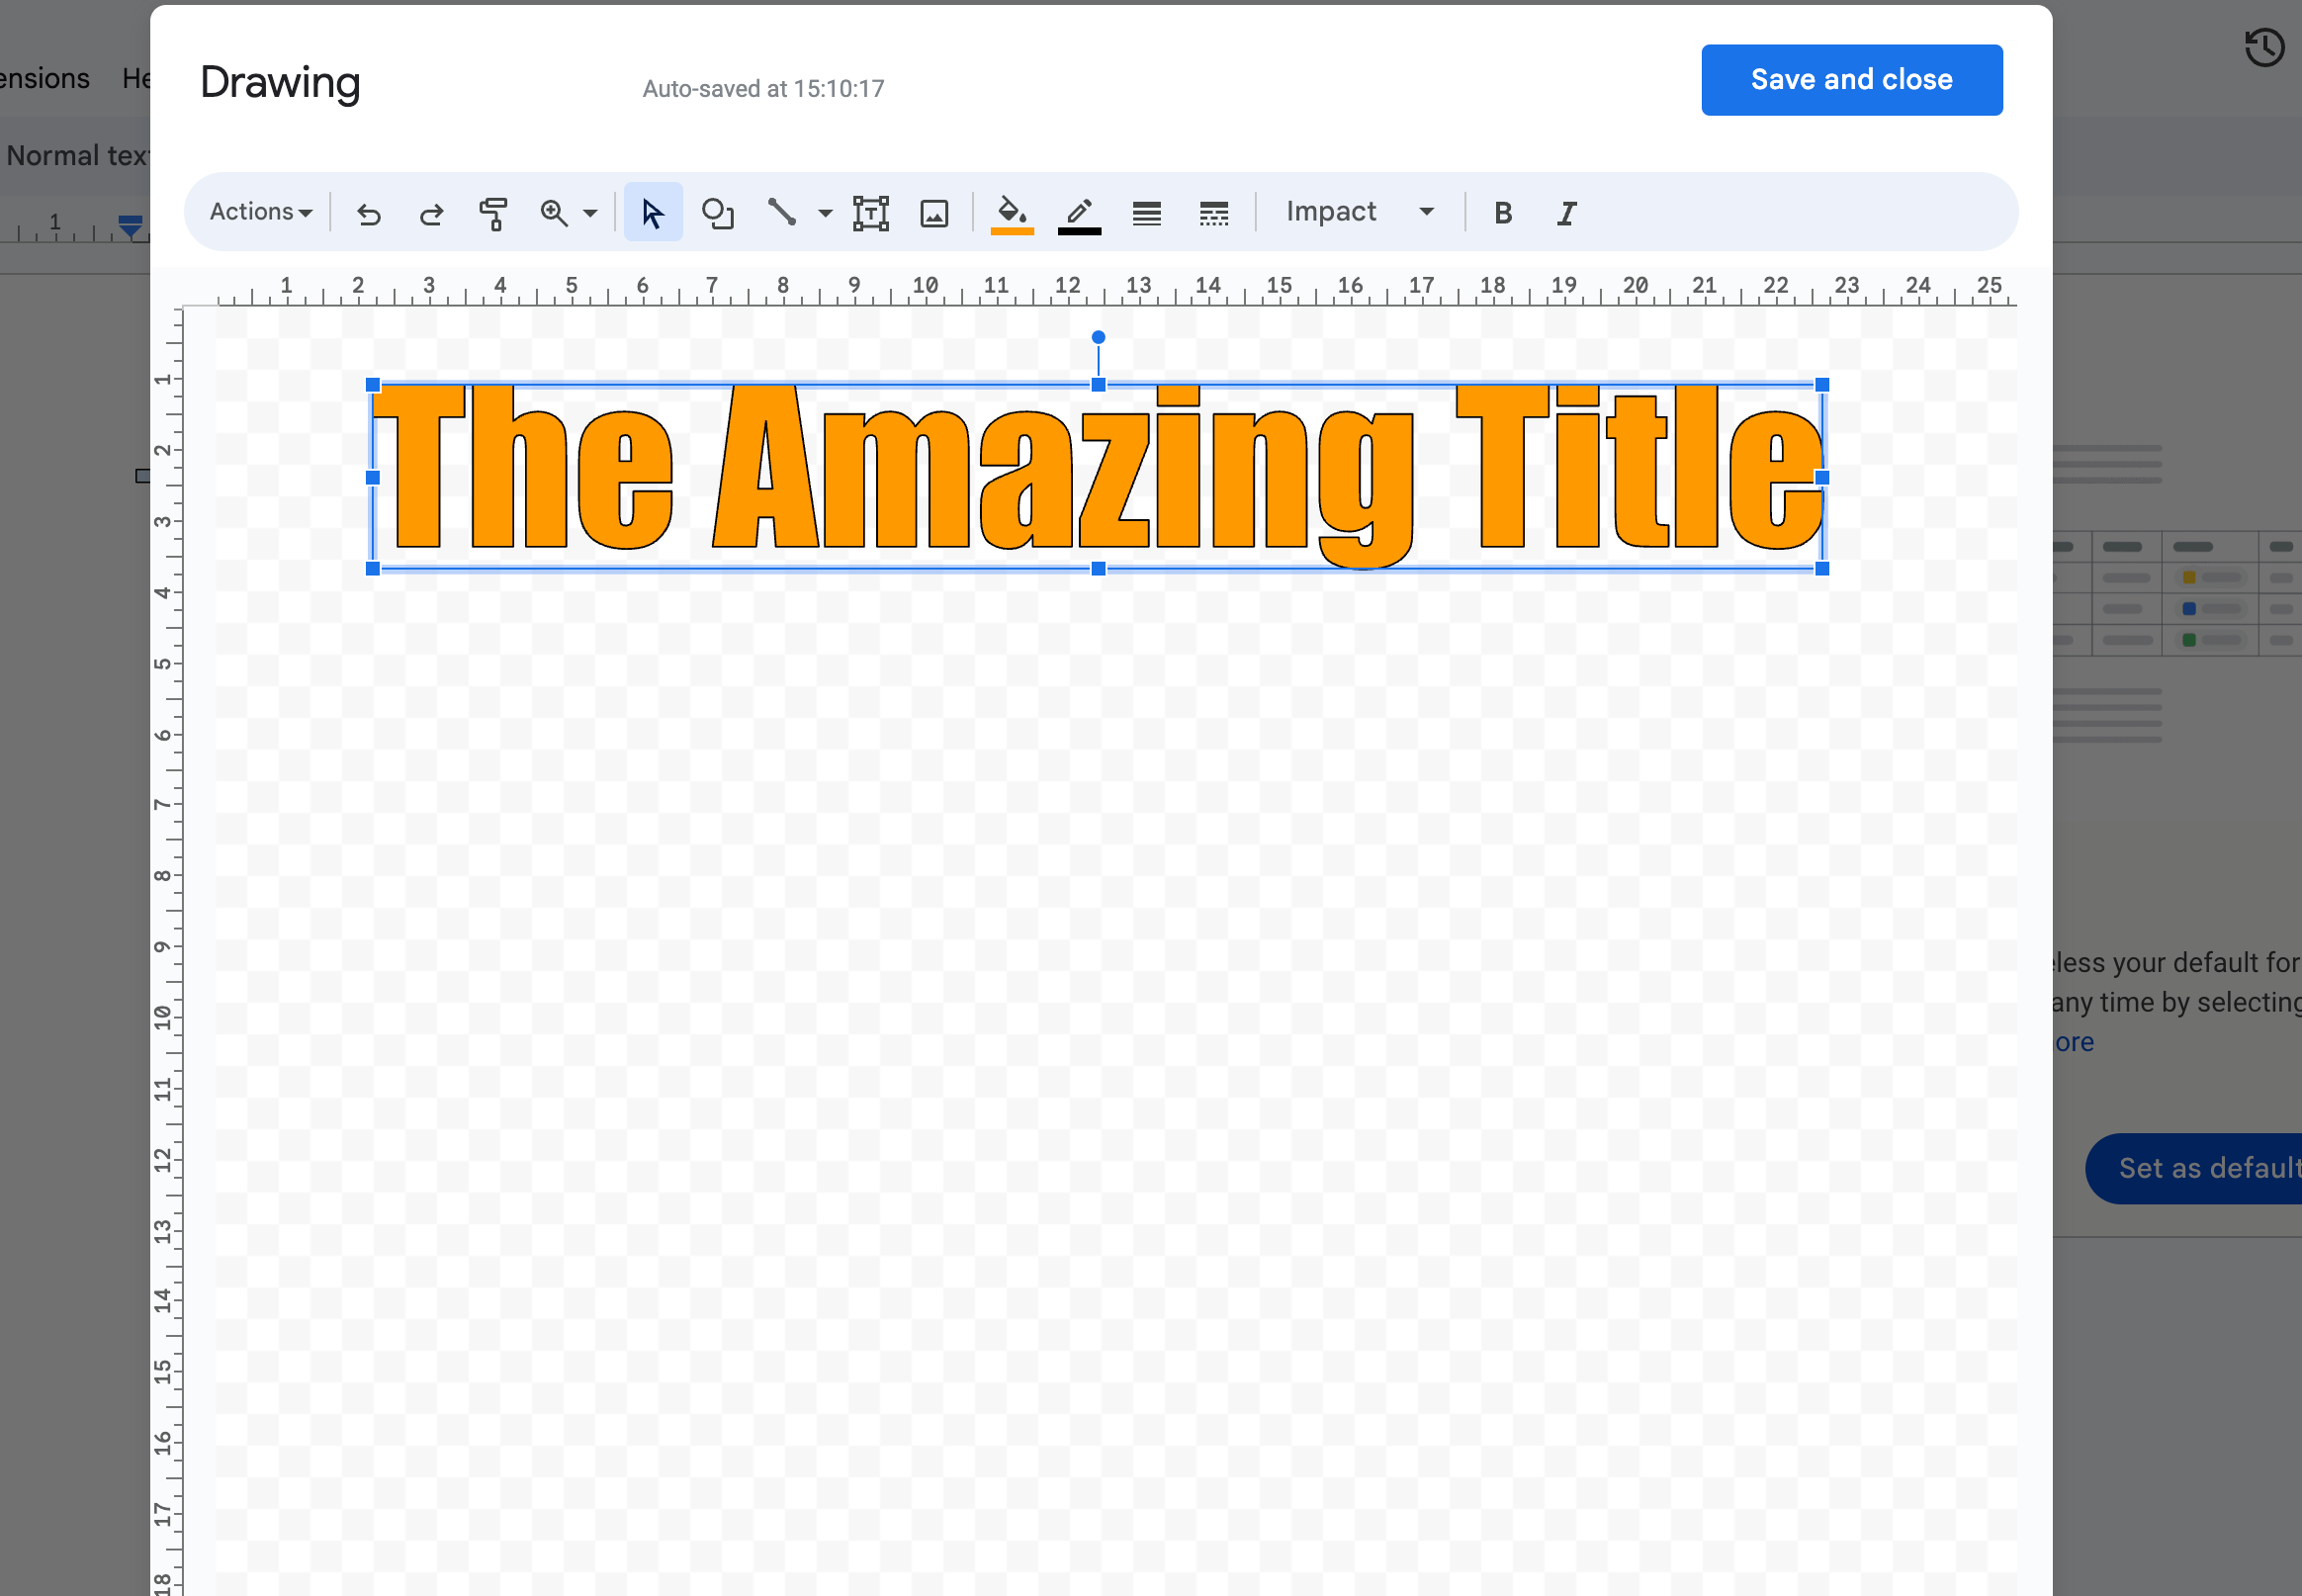
Whether you choose to imbue your title with vibrant hues or prefer the classic elegance of its original color, Google Docs hands you the palette to paint your vision.
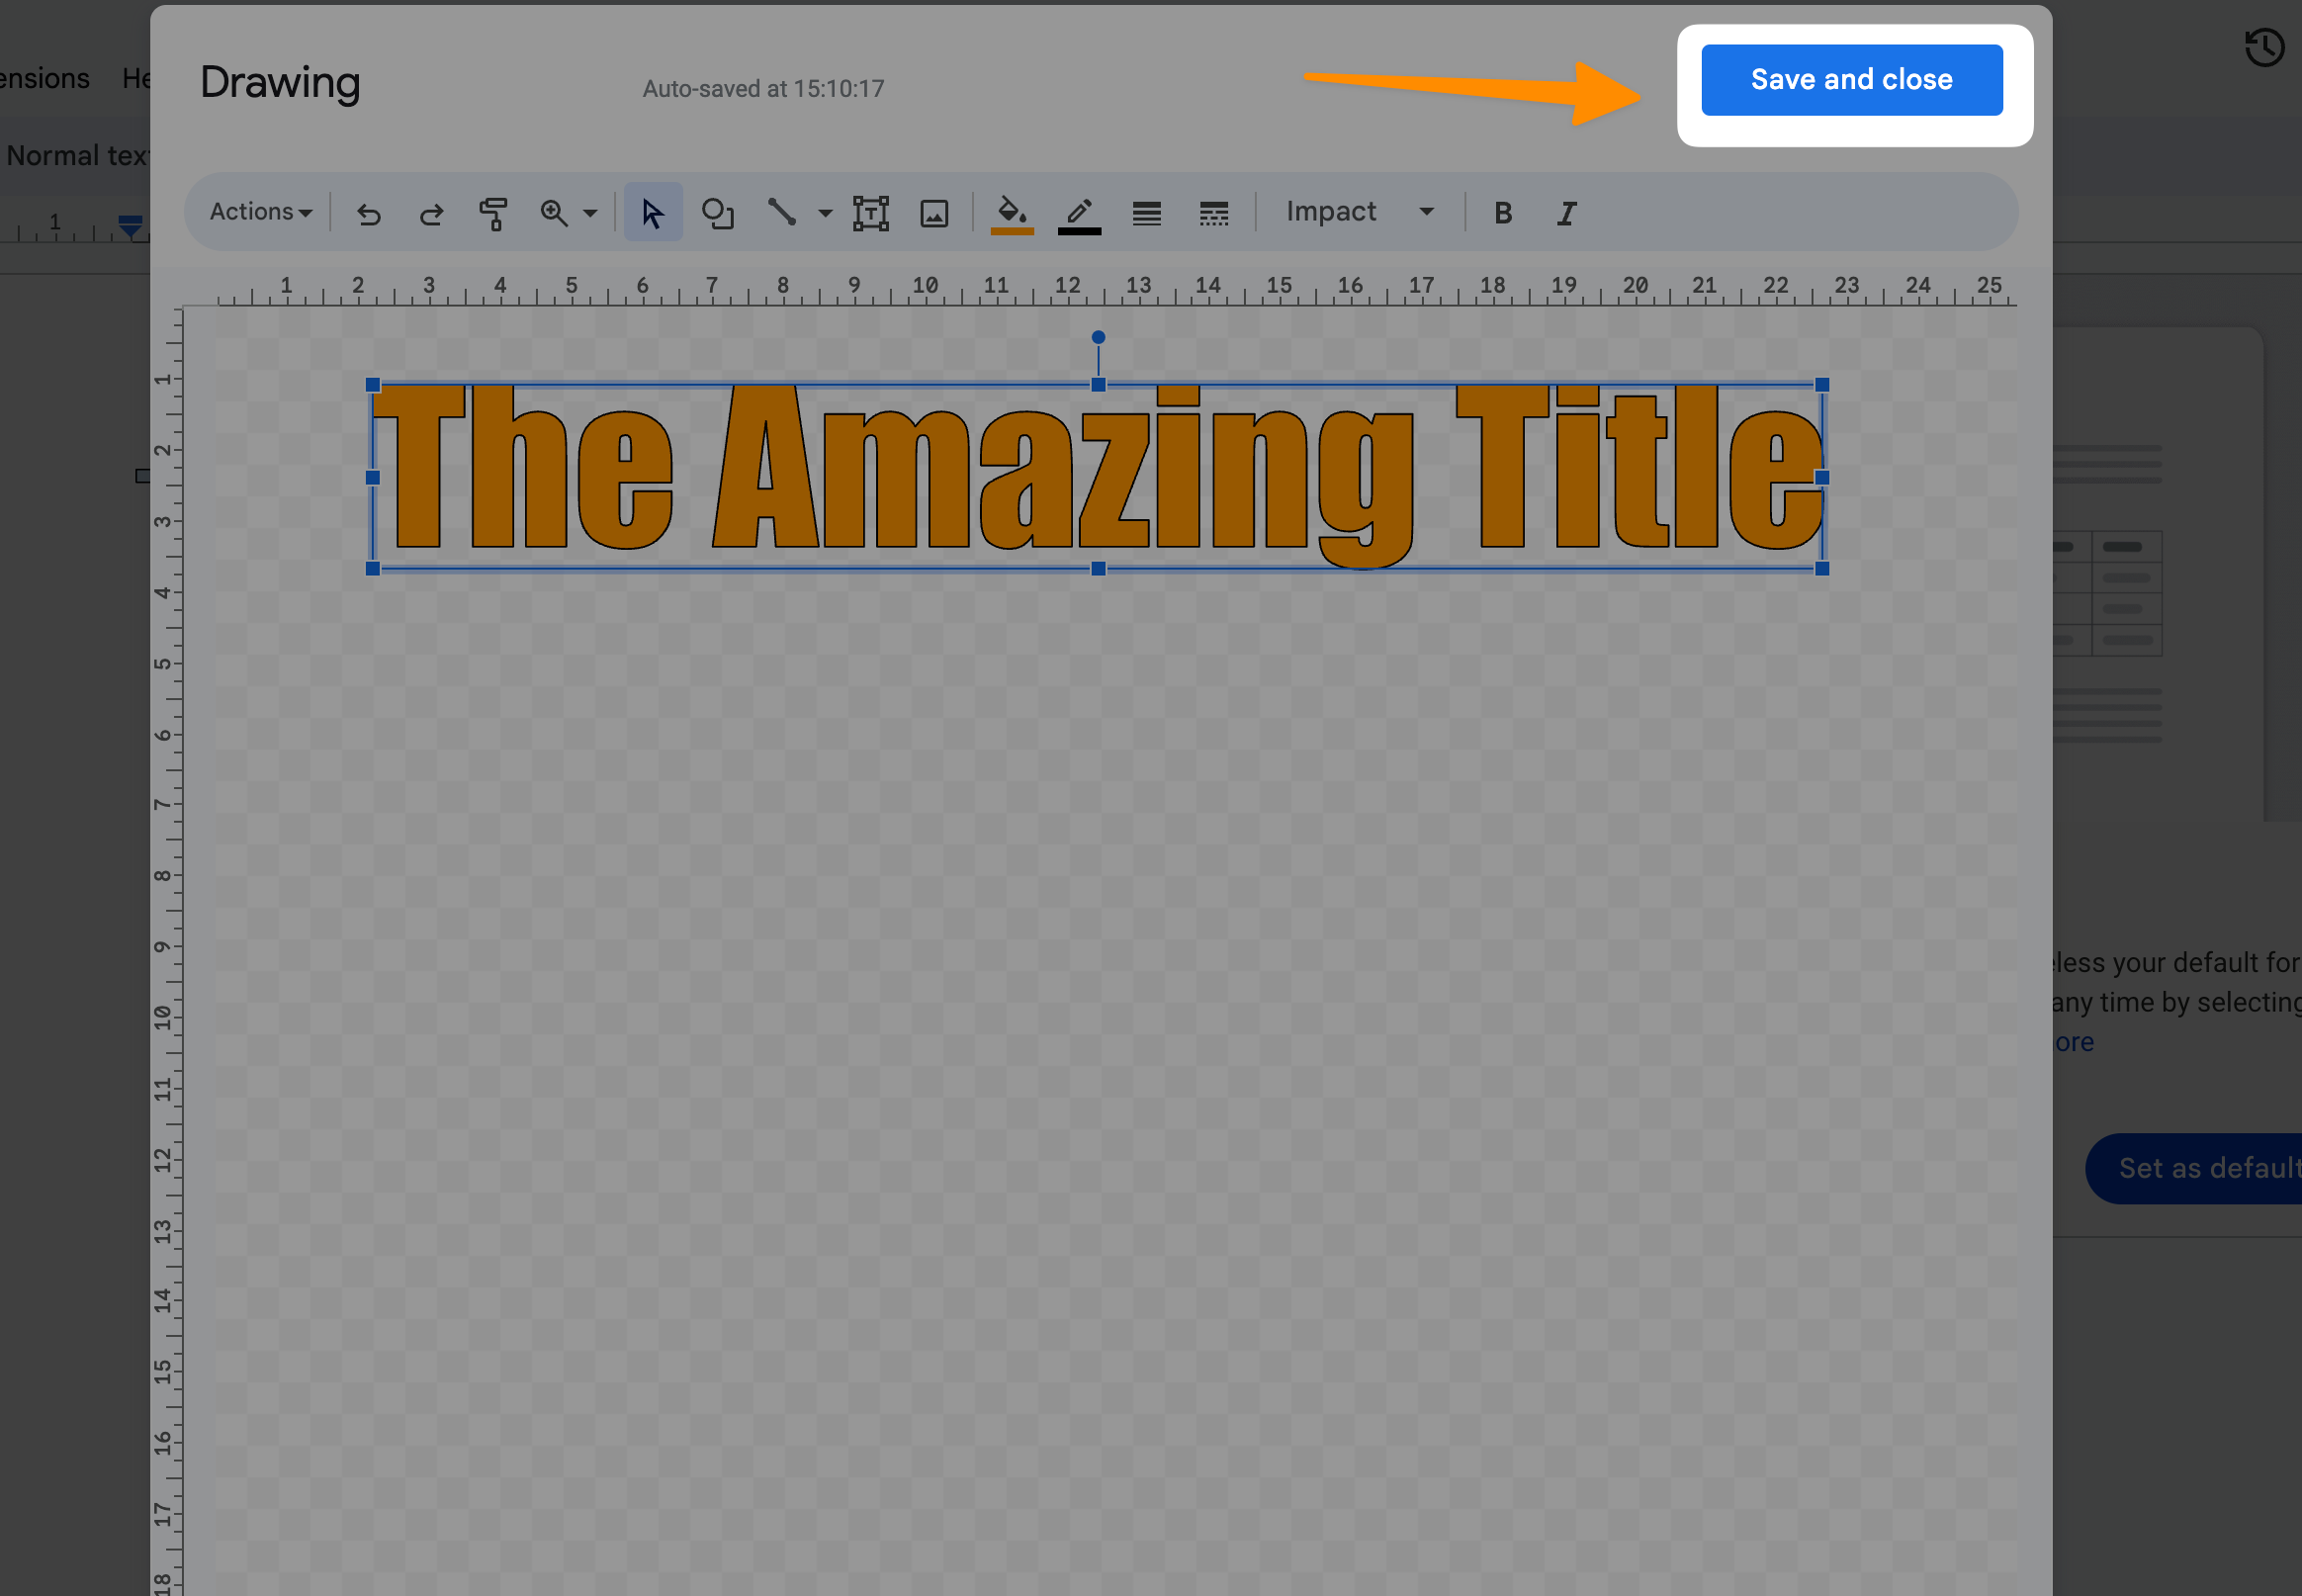
After finessing the font color to your liking, a simple click on the “Save and Close” button concludes this chapter of your booklet creation saga.
With each step, you’re not just crafting a document; you’re architecting an experience, leveraging Google Docs to easily create professional-looking booklets that resonate with your audience.
This process demystifies the creation of booklets, allowing anyone with an internet connection and access to Google Docs to transform a blank page into a captivating narrative, moving seamlessly from cover page to content.
Step 4: Cover Page Image
Now that you’ve masterfully set the stage with your booklet’s title, it’s time to bring your cover page to life by adding a compelling image.
By heading to the “Insert” button and navigating through to “Image,” you’re given a selection choice that’s as broad as the horizon.
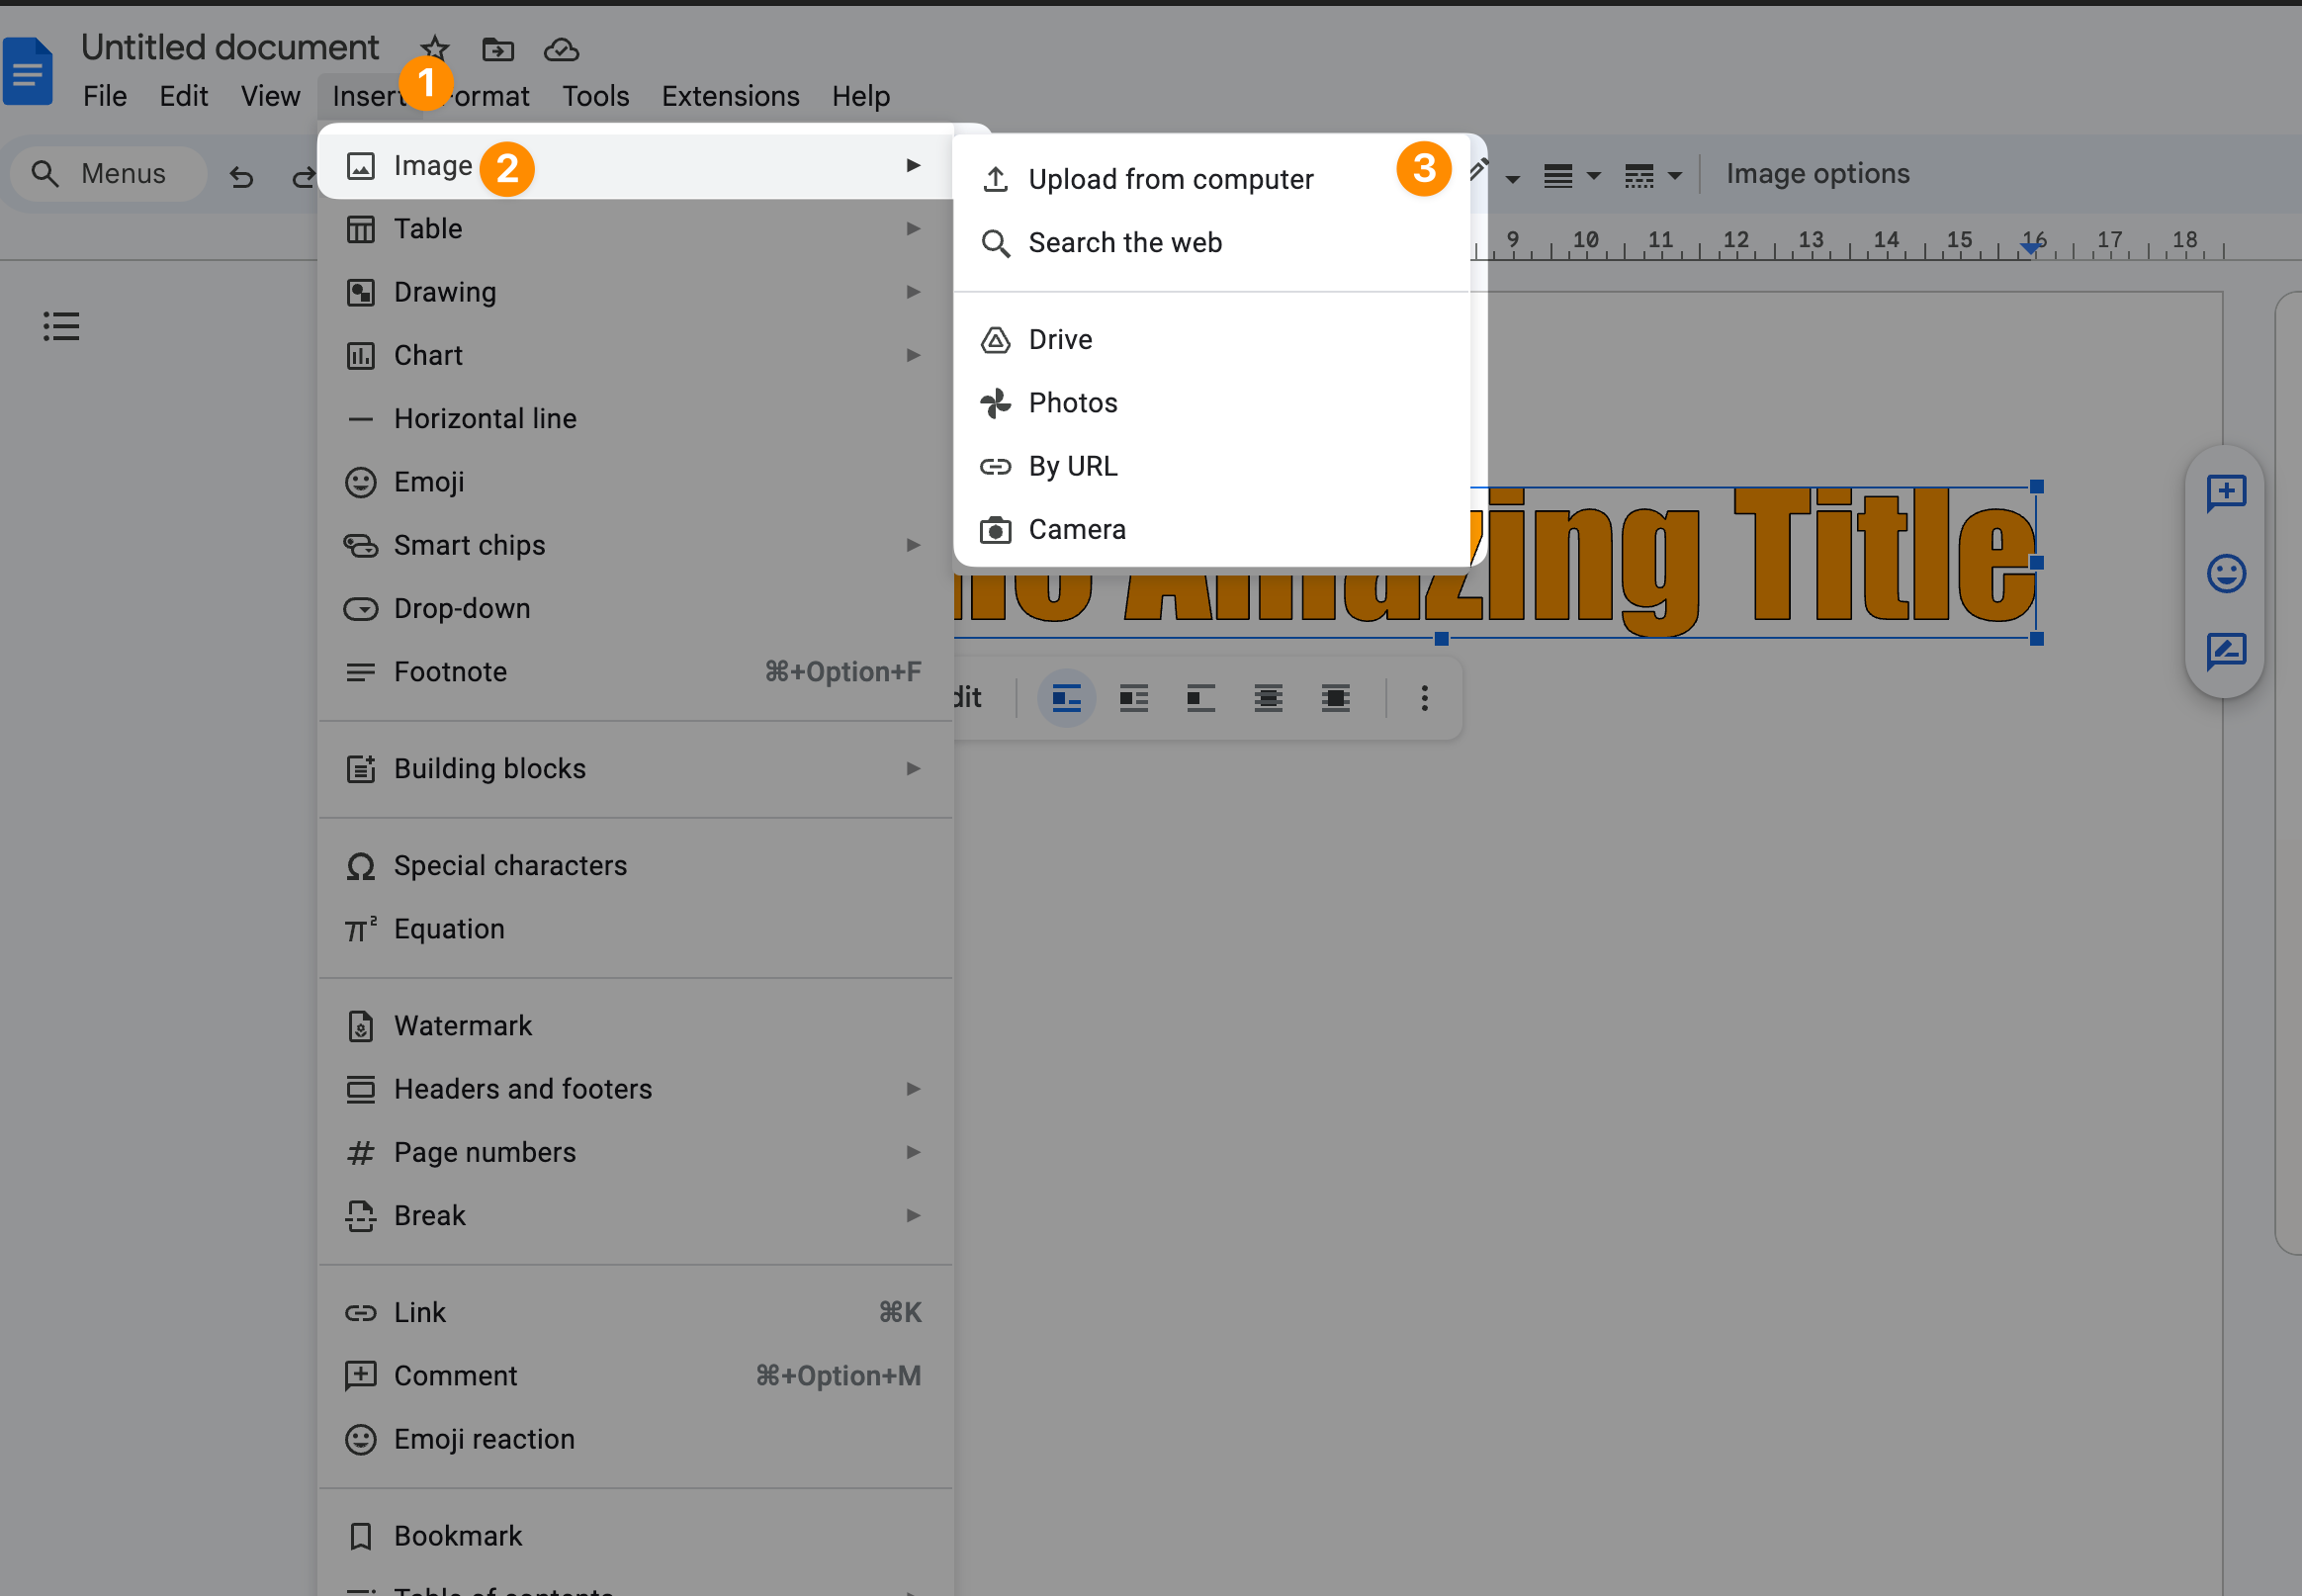
Opt to “Upload from computer” to bring your chosen visual into the fold.
Here lies the magic of Google Docs in creating professional-looking booklets, offering you various text wrapping options like “Inline,” “Wrap text,” “Break text,” “Behind text,” and “In front of text” to achieve the perfect balance between your image and text.
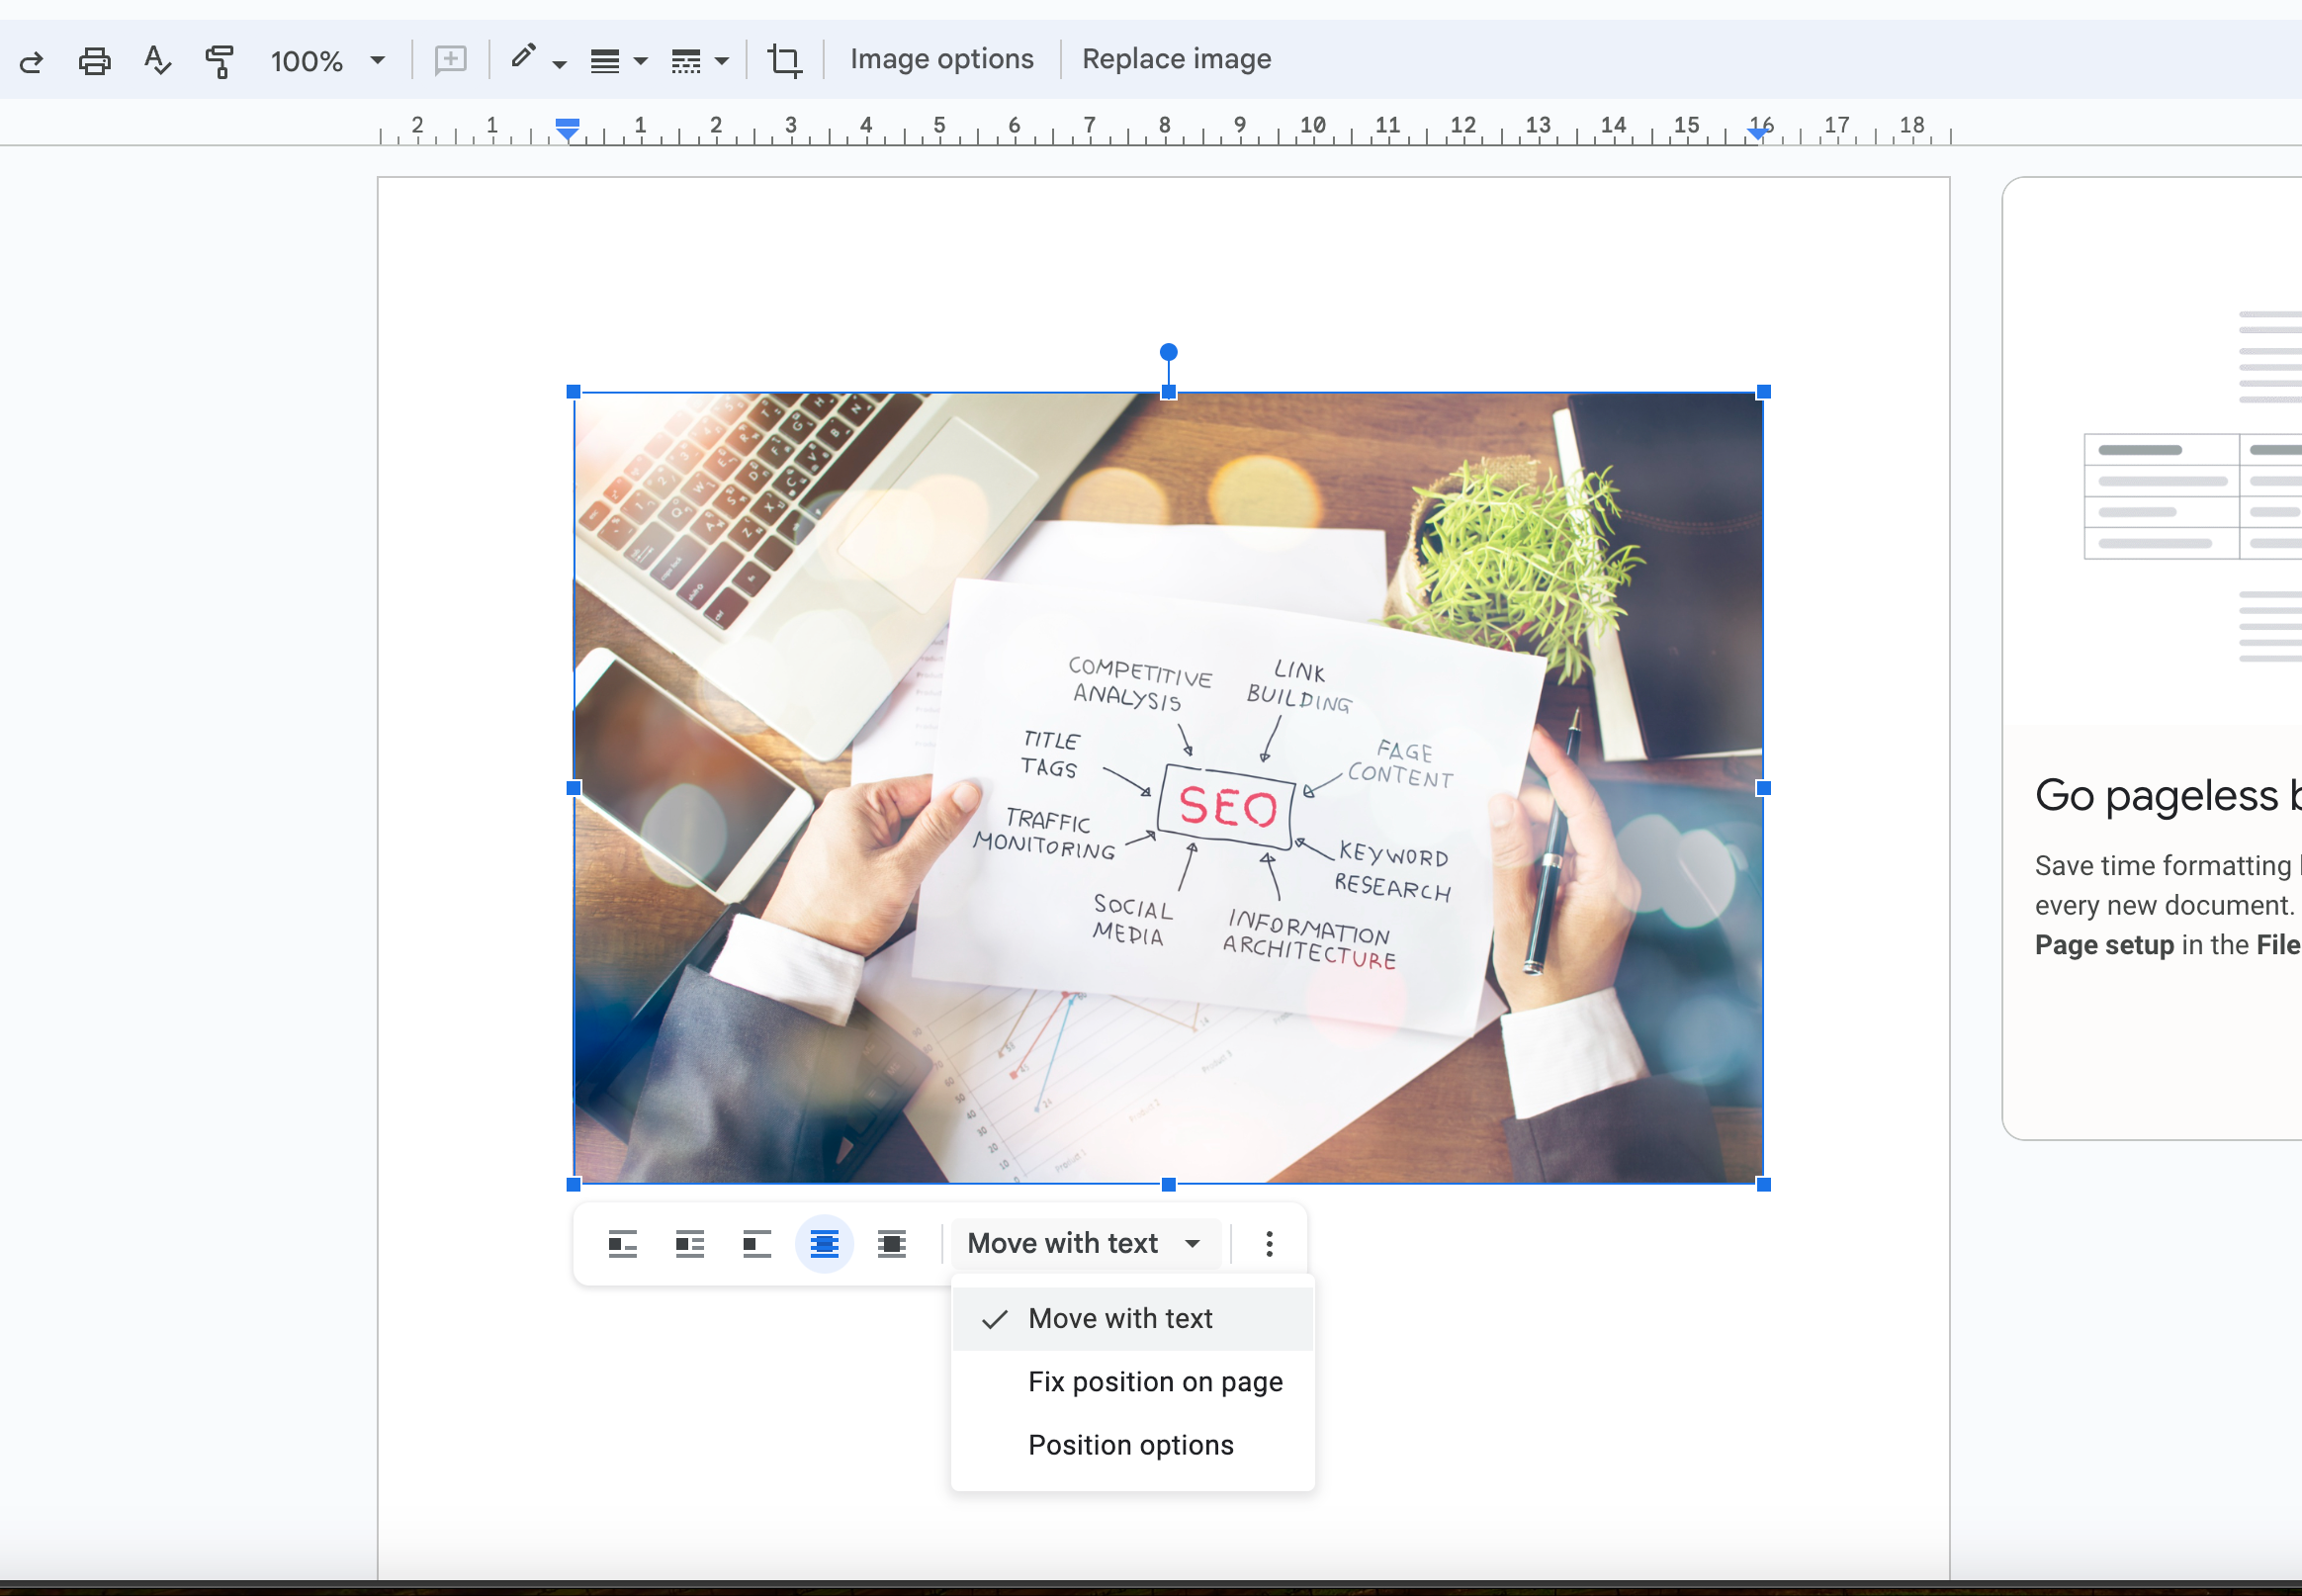
Next, to add a personal touch by inserting the author’s name, revisit the “Insert” tab, this time venturing into “Drawing” before selecting “New.”
This action prompts a dialog box that becomes your canvas for creativity. Here, you can craft a text box, selecting fonts and colors that align with your booklet’s theme, before inputting the author’s name. A simple click on “Save and Close” not only preserves your entry but also cements the author’s presence on the cover page.
This effortless integration of images and text boxes amplifies your ability to easily create booklets in Google Docs, utilizing its rich formatting options and seamless accessibility.
Step 5: Make Entire Theme
After you’ve meticulously crafted your title or established your cover page, your next mission is to weave a consistent theme throughout your booklet.
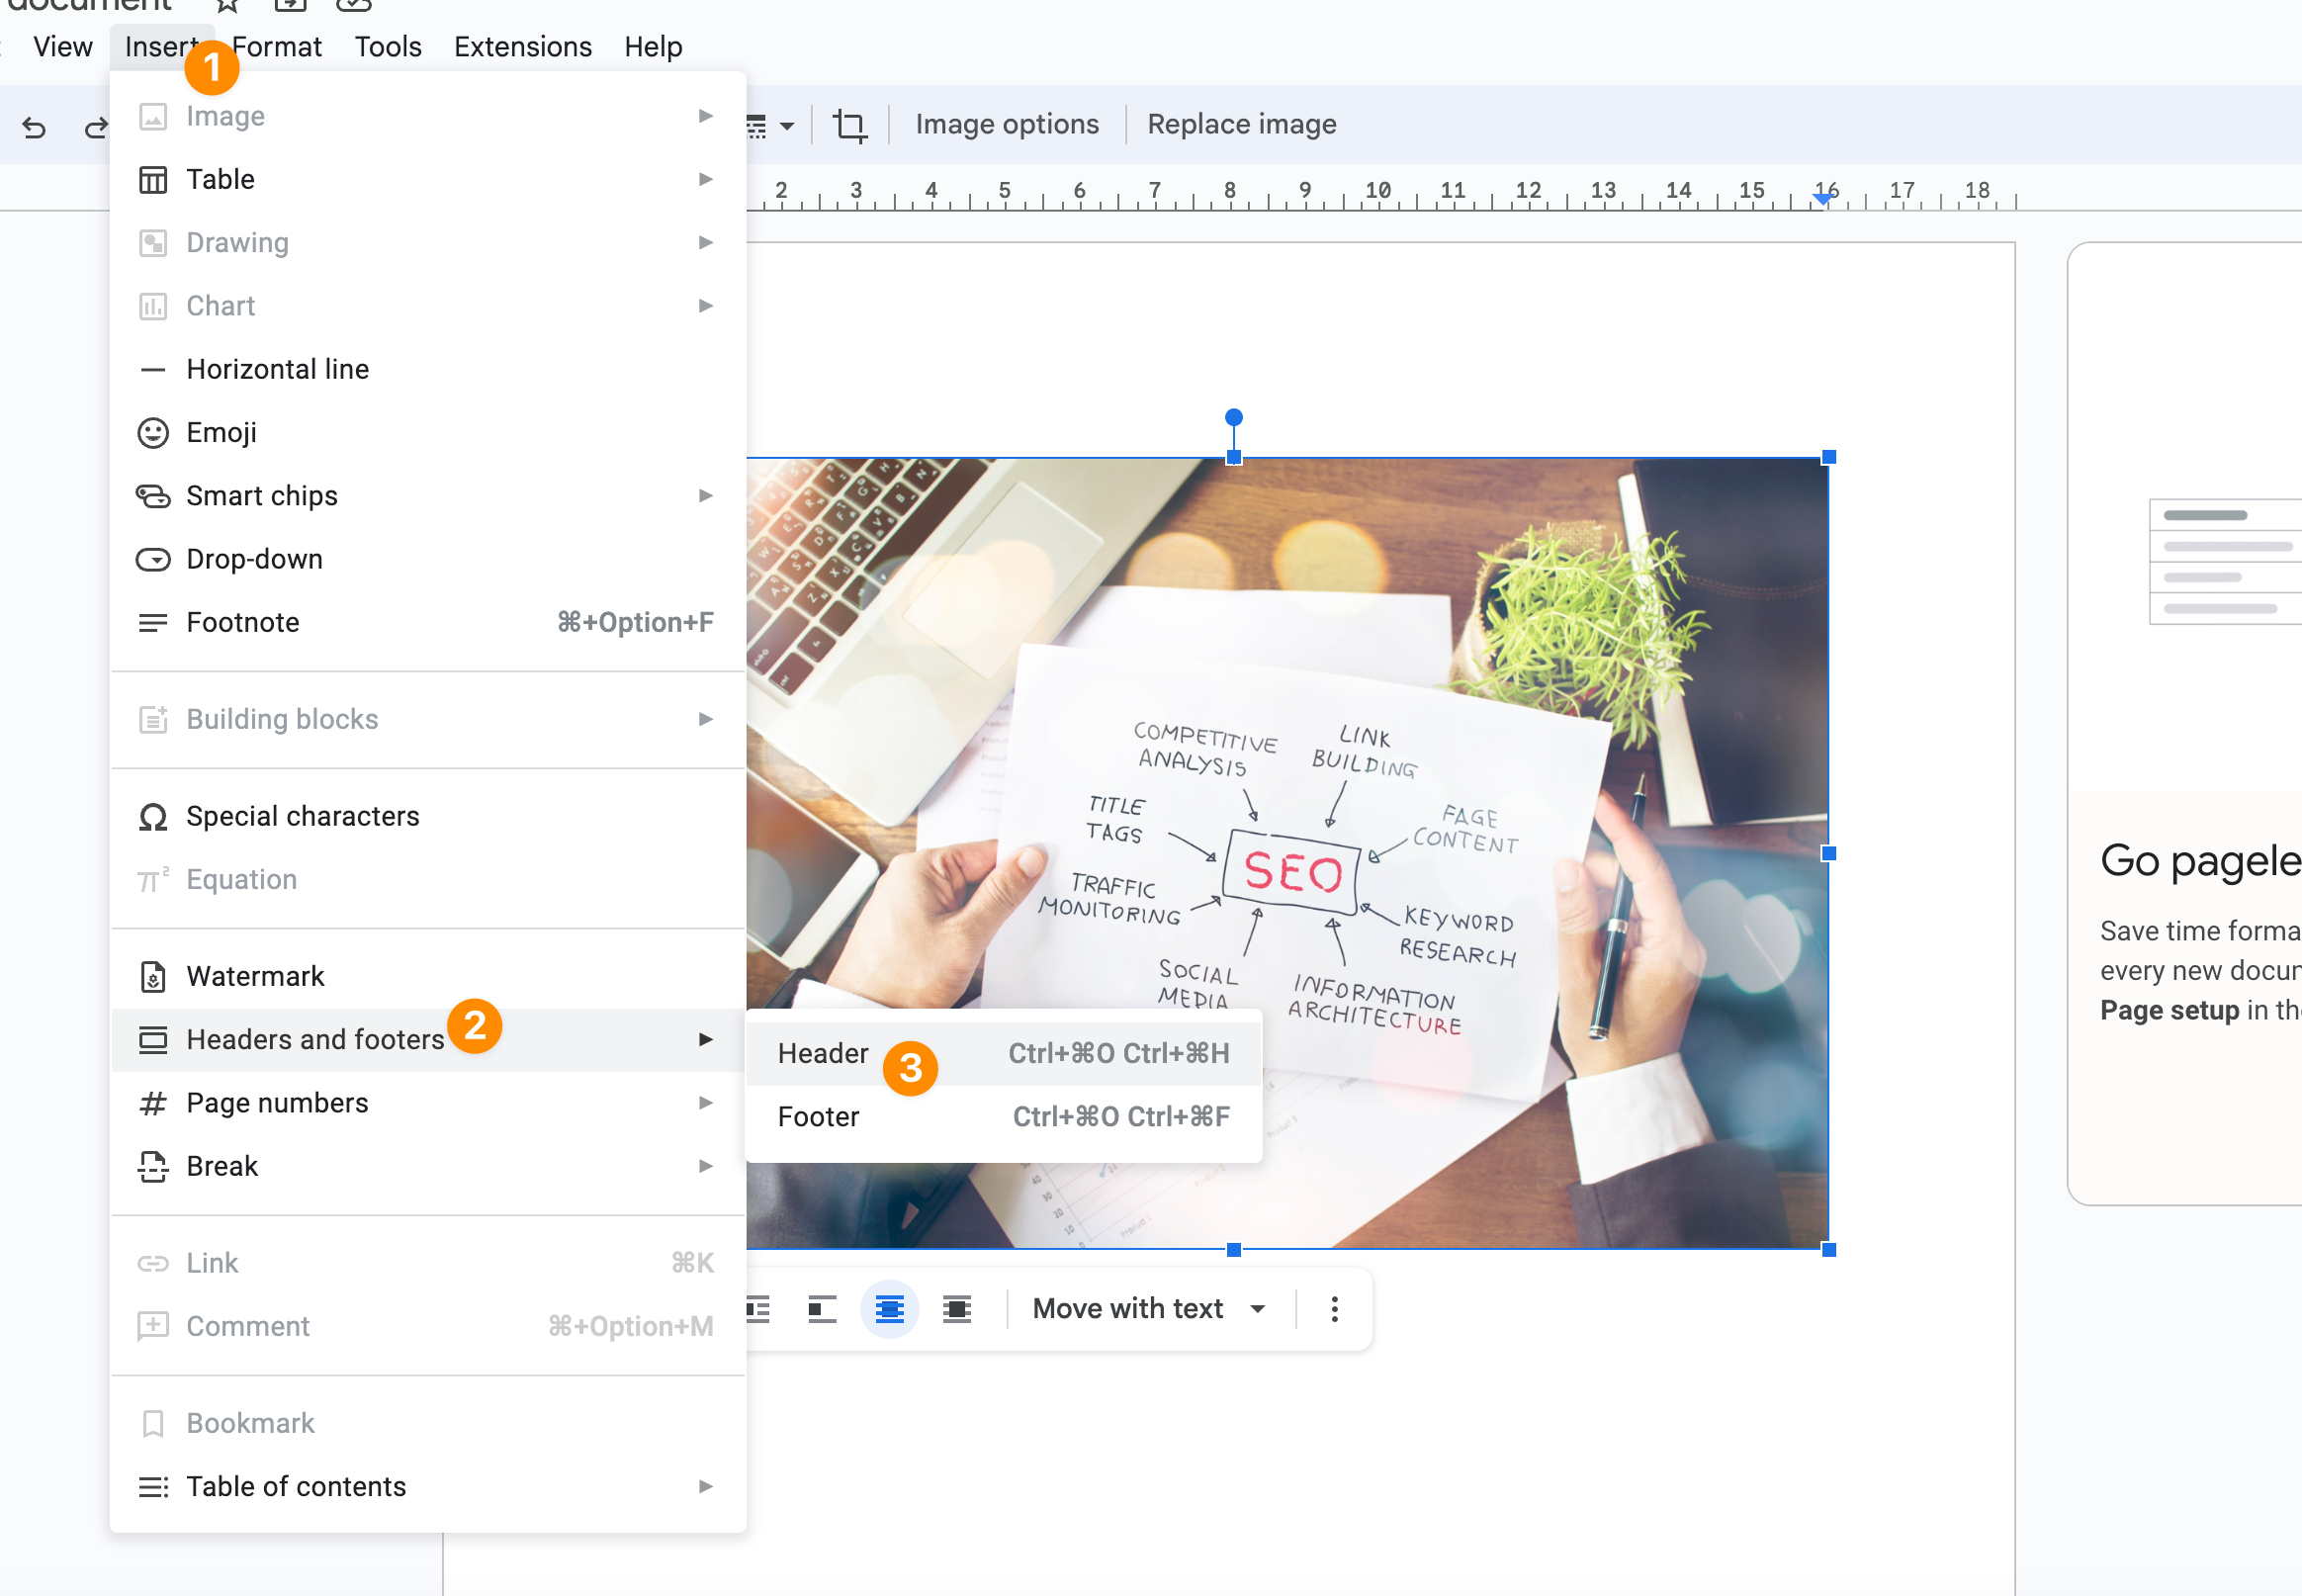
This is a pivotal step in how to create a booklet in Google Docs that truly stands out. Navigate to the “Insert” tab, then plunge into the “Headers & Footers” section, selecting “Header” to begin this transformation.
Here, you can introduce a header logo or a unique design element, pulling from the vast sea of options in the “Insert” drop down menu. Your booklet’s header not only sets a professional tone but also binds the pages into a cohesive narrative.
Following the header, embedding page numbers is crucial for navigation and maintains the organized flow of your content.
To do this, retrace your steps to the “Insert” tab, then wander to “Page Number” to select a formatting style from the available choices. Such small details play a big role in creating professional-looking booklets that captivate your audience from start to finish.
Enhancing your booklet further, add distinctive artwork that parallels your theme. This layer of customization injects personality into your booklet, guiding you towards the creation of a truly unique document in Google Docs.
Step 6: Insert Body Text and Images
With the foundational elements of your booklet firmly in place, the final step beckons—injecting life into your booklet with engaging body text intertwined with captivating images. This stage is where your narrative takes form, marrying text and visuals to articulate your message compellingly.
Google Docs serves as an ideal platform for this, facilitating the addition of text through a user-friendly text box feature and allowing for the inclusion of images via the image icon. Adding illustrations, shapes, or any artwork relevant to your content, further enhances the booklet’s appeal, making every page a visual and informational feast.
Your booklet’s readiness for the world—or at least for your target audience—nears completion as you finalize the text and images. Should you have the convenience of a personal printer with duplex printing capabilities, your creation can effortlessly transition from a digital masterpiece to a tangible entity.
However, for those striving for a touch of professionalism beyond the scope of home printing, the services of a professional booklet printing provider, such as Day Night Print, could be the solution. They offer the expertise and equipment necessary to bring your Google Docs booklet to life, ensuring a polished and professional look that speaks volumes of your dedication and creativity.
How to Create Text Columns in Google Slides in 3 Steps
Conclusion
Through this step-by-step guide, we’ve navigated the vast capabilities of Google Docs in creating professional-looking booklets. From the initial setup with a new document to the intricate process of adding pages, images, and ensuring perfect page layout and formatting options, Google Docs emerges as a powerful tool in your creative arsenal.
Whether it’s adjusting font size, selecting the right booklet template, or mastering the booklet layout, your ability to easily create and print your own booklet underscores the versatility of Google Docs as not just a document creating platform but as a gateway to bringing your unique narratives to life.
Test your knowledge
Take a quick 5-question quiz based on this page.


