Home / Blog / Social Media / Instagram / How to Fix Blurry Instagram Photos (7 Methods)
How to Fix Blurry Instagram Photos (7 Methods)
Choose Your Language:
Are your Instagram photos appearing blurry and lacking the clarity you desire?
In this ultimate guide, we delve into the top 8 proven methods to enhance your Instagram images. Say goodbye to fuzzy pictures and elevate your social media game with these actionable tips.
1 Why Do My Pictures Look Blurry on Instagram
In the realm of Instagram, various factors can impact the quality of your photos. Let’s explore some common issues:
- Images lacking good quality due to resolution or focus issues.
- Posting photos with incorrect aspect ratios leading to distortion.
- Using unsuitable image formats that may affect clarity.
- Uploading low-resolution photos resulting in poor visual appearance.
- Enabling Data Saving mode on Instagram, which can reduce image quality.
2 Methods to Fix Blurry Photos on Instagram
2.1 Method #1 – Maximize Your Camera’s Capture Quality
Enhance the camera quality on your mobile device to avoid blurry Instagram photos. Follow the steps below for both iOS and Android cameras.
2.1.1 iOS Camera:
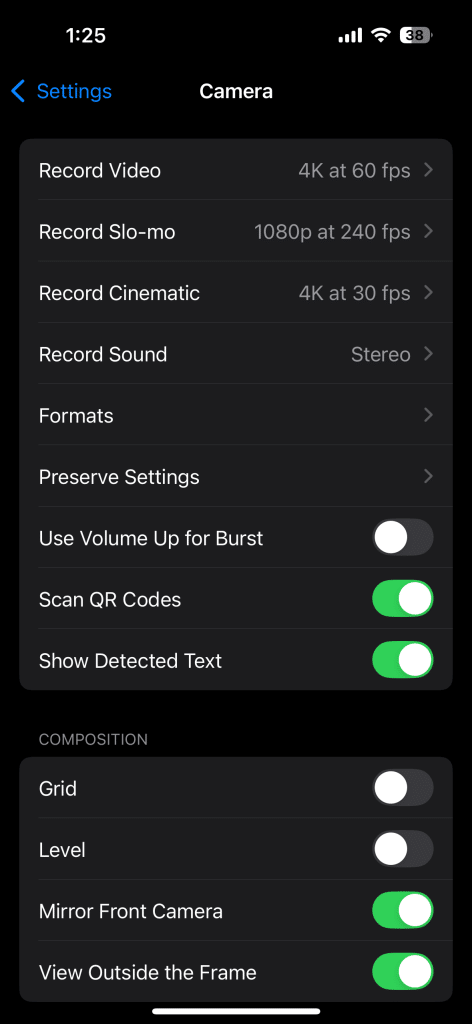
- Open your Camera app on iOS and navigate to settings to adjust resolution and focus for higher quality photos.
- Ensure your photos are saved in the highest quality format such as JPEG to maintain clarity on Instagram.
2.1.2 Android Camera:
- Access your Camera app settings on Android and verify that the resolution is set to the highest available for clear photos.
- Adjust the aspect ratio settings to match Instagram’s requirements for distortion-free images.
2.2 Method #2 – Fix Instagram Data Settings
To fix blurry photos on Instagram, simply adjust your settings. Turning off the data-saving feature will improve image quality. Let us show you how!
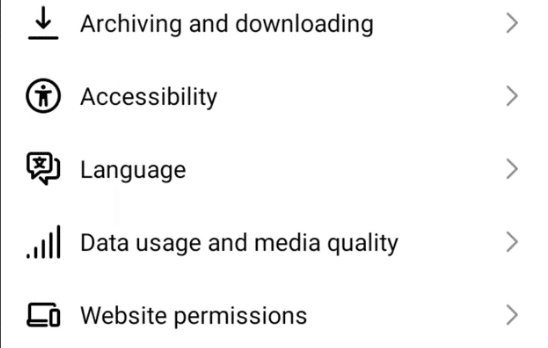
- From the bottom right corner of the Instagram app, tap on the profile icon.
- Open your profile and tap on ‘More,’ represented by three horizontal lines in the top-right corner.
- In the side menu that appears, select ‘Settings’ from the bottom right corner.
- Within the various setting options displayed, choose ‘Account’ and then select ‘Cellular Data Settings’ on the next screen.
- A new screen will display a toggle button on the right. Simply tap the switch next to ‘Data Saver’ to disable it.
2.3 Method #3 – Check Your Image Resolution
When you upload a high-quality image to Instagram, the app adjusts the aspect ratio, which can affect the photo’s display quality.
- When posting a high-quality photo on Instagram, make sure to select the right aspect ratio..
- Select the best balance to make your photo attractive and qualitative.
- The most common aspect ratios for photo formats are:
- 1:1 for square photos
- 1.91:1 for landscape photos
- 4:5 for portrait photos
2.4 Method #4 – Choose Better Quality Image Format
Uploading an unsupported image format to Instagram can result in the platform converting it, which may cause your photos to appear blurry.
To ensure clear and high-quality images on Instagram, consider the following steps:
- Always opt for JPEG format for better quality photos as Instagram supports only JPEG and PNG formats.
- While PNG images may not always retain their quality, JPEG is a reliable choice for all users.
2.5 Method #5 – Use Free tools Like Canva To Edit first
Editing photos before uploading them to Instagram can significantly enhance their quality. Free tools like Canva offer a user-friendly platform to edit photos effectively.
This section provides a step-by-step guide to using Canva for editing your Instagram photos.
- Start by creating a free account on Canva or log in if you already have one.
- Select the ‘Create a Design’ option and choose the ‘Instagram Post’ template to ensure the correct aspect ratio.
- Upload your photo by clicking on ‘Uploads’ and then on the ‘Upload an image or video’ button. Select the photo you wish to edit from your device.
- Enhance your photo’s quality with Canva’s tools to adjust brightness, contrast, and saturation. This step helps in fixing blurry pictures.
- Apply filters or effects if desired to add a unique touch to your photos.
- Once you are satisfied with the edits, click on ‘Download’ at the top right corner. Ensure you select the JPEG format for the best quality on Instagram.
- Finally, upload the edited photo to your Instagram account to share with your followers.
By following these simple steps, you can easily fix blurry Instagram photos and improve your profile’s overall aesthetic appeal.
2.6 Method #6 – Clear Your Instagram Cache
Clearing the Instagram cache can resolve blurry photos by freeing up storage and improving the app’s performance. Follow these steps for both Android and iOS devices.
2.6.1 Android Device:
- Open the Settings app on your Android device.
- Scroll down and tap on ‘Apps’ or ‘Application Manager’ depending on your device.
- Find and select the Instagram app from the list.
- Tap on ‘Storage’ and then on ‘Clear Cache.
- Restart the Instagram app to see the changes.
2.6.2 iOS Device (Offloading App):
- On your iOS device, open the Settings app.
- Tap on ‘General’ and then select ‘iPhone Storage’.
- Scroll down to find Instagram and tap on it.
- Select ‘Offload App’, then reinstall Instagram from the App Store.
- This process will clear the cache without losing your app data.
By following these steps, you can free up space and potentially fix blurry photos on Instagram, enhancing your overall experience on the platform.
2.7 Method #7 – Use AI to Upscale Your Photo
AI upscaling represents a powerful tool to enhance the resolution and clarity of your Instagram photos. By utilizing AI technology, users can transform blurry photos into high-quality images. This section provides a step-by-step guide on how to use AI to upscale your photo.
- First, sign up at Copyrocket.ai. Navigate to the website and click on the sign-up option to create your account.
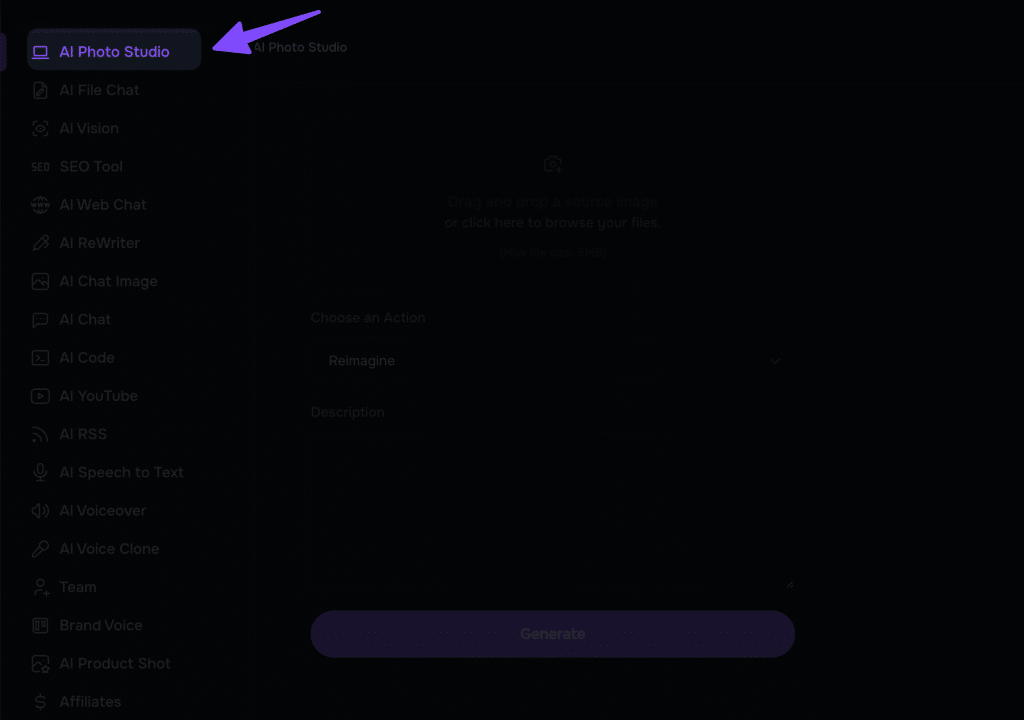
- After logging in, locate ‘AI Photo Studio’ on the left side of the dashboard and click on it.
- Drag your photo to the uploader. Ensure your photo meets the required standards for the best upscaling results.
- Select ‘Upscale’ from the dropdown menu. This option instructs the AI to enhance the resolution of your photo.
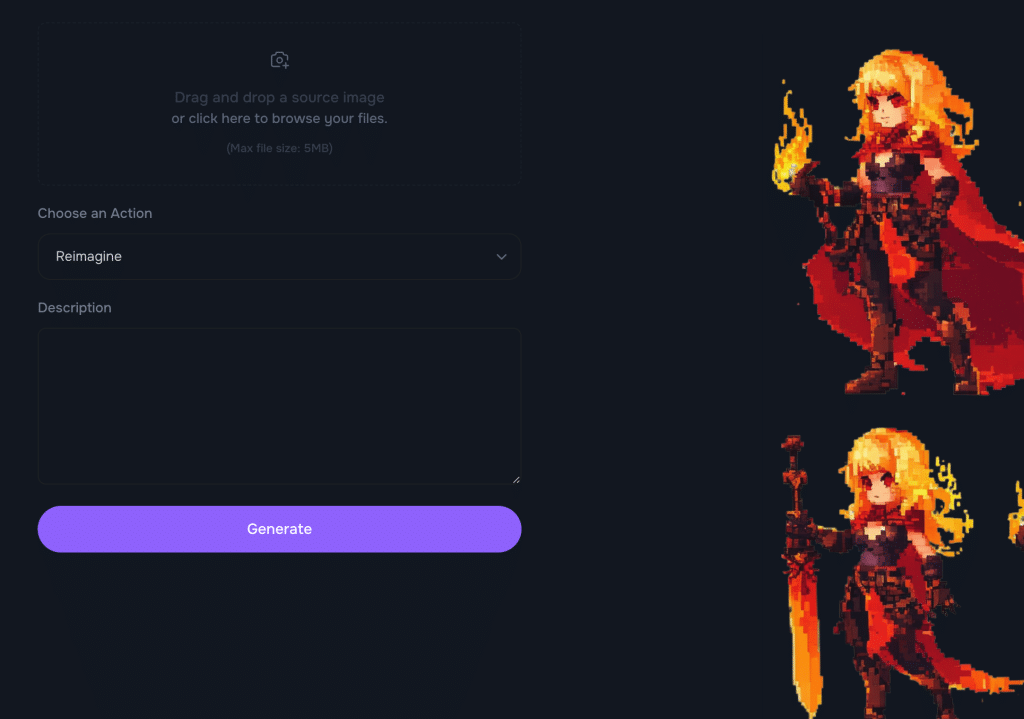
- Click on ‘Generate.’ The AI will now start processing your photo, enhancing its quality by improving resolution and clarity.
- Download your upscaled image. Once the process is complete, a ‘Download’ button will appear next to your photo. Click on it to save the enhanced photo to your device.
By following these steps, you can significantly improve the quality of your photos, making them more suitable for posting on Instagram. This method helps in fixing blurry Instagram photos, ensuring your posts look their best.
3 Frequently Asked Questions (FAQs)
3.1 Why do Instagram photos appear blurry?
Photos on Instagram appear blurry due to factors such as uploading low resolution images, incorrect aspect ratios, and the app’s data saving mode. Poor internet connection can also impact the uploading process, leading to blurry images.
3.2 Why Does Instagram Lower Picture Quality?
Instagram reduces image quality to enhance app performance and minimize data usage.By compressing images, Instagram ensures faster loading times and conserves bandwidth, which is especially beneficial for users with limited data plans or slow internet connections.
3.3 How can I improve the resolution of my Instagram pictures?
To improve the resolution of your Instagram pictures, start by maximizing your phone’s camera quality. Use the correct aspect ratio and upload photos in high resolution. Editing photos before uploading and ensuring a stable internet connection can also help maintain image quality.
3.4 Does Instagram compress images automatically?
Yes, Instagram automatically compresses images to optimize app performance and decrease loading times. This compression can affect the quality of uploaded photos, making them appear blurry or pixelated. Uploading high-quality JPEG files and using the right aspect ratios can mitigate this effect.
4 Conclusion:
In conclusion, fixing blurry Instagram photos in 2024 requires a blend of technical adjustments and creative solutions. By maximizing your phone’s camera quality, editing photos with tools like Canva, and making informed choices about aspect ratios and file formats, you can significantly enhance the quality of your Instagram posts. Additionally, addressing Instagram-specific settings such as disabling data saving mode, clearing the app’s cache, and adjusting for optimal upload conditions will further ensure your photos retain their clarity. Whether it’s through adjusting your Instagram data settings or ensuring a stable internet connection, these strategies collectively offer a comprehensive approach to overcoming the challenge of blurry pictures on Instagram. Embrace these tips to transform your Instagram feed with high-quality, engaging visuals that capture the attention of your audience.
Test your knowledge
Take a quick 5-question quiz based on this page.


