How to Create a Temporary Website for Free (4 Methods)
Choose Your Language:
Welcome to our guide on how to create a temporary website free of hassle!
Whether you’re looking to host a website for free, build landing pages for short term projects, or temporarily share files, we’ve got you covered. With tools like user-friendly website builders, free web hosting, and customizable templates, creating a site has never been easier.
From secure platforms with unlimited disk space to drag-and-drop features that simplify the process, this article is your complete resource for launching a temporary website.
Whether it’s for a portfolio, project, or to share images and videos with clients or friends, you’ll find all the features you need to publish and manage your site effectively. Let’s dive in and explore how to bring your ideas to life with a temporary website that’s a real game changer!
How to Create A Dog Breeding Website (Step-By-Step Guide)
1 Create a Temporary Website Using Free Web Hosting
Subheading: Create a Temporary Website Using Free Web Hosting
Are you looking to create a temporary website without breaking the bank? Well, you’re in luck! In this guide, I’ll show you three super easy methods to create your very own temporary website using free web hosting. And trust me, it’s so simple, even your grandma could do it (no offense to grandmas, they’re awesome!).
1.1 Method 1: Blogger Platform – Free and Fabulous!
Step 1: Sign up for an account on Blogger. It’s free and takes just a few minutes. Once you’re in, you’ll have access to various customizable templates.
Next Create a Blog name;
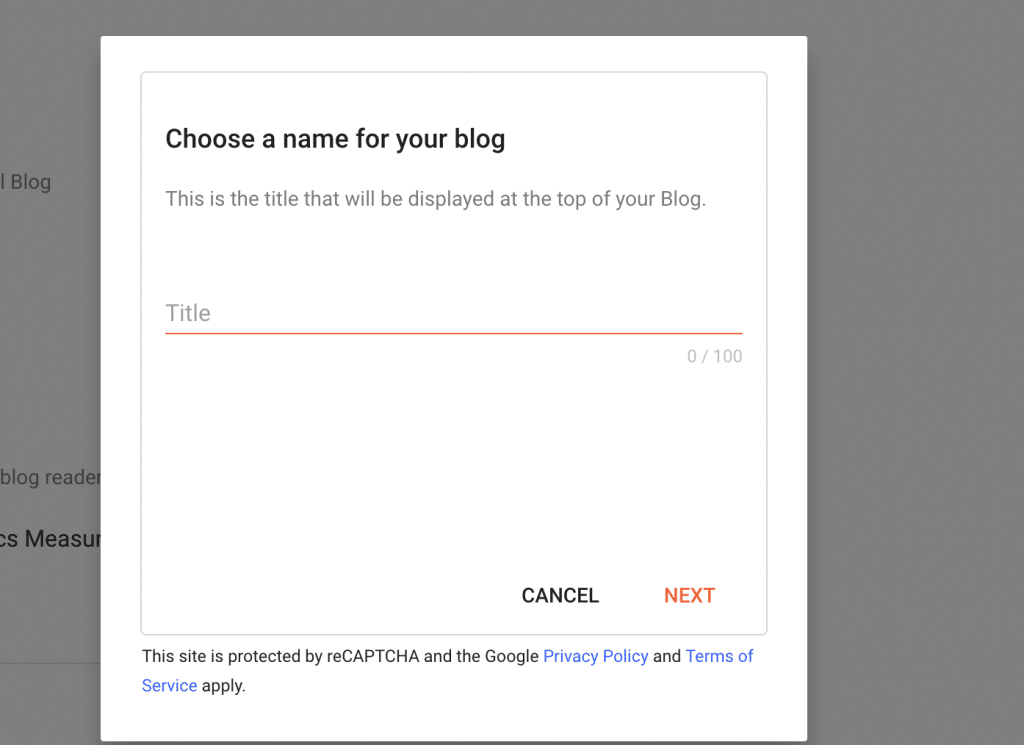
Then add your temporary address or URL;
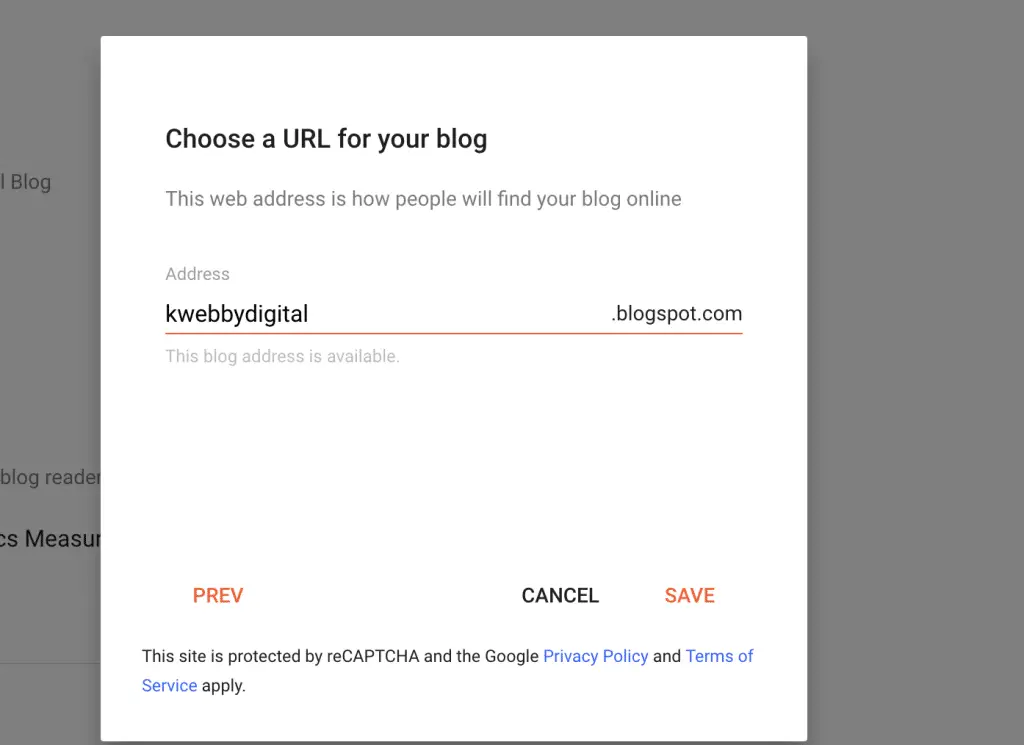
Click on Save to continue.
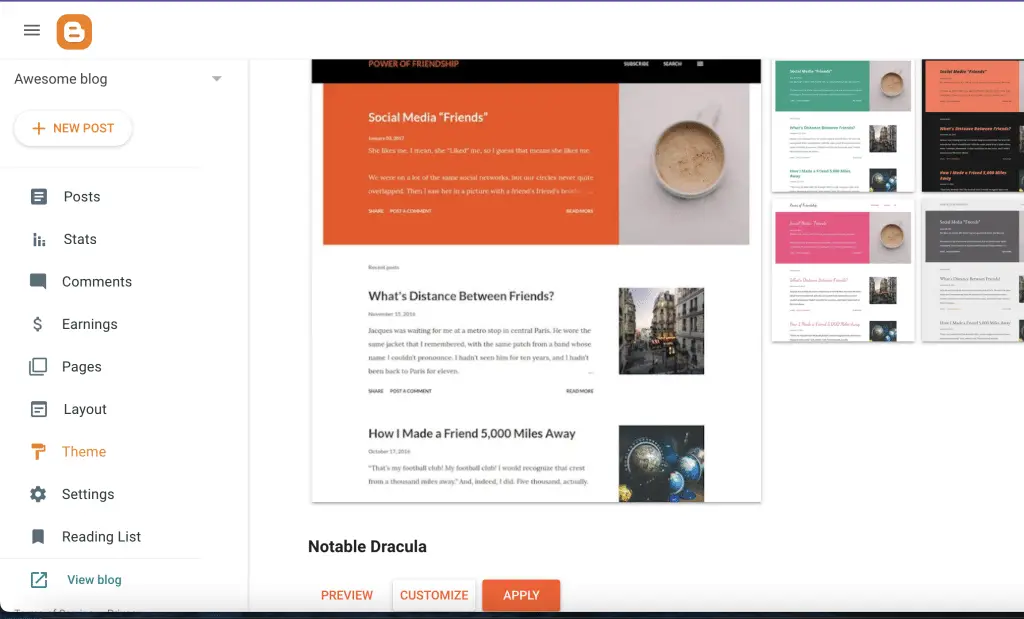
Step 2: Choose a template that suits your temporary website’s vibe. There are tons of options to choose from, so take your time and have fun exploring them.
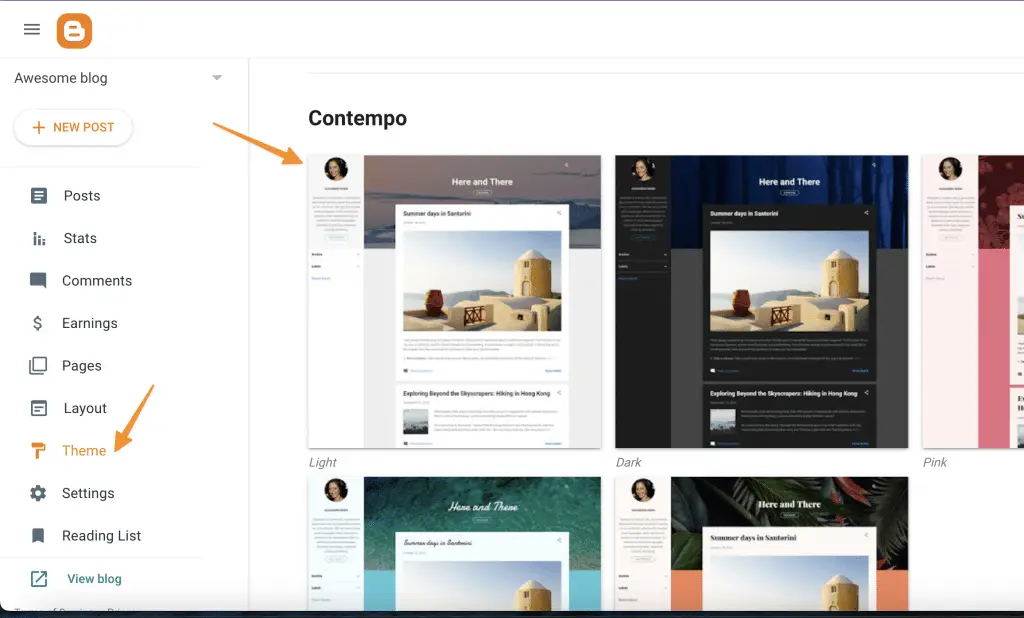
Step 3: Customize your template to make it uniquely yours. Add your desired text, images, and other elements to give it that personal touch.
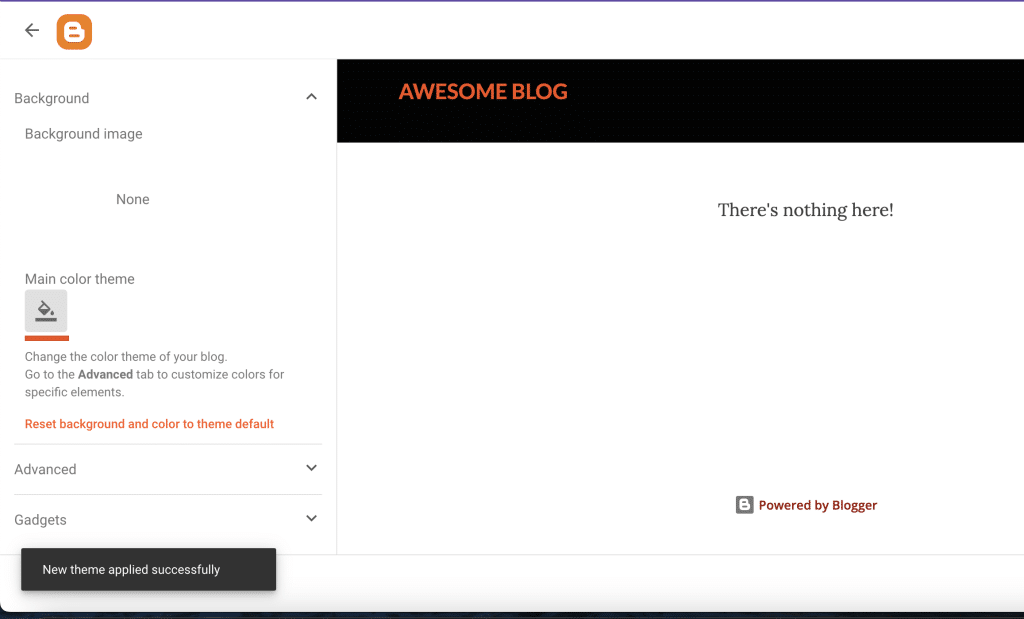
Step 4: Publish your temporary website and voila! You’re officially live on the web. Now you can share the link with your friends and let them marvel at your web designing prowess.
1.2 Method 2: WordPress.com Platform – Where Simplicity Meets Style!
Step 1: Head over to WordPress.com and sign up for a free account. It’s quick and easy, just like ordering pizza (but without the calories).
Step 2: Choose a theme that tickles your fancy. WordPress.com offers a plethora of stunning themes that will make your temporary website look like a million bucks.
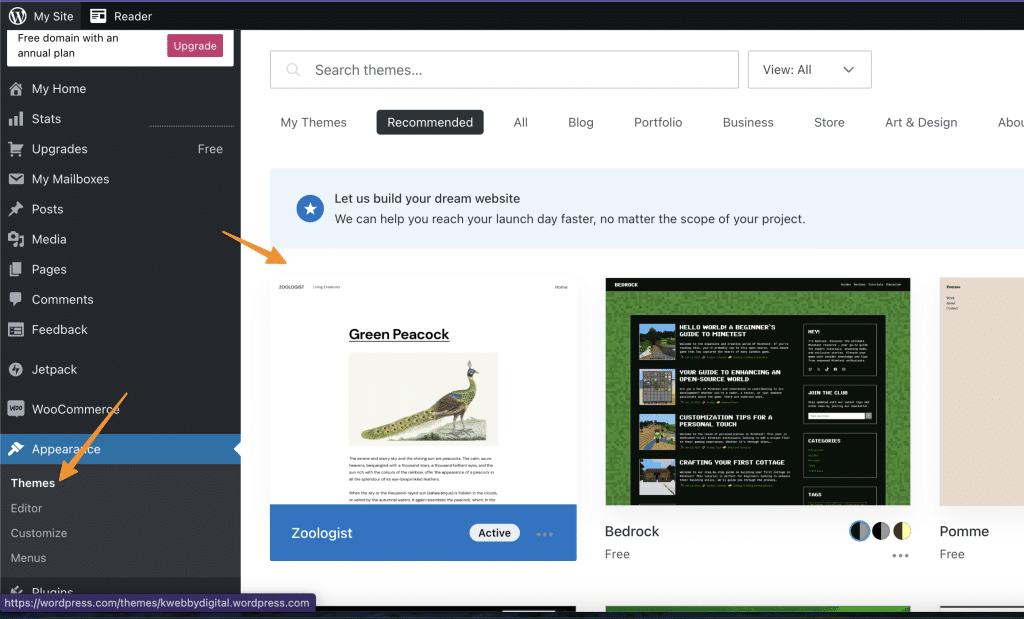
Step 3: Customize your theme by adding your text, images, and other cool features. Don’t be afraid to let your creativity run wild.
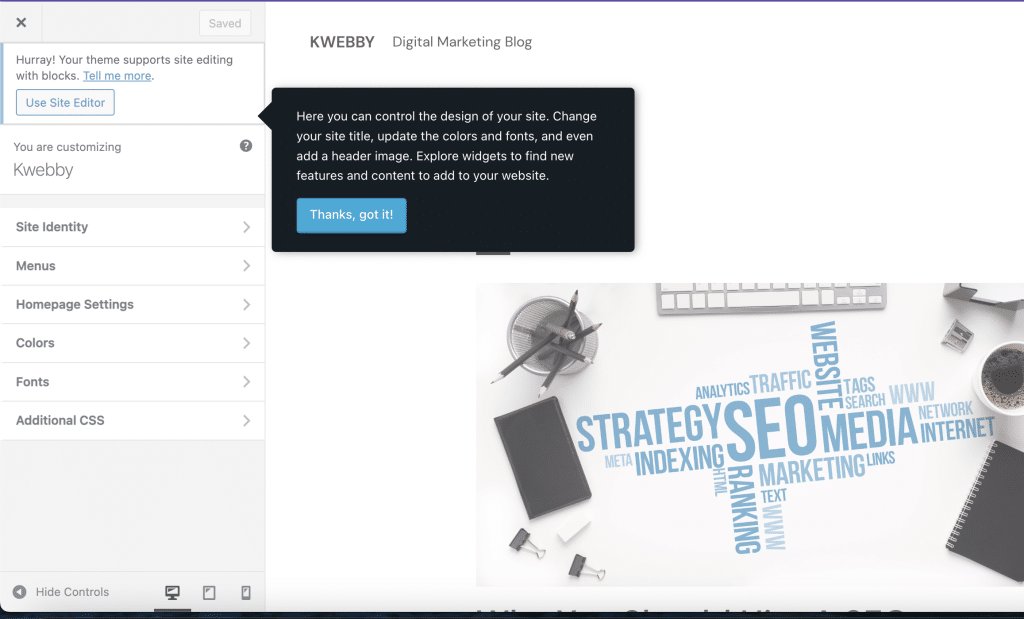
Step 4: Hit that magical publish button, and your temporary website will be live in an instant! Now you can sit back, relax, and bask in the glory of your temporary web creation.
How to Create a Betting Site with WordPress (The Truth & Solution)
1.3 Method 3: Wix – The Wixard of Website Building!
Step 1: Create a free account on Wix. It’s as easy as ABC (actually, it’s even easier).
Step 2: Explore the wide range of professionally designed templates and choose the one that catches your eye . You’ll be spoiled for choice, trust me!
Step 3: Customize your chosen template with your images, text, and quirky elements to make it truly yours. Let your personality shine through!
Step 4: Time to go live! Publish your temporary website with just a click of a button, and watch as your creation takes the internet by storm.
1.4 Method 4: Using Tiiny.host Microsite Builder
Tiiny.host is a game changer for anyone needing to temporarily share static websites, offering a user-friendly, fast, and free solution without the need for an account or technical expertise. This simple platform allows you to create a temporary website for free, perfect for portfolios, landing pages, or sharing short-term projects with clients. Here’s how to get started:
Step 1: Prepare Your Files
Ensure all your website files, including HTML, CSS, images, and other resources, are organized in a folder. Make sure the folder includes an index.html file as the starting point for your site.
Step 2: Compress the Folder
Compress your folder into a .zip file. This packaged format is essential for uploading your website to Tiiny.host.
Step 3: Upload to Tiiny.host
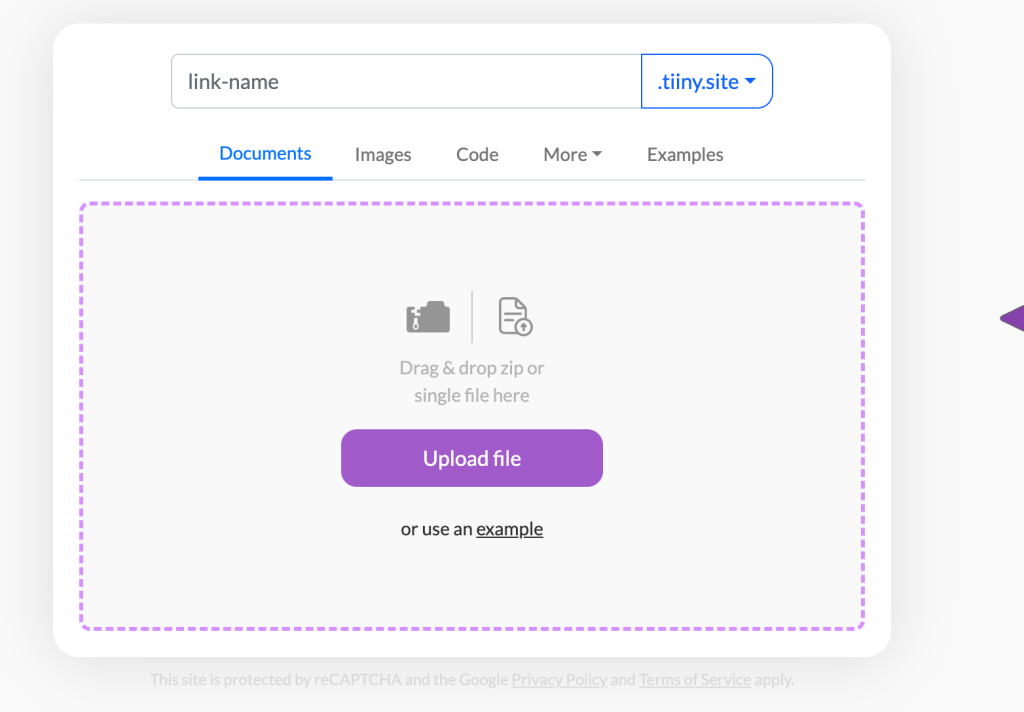
Visit Tiiny.host and follow these steps:
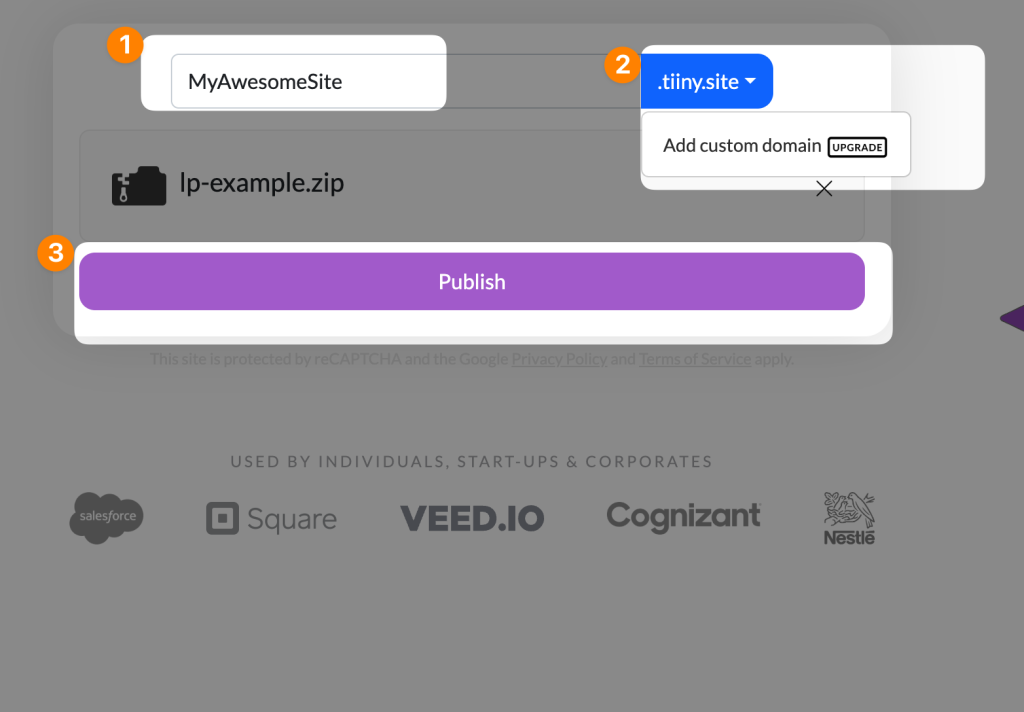
- Select a unique subdomain name for your site. This will form part of your website’s URL.
- Drag and drop your
.zipfile into the upload section. - Click the “Upload file” button to begin the process.
1.5 Extra Hosting Gems: More Free Hosting Options for You!
If you’re feeling adventurous and want to explore beyond the realms of Blogger, WordPress.com, and Wix, here are some other free hosting options you can consider:
1. Weebly – Build a beautiful temporary website with their easy-to-use drag-and-drop editor.
2. Jimdo – Create your temporary website in minutes using their user-friendly interface.
3. Webnode – Get your temporary website up and running quickly with their intuitive platform.
So there you have it, my friend! Three simple and free ways to create your very own temporary website.
Whether you choose the user-friendly Blogger, stylish WordPress.com, or the versatile Wix, the possibilities are endless. Time to let your temporary creativity shine and share your temporary web masterpiece with the world.
Happy web creating!
2 Create a Temporary Website Locally using LocalWP.
Subheading: Create Temporary Website Locally Using LocalWP
Are you ready to embark on the journey of creating a temporary website? Well, buckle up and prepare to dive into the world of website creation like never before! In this step-by-step tutorial, we’re going to show you how to create a temporary website locally using LocalWP. Trust me, it’s easier than riding a unicycle while juggling pineapples!
Step 1: Get Your LocalWP Ready
Alrighty then! In order to get started, you’ll need to fetch yourself a copy of LocalWP. It’s a handy-dandy tool that allows you to create and manage websites right from the comfort of your own computer. Head over to their website, download and install LocalWP like a champion.
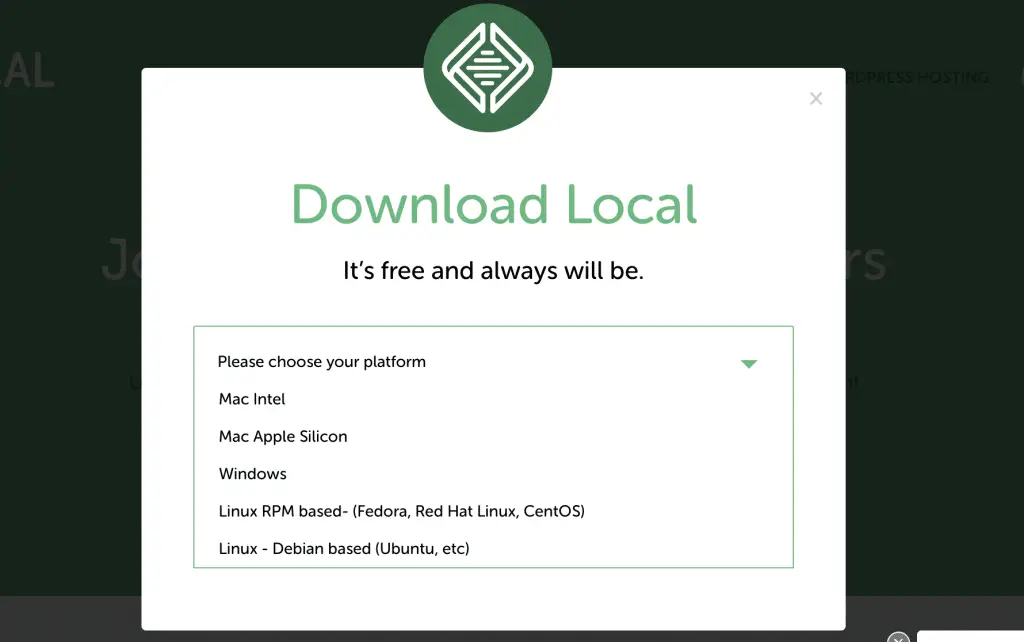
Step 2: Fire Up LocalWP
Now that you’ve successfully tamed the LocalWP beast, it’s time to fire it up and let it flex its muscles. Open LocalWP and prepare to be amazed by its awesomeness.
Step 3: Create a New Site
You’re on a roll now! Click on the “Create a New Site” button in LocalWP and let the magic begin. Give your temporary website a catchy name like “PixieDustDreams” or “WhimsicalWanderings.”, It will be added to your Temporary URL.
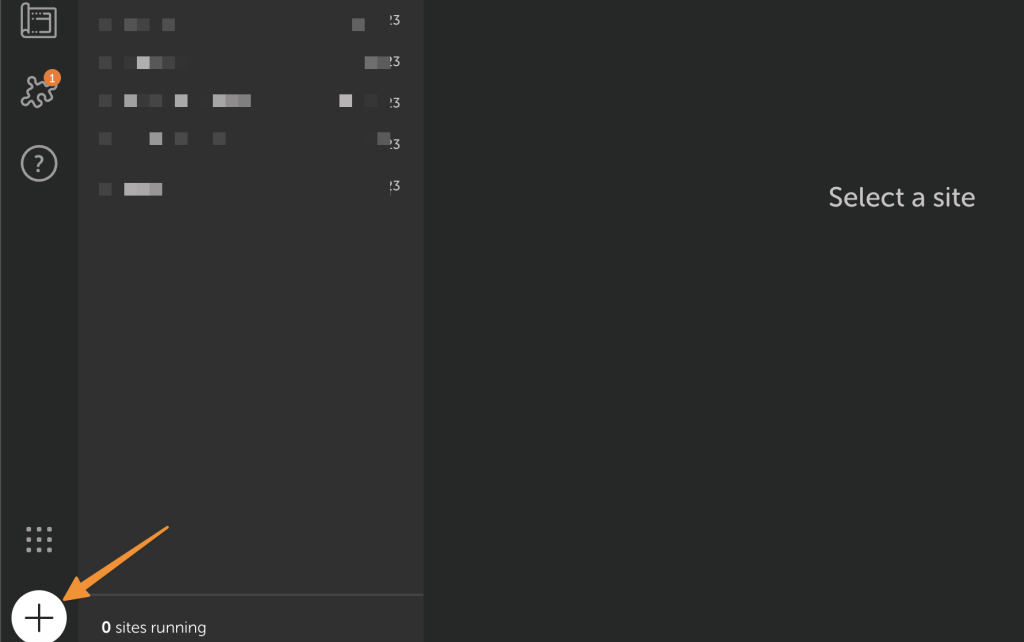
Remember, this is your temporary playground, so let your creativity soar like a unicorn on roller skates!
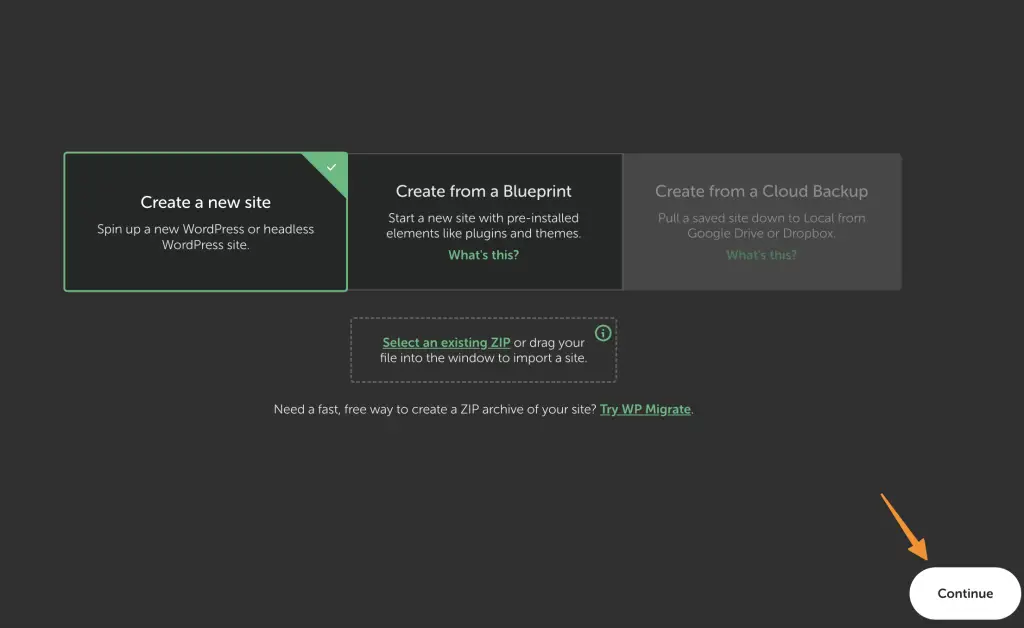
Step 4: Choose Your Environment
Next up, you’ll need to choose the environment for your temporary website. LocalWP offers only WordPress Option as default.
Step 5: Select Your WordPress Version
Ah, decisions, decisions! This step is where you get to choose the version of WordPress you want to install for your temporary website. You can go with the latest and greatest or opt for an older version if you’re feeling nostalgic. Once you’ve made up your mind, click the “Next” button with confidence.
Step 6: Set Up Your Temporary Website
Now it’s time to add some pizzazz to your temporary website. Enter a temporary login name and password that even the mischievous leprechauns would envy. Just make sure it’s memorable enough for you to access it later. Feel free to sprinkle your temporary website with a cool theme and essential plugins as well!
Step 7: Et Voila! Your Temporary Website is Ready
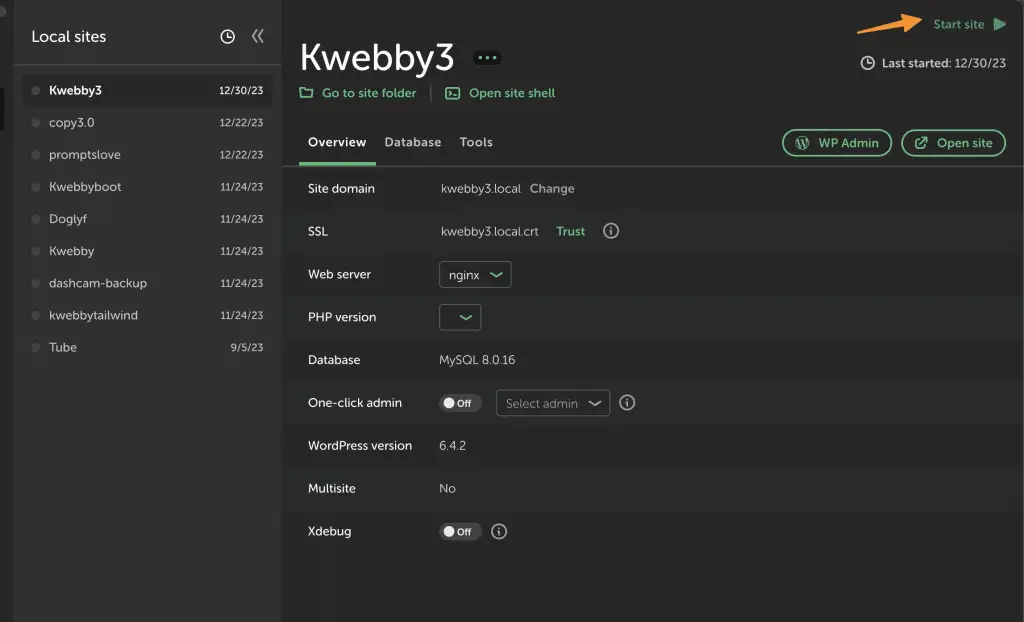
Congratulations, maestro! You’ve successfully created a temporary website locally using LocalWP. Give yourself a pat on the back and a round of applause. Now you can dive into the world of web design, experiment with different layouts, and unleash your inner creative genius without a care in the world.
Remember, this temporary website is your sandbox for adventure and experimentation. So go forth, have fun, and don’t be afraid to break a few virtual windows along the way. After all, the beauty of creating a temporary website is that you have the freedom to explore, learn, and grow without any lasting consequences. Happy website tinkering, my adventurous amigo!
3 Final thought!
Creating a temporary website free of cost has never been easier with platforms like WordPress, Wix, and Blogger offering free web hosting solutions. These website builders provide all the features you need, from customizable templates to drag-and-drop tools, making it simple to create professional-looking landing pages for short term projects or to temporarily share ideas, files, or portfolio work. Whether you’re launching a site to publish content, showcase images, or share a link with clients and friends, these platforms offer secure hosting with unlimited disk space and a free plan option.
For those requiring complete control, locally hosting with HTML and Javascript can be a game changer, especially for custom projects or when creating a website for free without platform limitations. This approach ensures you can fully customize the site to represent your brand, while also maintaining data security and offering flexibility to adjust the domain, URL, or resources to meet your needs.
Temporary websites are incredibly helpful for companies or individuals looking to gain feedback from visitors or promote specific events quickly. These platforms make it easy to sign up, process data, and launch with minimal effort. Whether you’re creating a temporary webpage for a project, testing a design concept, or building a browser-based page to attract attention, these tools are a secure and effective way to reach your audience.
With their user-friendly interfaces and range of templates, website builders and hosting solutions simplify the process, from setup to publish. They’re the perfect platform for anyone looking to create a temporary site that makes an impact without the commitment of long-term hosting.
Test your knowledge
Take a quick 5-question quiz based on this page.


