Adding your WordPress sitemap to search engines is an important step in getting your website ranked higher.
In this tutorial, we will show you how to add your sitemap to Google, Bing, and Yandex.
We will also discuss the benefits of submitting your sitemap to search engines. If you have not added your site map yet, or are struggling to add it, follow the simple steps below!
What is a Sitemap?
A sitemap is a file where you can list the web pages of your site to tell Google and other search engines about the organization of your site content.
Search engine web crawlers like Googlebot read this file to crawl your site. A sitemap is like a roadmap that tells Google which pages on your website are most important.
Why Submit a Sitemap?
There are a few reasons why you would want to submit a sitemap to Google and other search engines:
- To tell Google about pages on your site that are available for crawling.
- To provide information about specific types of content on your site, such as when it was last updated.
- To specify the relative importance of different pages on your site.
- To request that certain pages not be crawled by Google.
- An easier way for search engines to recognize your links or content for their indexes.
How to Create A Sitemap in WordPress?
There are various ways to create a sitemap in WordPress using WordPress plugins but in this tutorial, we will use the most popular SEO plugin RANKMATH which is one of the best out there for all of your digital marketing needs.
First, Download and Install the RANKMATH plugin from the WordPress Plugin Directory or get your full version copy from the RANKMATH website (recommended);

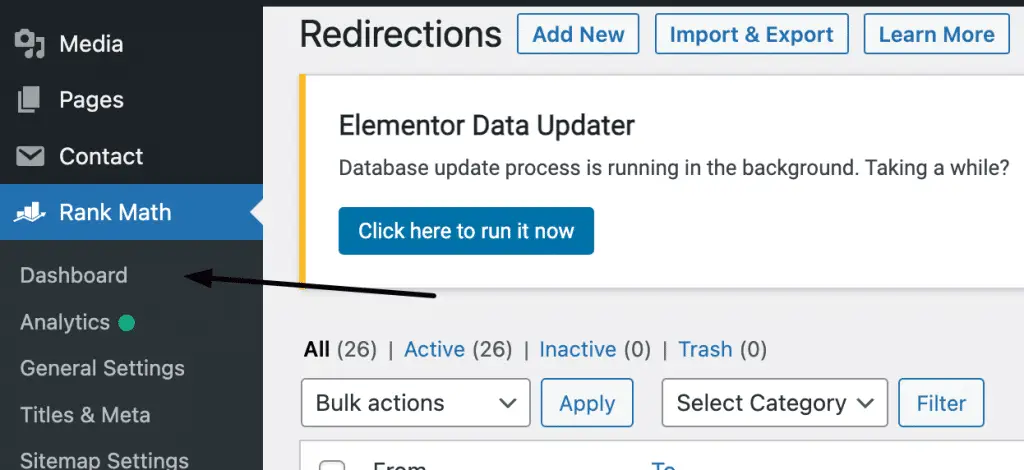
After installation and Activation of the RANKMATH Plugin, Mouse-hover to RANKMATH option on the left panel of WordPress and Click on “Dashboard”;
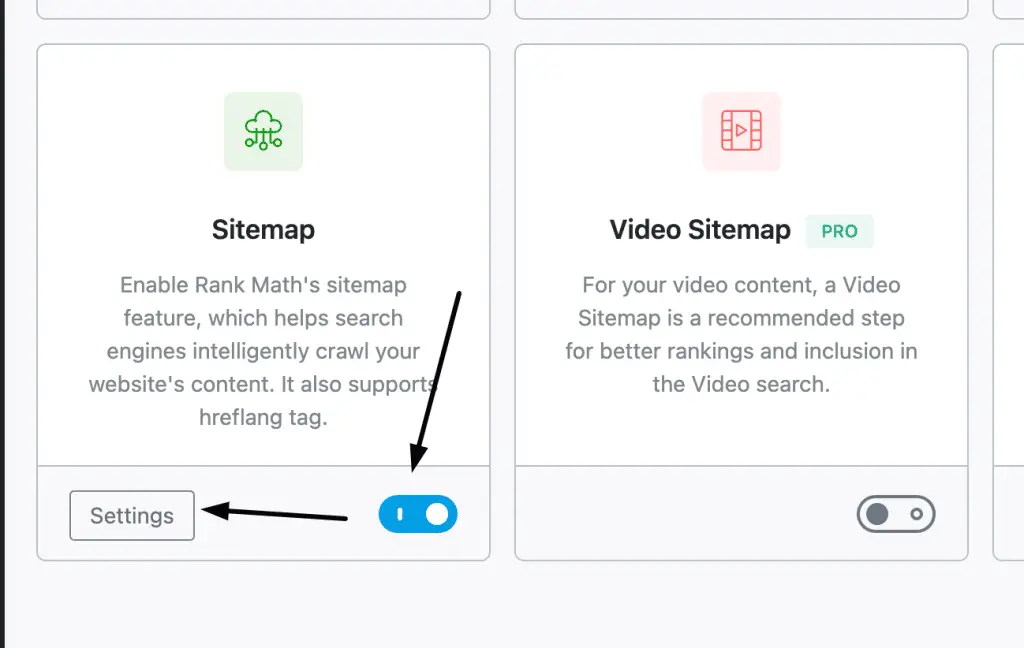
Enable Sitemap in the last row and go to settings;
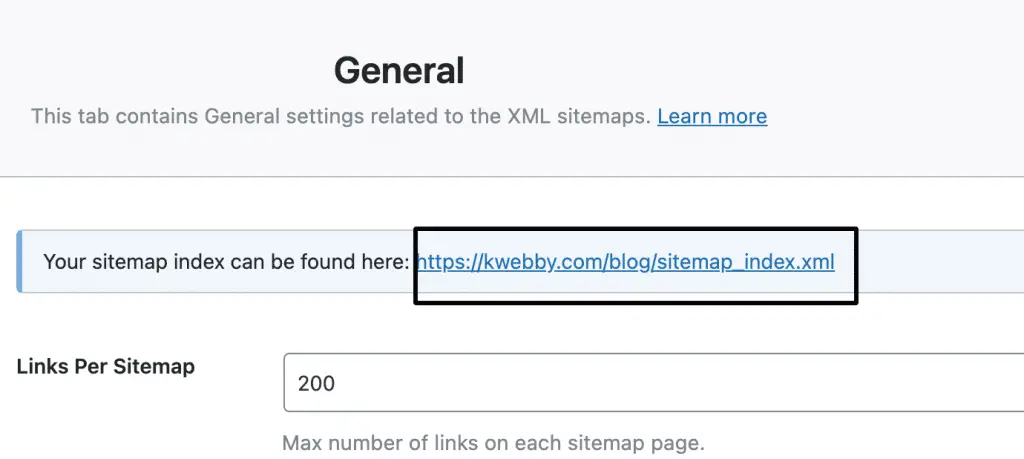
There you will get the URL of your sitemap i.e. https://yourpdomain.com/sitemap_index.xml
Configuring Sitemaps in RANKMATH
Not every URL you want in your sitemap right?!
Therefore, shortlist the types of URLs you want in the sitemap such that only relevant pages should get indexed by search engines like Google, Bing, Yahoo, Yandex, etc.
Best Practices Includes URLs of ;
- Homepage
- Blog Posts
- Important Pages i.e. Contact, Privacy, Landing, Terms, EULA, Cookies Policy
- Images
- Categories Archives
Best Practices Excludes URLs in Sitemap Of;
- Tags
- Attachment pages
- Membership Pages
Now you know by now which URLs to include or not, let’s start configuring it in our plugin;
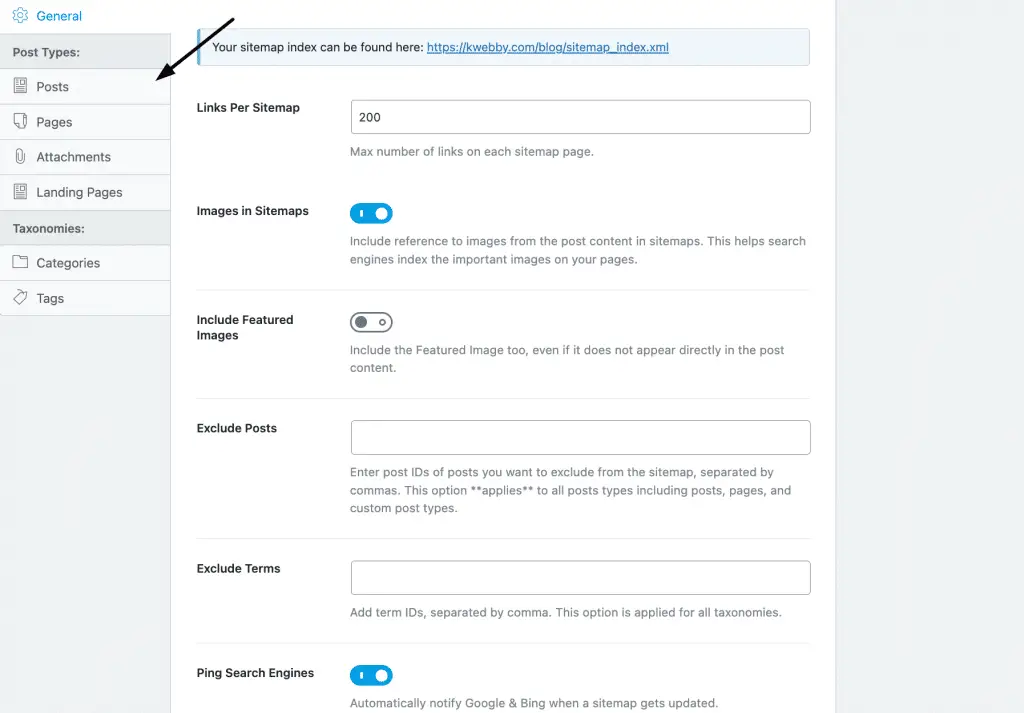
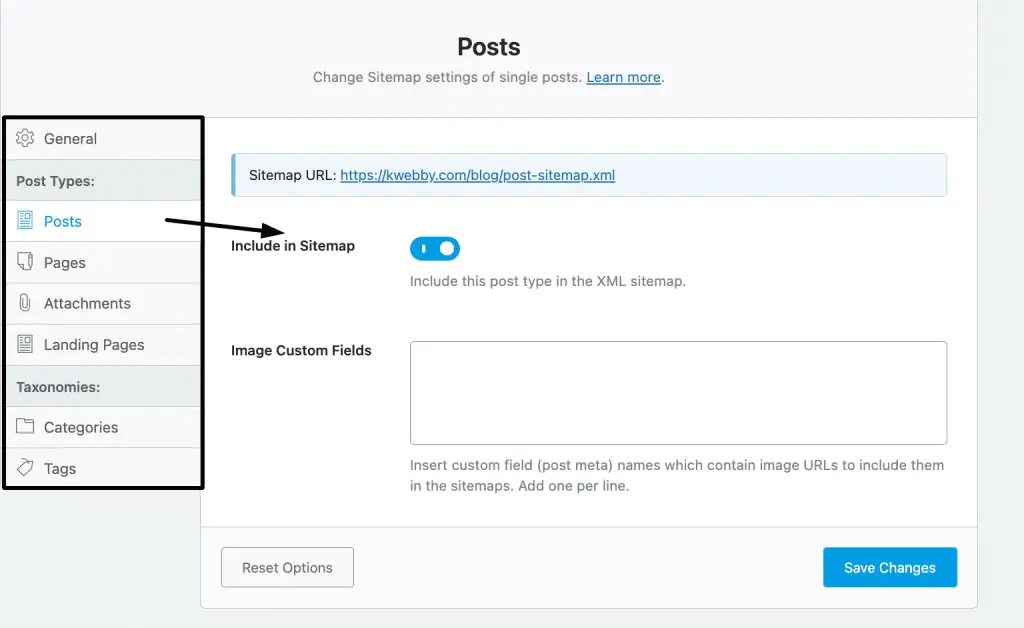
Browse Through the tabs on the left side and toggle the button which sitemaps you want to include or not;
Now, If you open the Sitemap URL, you will find your structured sitemap like below;
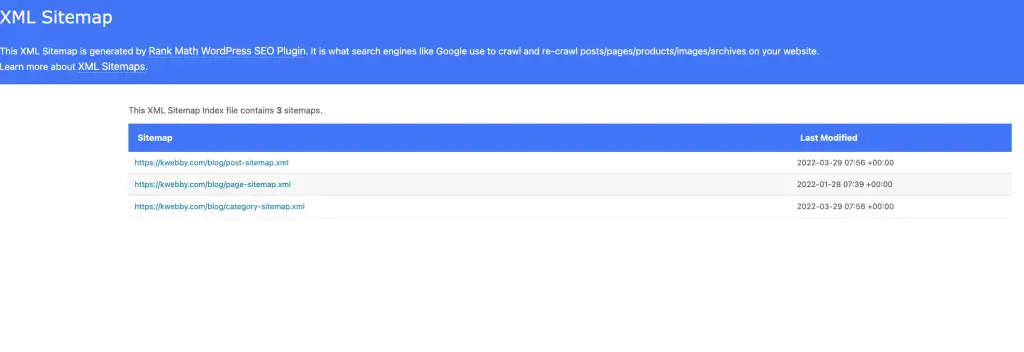
Mainly divided into 3 parts i.e. Post, Categories and Pages.
Leave the page as we need it to submit them to search engine’s webmaster consoles as follows.
How to Create A Sitemap in Non-WordPress Sites?
If you are not using WordPress, there are a few ways to create your sitemap.
You can use an online sitemap generator or create one manually.
Creating a sitemap manually is not recommended unless you have a small website with a few pages.
It is easier to use an online sitemap generator or a sitemap plugin.
Here are a few online sitemap generators:
- Kwebby’s XML Sitemap Generator
- Screaming Frog (500 Urls for free)
We will learn how to create by using both of these FREE tools as follows;
Generate Sitemap With Kwebby’s Sitemap Generator
Kwebby’s Sitemap Generator is our forever free in-house tool to create XML sitemaps easily in one single click.
First, go to our tool page;
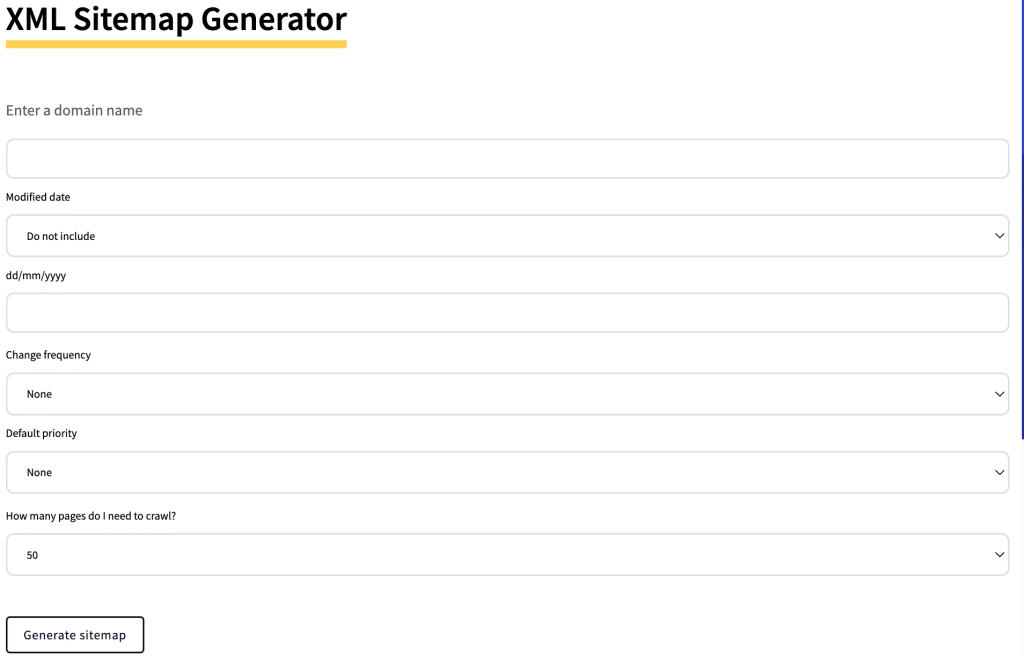
Now following are the fields you need to fill;
- Domain name – Your domain name i.e. mysite.com
- Modified Date – When is the last time you have modified your website. you can select “Today’s date” from the drop-down or select and enter the custom date in dd/mm/yyyy format.
- Change Frequency – How often do you update your website
- Default Priority – You can leave it “none” if you don’t know about it.
- Pages to Crawl – How many pages you want to crawl, our free tool can crawl upto 5000 Pages, therefore you can select accordingly.
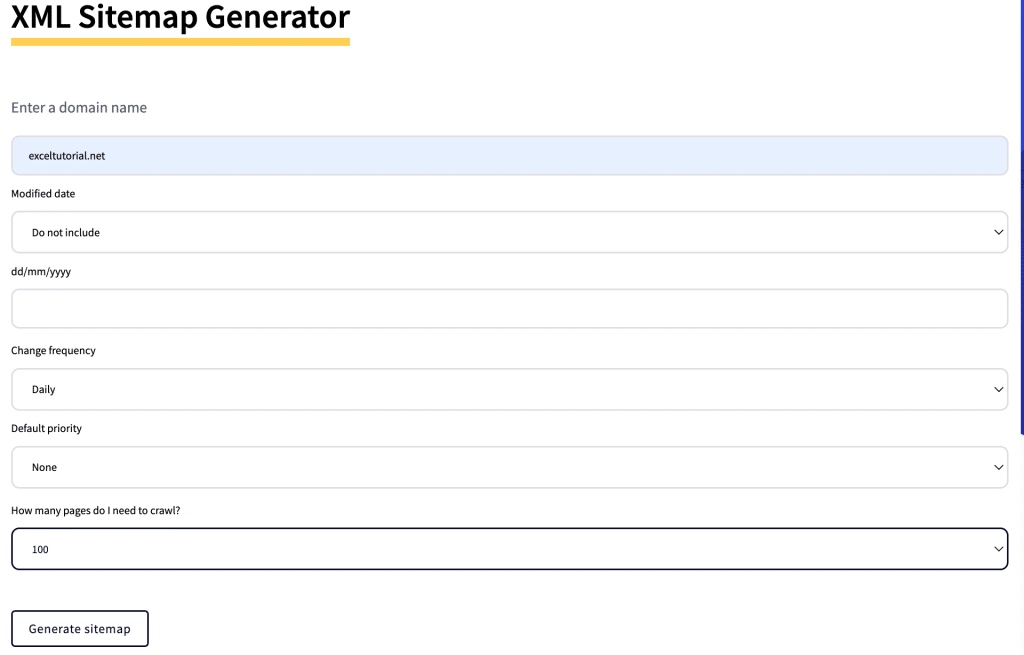
Now click on “Generate Sitemap”, The output will look like the below;
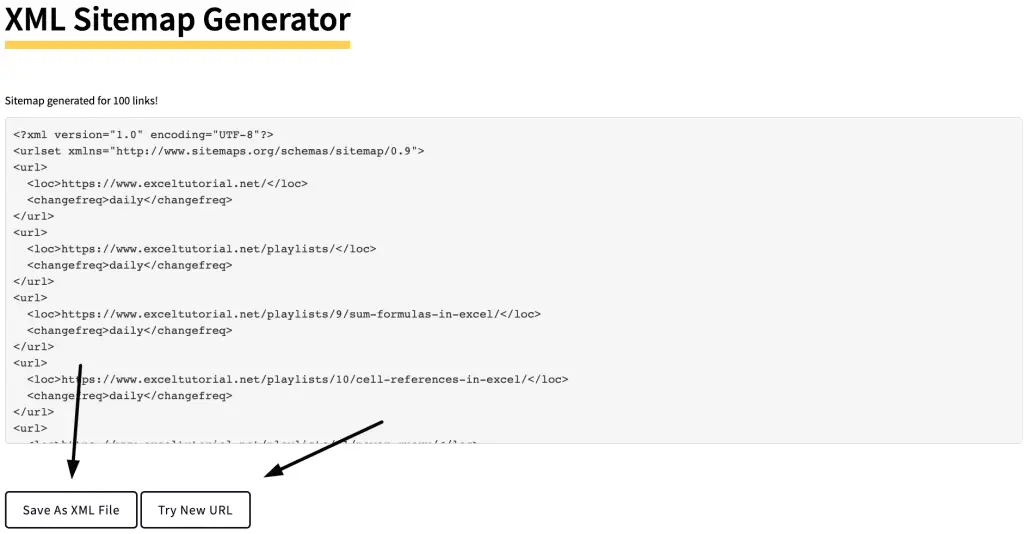
You can either save the output as an XML file or you can copy and paste into the new file on your desktop and upload it to your website.
Generate Sitemaps with Screaming Frog
Screaming Frog is a desktop-based sitemap generator that can be used for both small and large websites.
It has both free and paid versions. The free version has some limitations like it can only crawl 500 URLs but it’s enough if you have a small website or just starting out.
First, Download the Screaming Frog tool from their website.

Now, open the tool and enter your website’s URL in the “Address” field and click on “Start”.
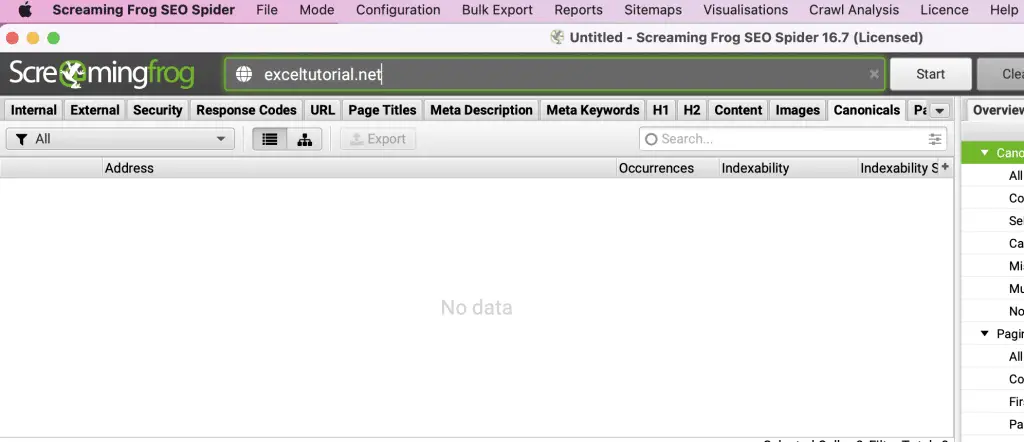
The tool will start crawling your website and will show the results on the main screen. It may take a while to perform crawl depending on the size and number of pages of your website.
You can see how many pages it has crawled on the left side.
When it’s done, go to “Sitemaps > XML Sitemaps”
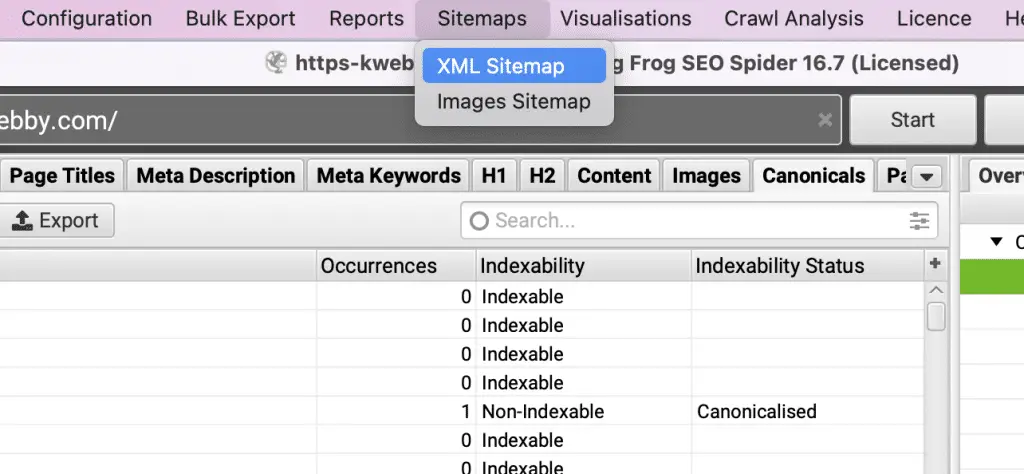
Now Select Pages to include;
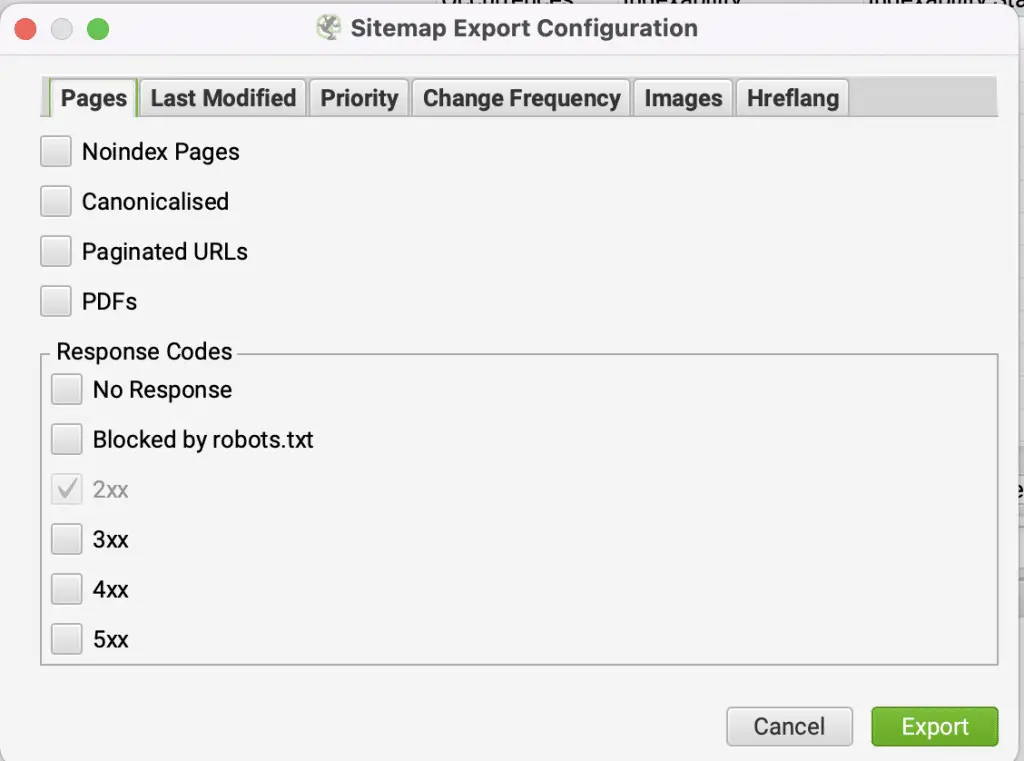
Include Pages with a 2XX code response which Implies an OK response that means the page is valid and working.
Include pages with the canonical URL which means the page is valid and does not have any duplicate content.
Other Options to consider;
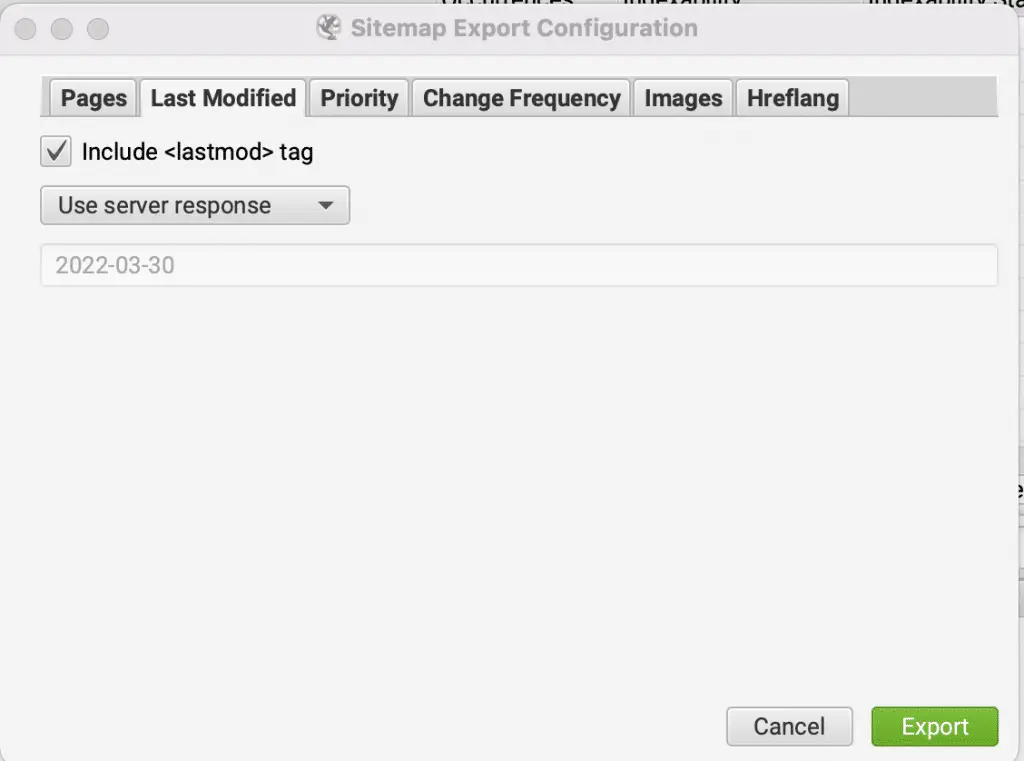
Last Modified : If you’re not aware of this option than you can skip it, otherwise default last modified option include <lastmod> tag with “Use Server response” option enabled. It is highly recommend to use this since it uses server response to modify the same.
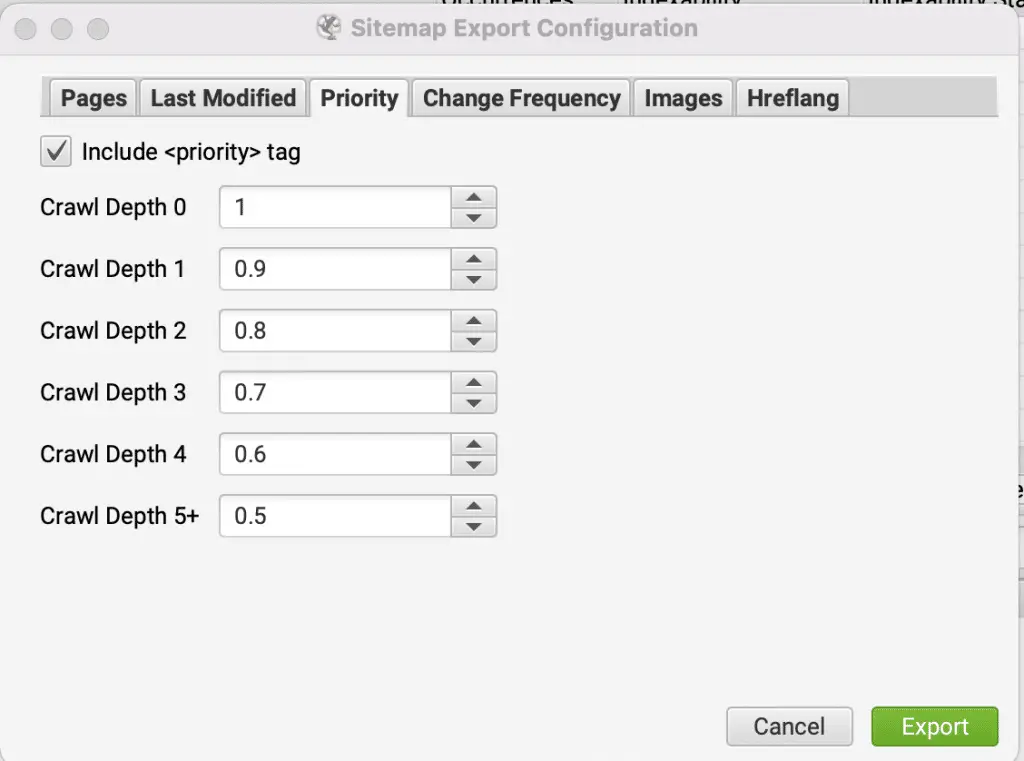
Priority: By default screaming frog includes Priority tag which has different crawl depth as you can see in the snapshot below;
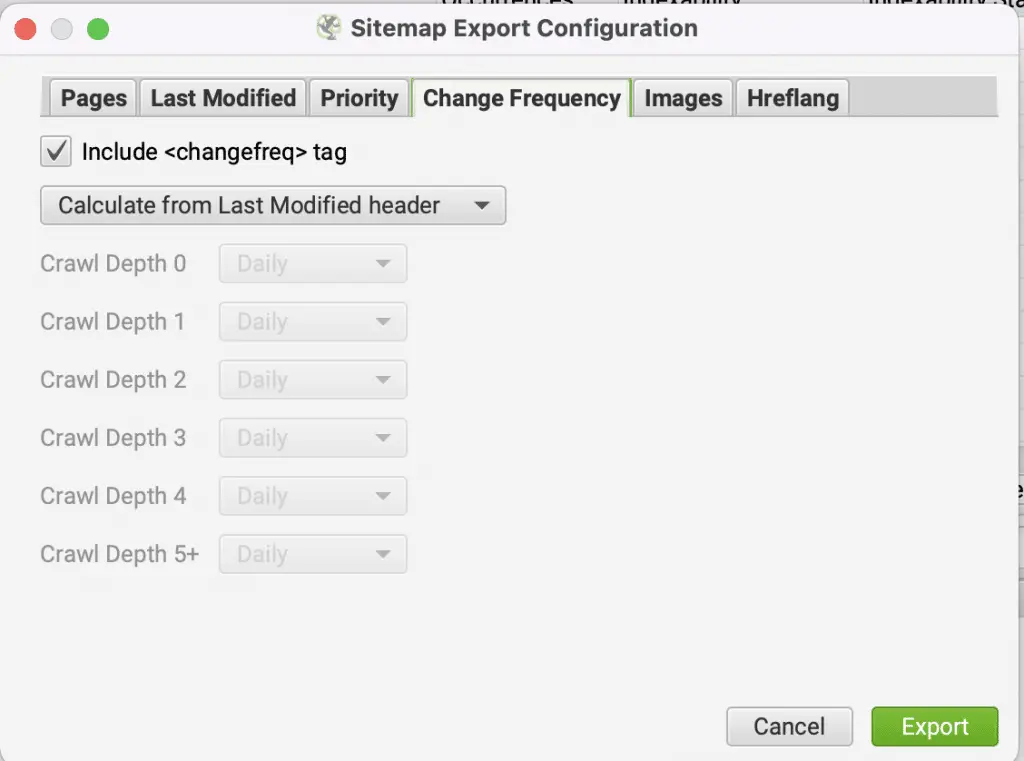
Change Frequency: You can either use Last Modified Header or Crawl Depth settings to include <changefreq> tag in your XML Sitemap, We suggest you to keep it default with “calculate from Last Modified Header” option;
Images: If you want to include images in your XML Sitemap then do check the option of “include Images” as below;
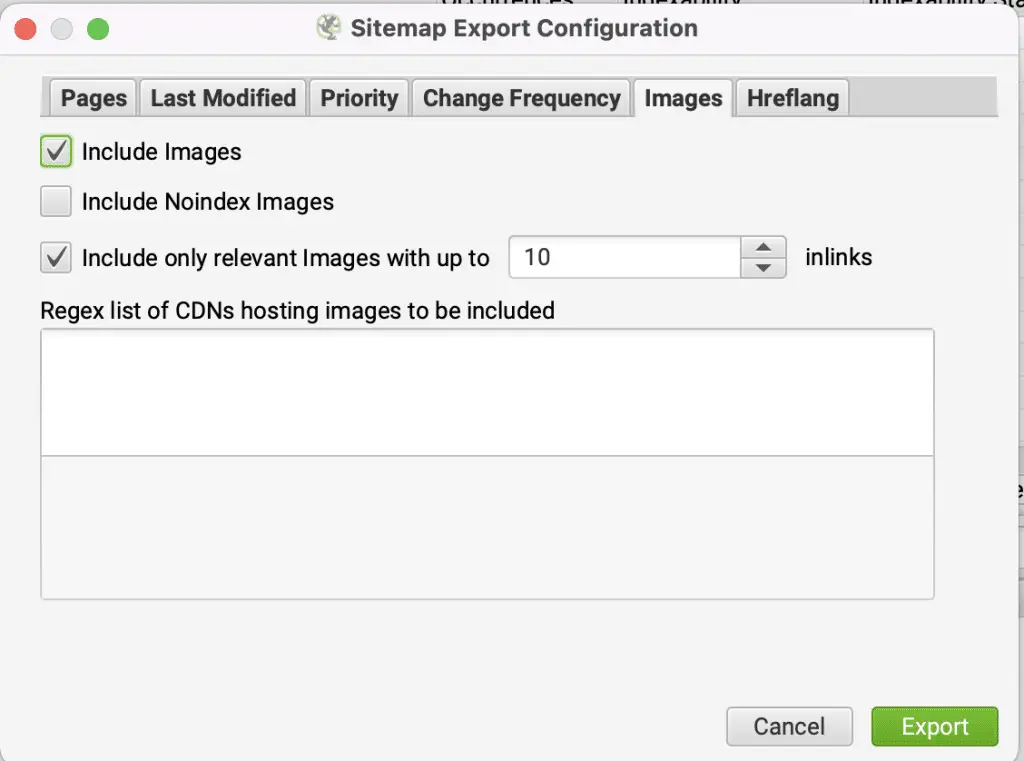
If you use CDN for image hosting then you can also include regex list of CDNs images which you want to include into your sitemap. If you don’t know about this, then you should contact your CDN service provider.
Theres also an option to include NoIndex Images which is tagged into your pages, if you want it to include into your sitemap, then you can also check that option.
Hreflang: This option will include link elements for each URL that has HREFLANG data, If you want you can enable it, but I suggest you to disable the same to discourage search engines to follow it.
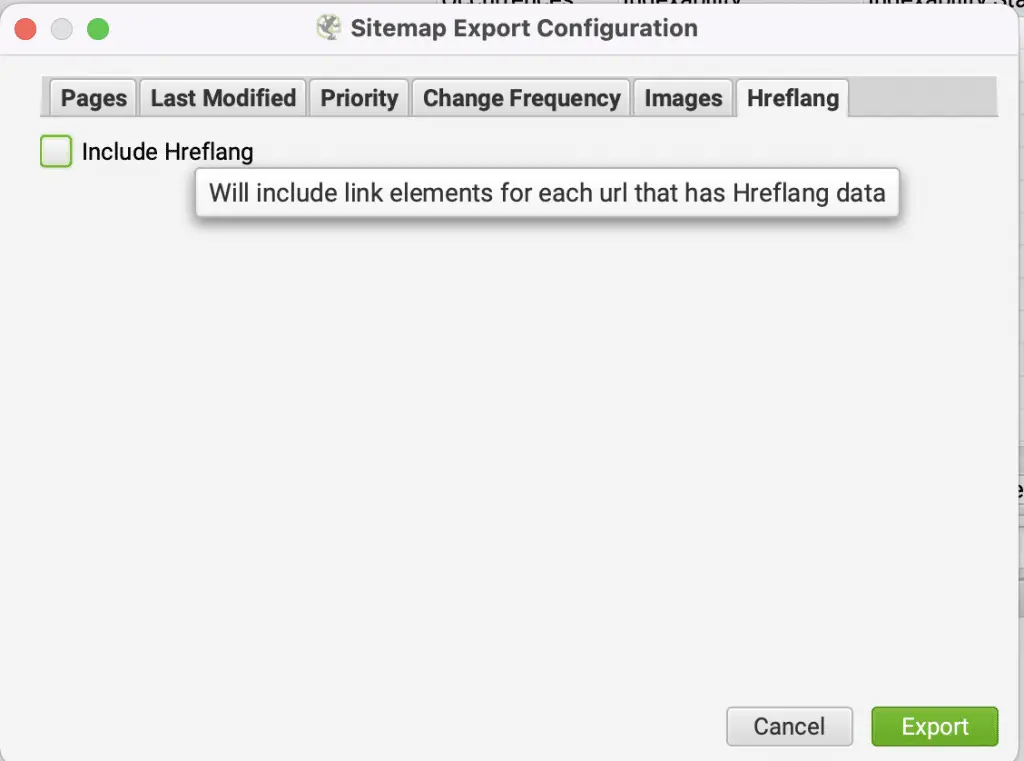
Now click on export and save your file as XML sitemap and upload the same to your domain’s root folder.

Why is it better to use Plugins for WordPress Sitemap?
WordPress Plugins are the better way to generate WordPress Sitemaps because it automatically updates the sitemap whenever you create new content, pages, media, etc. such that you won’t need to manually update it every time.
Following are some of the WordPress plugins available to generate WordPress Sitemap;
- Rankmath SEO Plugin
- Yoast SEO
- XML Sitemap
- All in One SEO Plugin
You can use either of them to generate custom WordPress Sitemap with custom rules to index your pages faster in search engines.
How to Submit Your WordPress Sitemap To Google
After you have generated your sitemap, the next step is to submit it to Google.
You can do this by adding your sitemap to your Google Search Console account.
If you don’t have a Google Search Console account, you can create one for free.
Once you are logged in, click on “Sitemaps” from the left sidebar and then click on “Add a New Sitemap”.
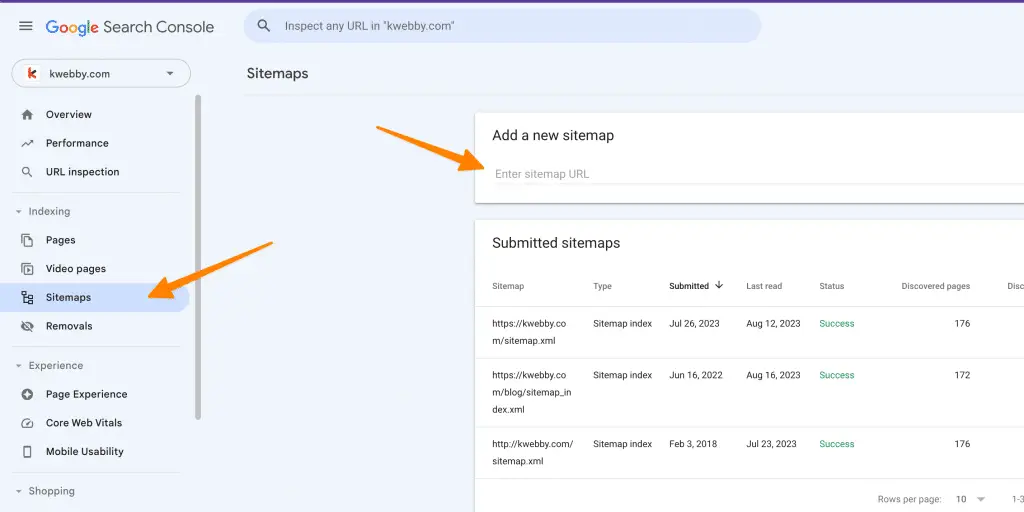
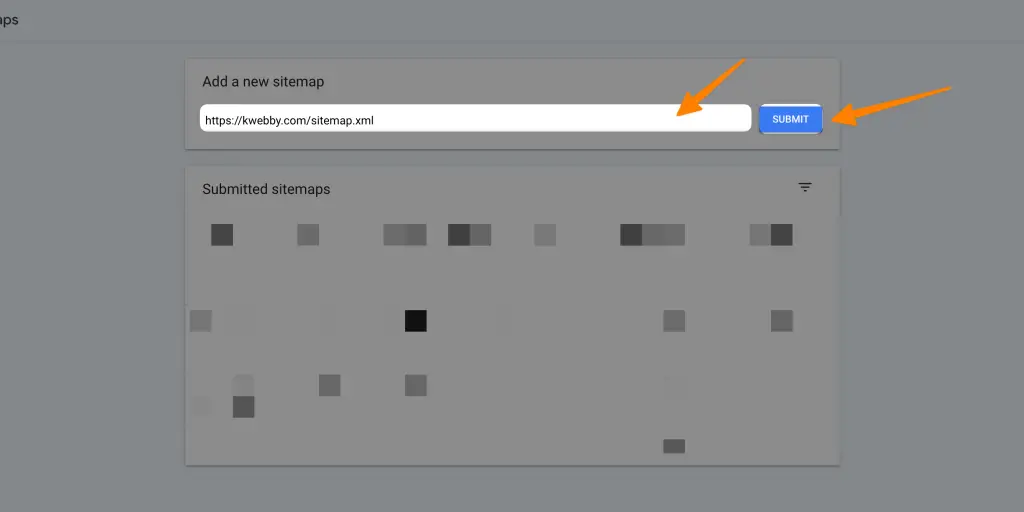
Enter your sitemap URL in the “Sitemap” field and click on “Submit”.
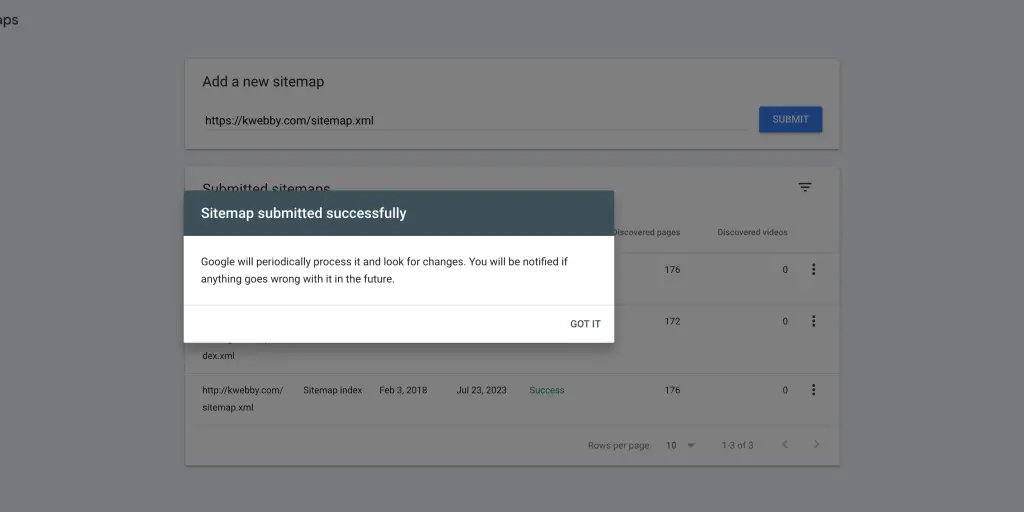
You will see a success message like below;
How to Submit Your WordPress Sitemap To Bing
Just like Google, you can submit your sitemap to Bing Webmaster Tools.
If you don’t have a Bing Webmaster Tools account, you can create one for free.
Once you are logged in, Choose your website from the left sidebar and then click on “Sitemaps”.
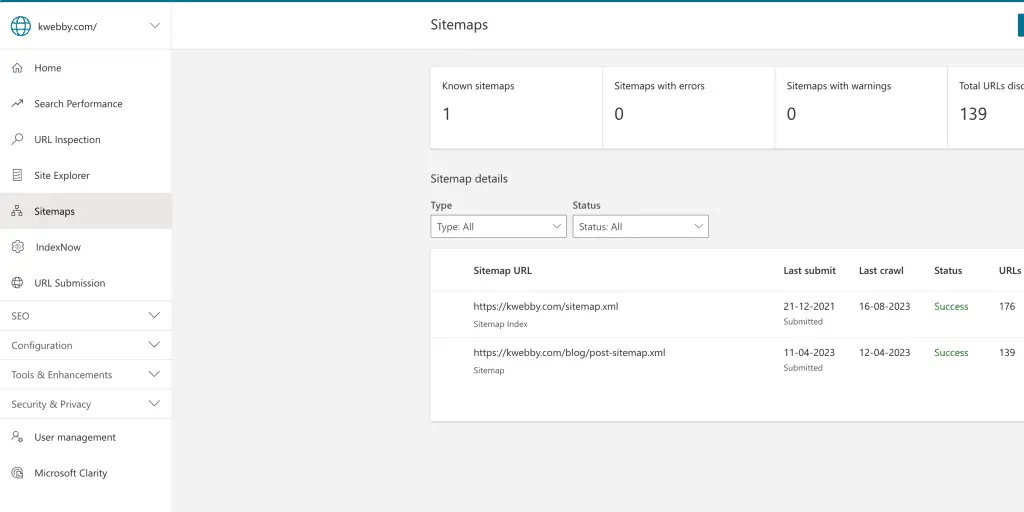
Now, click on “Submit Sitemap” and then paste your Sitemap URL as below;
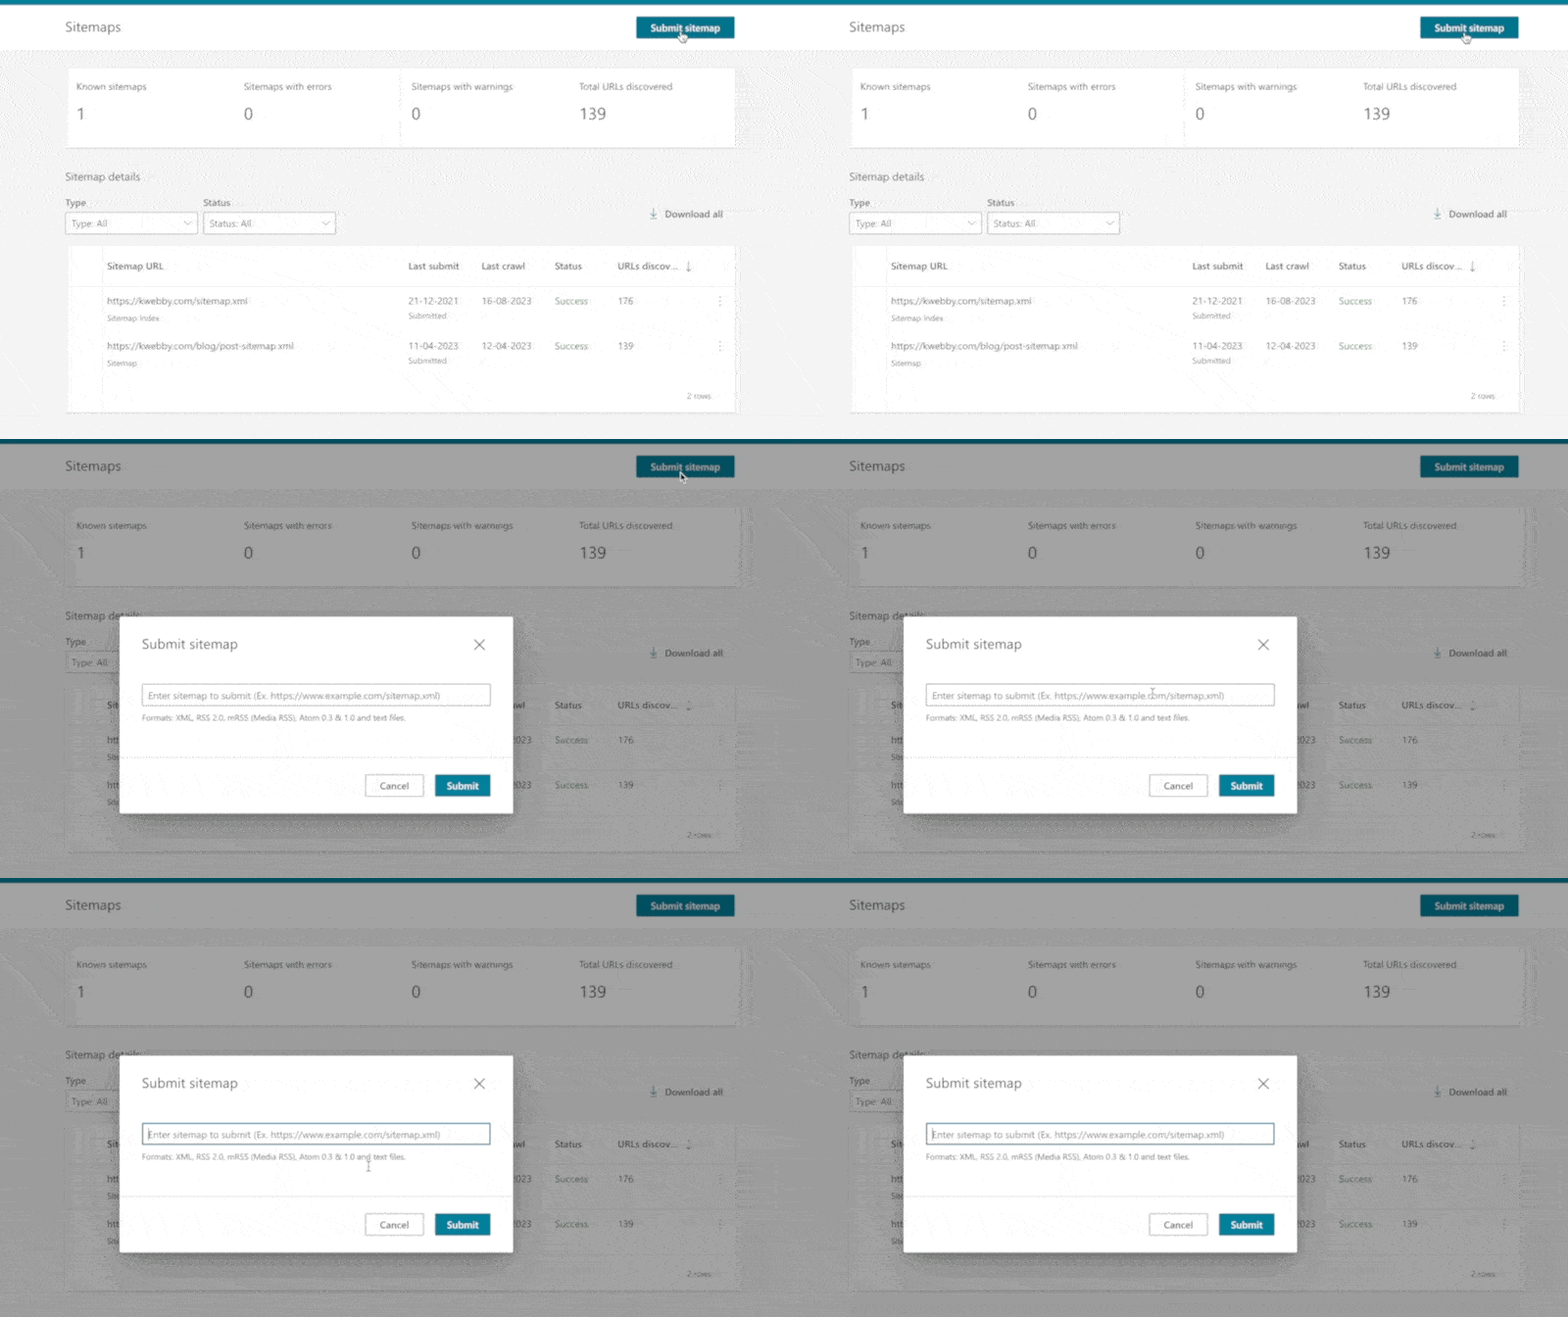
Now, click on submit and you’re done.
How to Submit Your WordPress Sitemap To Yandex
Yandex is a Russian search engine that is used by millions of people.
If you want to reach out to this audience, then you need to submit your sitemap to Yandex Webmaster Tools.
If you don’t have a Yandex Webmaster Tools account, you can create one for free.
Once you are logged in, Choose your website from the topbar and select “Indexing” as below;
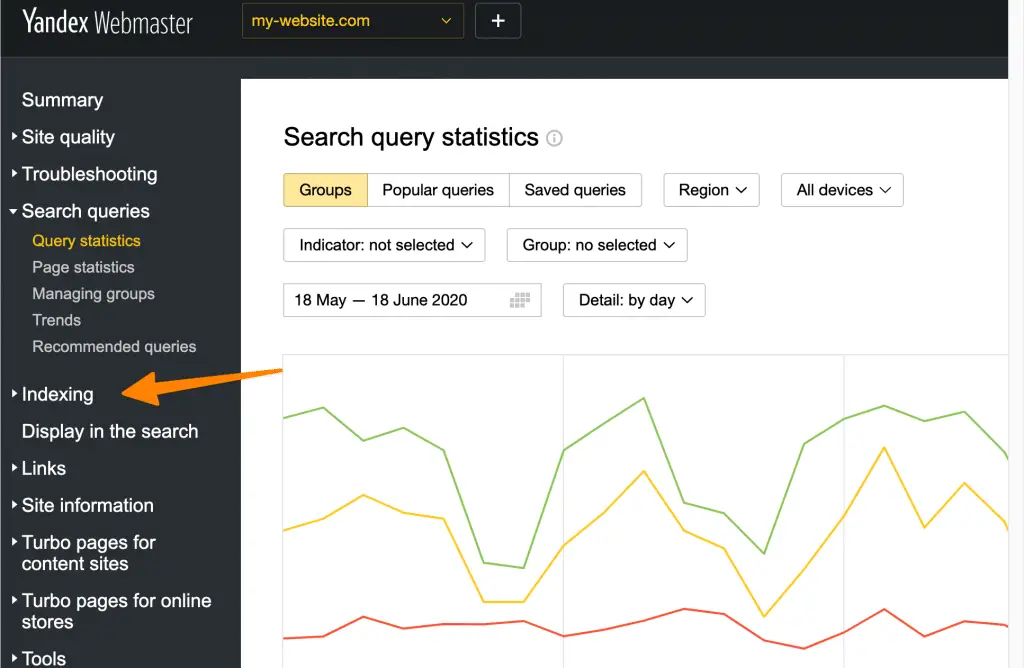
There just click on sitemap and add your sitemap URL and you’re done.
Conclusion
Adding your WordPress sitemap to search engines is a very important part of SEO.
It is an easy process and only takes a few minutes to do.
I hope this tutorial helped you add your sitemap to Google, Bing, and Yandex.
If you have any questions or comments, please let us know.
Frequently Asked Questions
We hope we have answered all your queries in this blog but even if you have some questions in mind, we do hope we have covered it in the following set of frequently asked questions;
How do I add a sitemap to my WordPress site?
There are many ways to add a sitemap to your WordPress site. You can use a plugin like Yoast SEO or All in One SEO Pack, or you can use a tool like Screaming Frog to generate your sitemap and then upload it to your website.
How do I submit a sitemap to search engines?
The best way to submit your sitemap to search engines is to use a tool like Google Search Console or Bing Webmaster Tools. These tools will allow you to submit your sitemap and track its progress.
How do I add a sitemap to my website?
If you want to add a sitemap to your website, you can use a plugin like RANKMATH or others like Yoast SEO or the All in One SEO Pack plugin. These plugins will generate a sitemap for you and allow you to upload it to your website. You can also use a tool like Screaming Frog to generate your sitemap and then upload it to your website.
Does my WordPress site have a sitemap?
If you are using a plugin like RANKMATH or others then your WordPress site likely has a sitemap. You can check to see if your WordPress site has a sitemap by going to your website’s root directory and looking for a file called “sitemap.xml”. If you cannot find this
How do I create a WordPress sitemap without plugins?
If you want to create a WordPress sitemap without plugins, you can use a tool like Screaming Frog to generate your sitemap and then upload it to your website. You can also use a tool like XML-Sitemaps.com to generate your sitemap and then upload it to your website.
How do I manually create a sitemap in WordPress?
If you want to manually create a sitemap in WordPress, you can use a tool like Screaming Frog to generate your sitemap and then upload it to your website. You can also use a tool of ours i.e. kwebby Sitemap Generator to generate your sitemap and then upload it to your website.
How do Sitemaps work?
An XML sitemap is an architecture of a website with a set of URLs listed to let search engines crawl and index it into their search pages. An XML sitemap is the format in which the leading search engine accepts from users and indexes according to their web page standards.
What is WP Sitemap XML?
WP Sitemap XML is a WordPress plugin that helps you create a sitemap for your website. It allows you to add, edit, and delete URLs from your sitemap. It also allows you to export your sitemap to XML, HTML, and RSS formats.
Do I need a sitemap on my website?
Adding a sitemap to your website is a good way to ensure that search engines can index your website. If you are using a plugin like RANKMATH or others then your WordPress site likely has a sitemap. You can check to see if your WordPress site has a sitemap by going to your website’s root directory.
Is creating and Submitting a Sitemap is Mandatory?
Yes, it is. If you don’t have a sitemap, your website will not be indexed and ranked by Google. So you must create one for your website and submit it to Google Search Console.
Test your knowledge
Take a quick 5-question quiz based on this page.


