Grouping elements in Canva is a powerful feature that enables designers to maintain consistency, align elements precisely, and manipulate multiple objects as one.
Mastering how to group on Canva will revolutionize your design process, saving you time and ensuring a professional finish to your projects. Whether you’re a novice user or a seasoned designer, understanding how to effectively group on Canva will amplify your design capabilities and enhance your creative potential.
This guide will provide a detailed step-by-step process of a group on Canva, empowering you to take your designs to the next level.
Also, check out Canva Magic Studio: Step-by-Step Comprehensive Guide
What is Grouping?
Grouping is the process of combining multiple elements into a single unit. Once grouped, you can move, resize, rotate, and manipulate the entire group as one object rather than individually moving each element. This is especially useful when working with complex designs that have many elements.
How to Group on Canva
Here is a simple, step-by-step method on how to group elements on Canva:
Launch the Canva website and open your design. With your design on the screen, identify the elements you wish to group.
Click on the first element using your mouse. To select other elements, hold down the shift key on your keyboard and click on the individual elements you want to group. Note that the shift key gives you unlimited access to select all the elements you need.

Once you’ve selected all design elements you want to group, look to the top menu of your selected group on your screen. Here, you’ll see the group button. Click on it.

Upon clicking the group button, your selected elements will be grouped temporarily.
The group feature on Canva Pro also allows the flexibility of ungrouping elements whenever you want. To ungroup, select the grouped items and click on the ‘Ungroup’ button.

If you want to duplicate the group, simply select the group and hit the ‘Duplicate’ button. This creates an instance of the group. [pic]
Alternatively, you can create groups by dragging your cursor across the canvas to make a selection box visible around the elements you want to group, then follow the steps from point 3 onwards.
Remember, grouping and ungrouping elements on Canva provide you with a streamlined way to manipulate and align your design elements for a more professional look. Mastering these steps will help you get the most out of Canva and elevate your designs to the next level.
Also check out How to Add Fonts to Canva (2 Easy Methods)
How to Group in Canva On Mobile
If you use Canva on mobile, then the solution is a bit tricky; open your design on Canvas and then select and hold one element until it gets selected and you see the following menu bar;
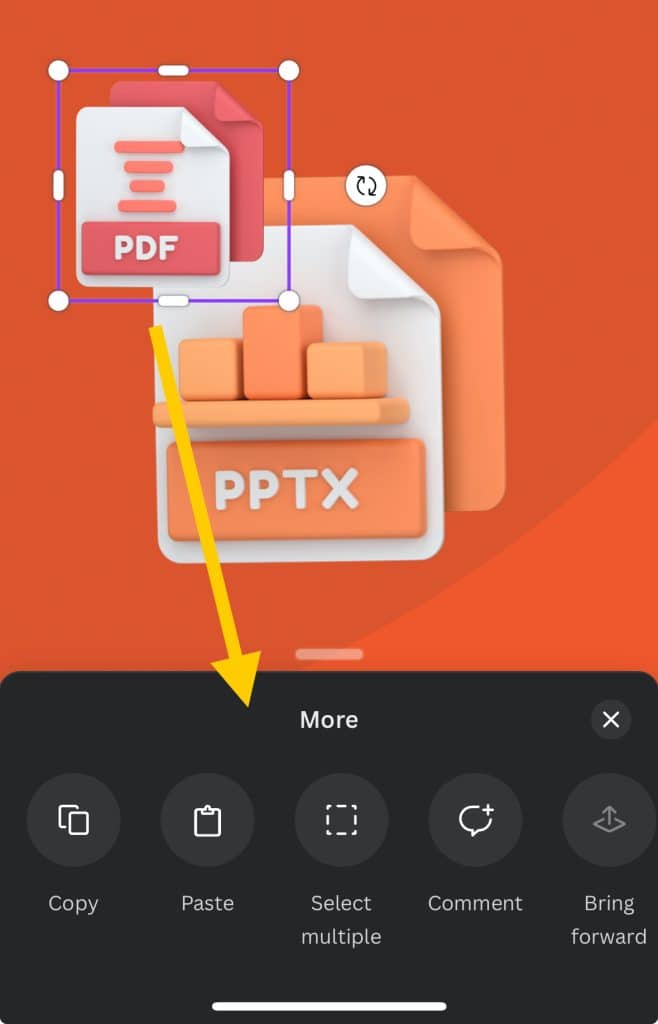
Then Tap on the “Select Multiple” option and select other elements which you want to include in the group as below;
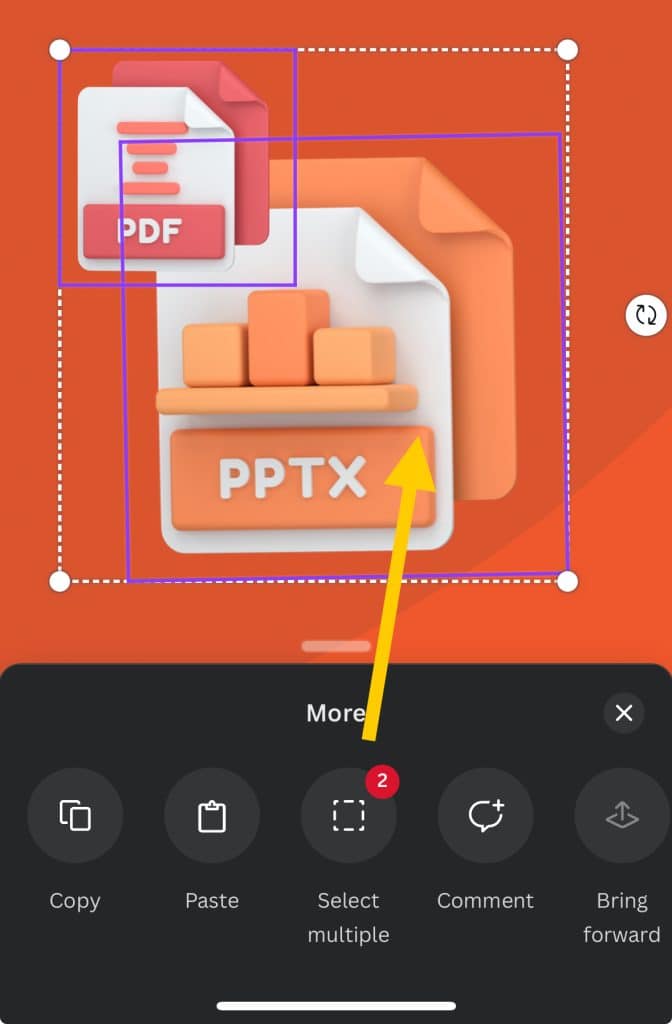
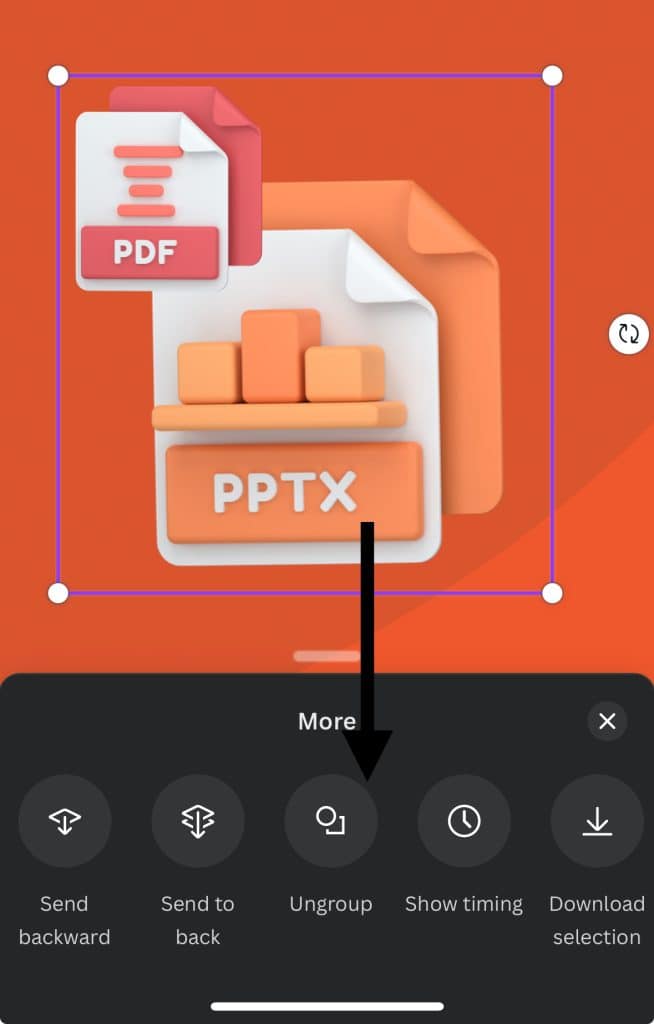
Now, from the options, slide right until you find the “Group” option and tap on it to group all selected Elements;
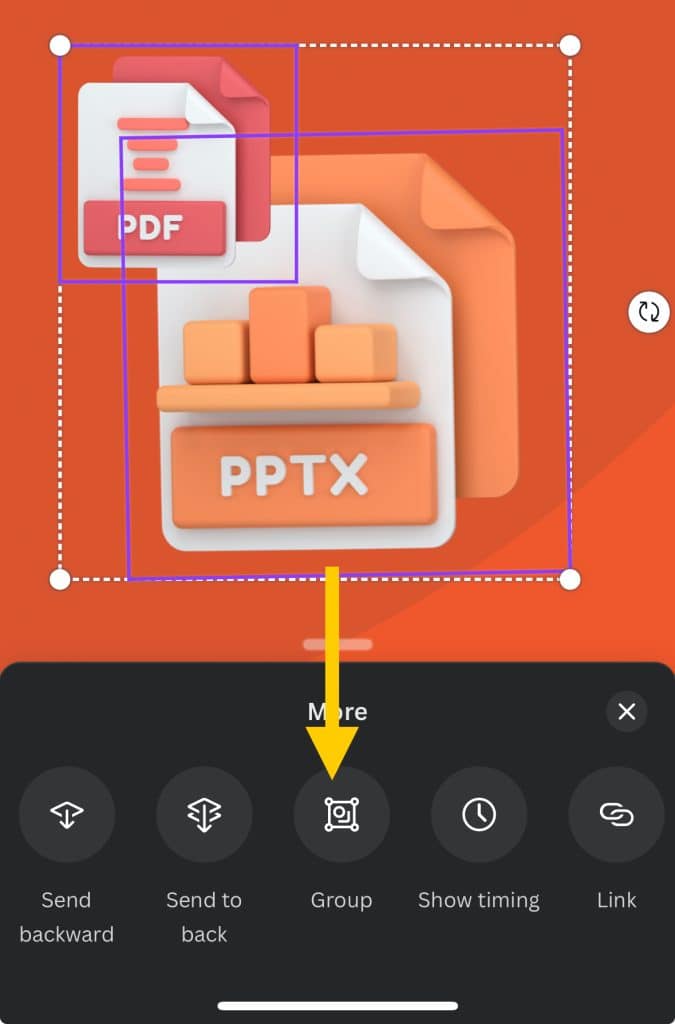
Now to ungroup the same, Tap on the same “Ungroup” option;
Also checkout How Do You Hyperlink on Canva? (Mobile and Desktop)
Tips for Grouping on Canva
Use Logical Groupings
When grouping items, consider the structure of your design. For example, if you have a cluster of graphics that form a particular element of your design, group them. This makes it easier to move them around as a single unit and maintain their relative positioning.
Leverage Drag Selection
If you need to group numerous design elements, simply click and drag your cursor to create a selection box around the elements. This can save you time and make the grouping process more efficient.
Creating Groups on Windows
Canva on Windows provides the same ease of use as on other platforms. Simply select the items, right-click, and choose the ‘Group’ option from the drop-down menu. Alternatively, you can use the ‘Ctrl + G’ shortcut after selecting the items.
Grouping on Mobile Devices
To group items on the mobile version of Canva, tap on the design element and then tap on ‘Select more’ in the bottom bar. Tap on all the elements you wish to group, then tap on the ‘Group’ option in the top bar.
Grouping and Layering
Remember that grouped items will behave as a single layer in your design. This can be especially helpful when you’re trying to accomplish a specific layering effect.
Use Grouping for Repetitive Designs
If you have a design element that repeats in your image, group it. This allows you to duplicate that group and ensure that every instance is consistent. This is especially useful when creating infographics, chart templates, or any other design that requires repeated elements.
Also learn,
How to Curve Text in Canva (4 Methods)
How to Have Transparent Background in Picture from Canva (Free Alternative)
How to print a page from Canva design (2 Easy Method)
Final Thoughts
Whether working on a small project or a large design, grouping on Canva can help you save time and stay organized. By following these simple steps, you’ll be able to group and ungroup elements with ease. So next time you’re working on a design, remember to use the grouping function in Canva for a more efficient workflow.
Frequently Asked Questions
What is the purpose of grouping elements on Canva?
Grouping elements on Canva allows you to manipulate multiple design components as a single unit. This feature enhances the efficiency of your design process, especially for complicated designs with numerous elements. It allows for precise alignment, consistent design, and easier manipulation of elements.
How can I group elements on Canva?
You can group elements on Canva by first selecting the items you wish to group. After selecting the items, look for the ‘Group’ button on the top right corner of your screen and click on it. The selected elements will then be grouped together.
Can I duplicate grouped elements on Canva?
Yes, Canva allows you to duplicate grouped elements. To do this, select the group and click on the ‘Duplicate’ button. This will create an exact copy of the grouped elements.

