How to Curve Text in Canva (4 Methods)
Choose Your Language:
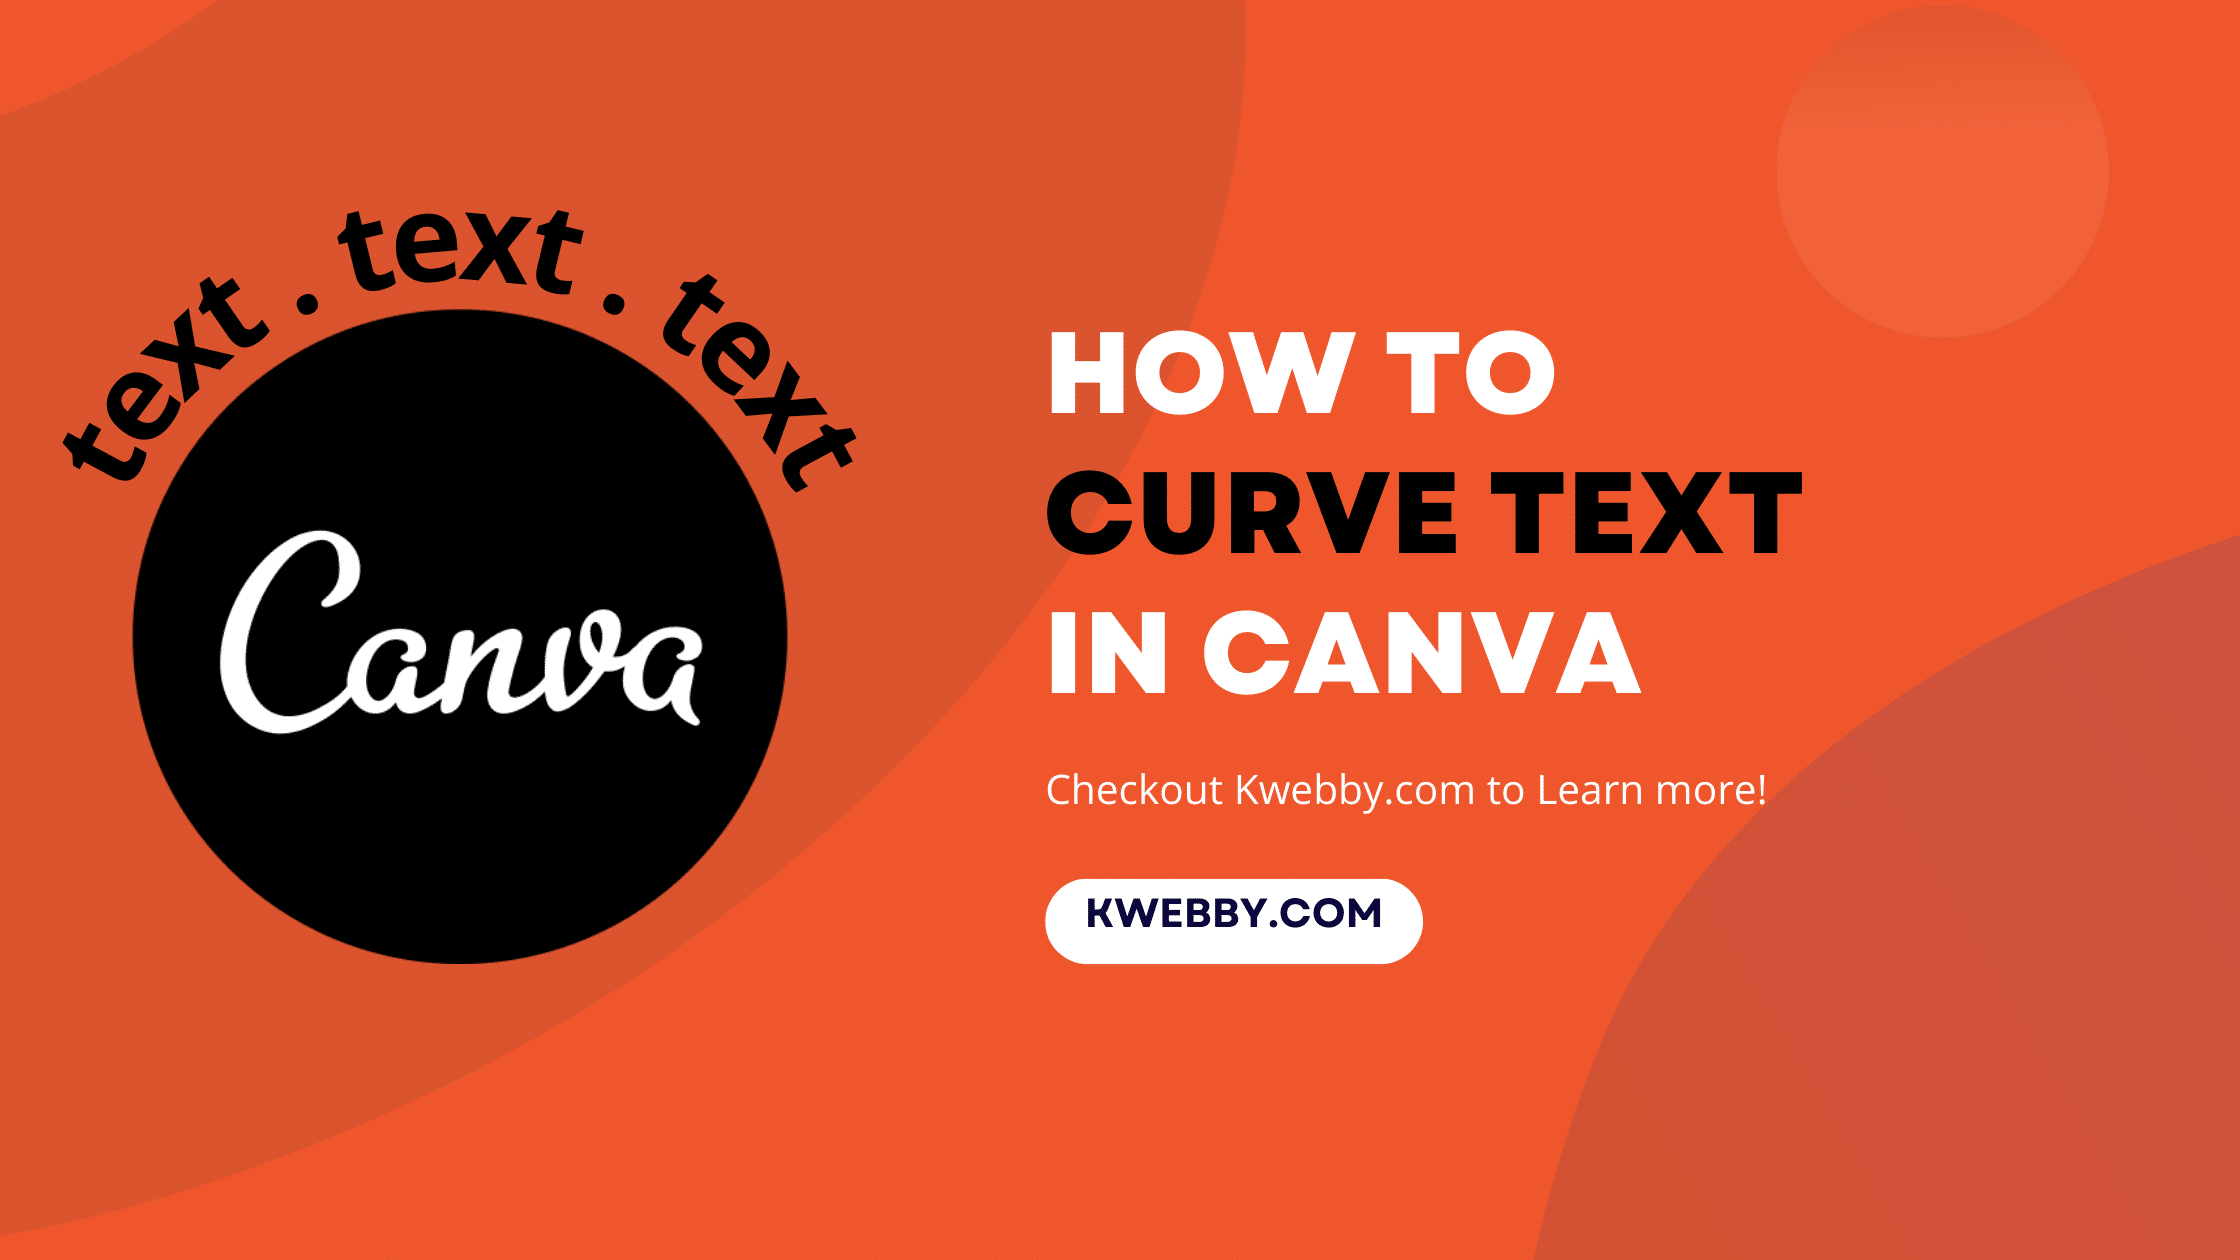
Creating visually appealing designs has never been easier with Canva’s intuitive features. One such feature is text curving, which adds a unique flair to your graphics.
Whether it’s for a logo design, invitation, or a social media post, learning how to curve text in Canva can open up new creative possibilities.
This guide will walk you through a step-by-step process, ensuring that you can effortlessly curve text and enhance your design in no time!
Checkout Canva Magic Studio: Step-by-Step Comprehensive Guide
1 Steps on How to Curve Text in Canva
1.1 Start a New Design
Begin by opening up your Canva workspace. In the top menu bar, click on “Create a design”. Choose a template that suits your needs or start from scratch.

1.2 Add Text
Click on the “Text” icon located on the left side of your Canva workspace. This will present you with various text box options. Select the desired text box and input your text.

1.3 Access the Curve Text Feature
Once your text is on the screen, click on it to select. This will open up a menu bar with formatting options. Look for the “Effects” button and click on it. In the effects panel, find and select “Curve”.

1.4 Adjust the Curve
After selecting “Curve”, a slider will appear in the adjustment panel. This is the curve slider. Slide it to the right to curve the text downward, or to the left to curve it upward.

The more you slide, the more pronounced the curve will be. Continue adjusting until you achieve the desired curve.
1.5 Fine-Tune Letter Spacing
If your curved text looks too tight or too stretched, you can adjust the letter spacing. Look for the “Spacing” option in the menu bar and adjust the “Letter” slider until the text looks right.

Remember, creating curved text in Canva isn’t just about making your text wavy. It’s about using the curved text feature to enhance your design and make it stand out.
1.6 Combining Curved Text with Elements
Enhancing your Canva designs with curved text can truly set your graphics apart. Integrating curved text with other elements adds a professional touch, whether you’re designing social media graphics, Facebook covers, or wallpaper patterns. But how exactly do you combine curved text with elements in Canva?
Start by selecting your preferred text box, then navigate to the effects panel and activate the ‘Curve’ effect. Once you’ve adjusted the curve and spacing of your text to your liking, it’s time to add some flair.

Do you want to place your curved text inside a circle shape? Scroll through the ‘Elements’ tab on the left-hand side of your Canva workspace and select ‘Shapes’. Choose a circle and adjust its size to fit your text. Now drag and drop your curved text inside the circle.

Perhaps you want to integrate your font? Navigate back to your text box, click on the ‘Font’ drop-down menu, and select ‘Upload a font’. Locate and select your desired font from your files. Now, your curved text will showcase your unique font, adding a personal touch to your Canva design.

Note: To add your own font in Canva, a Canva Pro subscription is required.
Also learn. How to Add Fonts to Canva (2 Easy Methods)
2 Steps on How to Curve Text in Canva Using Mobile
Curving text on Canva using a mobile device is just as straightforward as on a desktop. Follow this step-by-step tutorial to bend your text in different positions:
2.1 Start a New Design
Open the Canva app on your mobile device. Tap the ‘+’ icon at the bottom center to start a new design.
2.2 Add Text
Tap on the ‘+’ icon again and select ‘Text’ from the options. Choose from one of the text boxes and enter your body text.

2.3 Access the Curve Text Feature
Double-click on the text box to select it. A toolbar will appear at the bottom. Select the ‘Effects’ option;

And then Tap on “Shape” option;

and then choose ‘Curve’.

2.4 Adjust the Curve
A slider will appear at the bottom. Drag the slider to the left to curve the text upwards, or to the right to curve it downwards. Adjust until your text forms a semi-circle or any wavy shape you desire.

2.5 Fine-Tune Letter Spacing and Line Spacing
If your text looks too squeezed or too stretched out, adjust the ‘Spacing’ option in the toolbar. Here, you can modify both line spacing and letter spacing until your text change suits your design.
2.6 Change Text Color
By simply clicking on the color option, you can change the text color to match your design’s aesthetic.
2.7 Add Another Text Box
For more complex designs, such as quote posters or Facebook covers, you may want to add two text boxes. Simply repeat the steps above for the second text box, and adjust its position as needed.
2.8 Save Your Design
Once you’re happy with your design, tap the ‘Download’ button at the top right corner. Save your design to your device or directly share it on your social media platforms.
Also read, How to Have Transparent Background in Picture from Canva (Free Alternative)
3 How to Curve Text in Canva Using Templates
3.1 Choose a Suitable Template
Start by browsing the wide variety of pre-designed templates available on Canva. Select one that fits your design needs.
3.2 Edit the Text
Find the text box in the template you want to curve. Click on it and replace the dummy text with your own. Make sure your message aligns well with your design.

3.3 Curve the Text
Click on the text box to select it. This will open up a toolbar with various formatting options. Find and click on the “Effects” button. From the effects panel, select “Curve”.

3.4 Adjust the Curve of Your Text
Post selecting “Curve”, a slider will show up in the adjustment panel, namely the curve slider. Slide it to the right to curve the text downward, or to the left to curve it upward. Keep adjusting until you are satisfied with the curve.
3.5 Tweak the Letter Spacing
If your text appears too close together or too far apart after curving, you can tweak the letter spacing. Find the “Spacing” option in the toolbar and adjust the “Letter” slider until you’re happy with the spacing.
3.6 Save and Share Your Design
Once you’re satisfied with the curved text and overall design, click on the “Download” button on the top-right corner to save your design. You can then share your design on social media through email, or print it out, depending on its purpose.
Also read, How to print a page from Canva design (2 Easy Method)
4 How to Change the Angle of Curved Text in Canva
Altering the angle of your curved text in Canva is a simple yet effective way to add a dynamic element to your design. The process is straightforward to master.
Start by selecting the curved text box you want to rotate. Once selected, you’ll notice a round double-arrow cursor appearing at the top of the bounding box.

Click on this icon and drag it to the right or left to rotate your text on a pivot. You can rotate your text up to 360 degrees, offering endless possibilities for your design.
Whether you’re looking to create circular text, bend text, wavy text effect, or aim for a more whimsical look, adjusting the angle of your curved text provides an extra level of customization to your design.
5 How to Curve Text Using Canva App (Typecraft)
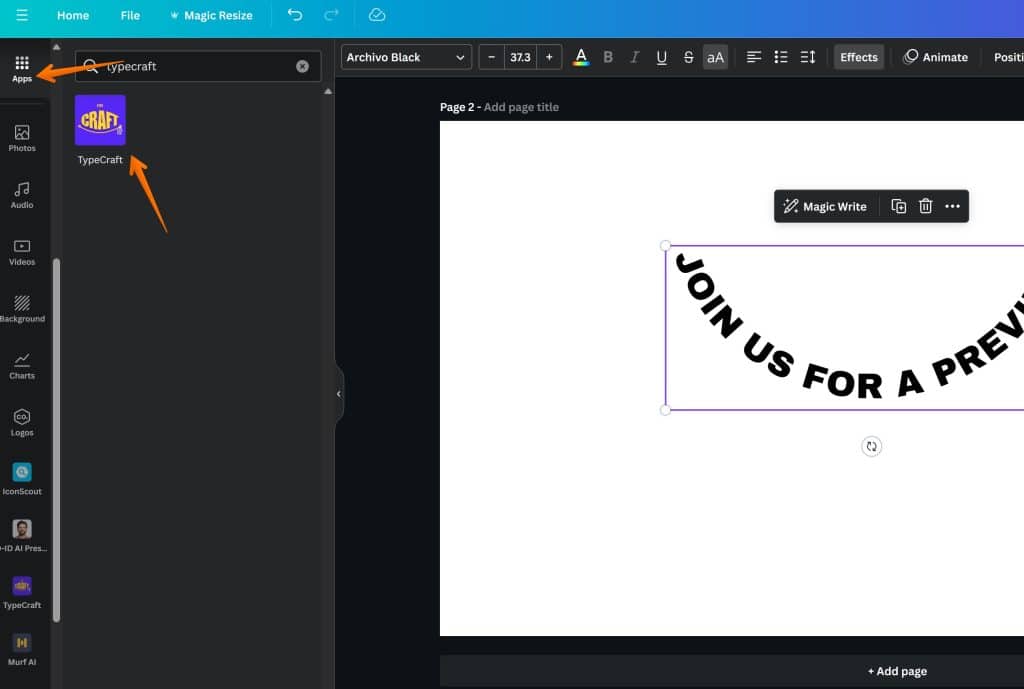
If you want to customise your text even further by adding different angles from top and bottom, you can do it easily with canva app called “Typecraft”.
First, you need to enable the Typecraft app by going to the sidebar > apps and typing “typecraft” in the search bar;
First, you need to type your text as follows;
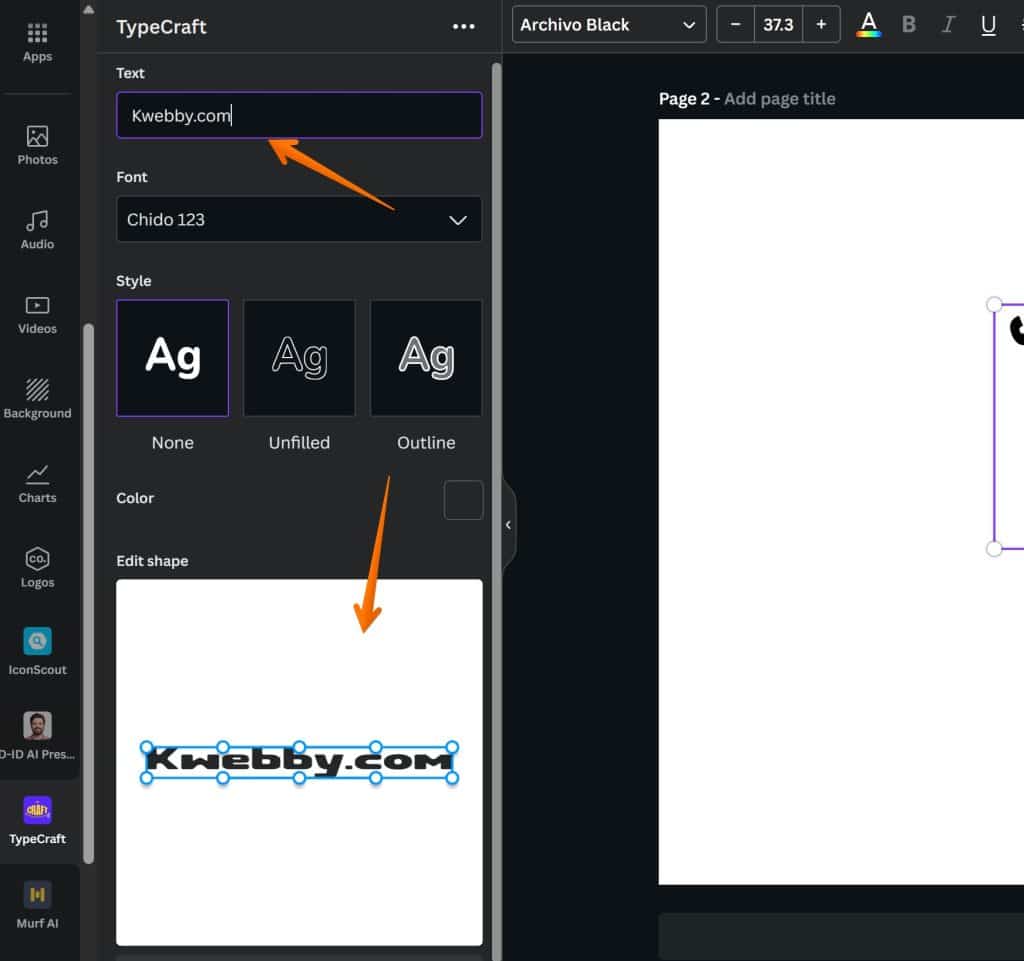
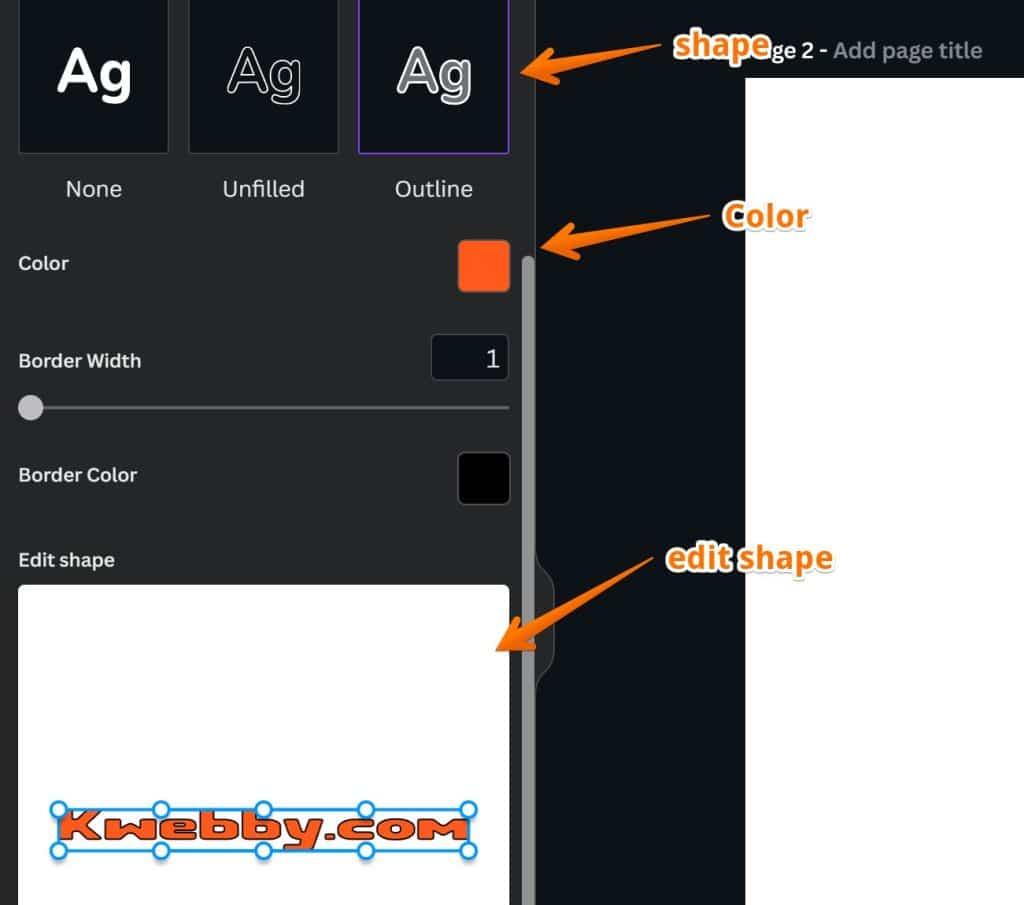
Next, select the font of your choice as you can see in above screenshot and also select the style as well, Then select the color you want to fill and at last scroll to edit shape section;
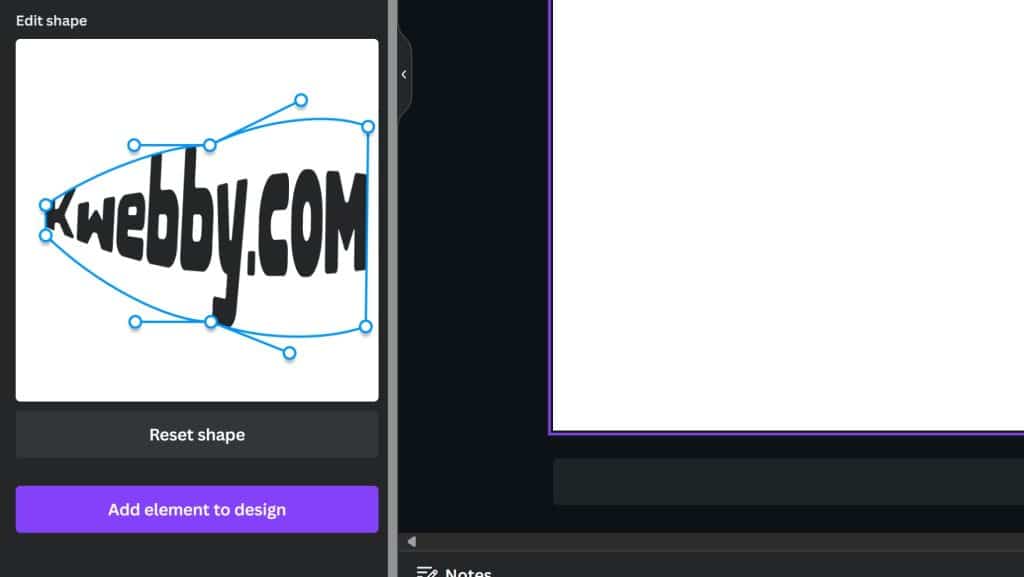
Now select the pointer from any side to curve the text as below;
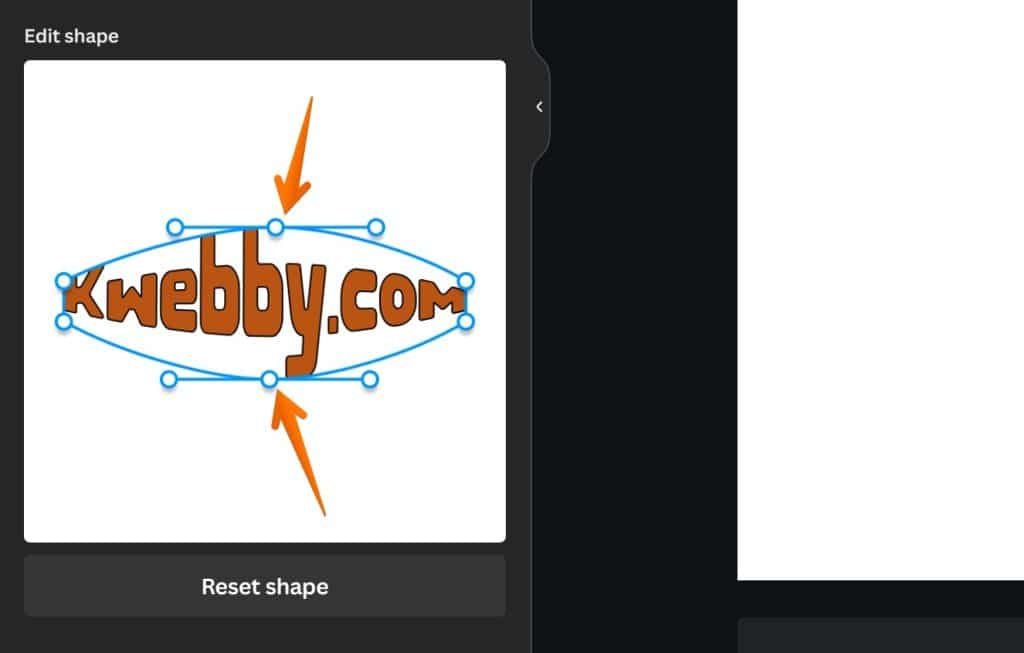
Another example as below, next you can add it to your design by select “Add elements to design”
Now, next customise it according to your design like the sample below;

6 Conclusion
In conclusion, curving text in Canva provides an enhanced level of customization, allowing you to add a unique and creative touch to your designs. Whether you’re crafting an engaging social media post, an eye-catching poster, or a professional presentation, mastering this skill can significantly elevate your design work.

