Controlling the fan speed on your PC is essential for maintaining optimal performance and preventing overheating, especially during intensive tasks or in warm environments.
Whether you’re a hardcore gamer pushing your PC to its limits, a creative professional running demanding applications, or simply someone who enjoys a quiet computing environment, understanding how to adjust fan speeds is crucial.
This guide will walk you through everything you need to know about fan control, from basic adjustments to advanced settings for CPU fans, GPU fans, and case fans.
You’ll learn how to manually control fan speeds to achieve the best balance between cooling and noise, use automatic fan speed options for effortless temperature management, and adjust fan curves for precise control.
We’ll also cover essential concepts like CPU temperature monitoring, selecting the right fan headers on your motherboard, and ensuring your cooling system effectively maintains your PC’s temperature. Whether you’re dealing with the default settings in your BIOS menu, exploring software solutions in Windows, or configuring a dedicated fan controller, this article has you covered.
Control Fan Speed Using the BIOS
Step 1: Boot into the BIOS/UEFI to Control Fan Speed
To adjust the fan speed directly through your computer’s BIOS or UEFI, initially ensure to save any ongoing tasks. Here’s a smooth step-by-step guide to access your BIOS/UEFI settings:
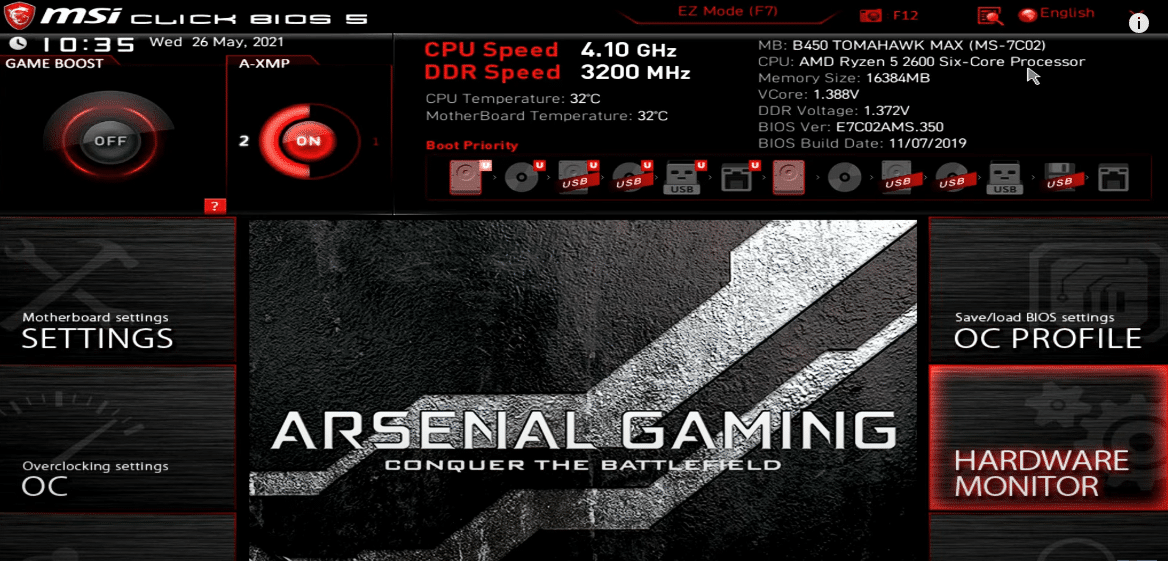
Press Windows key + i to open Settings.
Navigate to Update & Security and select Recovery from the left panel.
Under “Advanced startup,” click on Restart now.
After your PC restarts, choose Troubleshoot, then Advanced options, and finally UEFI Firmware settings before selecting Restart to boot into the BIOS/UEFI.
Finding the Fan Control Settings
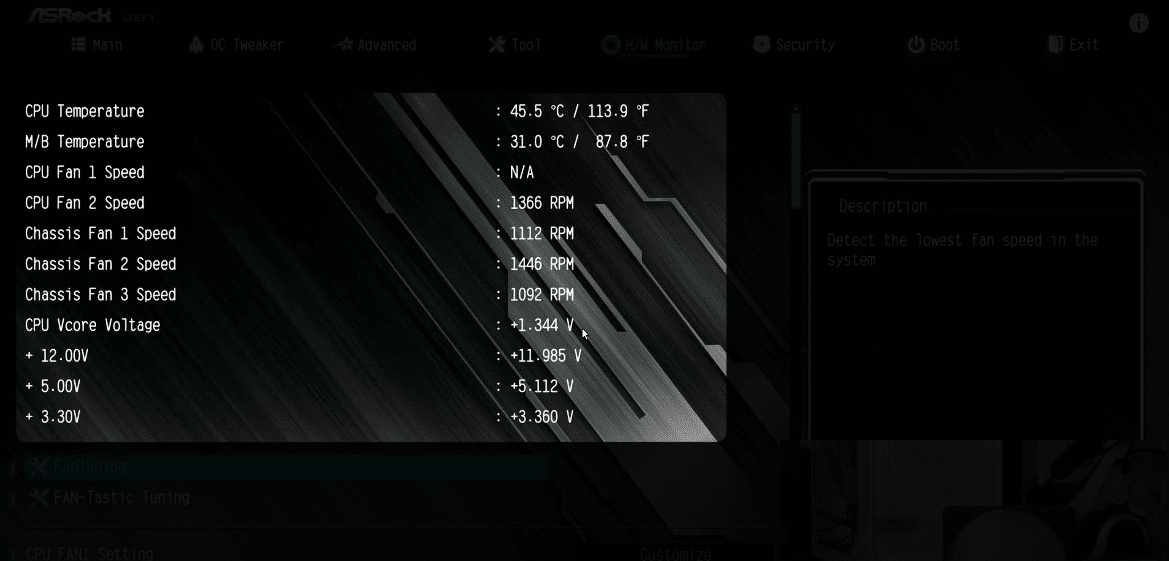
Within the BIOS/UEFI, the fan settings may be tucked away in various menus. Search for terms related to fans such as fan control, cpu fan speed, cooling, or temperature. You might need to enter an Advanced settings menu.
Adjusting Fan Speeds and Profiles
Different manufacturers offer varied options for fan speed adjustments. You may have the liberty to set the temperature thresholds that trigger higher fan speeds or to alter the RPM settings for optimal speed or full speed. If you’re aiming to find a balance between cooling efficiency and noise, adjusting these settings is key. Ensure that your selections do not compromise your system’s performance by allowing it to overheat.
Saving Your New Settings
To finalize and use your newly configured settings, look for the option to Save Changes and Exit typically found at the bottom of the screen. Press the indicated key to save your adjustments and exit. Upon rebooting, your system will operate under the new fan speed settings you’ve chosen, maintaining your PC’s temperature effectively with your customized fan curve.
Control Fan Speed Using Fan Control App (Windows)
Fan Control stands out as a pivotal solution for those wanting granular control over their system’s cooling profile, offering unmatched command over CPU and GPU fans, as well as any water cooling pumps that might be connected to your system’s fan headers.
This tool can be downloaded at no cost from its GitHub page or the official website, providing users with a comprehensive approach to fan speed control, CPU temperature management, and optimizing PC performance and airflow.
It is important to note that Fan Control is a third-party application developed by an independent developer. We are not responsible for any potential damage that the software could cause to your system. Users should proceed with caution, understanding that downloading and utilizing this fan control software is at their own risk.
By integrating Fan Control into your setup, you gain precise manual control over all fans within your system, ensuring your computer maintains its temperature efficiently without compromising on sound or cooling efficiency.
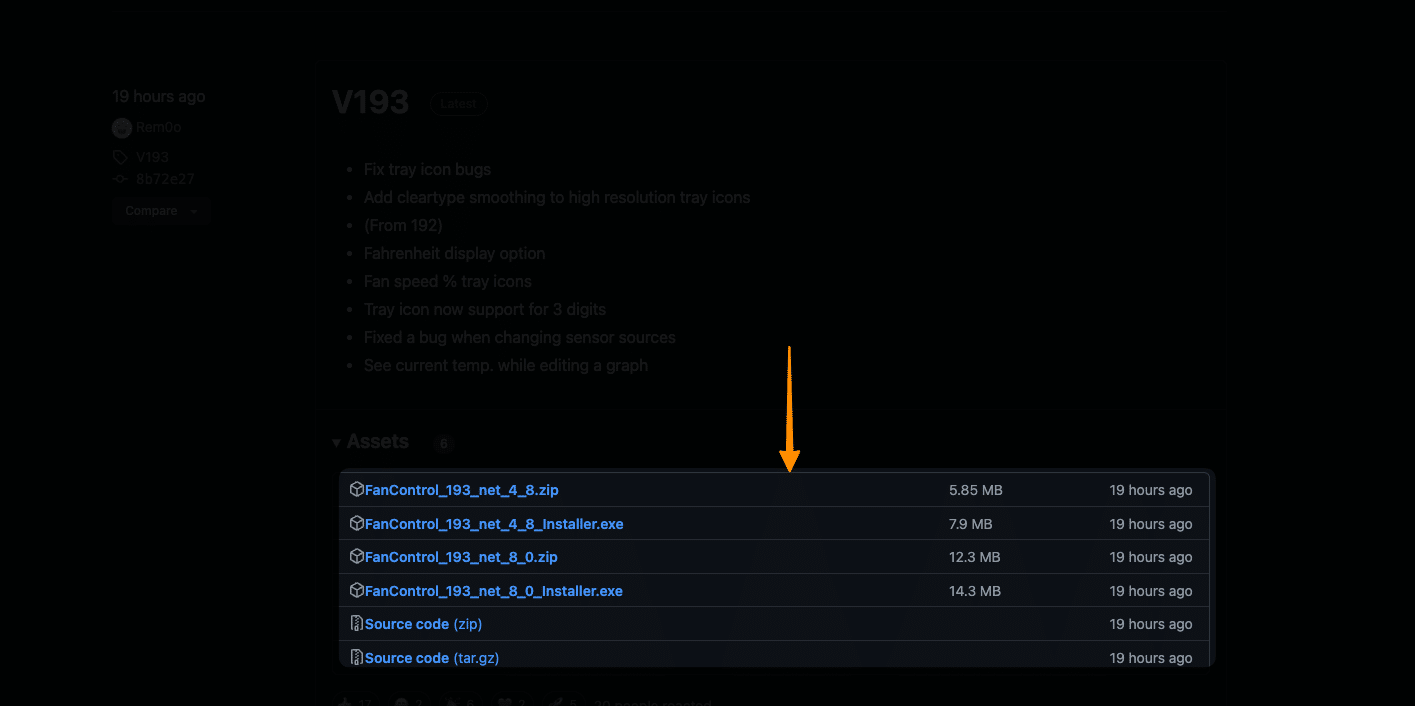
Step 1: Initiate by downloading the Fan Control application from its official website or the GitHub page. After downloading, extract the files to a specific folder. To start the application, locate and double-click the `FanControl.exe` file.
Step 2: Upon launching Fan Control, you’ll notice the home screen is neatly divided into two key areas: Controls and Speeds.
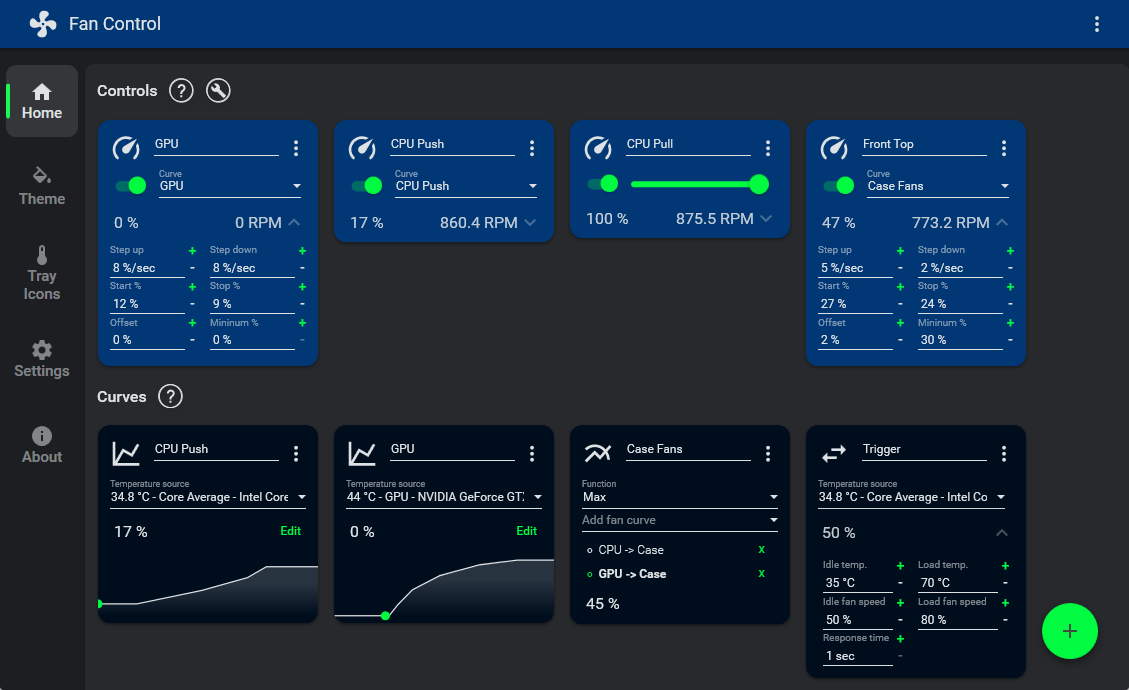
There’s a clear correspondence between each control card under Controls and its counterpart in Speeds. For example, if `Fan Control #1` is assigned to the CPU cooler or a connected liquid cooler pump, it would naturally control `Fan #1`. Subsequent fans, including case and GPU fans, are organized likewise.
Step 3: To verify the functionality of each fan, experiment by manually adjusting their speeds.
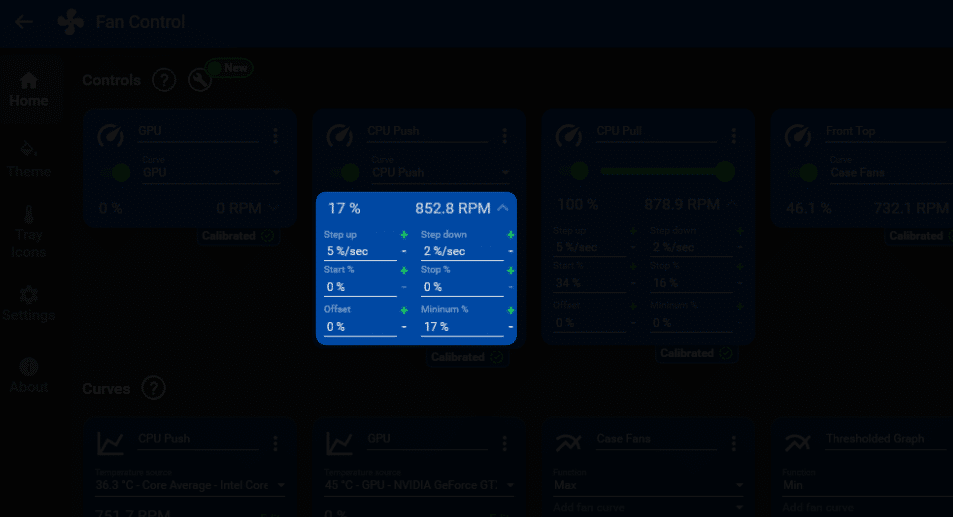
Access the three-dot menu on each fan’s control card, switch to Manual control, and utilize the slider to modulate the fan or pump’s speed. Changes should be reflected in the sensor card, with variances in airflow and fan noise serving as practical indicators of effectual control.
Step 4: For organizational ease, renaming each fan or control card is advised. Simply click on the title of any card to edit, providing clarity especially when dealing with multiples.
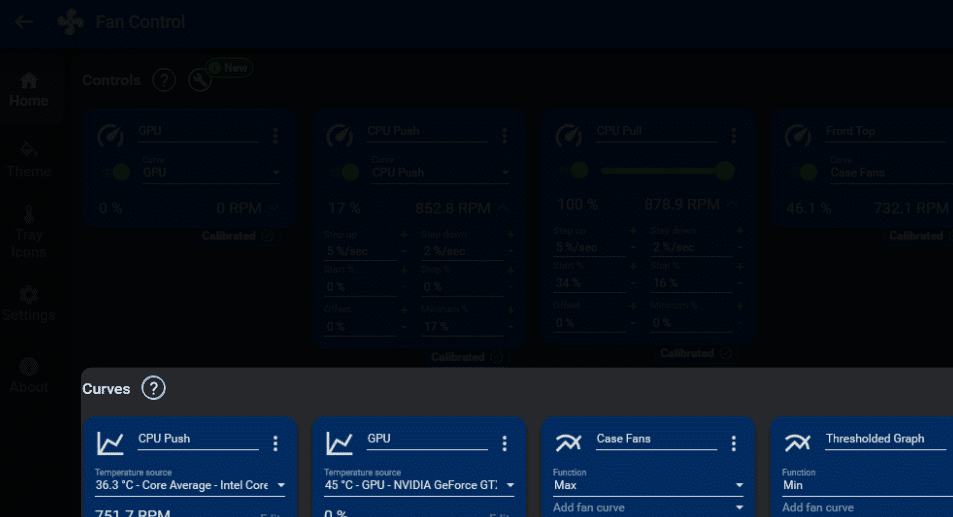
Ignore unused fan headers, typically shown as additional control cards, by selecting the hide option within each card’s three-dot menu.
Step 5: Though tempting to maximize fan speed for enhanced cooling, consider the implications. High speeds increase noise levels and potentially shorten fan lifespan. Furthermore, higher intake fan speeds can lead to more dust accumulation, necessitating frequent cleaning.
Step 6: Beyond simple manual adjustments, crafting custom fan curves is a sophisticated means to tailor cooling efficiency. Fan curves graphically represent the relationship between PC temperature and fan speed, allowing for nuanced cooling strategies.
To create one, hit the Plus button, selecting from various fan curve templates and temperature sensors. Assign specific fan speeds at predetermined temperatures using the Graph fan curve for a balanced approach between cooling and acoustics. Don’t forget to save your configurations through the three-dot menu, ensuring your settings are preserved for future application.
By integrating these methodologies, you’ll enhance your system’s thermal management while optimizing for performance or quiet operation, demonstrating how to control fan speed on PC with precision.
Control Fan Speed on Mac
Controlling fan speed on a Mac is slightly different than on a PC, but still manageable. On Mac, you can use the software app called “Macs Fan Control,” which allows for manual control of your Mac’s fans based on temperature sensors.
To get started, download and install the application from their website.
Once installed, open up the app and navigate to the “Fan Control” tab.
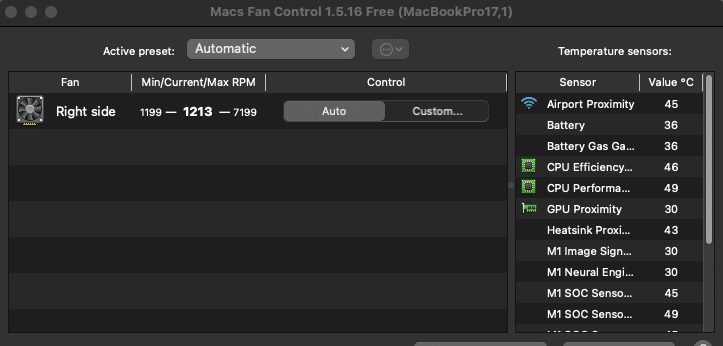
Here, you’ll see all of your available temperature sensors and fan options.
To create a custom fan curve, click on the “Custom” button next to the desired sensor.
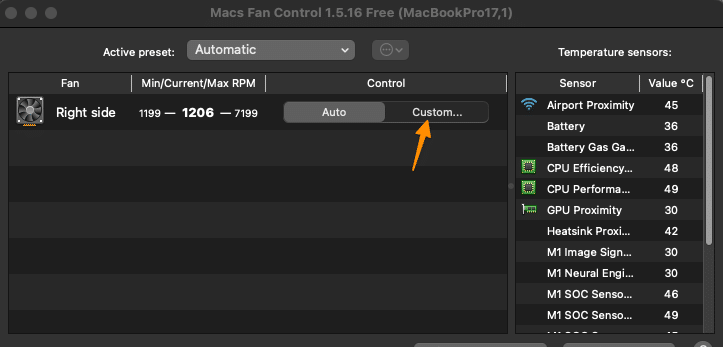
You can then adjust specific fan speeds at certain temperatures using the graph interface. Save your settings through the File menu to ensure they are applied in real-time.
Conclusion
In the realm of PC maintenance and optimization, understanding how to control fan speed on your computer is paramount for ensuring the system operates efficiently, remains cool, and produces minimal noise.
This comprehensive guide has walked you through the various methods of fan speed control, from manual adjustments within the BIOS to leveraging sophisticated software solutions like Fan Control.
By mastering these techniques, you’re not only able to maintain optimal CPU temperature and prevent overheating but also extend the lifespan of your components by avoiding unnecessary stress.
From adjusting RPM settings to configuring automatic fan speed, the control you have over your system’s cooling is extensive and can greatly influence your computing experience. The cooling mechanism, involving not just the CPU fans but all the fans within your setup, including those connected to the CPU fan header or additional fan headers, is critical for sustaining a healthy computer.
Whether you’re a seasoned PC builder or a novice looking to improve your system’s cooling efficiency, the steps outlined in this guide offer a deep dive into manually controlling and optimizing fan speeds.
Test your knowledge
Take a quick 5-question quiz based on this page.


