The working memory of your computer is its random access memory (RAM). Applications and the operating system on your computer are always writing and reading data to and from RAM.
For instance, your web browser saves a web page like this one in RAM while you are viewing it.
QuickTime moves data from slower system storage (such as a hard drive or solid-state drive) into considerably faster RAM when you launch a PC game.
Problems could arise if the RAM in your computer is malfunctioning. When your computer goes to read the RAM, it will find different data than when it saved it there. Data corruption, system freezes, blue screens of death (BSODs), program crashes, and other issues may result from this.
What are RAM testing tools and how do they work?
RAM testing tools are designed to methodically check the memory of your computer for issues by writing a specific set of data to each segment of RAM and subsequently reading it back.
If the data retrieved differs from what was initially written, it’s a clear sign that there’s a problem with your RAM, indicating faulty memory.
For the most thorough and accurate test ram results, the premier RAM testing applications necessitate restarting your PC to boot from a specially crafted system that bypasses the operating system, whether it’s Windows or another platform.
This procedure ensures that the testing tool can directly and comprehensively access the RAM without interference. While there are options like HCI Design’s MemTest that allow for testing within the Windows environment, these are typically not as effective.
Consequently, their use is not advised due to the potential for incomplete access to the RAM’s architecture, leading to less reliable detection of memory problems, faulty RAM modules, or errors in memory configuration.
Why Should You Test Your RAM?
Testing your computer’s memory often stems from the need to troubleshoot persistent system instability issues. Experiencing frequent blue screens of death (BSODs) could be a strong indicator that it’s time to examine your RAM’s health.
This becomes even more relevant when the BSOD error messages hint at problems related to the computer’s memory. Errors such as the all-too-common “Page Fault in Nonpaged Area” are often attributed to defective RAM.
Additionally, immediately after installing new RAM sticks, conducting a memory test is highly advisable. Despite quality control efforts, it’s not uncommon for new RAM—and other computer components—to arrive with defects straight from the manufacturer.
Early detection through a memory test can reveal any issues with your new RAM sticks, ensuring you can request a replacement before encountering disruptions during important tasks or gaming sessions. This proactive approach helps avoid data corruption, system crashes, and other frustrating memory problems.
By utilizing RAM testing tools or built-in diagnostics like the Windows Memory Diagnostic tool, users can confidently assess the condition of their RAM modules, ensuring their system’s memory is in optimal working order and enhancing overall computer performance.
It’s not a bad idea, by the way, to utilize both of the memory test tools we’re going to show you. There’s a slim chance that one piece of software will capture something that the other misses since different pieces of software may be weaker or better at identifying particular kinds of problems. We suggest seeking a “second opinion” in this manner if you have the time.
Option 1: Run the Windows Memory Diagnostic
To start testing your computer’s RAM for potential issues, first, you need to open Windows Memory Diagnostic tool. This is easily done by clicking on the Start menu. Once there, simply type “Windows Memory Diagnostic” into the search bar and hit Enter.
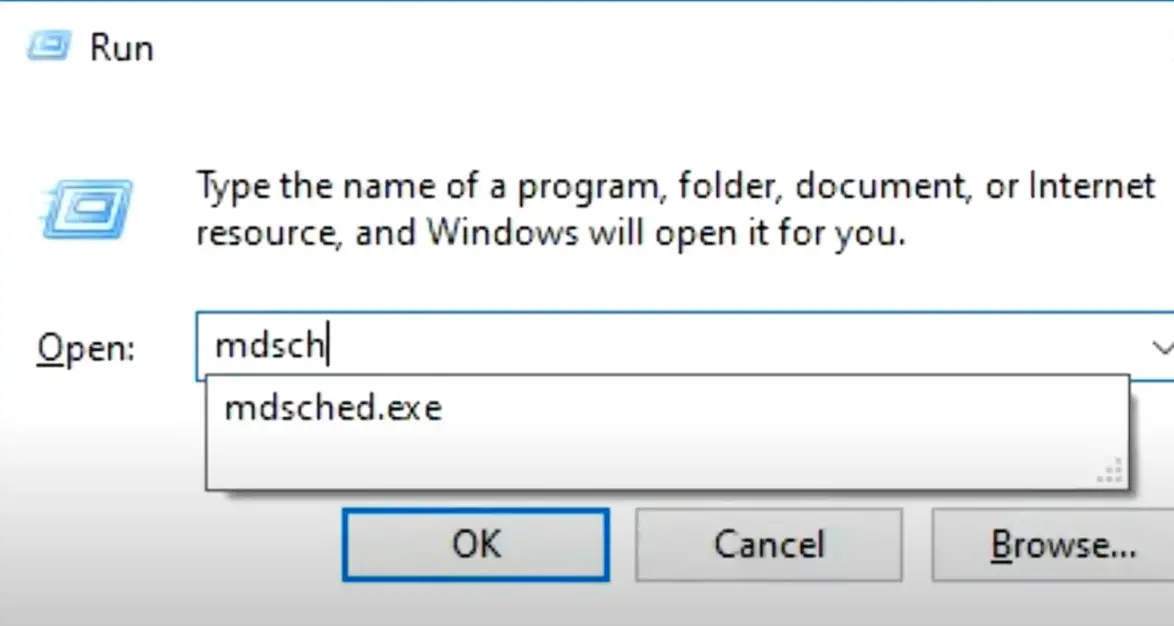
For those who favor keyboard shortcuts, pressing Windows Key+R will launch the Run dialog box. Simply type “mdsched.exe” and hit Enter.
Step 2: Restart Your Computer to Run the Test
Upon initiating the Windows Memory Diagnostic tool, you’ll be presented with an option to restart your computer immediately to check for RAM issues or to schedule the test for the next system restart.
For immediate results, click on “Restart now and check for problems (recommended).”
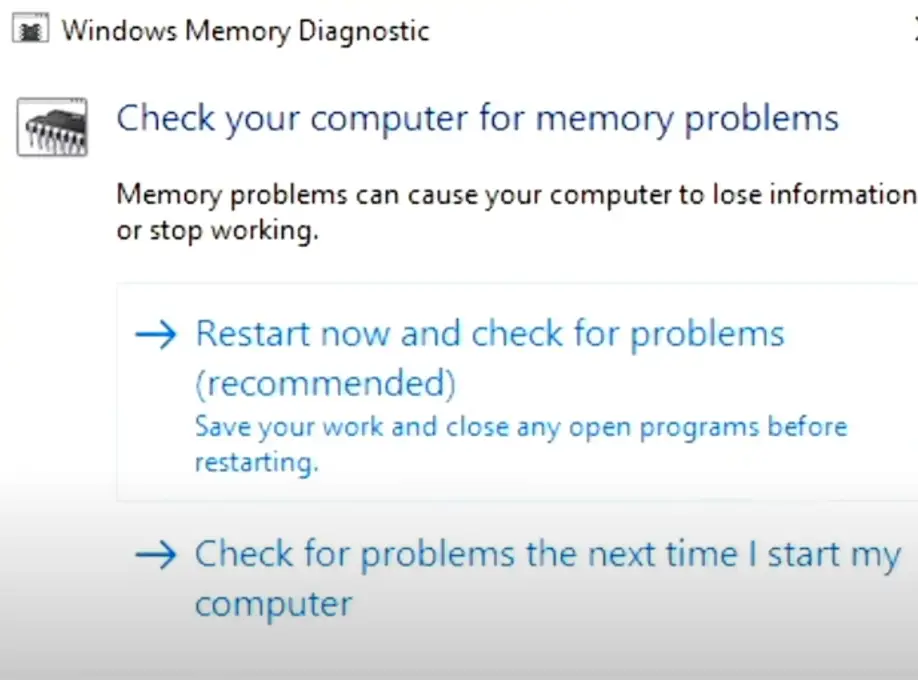
It’s crucial to save all your work before proceeding, as this step will reboot your system to start the memory tests.
Step 3: Allow the Test to Run
After your computer restarts, the Windows Memory Diagnostic Tool screen will appear. At this point, your sole task is to allow the tool to run the test without interruption.
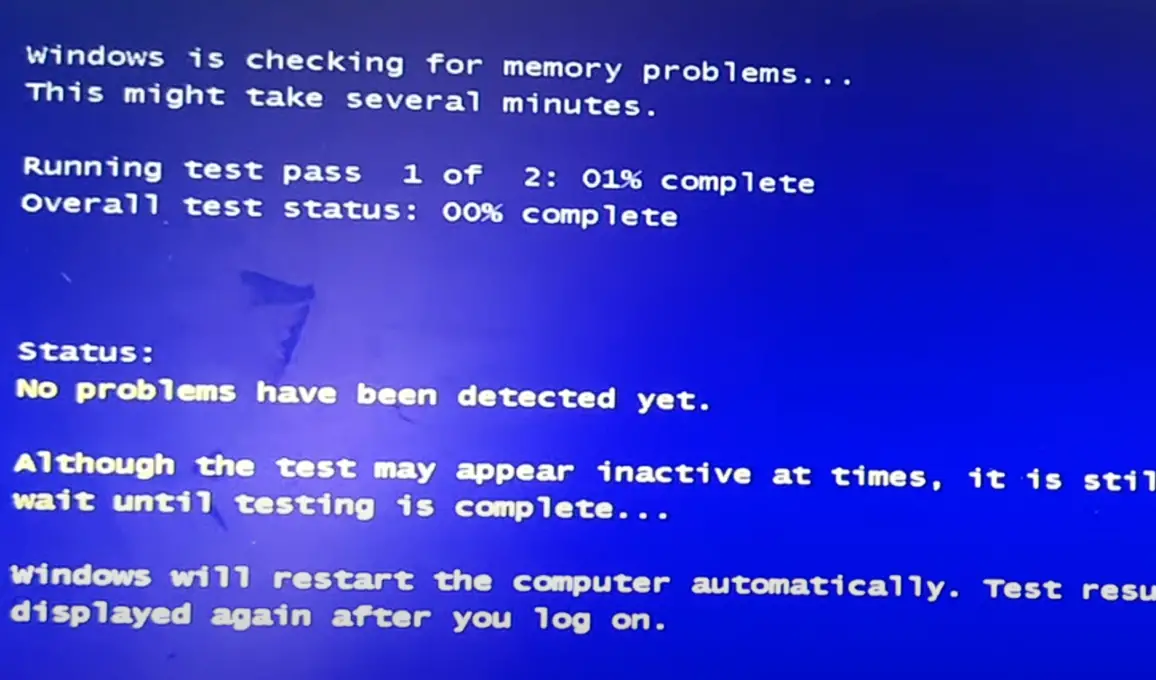
This diagnostic process involves a series of memory tests designed to detect RAM issues, faulty memory, or defective physical memory that could lead to system instability, data corruption, or the dreaded blue screens.
The screen will display a progress bar along with a “Status” message to keep you informed if any problems are detected during the RAM test.
Step 4: Review the Test Results
The beauty of the Windows Memory Diagnostic is its simplicity—the test runs automatically without the need for constant supervision. You’re free to step away from your computer, as the tool will reboot your system once the testing is complete.
Upon logging back into Windows, a pop-up window displaying the test results will appear, giving you a detailed account of your RAM’s health. If the test identifies any RAM issues or faulty modules, it’s recommended to take further action to fix these memory problems and ensure your computer’s performance is not compromised.
That’s what the tool indicates should happen, anyway. We were not able to see the results on Windows 10 or Windows 11. In case Windows doesn’t display them, follow this guide to locate them.
Launch the Event Viewer first. Choose “Event Viewer” with a right-click on the Start button. Press Windows Key+R, type “eventvwr.msc” into the Run dialog box, then hit Enter if you’re using Windows 7.
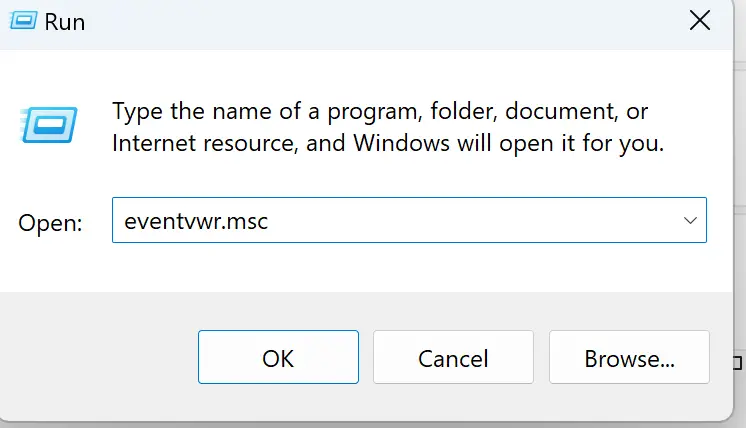
Go to System > Windows Logs. There will be a long list of events displayed. Tap “Find” in the window on the right.

In the search box, enter “MemoryDiagnostic” and select “Find Next.” At the bottom of the window, you’ll notice the result along with more information on your RAM.
Option 2: Boot and Run MemTest86
For a comprehensive analysis of your computer’s RAM, MemTest86 is an invaluable tool. Unlike the built-in Windows Memory Diagnostic, MemTest86 conducts a broader array of tests, increasing the likelihood of detecting elusive RAM issues.
Both a free and a paid version of MemTest86 are available, with the former typically sufficing for most users’ needs. It’s worth noting that MemTest86 is fully compatible with systems that use Secure Boot, thanks to being signed by Microsoft.
Step 1: Prepare the Bootable USB Drive
Begin by downloading MemTest86 and creating a bootable USB drive which will serve as the medium for running your memory tests. Execute the provided EXE file from the MemTest86 download package, and select a USB drive for the bootable media.
This process will format the USB drive, so ensure you have saved any critical data elsewhere.
Step 2: Boot from the USB Drive
After making bootable media, turn on your computer again and tell it to boot from the USB drive where you stored the memory test tool.
Step 3: Run the Memory Tests
MemTest86 will automatically commence a series of rigorous tests upon booting from the USB drive. The testing process continues indefinitely until you decide to halt it, providing an in-depth examination of how your RAM performs over time.
Step 4: Reviewing the Test Results
Once the test is complete, or when you choose to end it, you can exit the testing environment by pressing the “Esc” key and restart your computer to return to your operating system.
What to do if RAM test finds errors
When errors emerge during memory tests, it likely indicates that at least one of your RAM sticks might be defective and could require replacement. Should your computer still be under warranty, reaching out to the manufacturer for service is advisable.
Alternatively, if you have extra RAM available, trying out a swap to see if your computer’s stability improves with a different set of RAM sticks could be insightful.
For systems equipped with multiple RAM modules, removing one at a time could help pinpoint the faulty component. This method is particularly useful if you’re troubleshooting a computer you’ve assembled yourself or recently upgraded the RAM.
Compatibility issues between the RAM and the motherboard can also lead to problems, as can running the RAM at speeds it cannot handle reliably.
In such cases, adjusting the RAM speed to a lower setting via the UEFI or BIOS settings might resolve the issue. After making adjustments, re-running the RAM test can verify if the problem persists.
Should these steps suggest that a replacement is necessary, exploring options for the best DDR4 or DDR5 RAM would be the next course of action.
Test your knowledge
Take a quick 5-question quiz based on this page.

