Stopwatches are essential tools for measuring time intervals accurately.
This blog post will explore how to create a stopwatch with lap time functionality using JavaScript.
We’ll delve into the code step by step and explain the purpose and functionality of each component.
What is DragGAN AI Tool Which Took the Internet by Storm? 4 Incredible Features
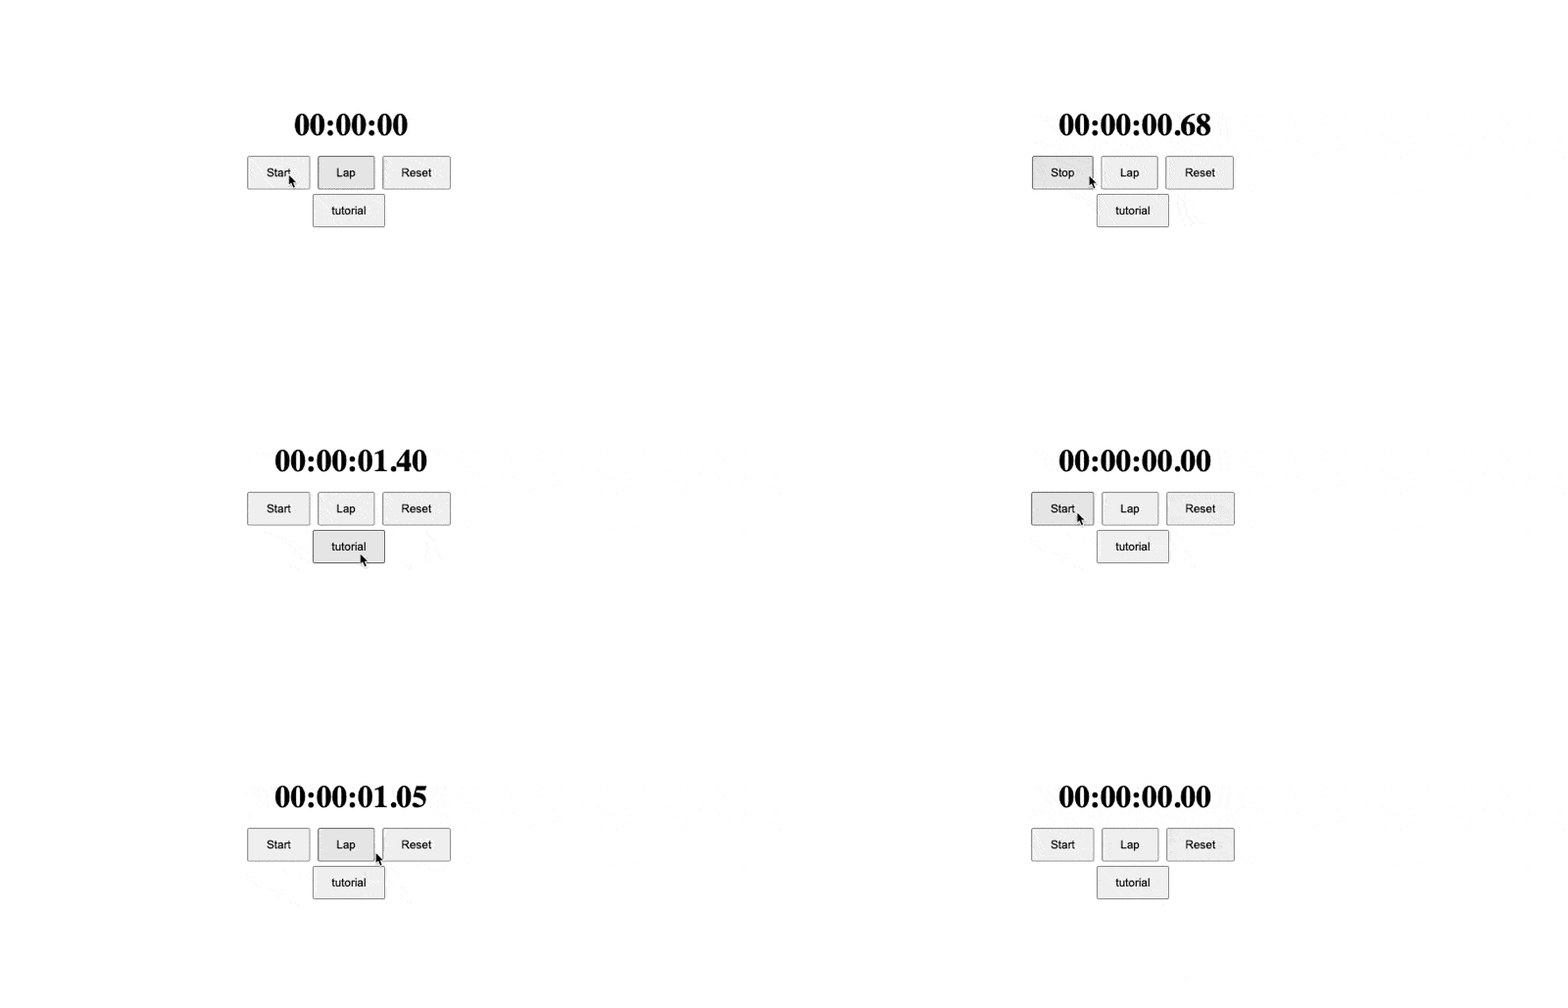
You can see the demo on codepen.io here.

The Structure for StopWatch (HTML & CSS)
Following are the basic structure for stopwatch as you can see in the demo above.
HTML:
<div class="container">
    <div class="stopwatch">
      <div class="display">
        <div id="time">00:00:00</div>
        <button id="start" onclick="startStopwatch()">Start</button>
        <button id="lap" onclick="lapTime()">Lap</button>
        <button id="reset" onclick="resetStopwatch()">Reset</button>
      </div>
      <ul id="laps"></ul>
    </div>
  </div>

  <audio id="startSound">
    <source src="start_sound.mp3" type="audio/mpeg">
    Your browser does not support the audio element.
  </audio>
CSS:
.container {
  display: flex;
  justify-content: center;
  align-items: center;
  height: 100vh;
}

.stopwatch {
  width: 300px;
}

.display {
  text-align: center;
  margin-bottom: 10px;
}

#time {
  font-size: 36px;
  font-weight: bold;
  margin-bottom: 10px;
}

button {
  padding: 10px 20px;
  margin-right: 5px;
}

#laps {
  list-style-type: none;
  padding: 0;
}

#laps li {
  margin-bottom: 5px;
}
Setting up the Variables
The initial code sets up several variables required for the stopwatch. The startTime, currentTime, and elapsedTime variables are used to track the timing values. isRunning keeps track of whether the stopwatch is currently running and lapCount stores the number of laps recorded.
let startTime, lapStartTime, currentTime, elapsedTime = 0;
let isRunning = false;
let lapCount = 1;
Starting and Stopping the Stopwatch
The startStopwatch() function controls the behavior of the “Start/Stop” button. When the button is clicked, it checks if the stopwatch is already running.
function startStopwatch() {
  if (isRunning) {
    stopStopwatch();
  } else {
    if (elapsedTime === 0) {
      startTime = Date.now();
    } else {
      startTime = Date.now() - elapsedTime;
    }
    lapStartTime = startTime;
    isRunning = true;
    updateDisplay();
    playSound();
    requestAnimationFrame(updateStopwatch);
  }
}
If it is, the stopStopwatch() the function is called to stop the stopwatch and calculate the elapsed time. Otherwise, if the stopwatch is not running, it startTime is set to the current time minus the elapsed time, and the stopwatch starts running.
The updateDisplay() function updates the stopwatch display, and the playSound() function plays a sound effect.
Finally, the updateStopwatch() function is called using requestAnimationFrame() to continuously update the stopwatch display.
Stopping the Stopwatch
The stopStopwatch() function is called when the stopwatch is stopped. It sets isRunning to false and calculates the elapsed time by subtracting the startTime from the current time. The updateDisplay() function is called to update the display accordingly.
function stopStopwatch() {
  isRunning = false;
  elapsedTime = Date.now() - startTime;
  updateDisplay();
}
Resetting the Stopwatch
The resetStopwatch() function resets the stopwatch when it is not running. It sets the elapsedTime and lapCount variables to their initial values, updates the display, and clears the lap times.
function resetStopwatch() {
  if (!isRunning) {
    elapsedTime = 0;
    lapCount = 1;
    updateDisplay();
    clearLaps();
  }
}
Recording Lap Times
The lapTime() function is called when the “Lap” button is clicked. It calculates the lap time by subtracting the startTime from the current time. The lap time is then formatted using the formatTime() function, and the lap time is added to the list of laps using the addLap() function.
function lapTime() {
  if (isRunning) {
    const lapTime = Date.now() - lapStartTime;
    const formattedTime = formatTime(lapTime);
    addLap(formattedTime);
    lapStartTime = Date.now();
  }
}
Updating the Stopwatch Display
The updateStopwatch() function is responsible for updating the stopwatch display in real-time. It calculates the currentTime by subtracting the startTime from the current time and calls the updateDisplay() function to display the formatted time.
function updateStopwatch() {
  if (isRunning) {
    currentTime = Date.now() - startTime;
    updateDisplay();
    requestAnimationFrame(updateStopwatch);
  }
}

function updateDisplay() {
  const formattedTime = formatTime(isRunning ? currentTime : elapsedTime);
  document.getElementById('time').textContent = formattedTime;
  document.getElementById('start').textContent = isRunning ? 'Stop' : 'Start';
}
Formatting the Time
The formatTime() function takes a time value in milliseconds and formats it into hours, minutes, seconds, and milliseconds. It pads single-digit values with leading zeros to ensure consistent formatting.
function formatTime(time) {
  const milliseconds = Math.floor((time % 1000) / 10);
  const seconds = Math.floor((time / 1000) % 60);
  const minutes = Math.floor((time / 1000 / 60) % 60);
  const hours = Math.floor(time / 1000 / 60 / 60);

  const formattedHours = hours.toString().padStart(2, '0');
  const formattedMinutes = minutes.toString().padStart(2, '0');
  const formattedSeconds = seconds.toString().padStart(2, '0');
  const formattedMilliseconds = milliseconds.toString().padStart(2, '0');

  return `${formattedHours}:${formattedMinutes}:${formattedSeconds}.${formattedMilliseconds}`;
}
Adding Lap Times
The addLap() function appends a new lap time to the list of laps. It creates a new list item element and sets its text content to include the lap count and the formatted lap time. The new lap time is added to the top of the list using prepend(), and the lap count is incremented.
function addLap(time) {
  const lapList = document.getElementById('laps');
  const listItem = document.createElement('li');
  listItem.textContent = `Lap ${lapCount}: ${time}`;
  lapList.appendChild(listItem);
  lapCount++;
}
Clearing Lap Times
The clearLaps() function clears all lap times by emptying the HTML content of the lap list.
function clearLaps() {
  const lapList = document.getElementById('laps');
  lapList.innerHTML = '';
}
Playing Sound (Optional)
The playSound() function plays a sound effect when the stopwatch is started. It retrieves the audio element, resets its current time to the beginning, and plays the audio.
function playSound() {
  const audio = document.getElementById('startSound');
  audio.currentTime = 0;
  audio.play();
}
Conclusion
Congratulations! Using JavaScript, you have learned how to build a stopwatch with lap time functionality. This functionality allows you to accurately measure time intervals and record lap times.
You can further enhance the stopwatch by customizing the CSS to match your preferred design and adding additional features as desired. Have fun experimenting and building upon this foundation!
Test your knowledge
Take a quick 5-question quiz based on this page.


