How to Setup Google Tag Manager in WordPress in 2025 (Without Issues)
Choose Your Language:
Adding Google Tag Manager to a WordPress site can be a bit tricky if you’re not familiar with the process. In this tutorial, we will walk you through the steps of how to Setup Google Tag Manager in WordPress in a way that is both efficient and easy to follow.
We’ll also show you how to troubleshoot any potential problems that may arise along the way. So whether you’re a beginner or an experienced WordPress user, this tutorial is for you!
1 What is Google Tag Manager?
Google Tag Manager is a free tool that allows you to manage and deploy marketing tags (such as pixels, analytics code, and eCommerce tracking) on your website or mobile app without having to edit your code.
It also gives you the ability to create custom tags for events such as form submissions, button clicks, and more.
Read More: How to enable two-factor Authentication in WordPress (2 Easy Way)
2 Why Should You Use Google Tag Manager?
There are many reasons why you would want to use Google Tag Manager on your WordPress site.
For starters, it can save you a lot of time and hassle by allowing you to manage all your website tags in one place.
It also eliminates the need for you to edit your code every time you want to make a change to your tags, which can be a major pain point for many WordPress users.
In addition, Google Tag Manager can help you more easily track and analyze your website data, as well as improve your overall website performance.
Read more: 8 Seo Metrics You Can Analyze From Google Analytics to rank better
3 What do you need to Install Google Tag Manager to a WordPress Site?
Installing Google Tag Manager on your WordPress site is a fairly simple process. However, there are a few things you’ll need to have in order before getting started:
- A WordPress website (self-hosted)
- A Google Tag Manager account
- Tag Assistant Extension for Troubleshooting
- GTM4WP WordPress Plugin
4 How to Add Google Tag Manager to a WordPress Site
Now that you have everything you need, let’s walk through the process of adding Google Tag Manager to your WordPress site.
The first thing you’ll need to do is create a new container in your Google Tag Manager account.
4.1 Step1: Install Google Tag Assistant Chrome Extension
The first step is to install the Google Tag Assistant extension on your Chrome browser.
This extension will help you troubleshoot any potential issues that may arise while setting up your Google Tag Manager container.
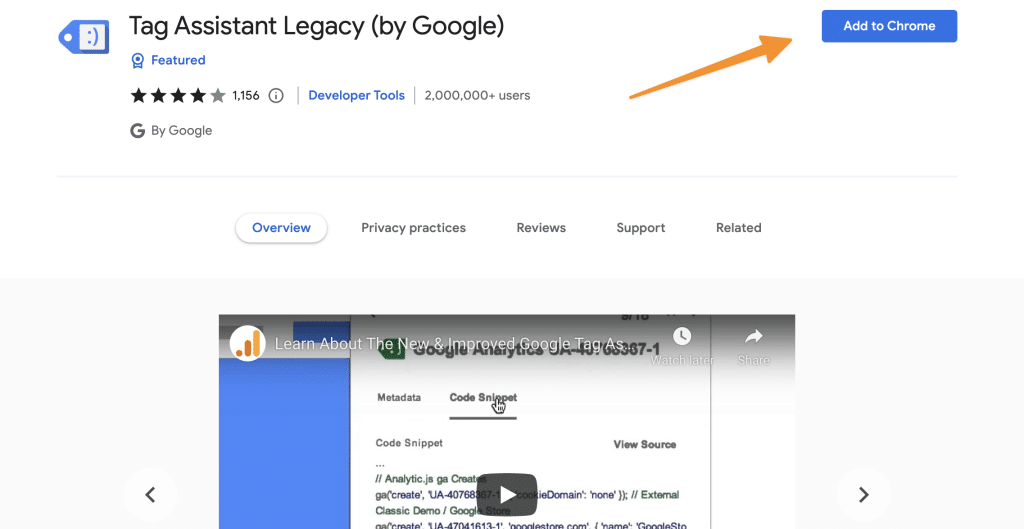
Go to the extension page here, and click on “add to chrome”;
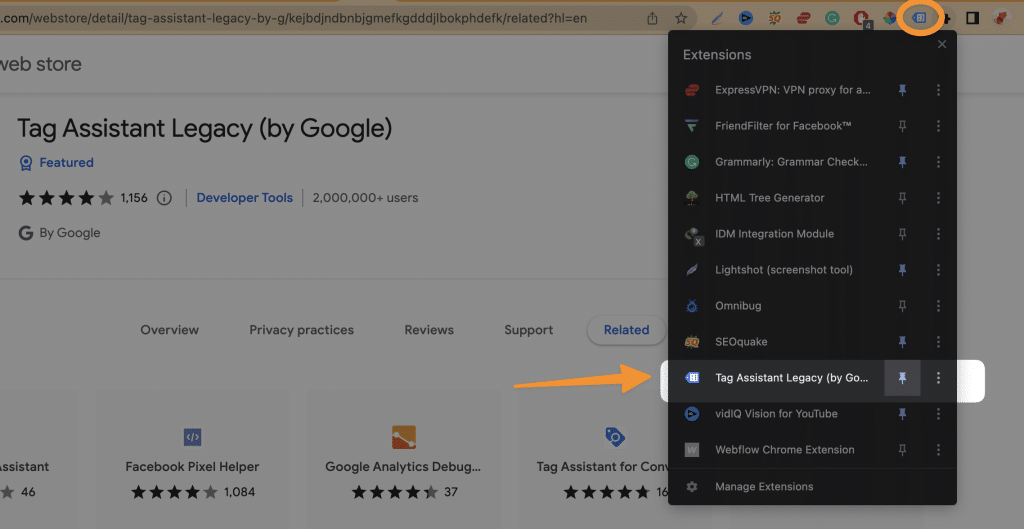
Click on the extension icon and pin the extension to the chrome nav bar;
4.2 Step2: Setup Google Tag Manager Account
Step one is to set up your Google Tag Manager account. If you don’t have one already, you can create a free account here.
Click on the start for free button;
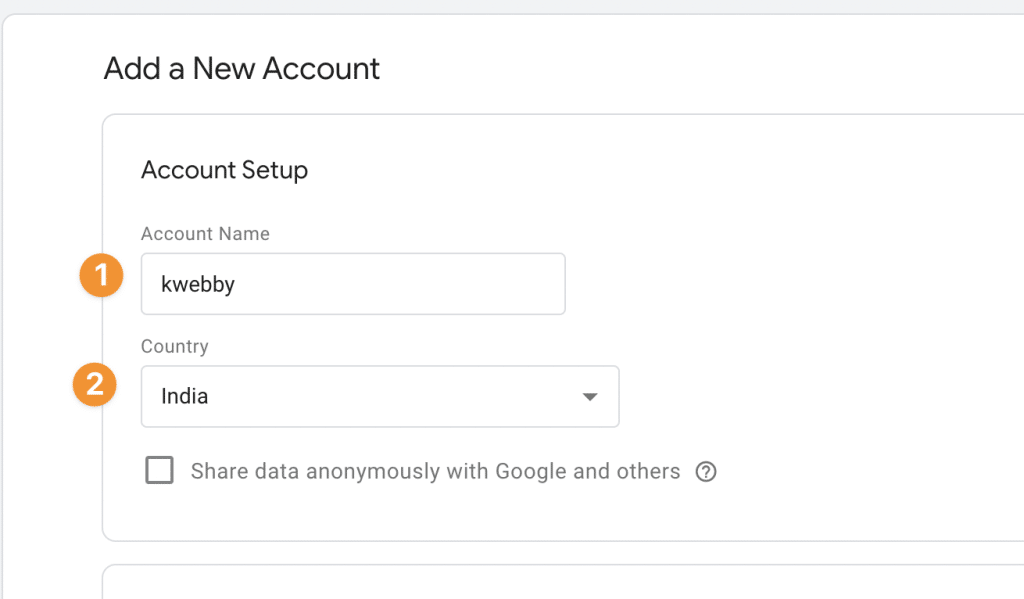
It redirects you to the account setup page, where you need to fill in all required details, Enter your domain URL in the container setup section
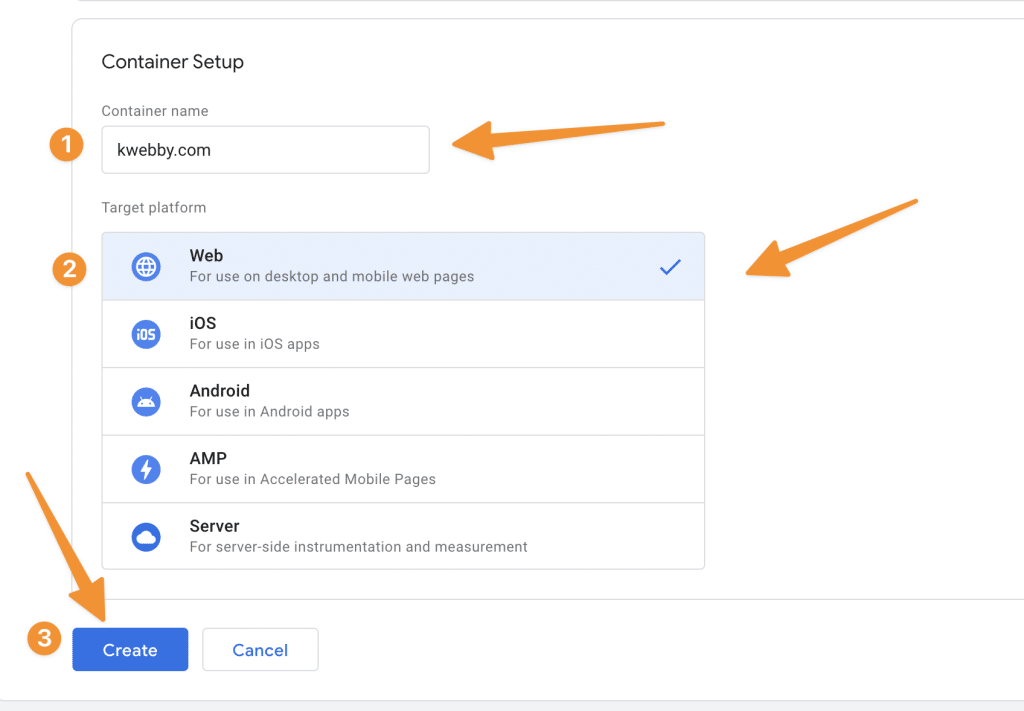
and click on “web” as the target platform, then click “create”.
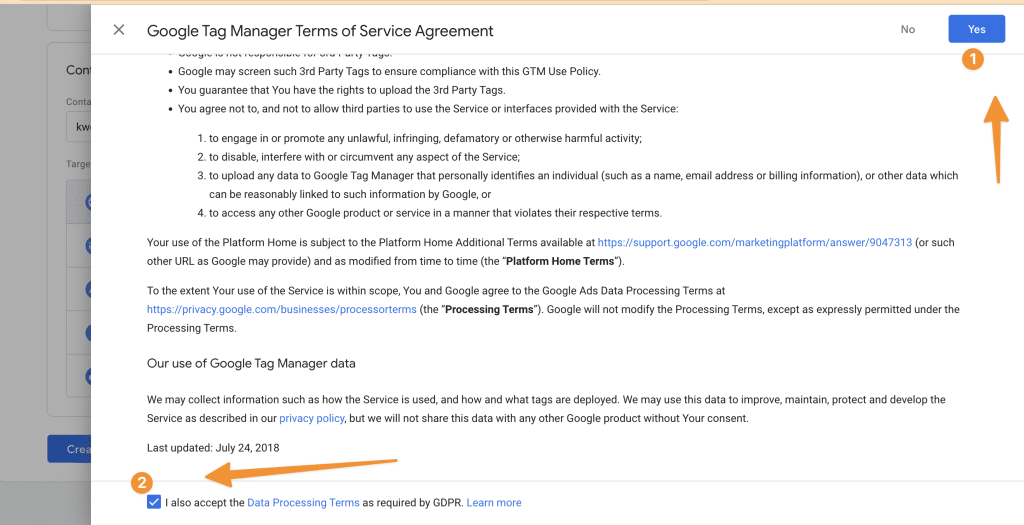
Now a new popup window will open for terms and conditions just select “Yes” and click the checkbox accepting the terms;
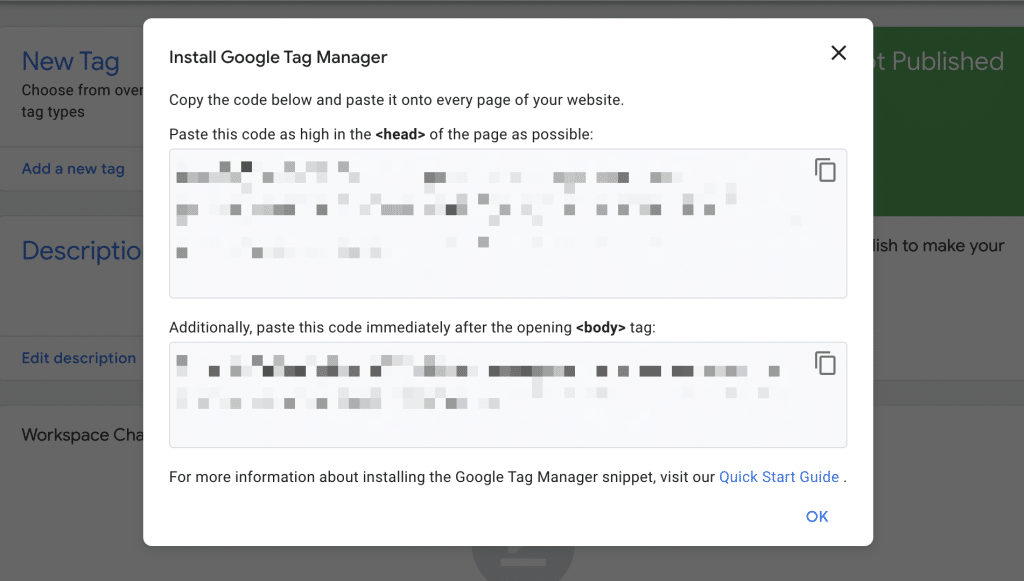
Once you’ve created your account, you’ll be given a code to put on your head and body tag as below (optional);
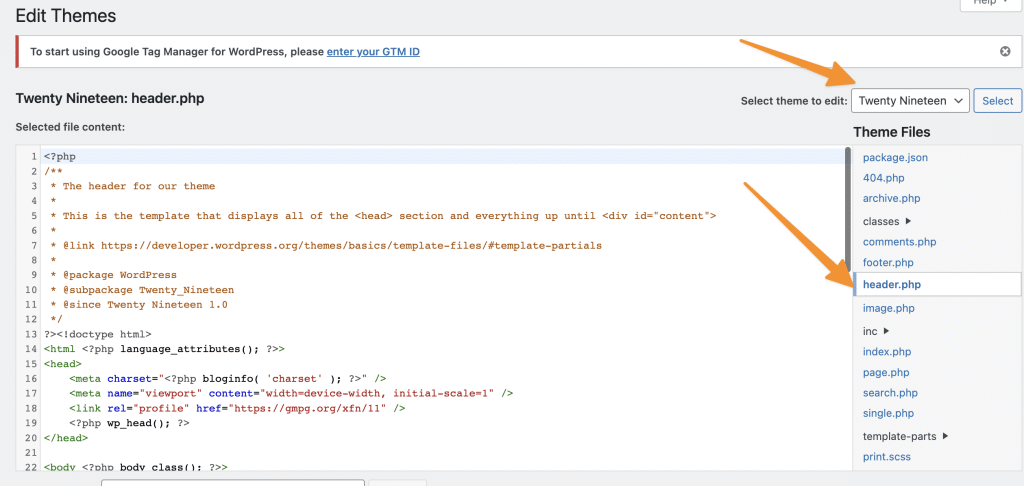
You won’t be needing this since we are using a WordPress plugin but if you want you can add the <head> code in the theme header section by going to Appearance > theme file editor > select your theme > header.php, just before </head> tag as below;
and the body tag you need to add the same into the footer by going to footer.php and pasting the code like below;
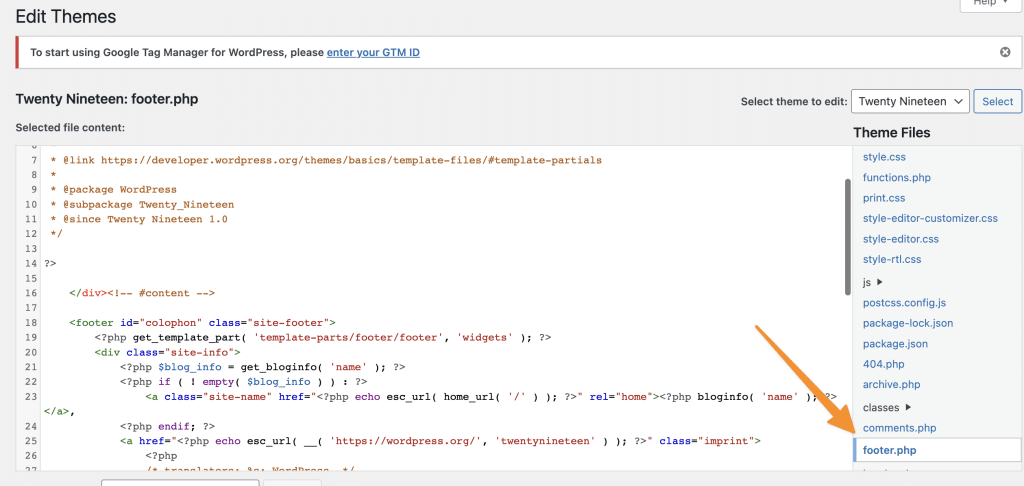
It will do the job but if you are not comfortable editing a theme file thinking it may break something then please ignore the steps above and move forward with the next step below.
Keep note of your Google tag ID starts with GTM as follows;
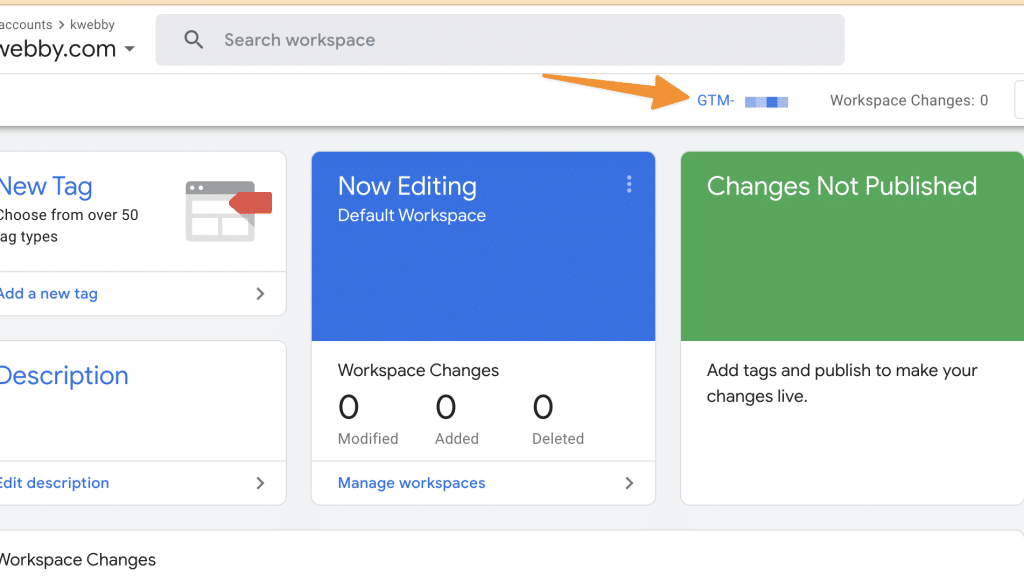
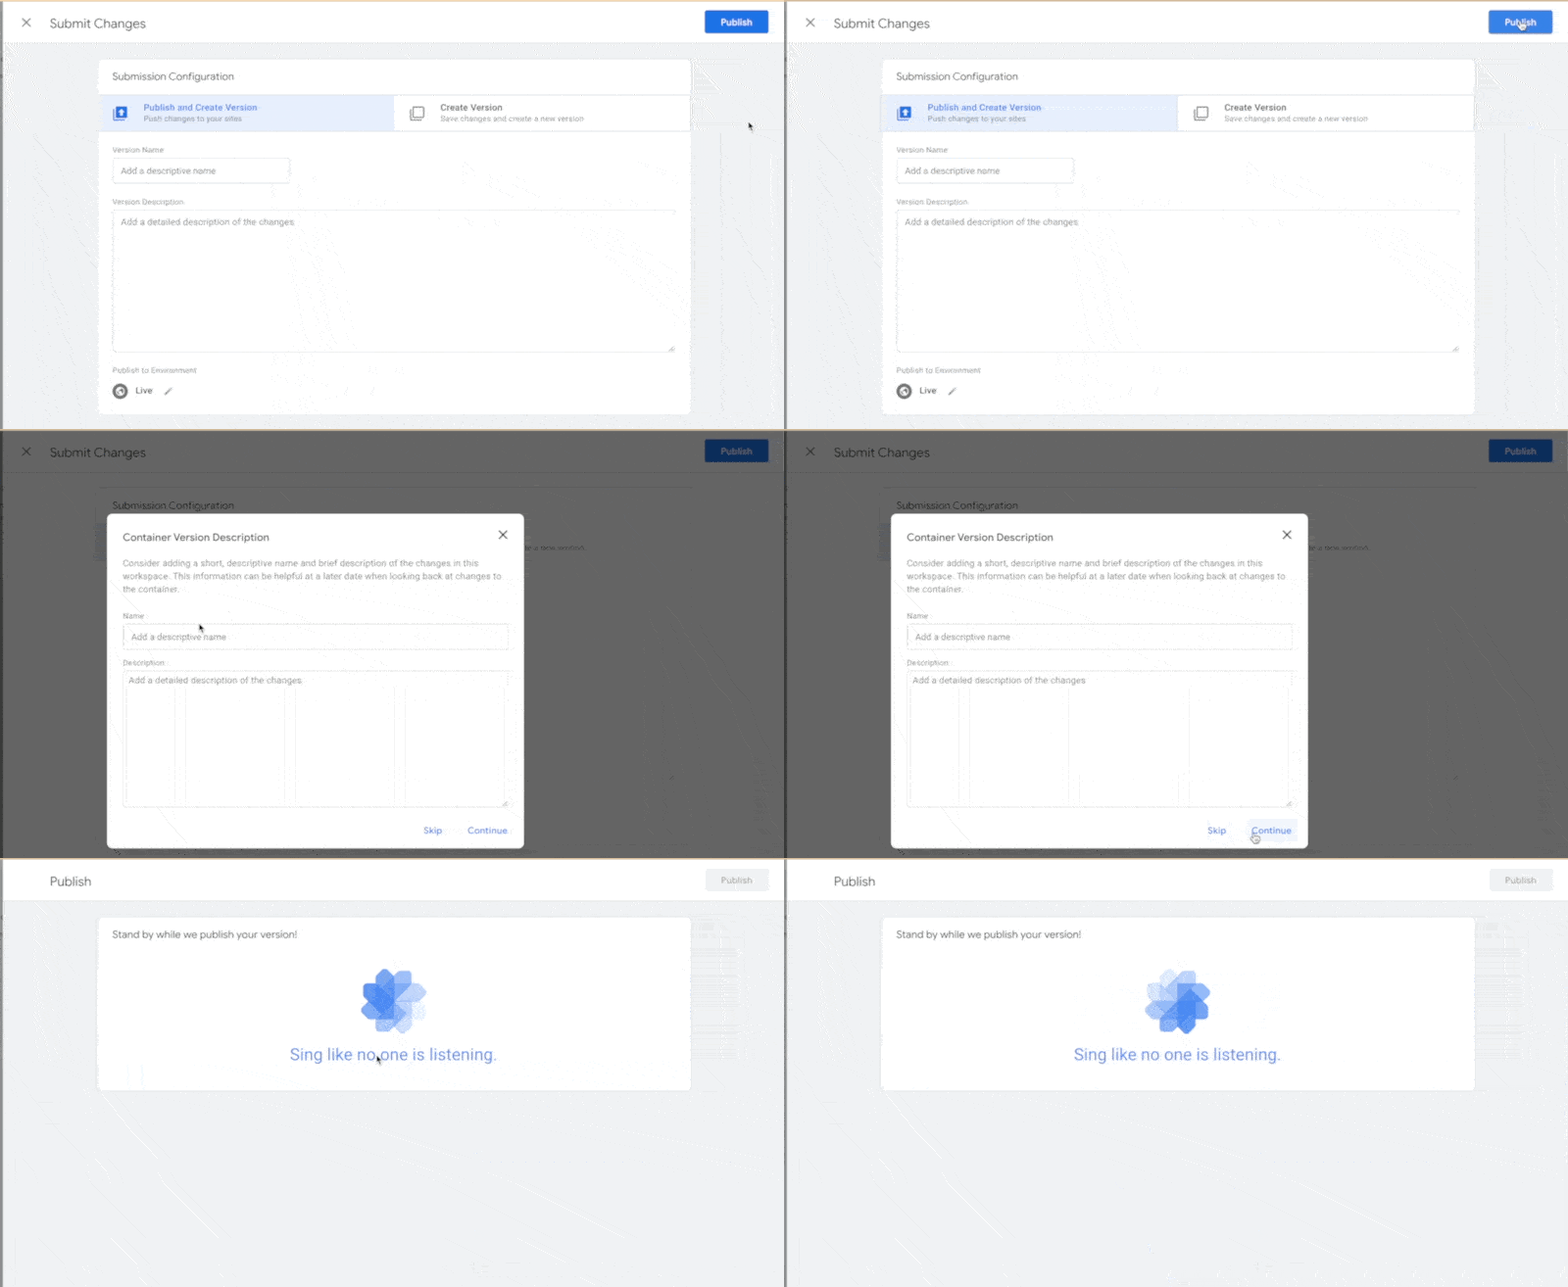
As you can see on your dashboard that changes are not published, therefore, you need to publish the tag by clicking on “Submit”;
then click on “publish” and “continue” when the popup appears;
4.3 Step3: Install and Activate GTM4WP WordPress Plugin
The next step is to install and activate the GTM for the WordPress plugin.
This plugin will help you easily integrate your Google Tag Manager container into your WordPress site.
Go to plugins > add new, in the search box type “GTM4WP” and click on enter;
It shows the plugin like below, click on install now;
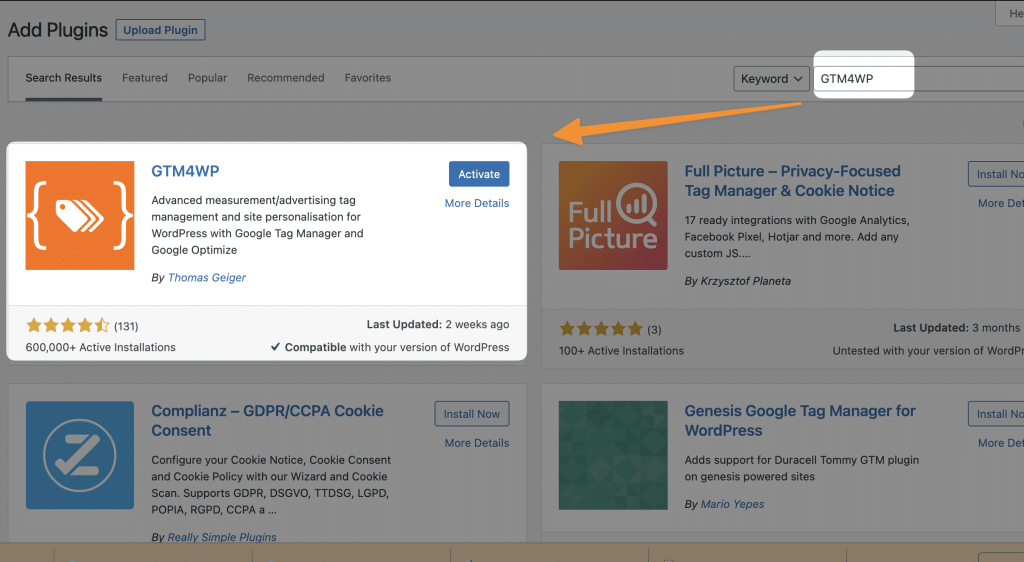
After installing the plugin, activate it.
4.4 Step4: Configure GTM4WP Plugin Settings
Once the plugin is activated, you’ll need to configure its settings.
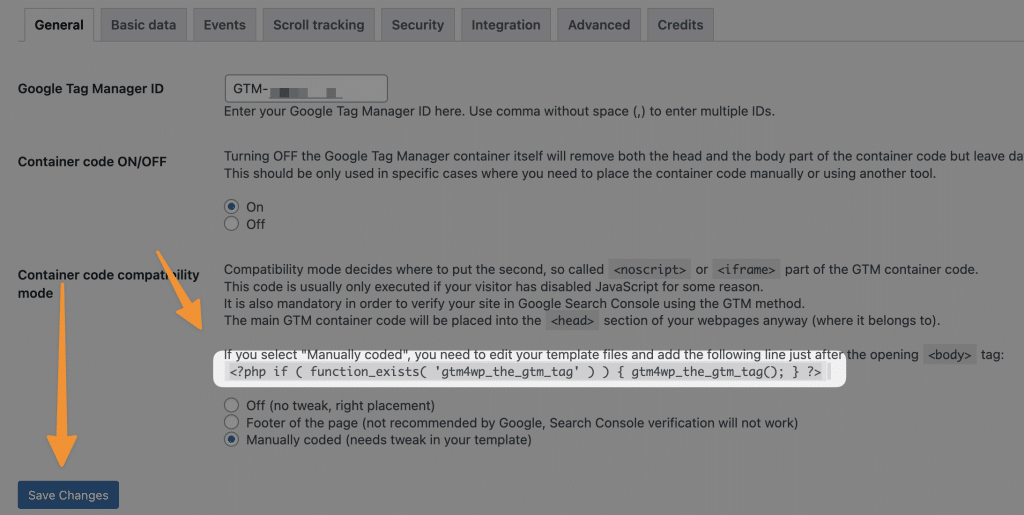
Go to Settings > GTM and enter your Google Tag Manager ID in the Container ID field.

This can be found in your GTM account which has been discussed in Step 2 above.
In next turn code Container Code ON;

And next, you have three options available for code compatibilities for customer code placement, if you don’t want to play with it then click on “off”, but if you want to place it to the footer to increase fast page loading then click on “footer”.
But we suggest you select the “manually coded” option for proper placement for maximum result.
All you need is to copy the PHP code which is mentioned just above the options and click “save changes”;
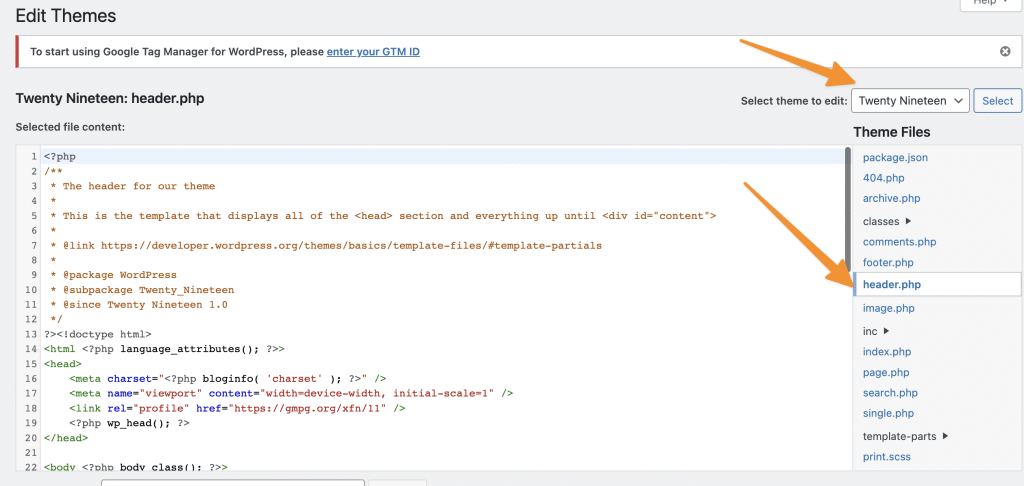
Now, go to your theme file editor by going to appearance > theme file editor;
Select your theme and select the “Theme Header” (header.php) file;
Now paste the code just after the body tag as follows;
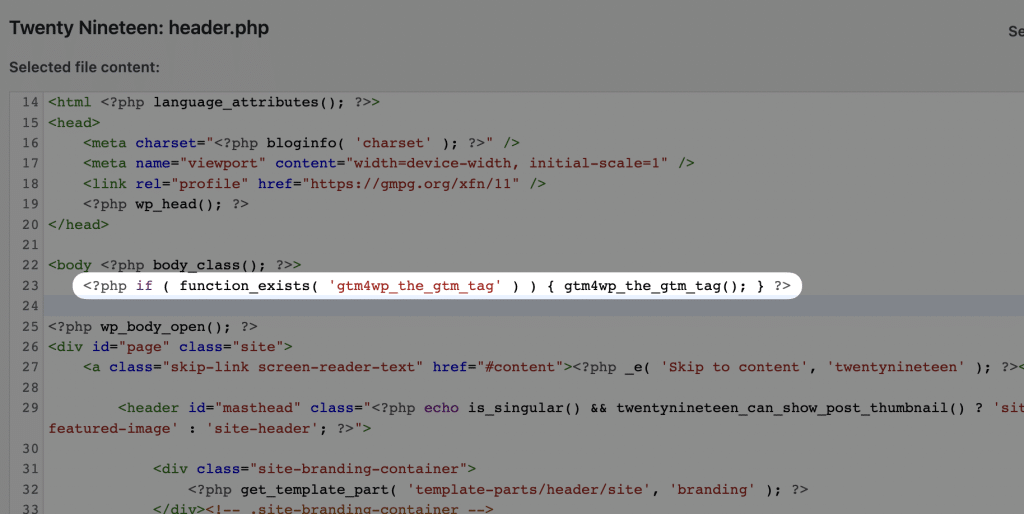
Click on “save”
4.5 Step5: Verify your Installation
Now that you have added your Google Tag Manager code to your WordPress site, it’s time to verify the installation.
The best way to do this is by using the Google Tag Assistant Chrome extension.
This extension will help you troubleshoot any potential issues that may arise while setting up your Google Tag Manager container.
Now, go back to your website and click on the Google Tag Assistant icon in your Chrome browser.
It will show you a page like the below with different tags, Click on “enable” for all tags;
Now go back to your website and refresh the page, then click on the Google Tag Assistant icon again.
You should now see a green status next to your container ID (as shown in the image below).
This indicates that your Google Tag Manager installation is working properly.
If you see a red status, this means there’s an issue with your installation.
Common issues include incorrect container IDs, mismatched container codes, or code placed in the wrong location on your website.
Troubleshooting these issues is beyond the scope of this article, but you can find more information in the Google Tag Manager documentation.
That’s it! You have successfully added Google Tag Manager to your WordPress site.
If you have any questions, feel free to leave a comment below. And don’t forget to check out our other WordPress tutorials!

