As a new YouTuber, one of the most important steps to succeed on YouTube is to choose the right youtube category. Selecting the appropriate category helps YouTube understand what your video is about. Therefore, it helps target the video to the right audience.
This can result in better discoverability. However, what if for one of your videos, you picked the wrong category? Or maybe you decided to switch the type of content you uploaded and need to change the previous youtube videos?
Luckily for you, the YouTube platform allows you to change video category even after it has been uploaded. The process to change video category is straightforward and easy, ensuring your videos are always in the correct category. In this article, I will guide you through the straightforward process of how to change your YouTube categories.
Checkout our Free Youtube Tools;
Method #1 – Change the category of a previously uploaded video
Step 1: Access YouTube Studio
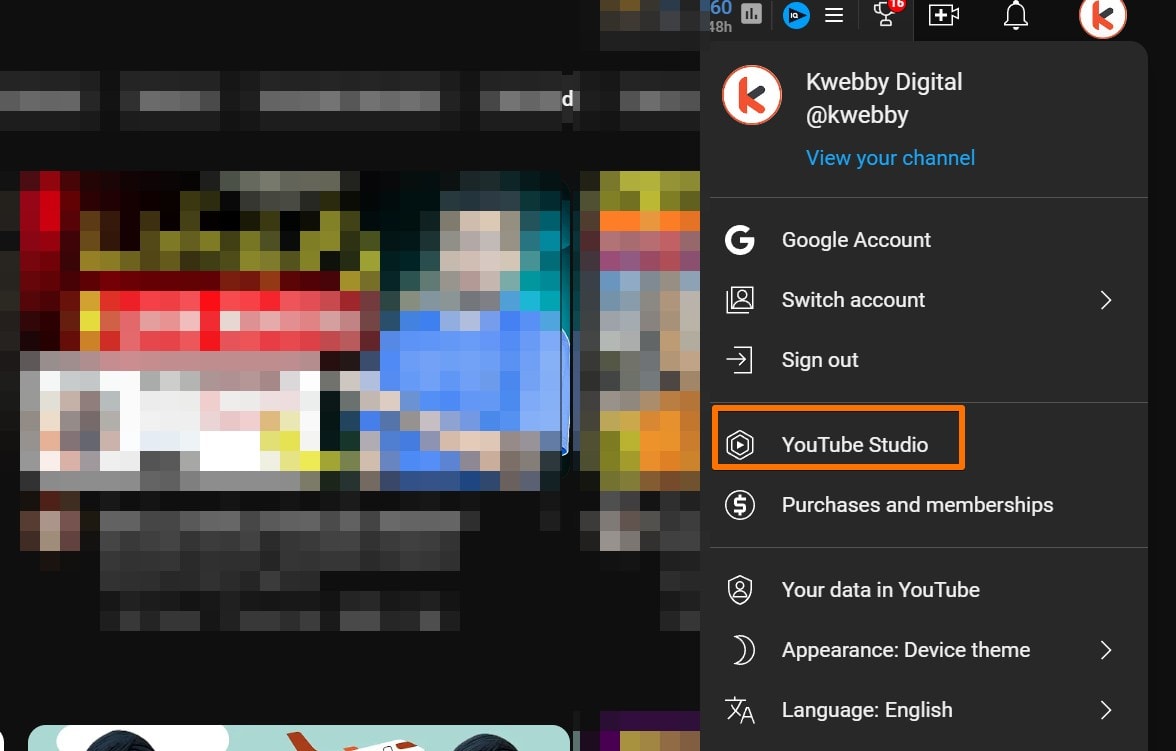
First, you need to log in to your YouTube account and head over to YouTube Studio using the link studio.youtube.com.
Step 2: Navigate to Videos
Once you are in YouTube Studio, click on the “Content” tab on the left sidebar to view your uploaded videos. This is where you can manage all your video content.
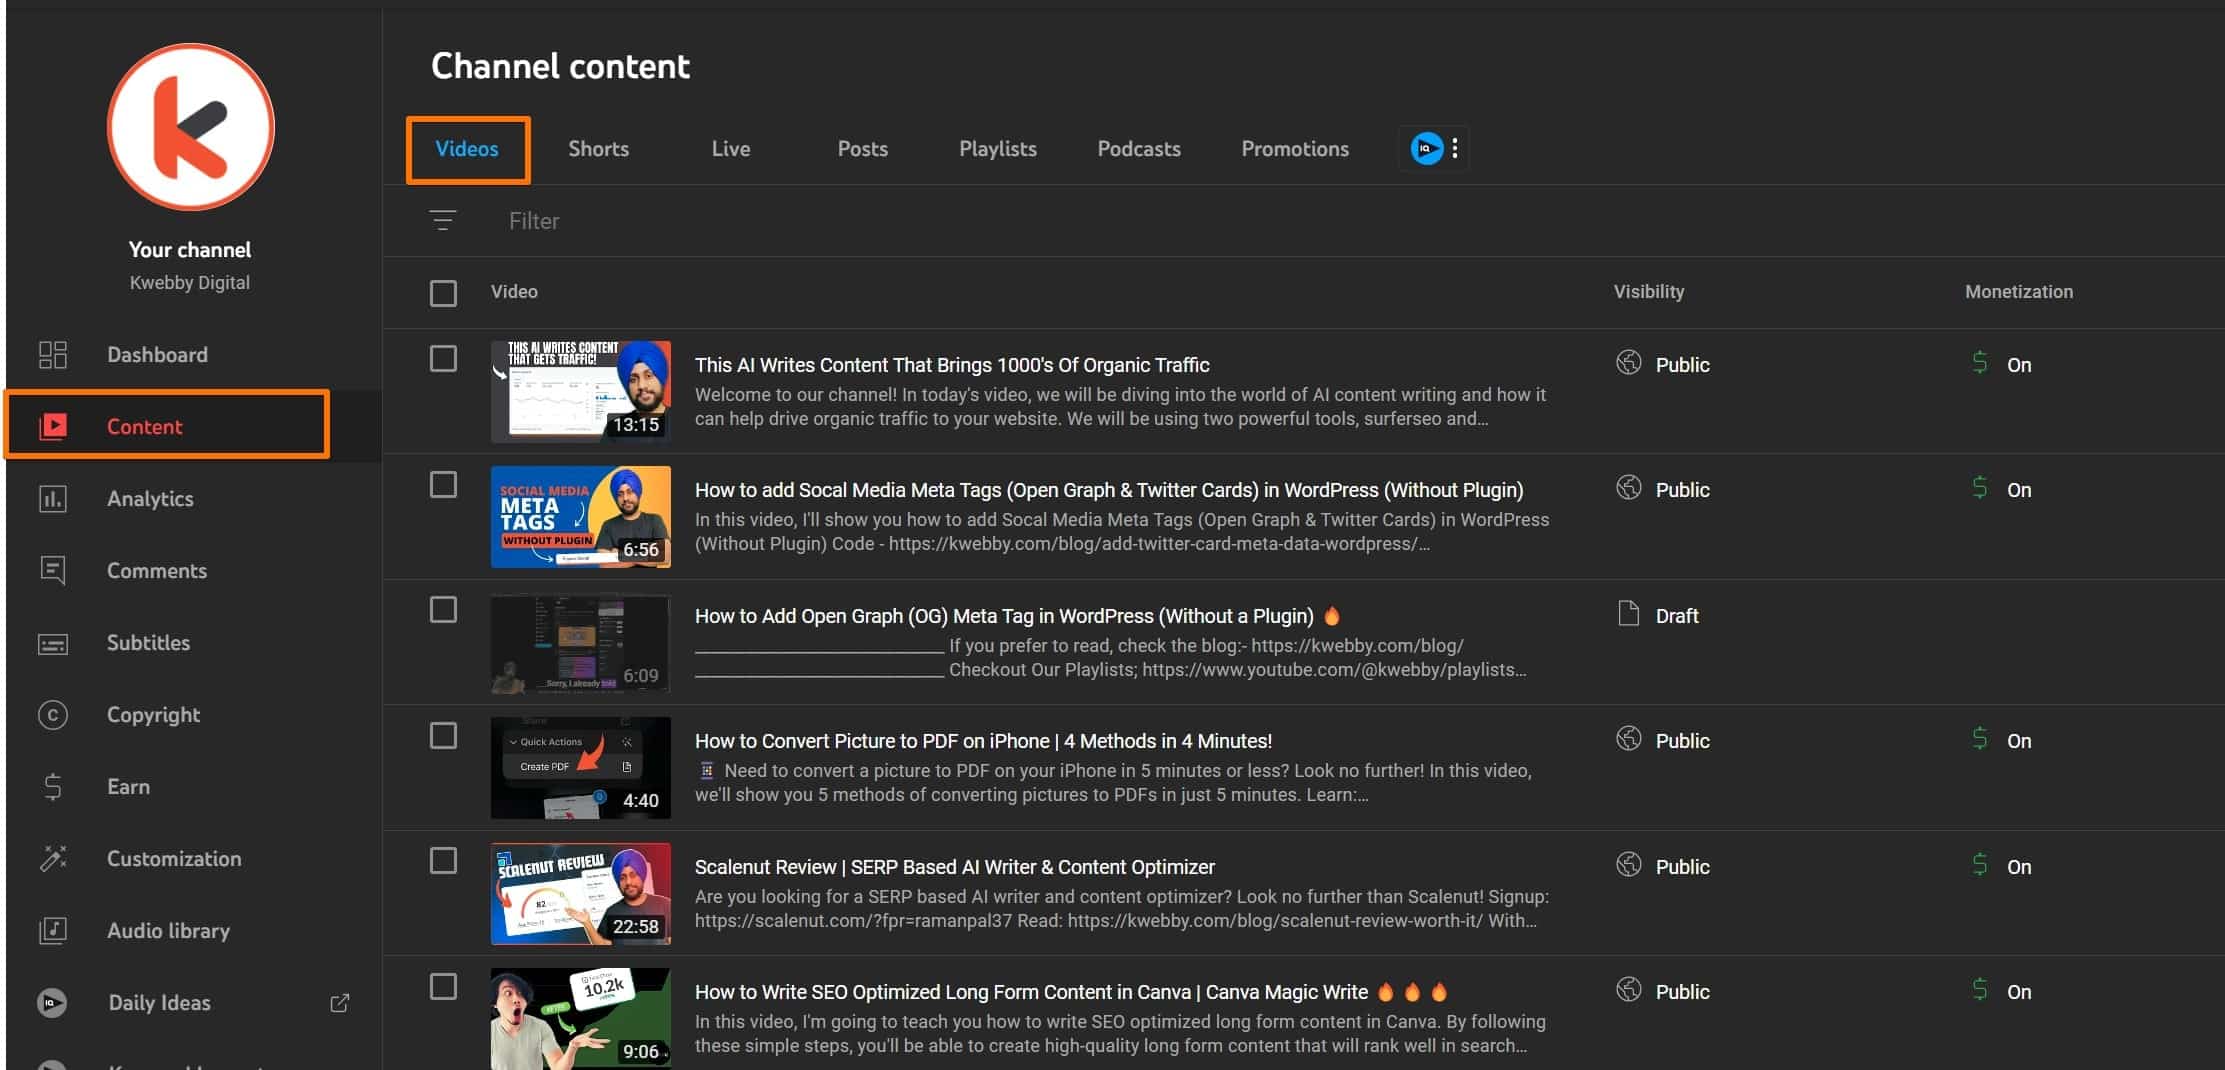
Step 3: Select the Video to Edit
Find the video for which you want to change the category. Click on the thumbnail or title of the video to open the video details page.

Step 4: Tap on Edit
Scroll down to find the category option.
Step 5: Choose the Correct Category
In the “Category” section, you will find a dropdown menu with different categories. Choose the most appropriate category for your video from the available categories.
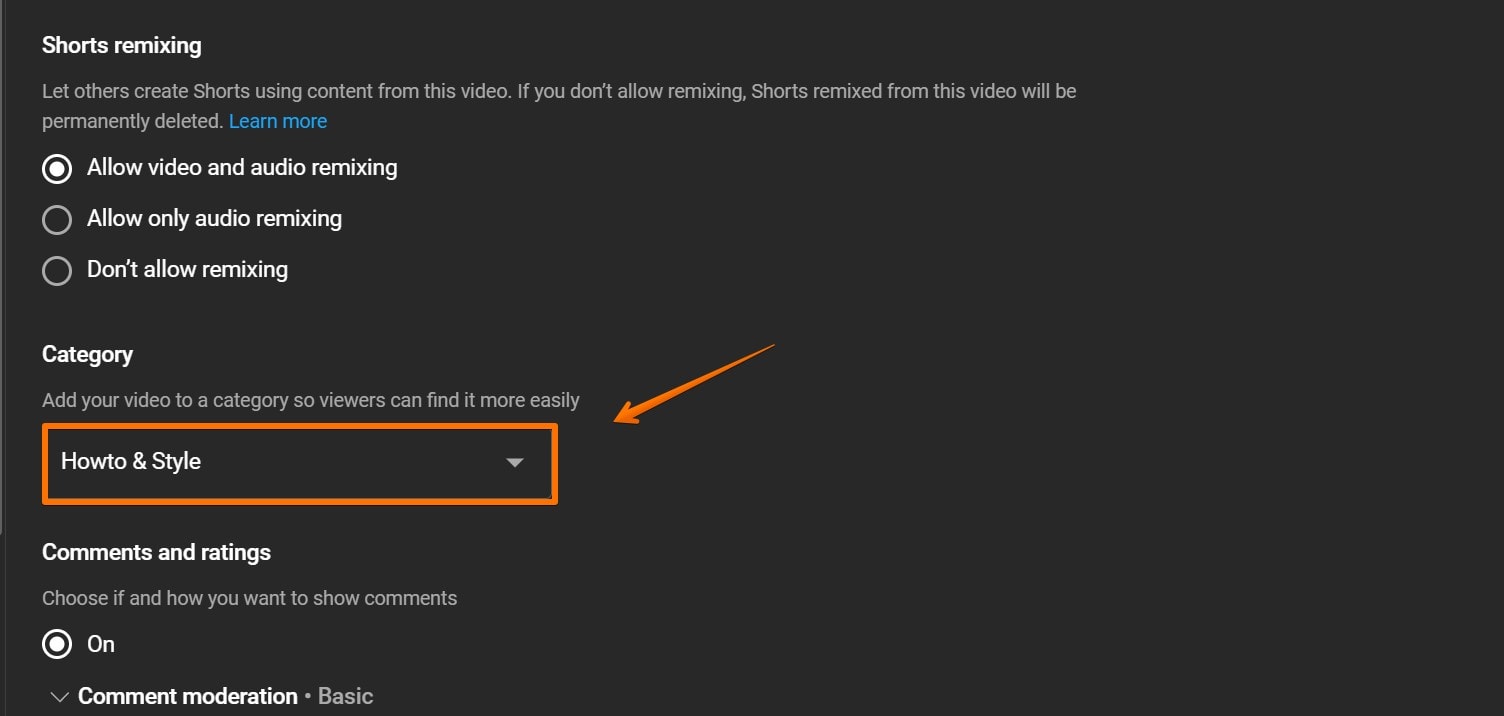
Step 6: Save Your Changes
Don’t forget to click the “Save” button, which you can find at the top-right or bottom-right of the page, to ensure your changes are updated.
Method #2 – Change the Default category of future videos:
This is also the way to change the youtube channel category. But if you want to make this category default for all the future videos, follow the steps below:
Step 1: Access YouTube Studio
Sign in to your YouTube account and go to YouTube Studio using the link studio.youtube.com.
Step 2: Open Settings
In the left sidebar menu, click on the “Settings” option.
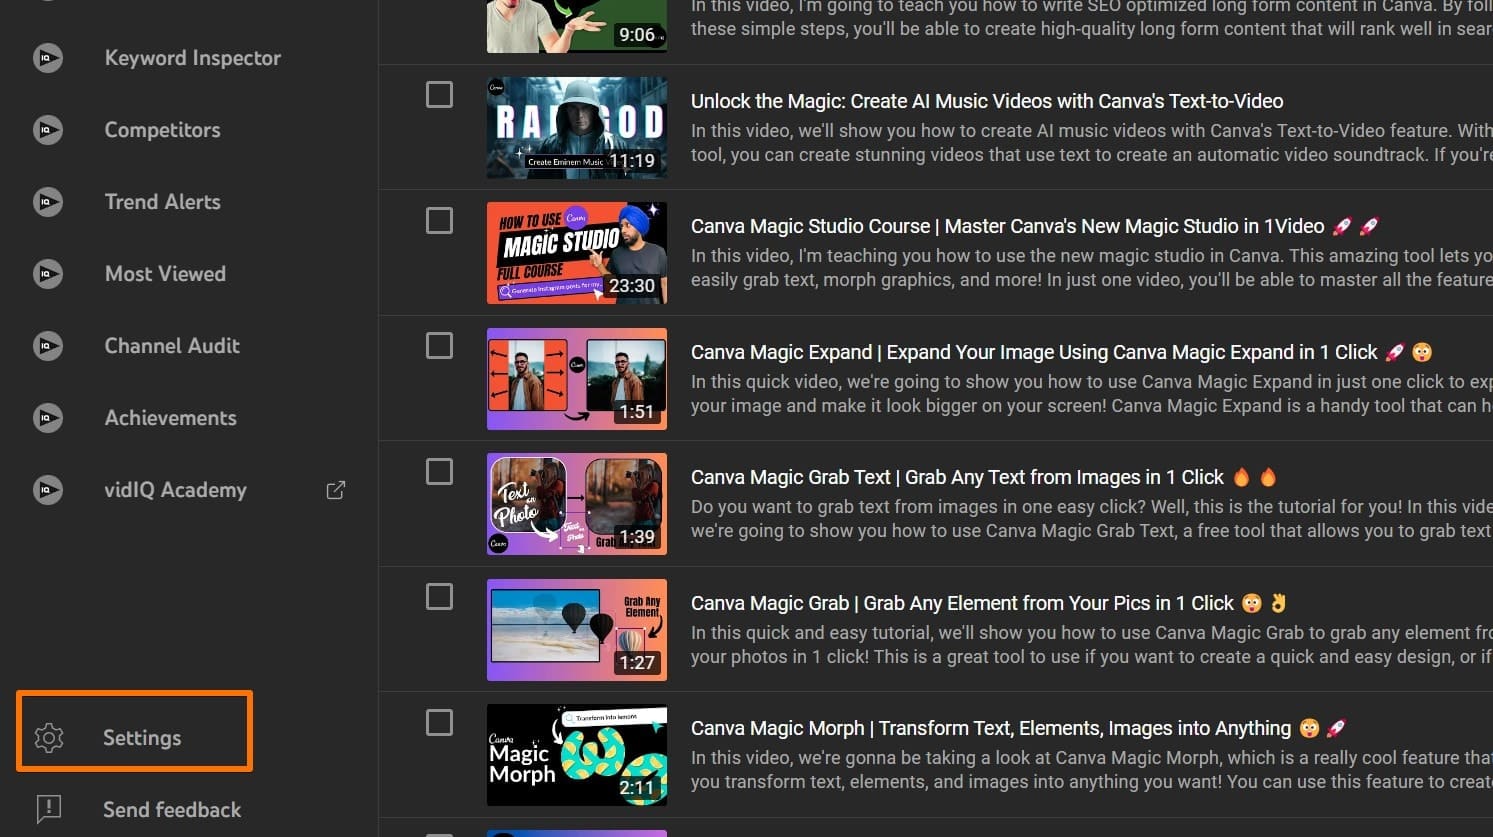
Step 3: Go to Upload Defaults
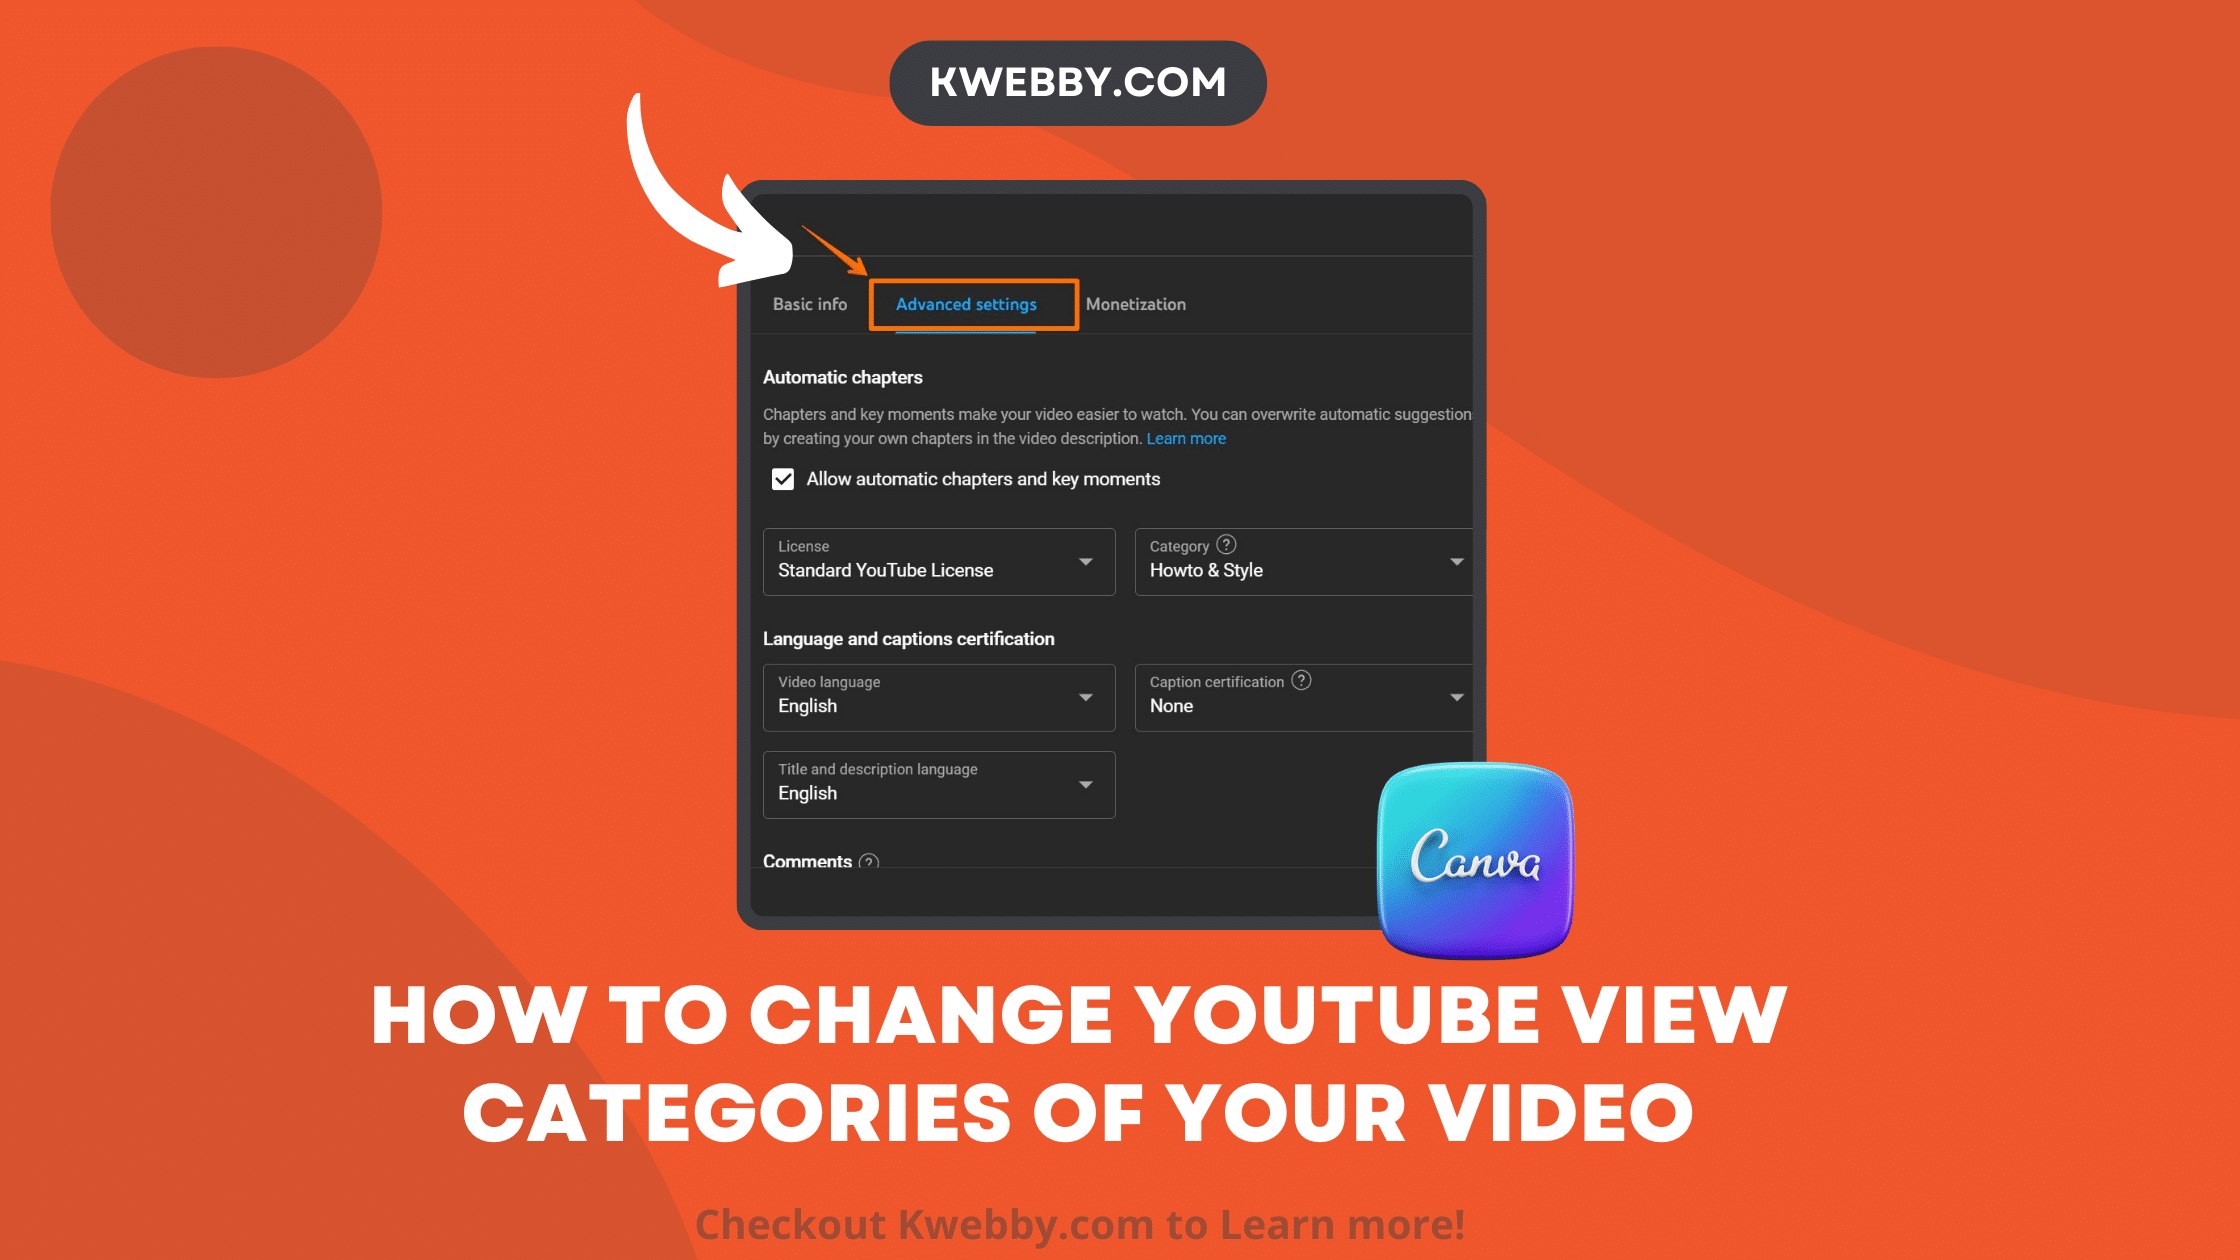
Select “Upload Defaults” from the settings menu and then navigate to “Advanced settings”.
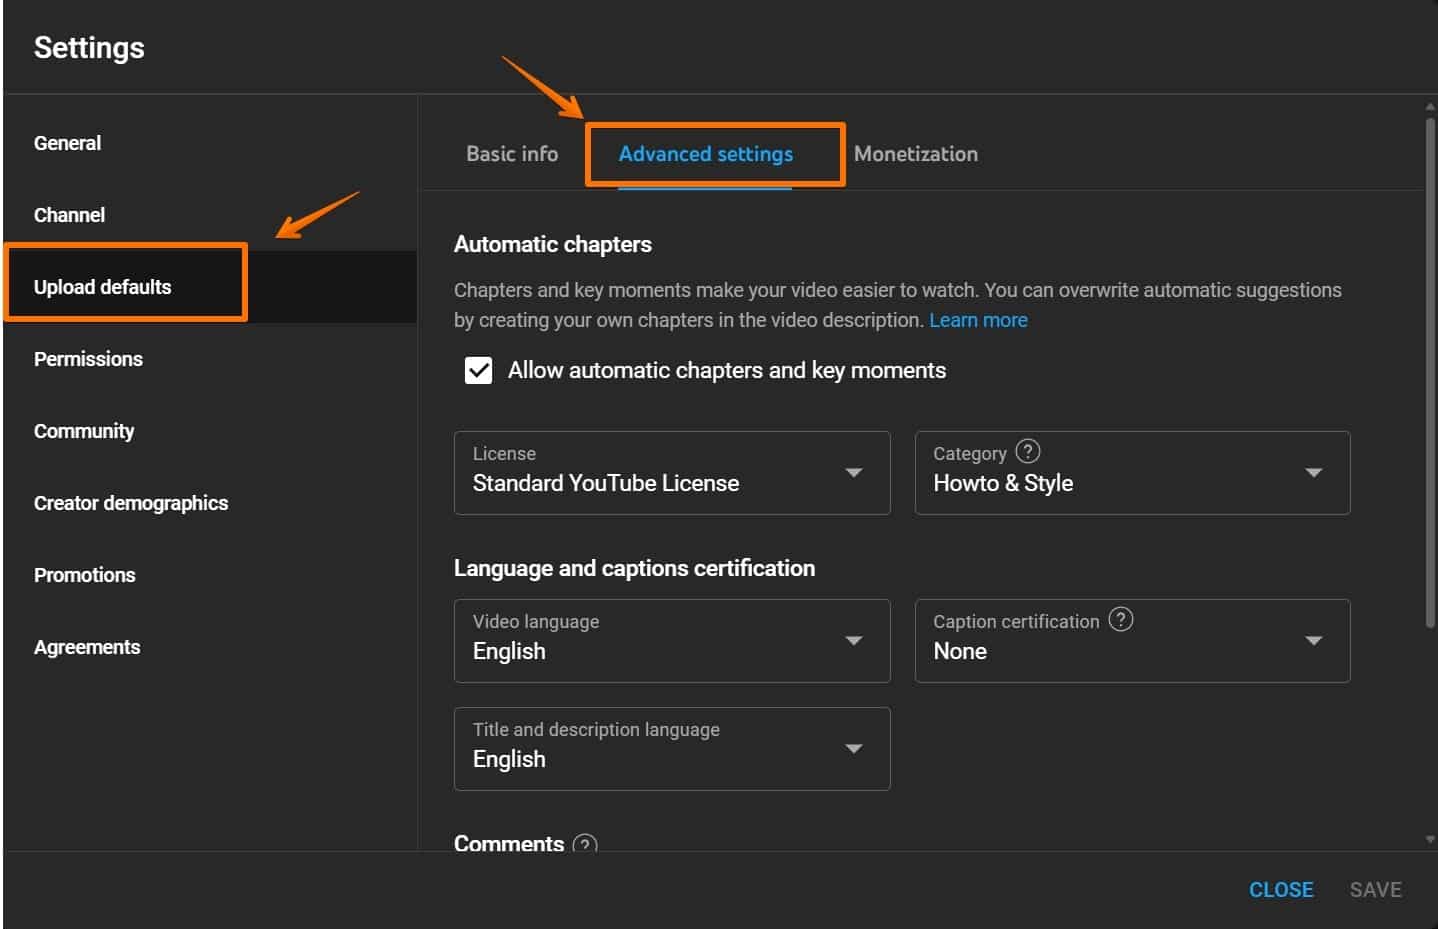
Step 4: Choose a New Category
Under the “Category” section, click on the dropdown menu. You will see a list of different categories such as Film & Animation, Autos & Vehicles, Music, Pets & Animals, Sports, Travel & Events, Gaming, People & Blogs, Comedy, Entertainment, News & Politics, Style, Education, Science & Technology, and Non-profit. Choose the category that best fits your channel content.
Step 5: Save Your Changes
Make sure to click the “Save” button to update your settings. This will set the selected category as the default for all your future uploads.
Conclusion
Changing your YouTube video category is a simple yet powerful way to reach the right audience and increase watch time. By following the steps outlined, you can easily correct any wrong category choices and ensure that your videos are placed in the most appropriate category.
This practice informs YouTube about the content of your videos, helping the platform target the right viewers and update videos accordingly. Whether you’re dealing with previous videos or setting upload defaults for future content, using YouTube Studio offers a straightforward process to switch to the correct category and attract more people interested in your specific video categories.
Test your knowledge
Take a quick 5-question quiz based on this page.

