
How to Create Categories in Google Sheets in Few Steps
Choose Your Language:
In today’s data-driven world, organizing information efficiently is more important than ever. Thanks to tools like Google Sheets, what once was a Herculean task reserved for ledger books and manual entries, fraught with errors and inefficiencies, can now be managed with precision and ease.
This article is a deep dive into how to create categories in Google Sheets, a feature that revolutionizes the way we organize, analyze, and retrieve data.
Google Sheets does more than just crunch numbers; it allows for sophisticated data manipulation — from sorting information into meaningful categories to using dropdown menus for simplified data entry.
Whether you’re dealing with main categories and subcategories, or you’re in search of a method to filter data for better analysis, Google Sheets offers a plethora of functionalities like data validation, dropdown list creation, and organizing data in descending order, ensuring your spreadsheet work is as efficient as possible.
By the end of this guide, you’ll be well-versed in using Google Sheets to categorize your data, making it easily accessible, manageable, and significantly more useful. Join us as we unpack the steps to transform your data into a neatly organized powerhouse of information.
1 Step-by-step guide to making categories in Google Sheets
Google Sheets stands out as the go-to tool for effectively managing, analyzing, and categorizing data, especially when it comes to documents related to finances and record-keeping. Mastering these techniques undoubtedly simplifies the categorization process within Google Sheets.
To start categorizing your data, it’s essential to have a diverse set of data that can be organized into various categories. To illustrate this, I’ve prepared an example using an item list from a general store.
Through this example, we’ll explore the step-by-step process of creating categories, enhancing our understanding of how to efficiently utilize Google Sheets for data organization.
This walkthrough aims to make your data easily manageable, neatly organized, and significantly more functional. Ready to enhance your Google Sheets skills? Let’s dive in.
1.1 Step 1: Preparing Your Spreadsheet
First things first, open your Google Sheets document and have your general items list ready. This is where each item will be organized into categories.
1.2 Step 2: Adding a Category Column
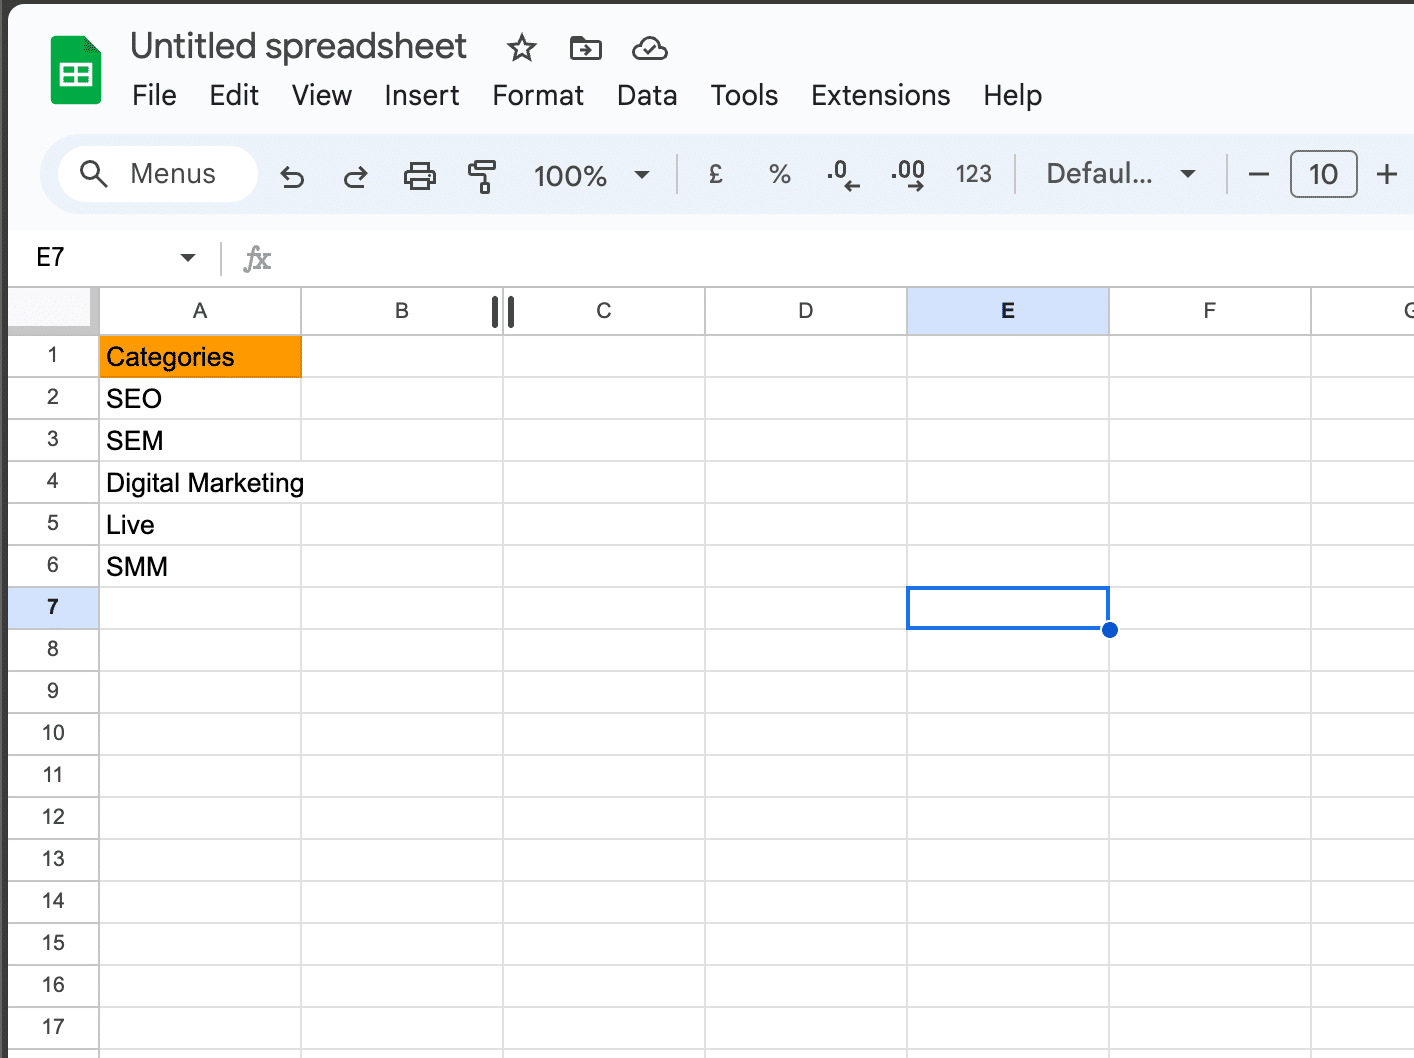
Next, add a new column in your sheet dedicated solely to categories. Title this column at the top to avoid any confusion, making it clear this column is meant for categorizing your items.
1.3 Step 3: Create a Separate Categories Sheet
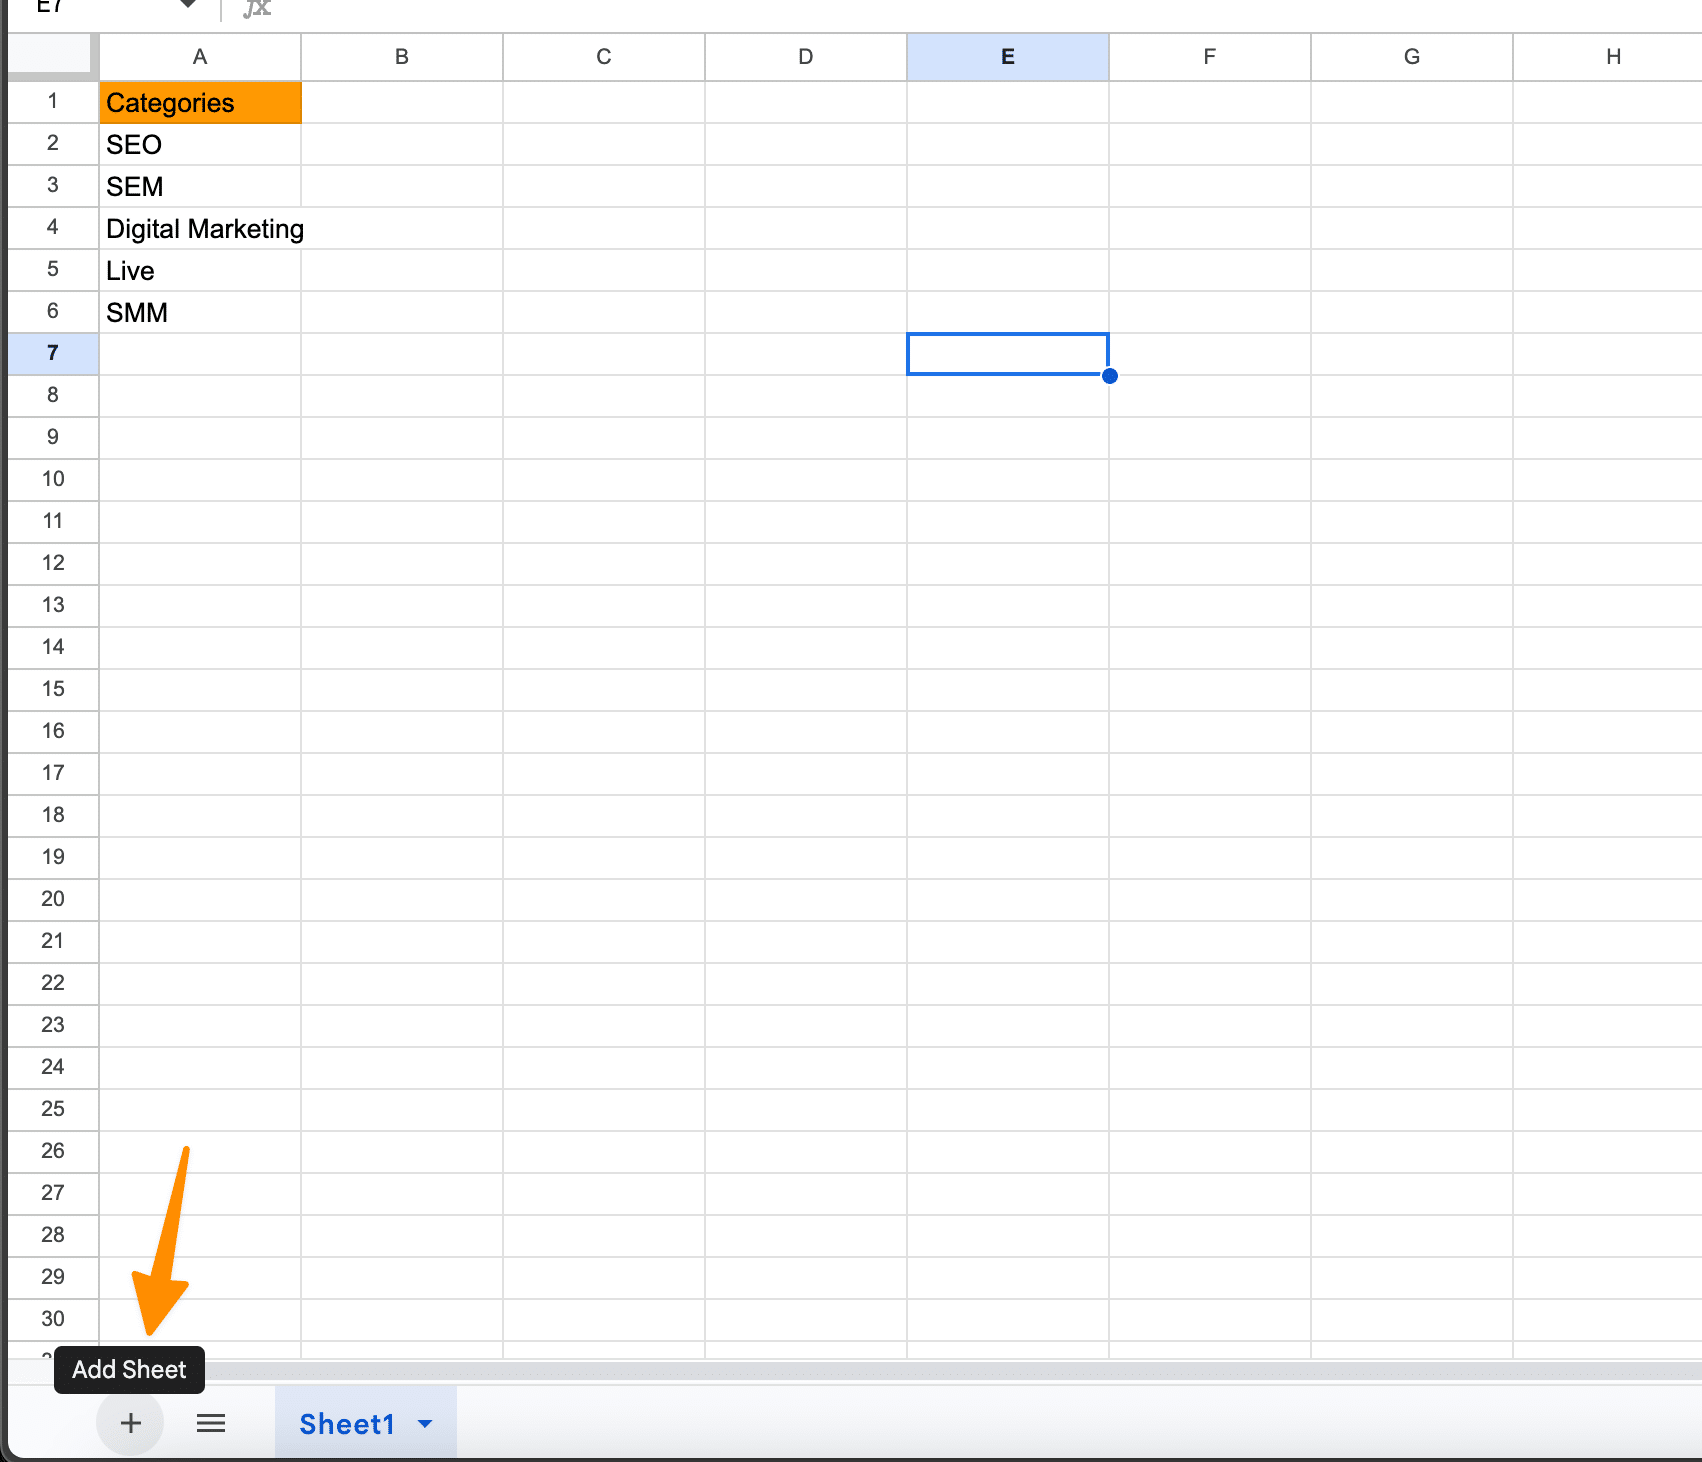
Open a new sheet within the same Google Sheets document and name it “categories.” to creare separate sheet. Here, list down every category relevant to your items.
This approach helps maintain a clean and organized workspace, separating the category management from your existing data.
1.4 Step 4: Selecting the Cell Range
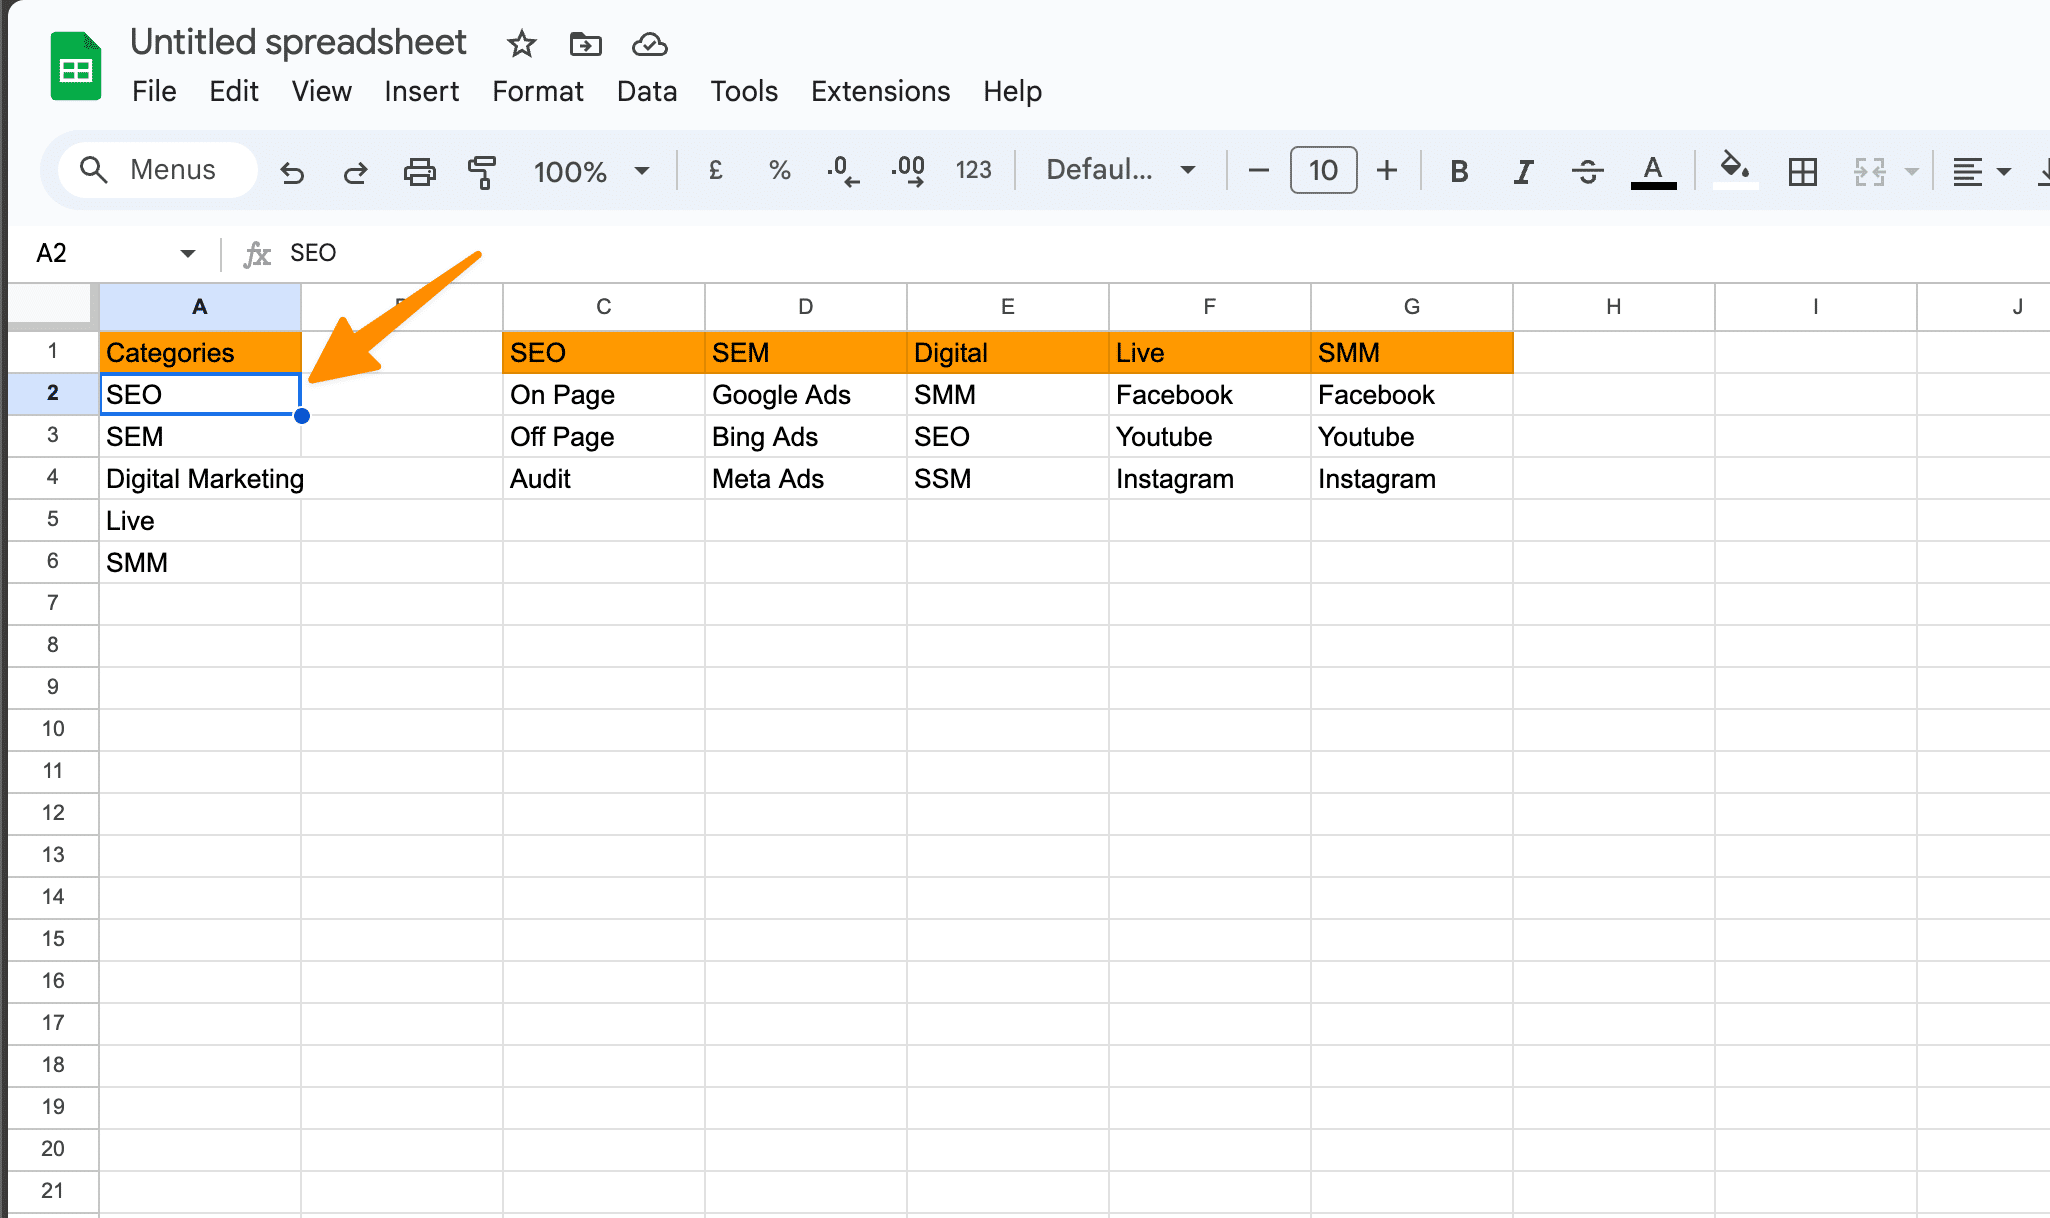
Decide on the cell range within your items list that you’ll be using for categorization. This is an important step to ensure data validation is applied correctly across your desired dataset.
1.5 Step 5: Accessing the Data Menu
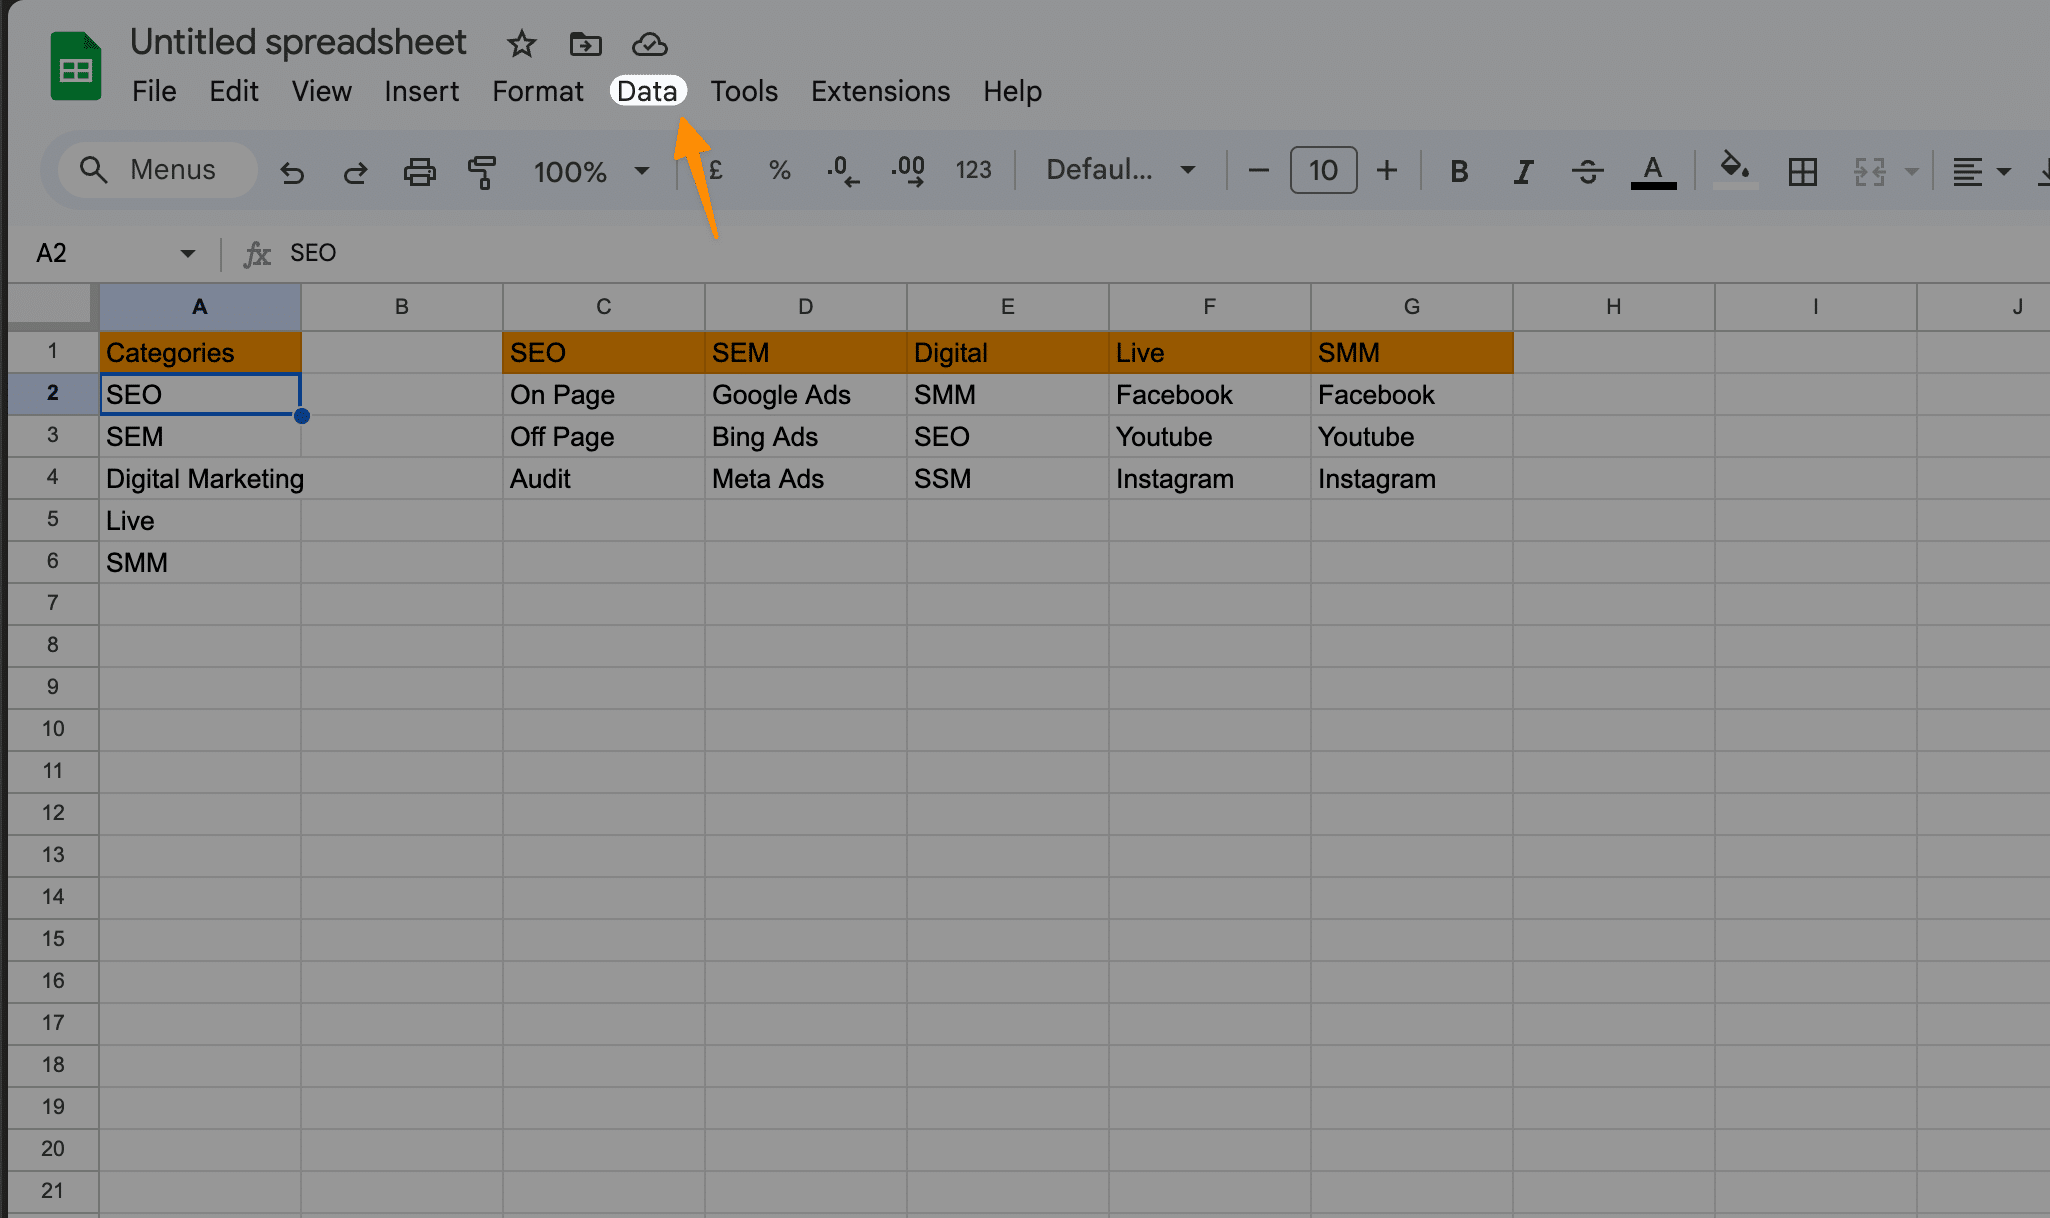
Highlight the selected cells and click on the “Data” tab in the main menu.
1.6 Step 6: Select Data Validation
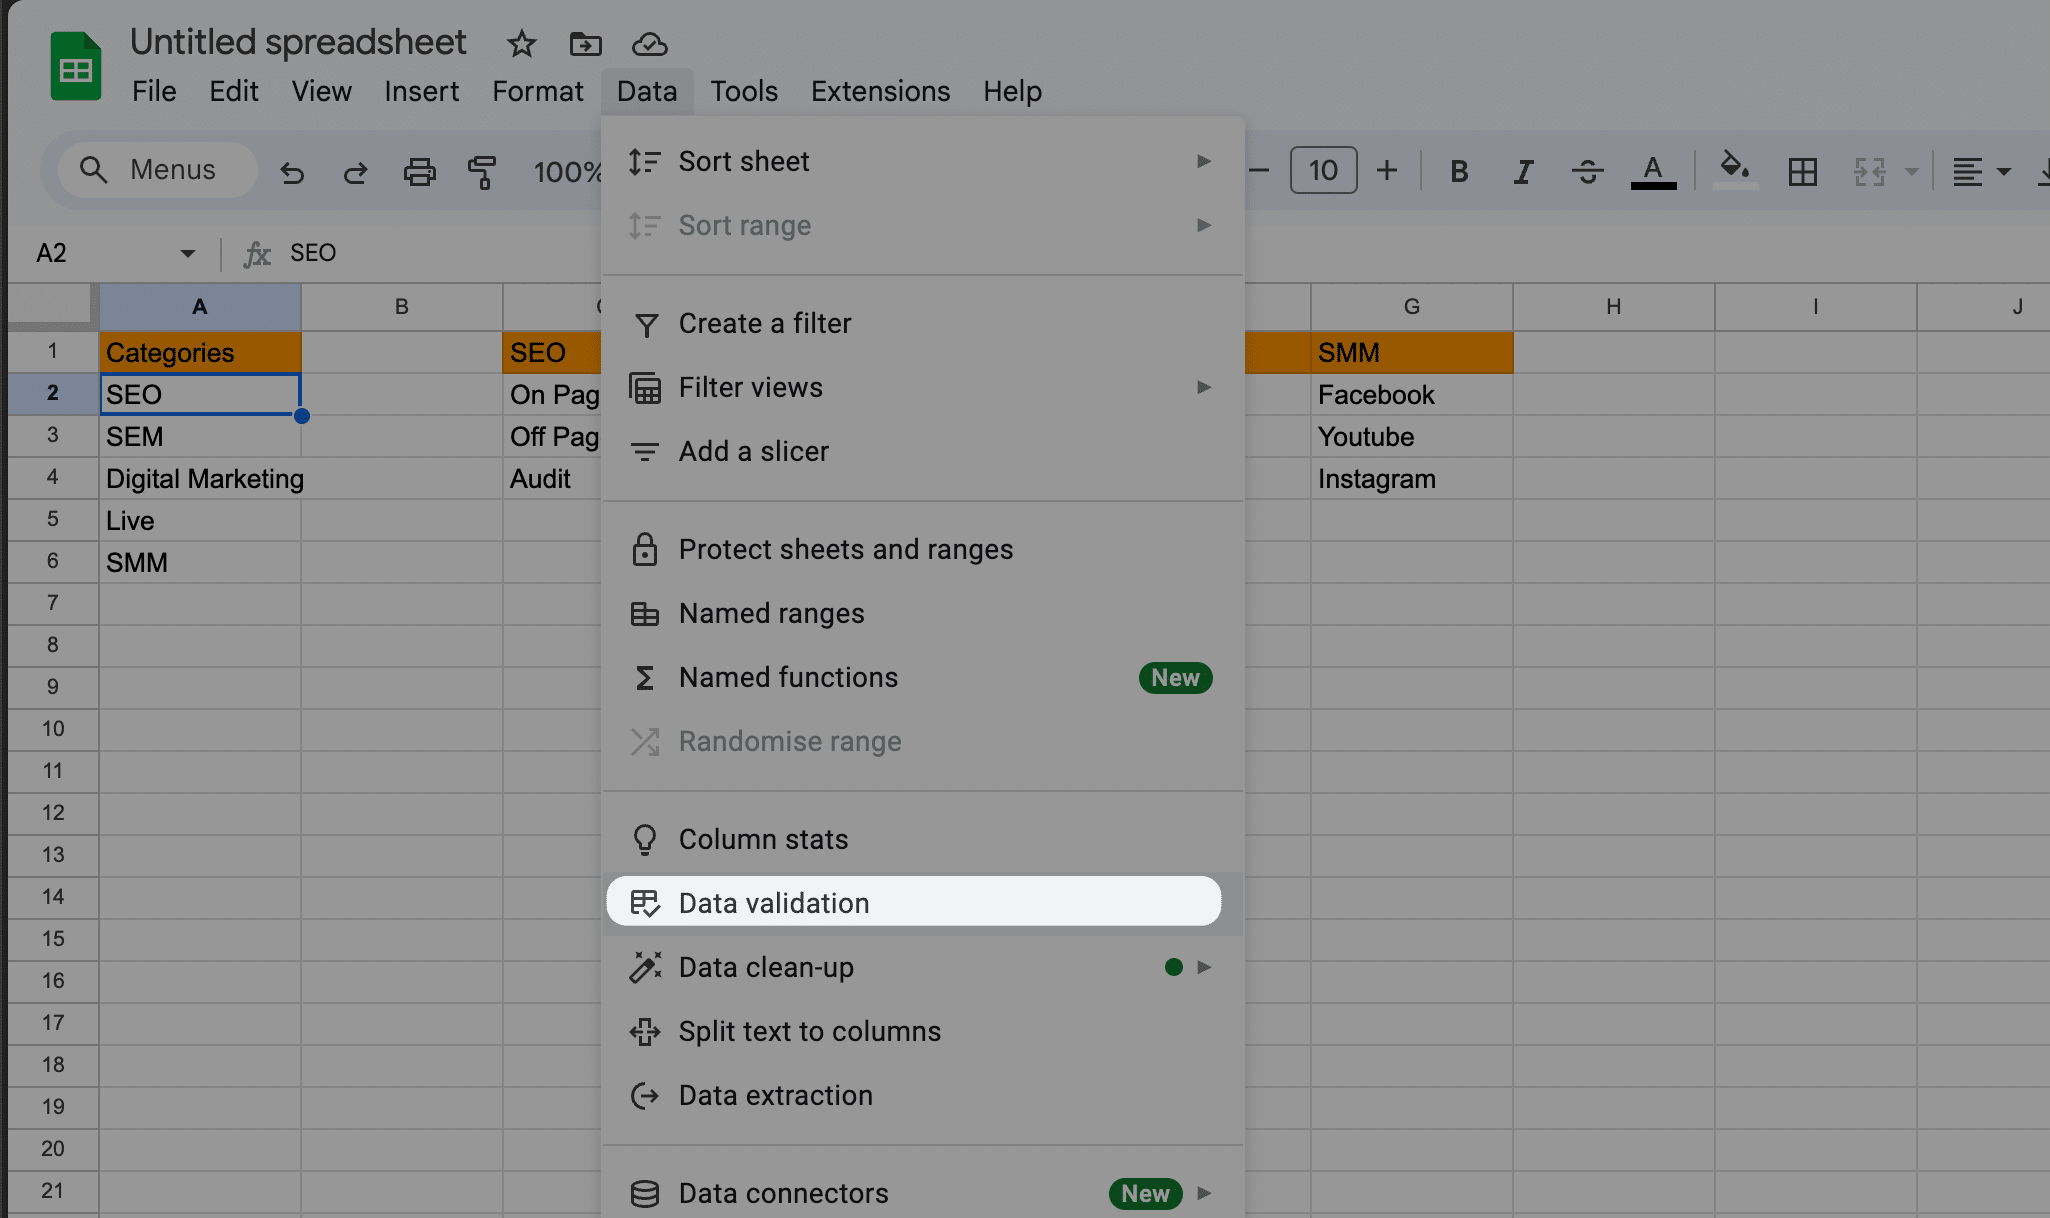
From the Data menu, you’ll see the option for “Data validation.” Click on it to open up the data validation rules panel.
1.7 Step 7: Setting Up Dropdowns from a Range
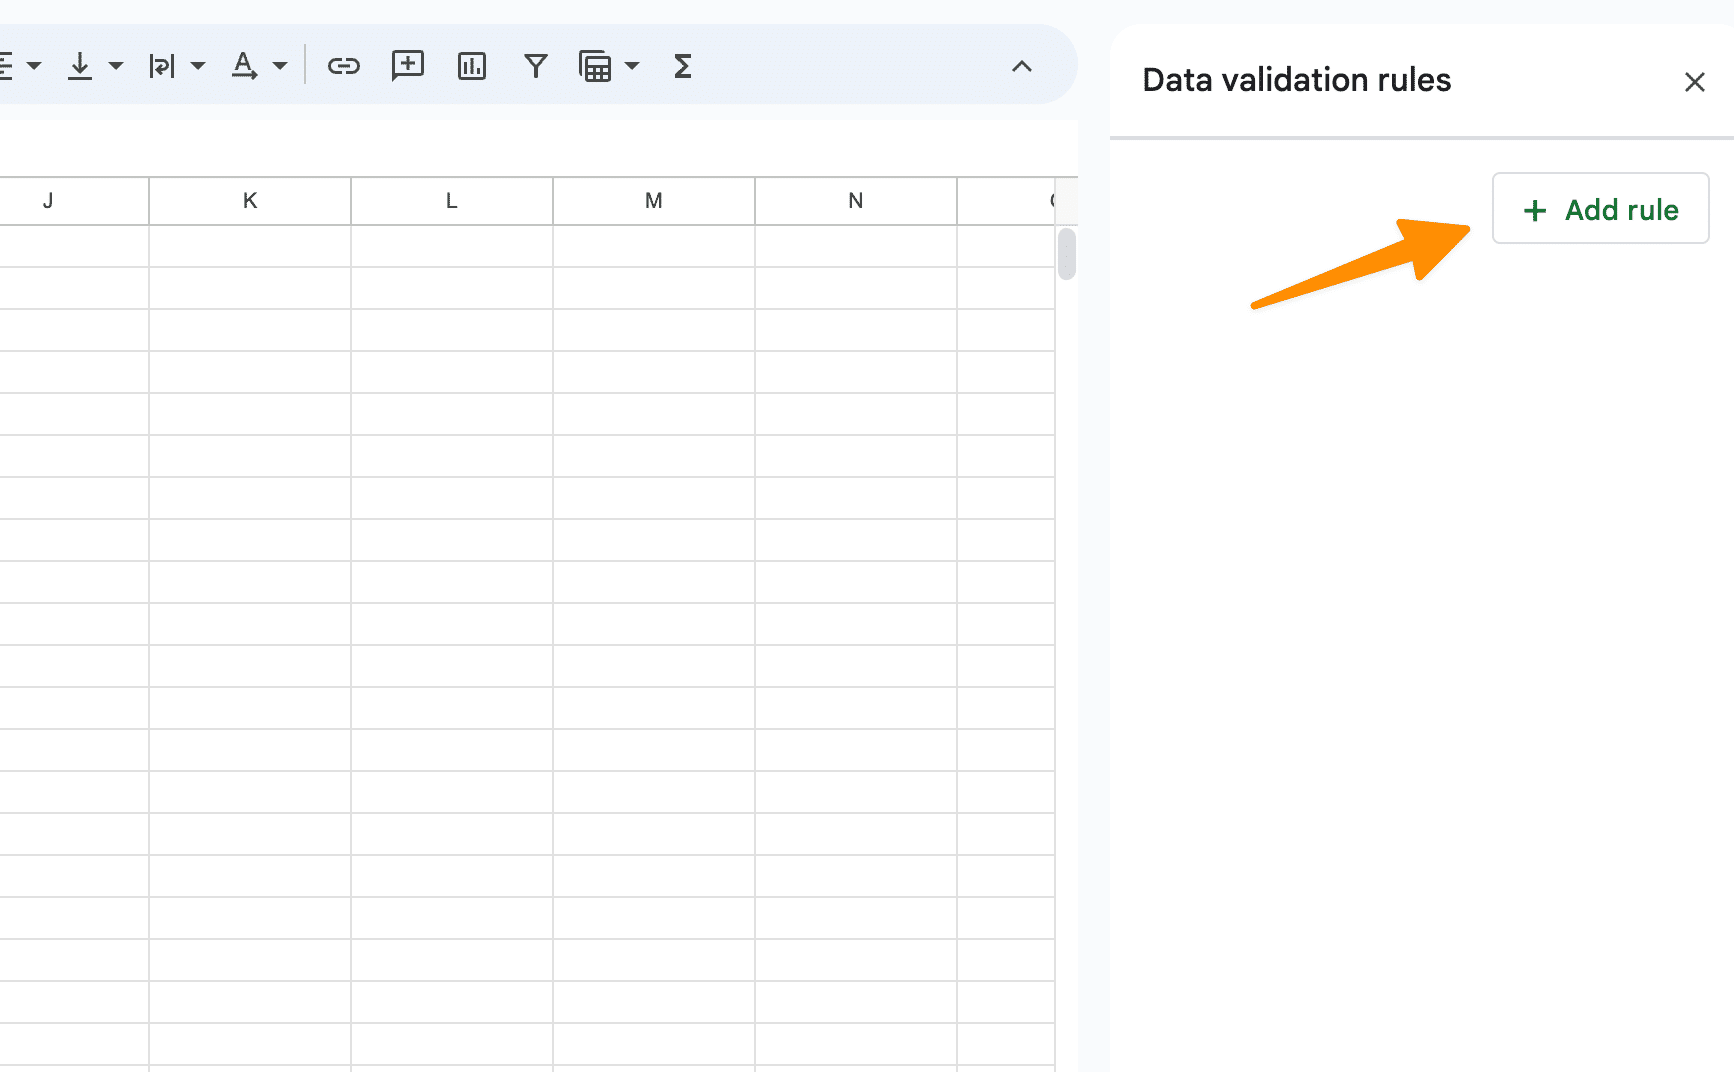
In the Data Validation window, choose add rule. the choose “Dropdown (from a range)” to create drop down lists from a range from dropdown options;
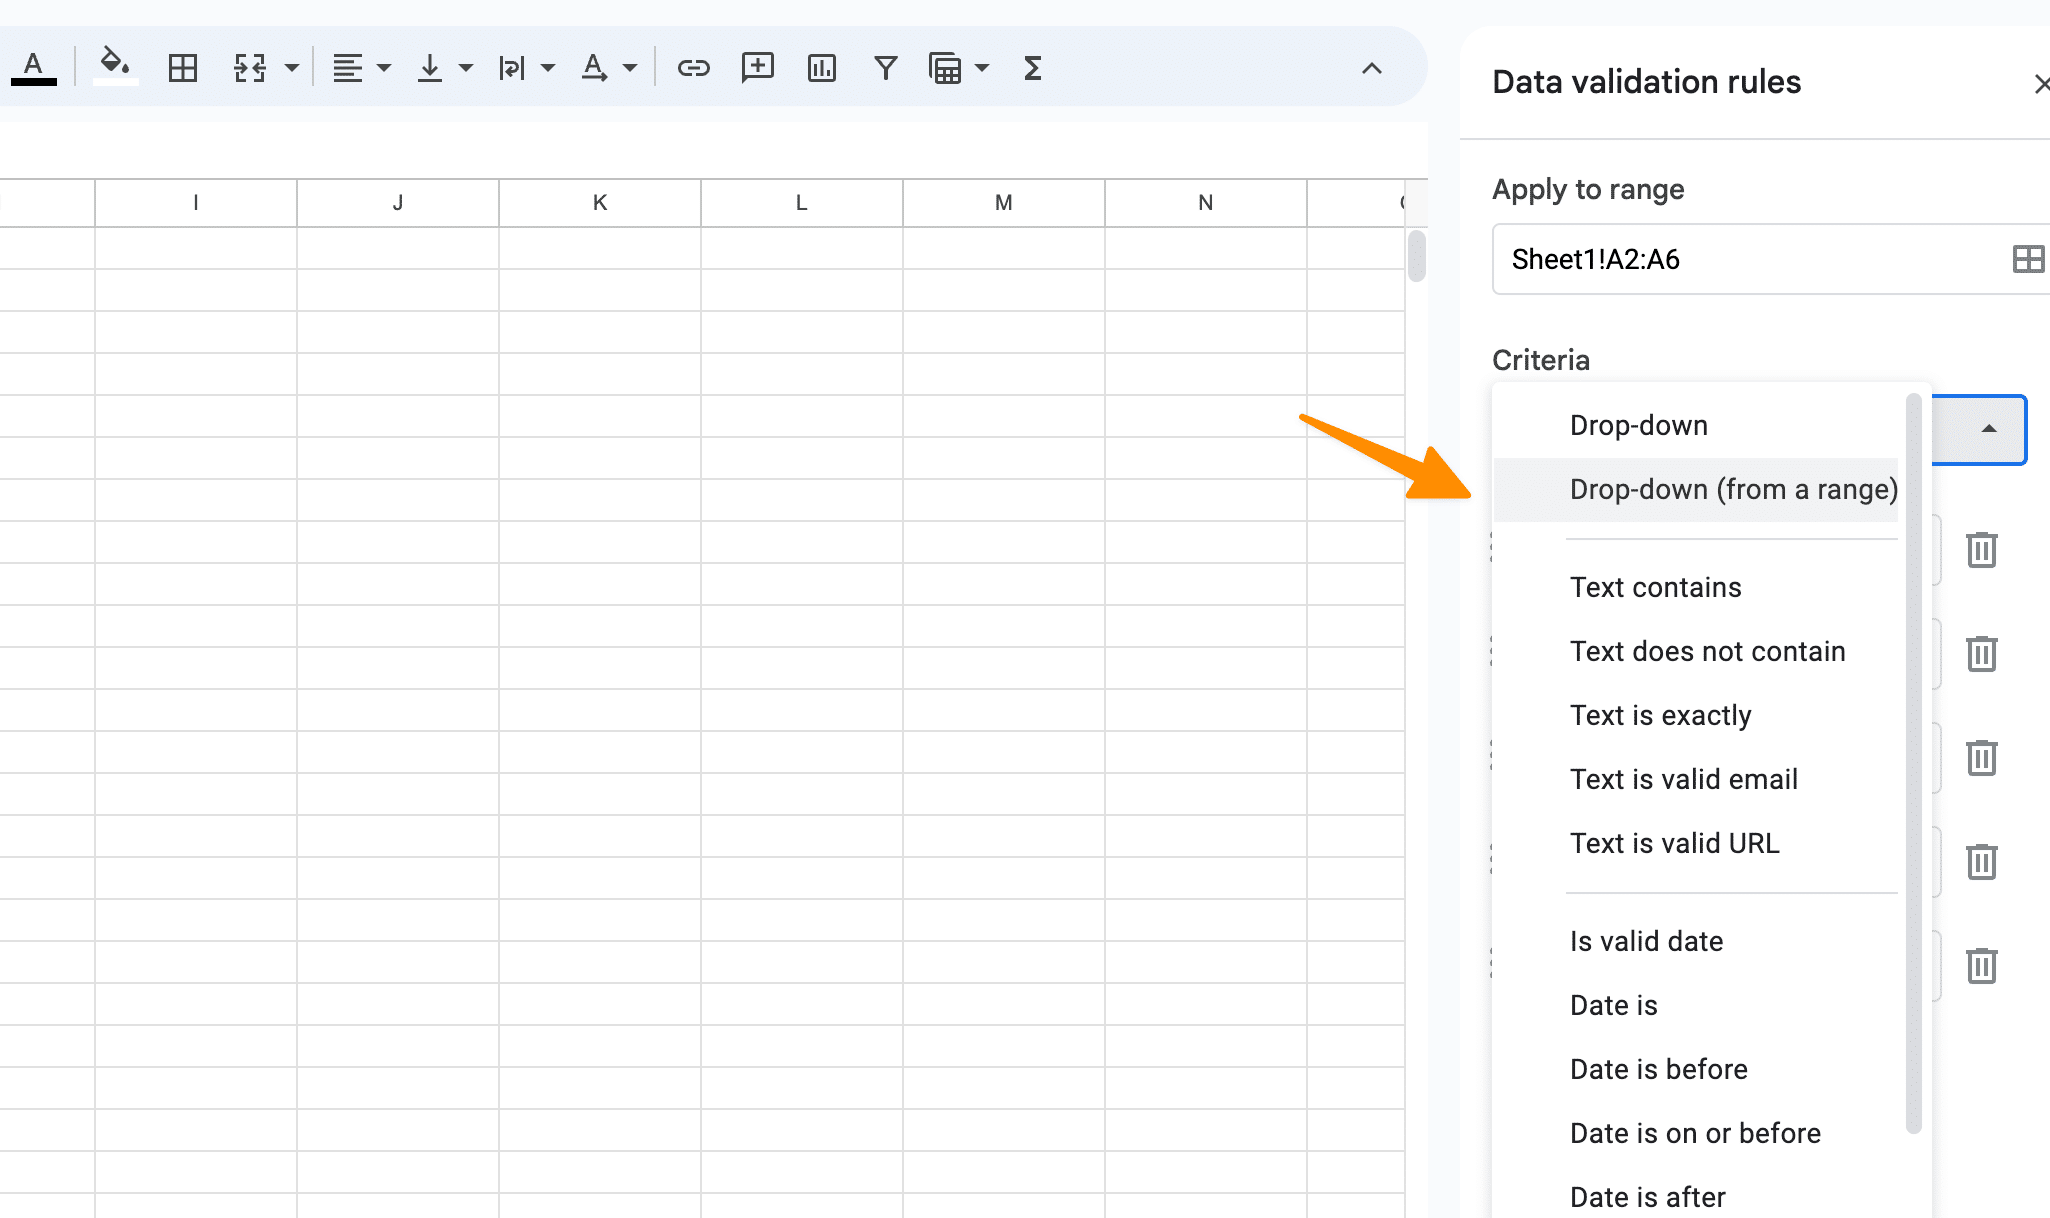
1.8 Step 8: Specifying the Category Range
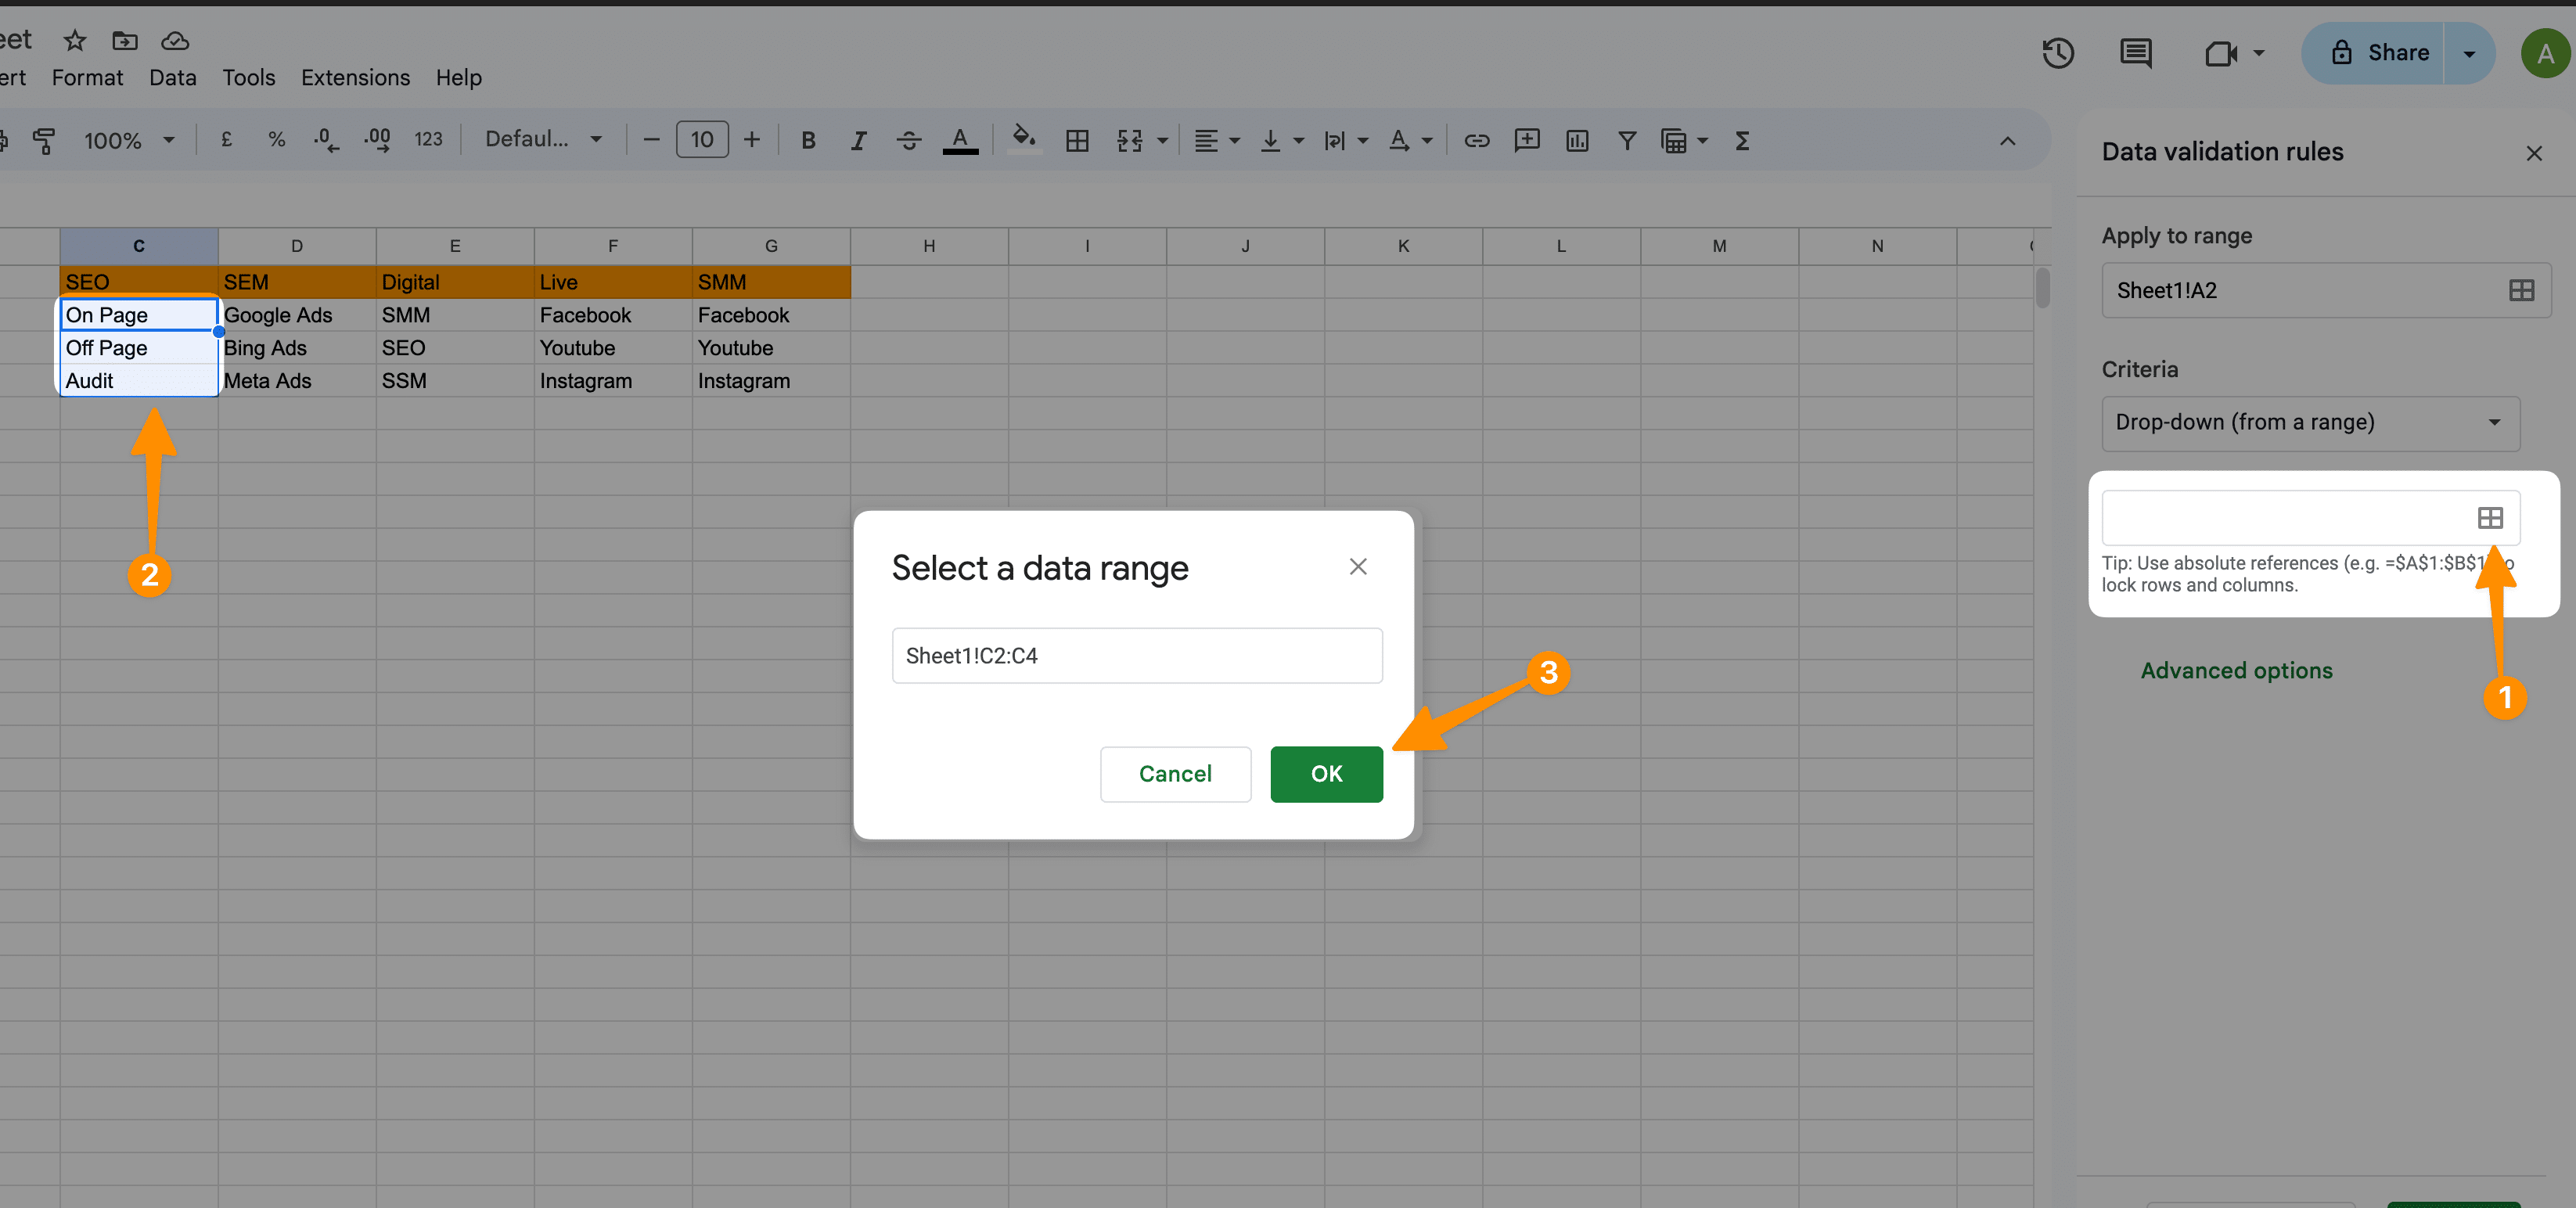
Click on the image to select the criteria’s range, which will open a dialogue box.
Navigate to your categories sheet, select the appropriate range of cells, and this range will automatically populate in the dialogue box.
You can also select named range if any or two columns while selecting a range.
If you want to re-do you can click remove rule to restart the process.
1.9 Step 9: Confirming Your Data Validation Criteria
After setting your range, simply click “OK” to confirm your data validation settings. Your spreadsheet is now equipped to manage data entry more efficiently, with minimized errors and standardized category names.
1.10 Step 10: Additional Data Validation Needs
You may explore additional settings in the data validation rules panel, such as rejecting input that doesn’t match the criteria. This ensures your data stays clean and relevant to your categories.
1.11 Step 11: Finalizing and Using the Dropdown Menu
Click “Done” to finalize your data validation setup.
You’ll notice a small arrow in the cells of your category column, indicating that a dropdown list is available.
1.12 Step 12: Categorizing Your Items
By clicking on the arrow, a dropdown menu will appear with all your predefined category options, making it easy to categorize each item accurately. This streamlined process not only saves time but also enhances the way you organize data, analyze data, and filter data within Google Sheets. With every item neatly categorized, your Google Sheets work becomes significantly more structured and accessible.
2 Conclusion
In the digital age where data plays a crucial role in decision-making and strategic planning, mastering how to organize and analyze data in Google Sheets has become an indispensable skill. Throughout this guide, we’ve demonstrated the step-by-step process of how to create categories in Google Sheets, emphasizing the importance of data validation, the efficiency of dropdown lists, and the precision of filtering data to enhance your Google Sheets work.
Remember, the steps outlined, including the utilization of the data menu, accessing data validation rules panel, and defining named ranges, are more than just techniques—they are the building blocks for transforming your Google Sheets into a powerful tool for data analysis.
Test your knowledge
Take a quick 5-question quiz based on this page.


